“Are you sure these will set properly?” my friend asked skeptically as I carefully poured the blue gelatin layer, trying not to disturb the pristine white layer below. Honestly, I wasn’t 100% confident either. The first time I attempted these layered jello shots, the red and blue colors swirled into each other, turning the whole thing into a purple mess. But after a couple of tries — and a lot of patience waiting for each layer to set just right — I nailed this festive recipe. Now, they’re a staple for every summer party, especially those Fourth of July barbecues.
It’s funny how these colorful jello shots became my go-to party trick. I remember that chaotic weekend when I was scrambling to throw together something fun and quick for a last-minute get-together. The usual chips and dip felt tired, and I needed a no-fuss recipe that still screamed celebration. Layered jello shots fit the bill perfectly — vibrant, playful, and surprisingly easy once you get the hang of the timing.
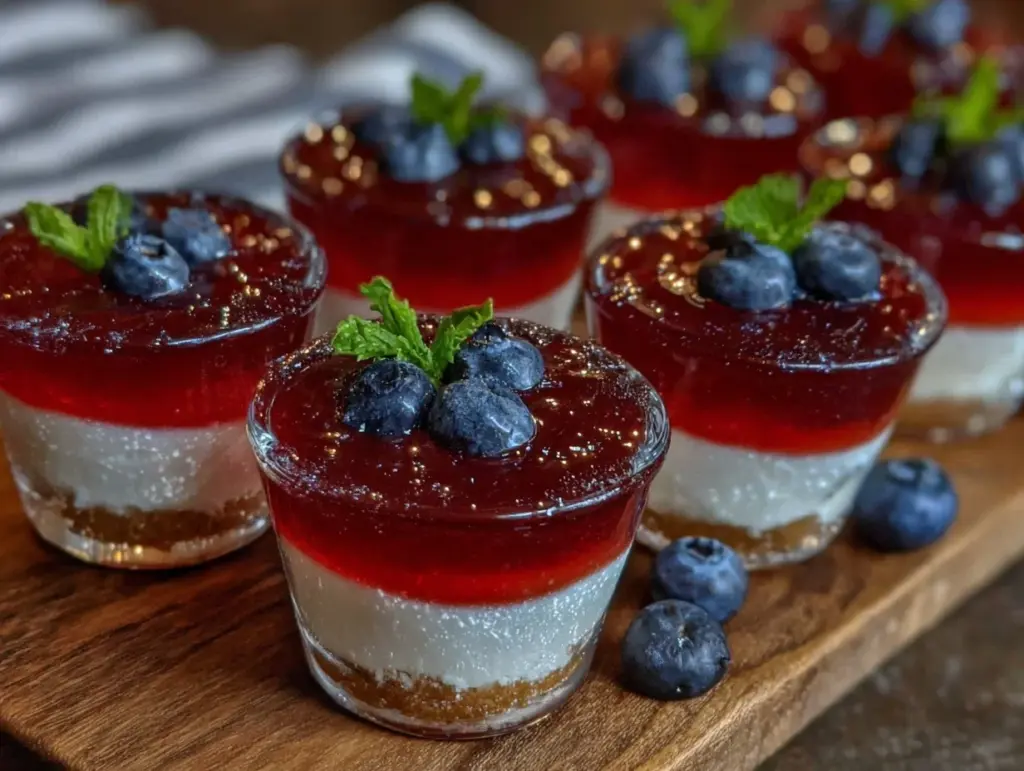
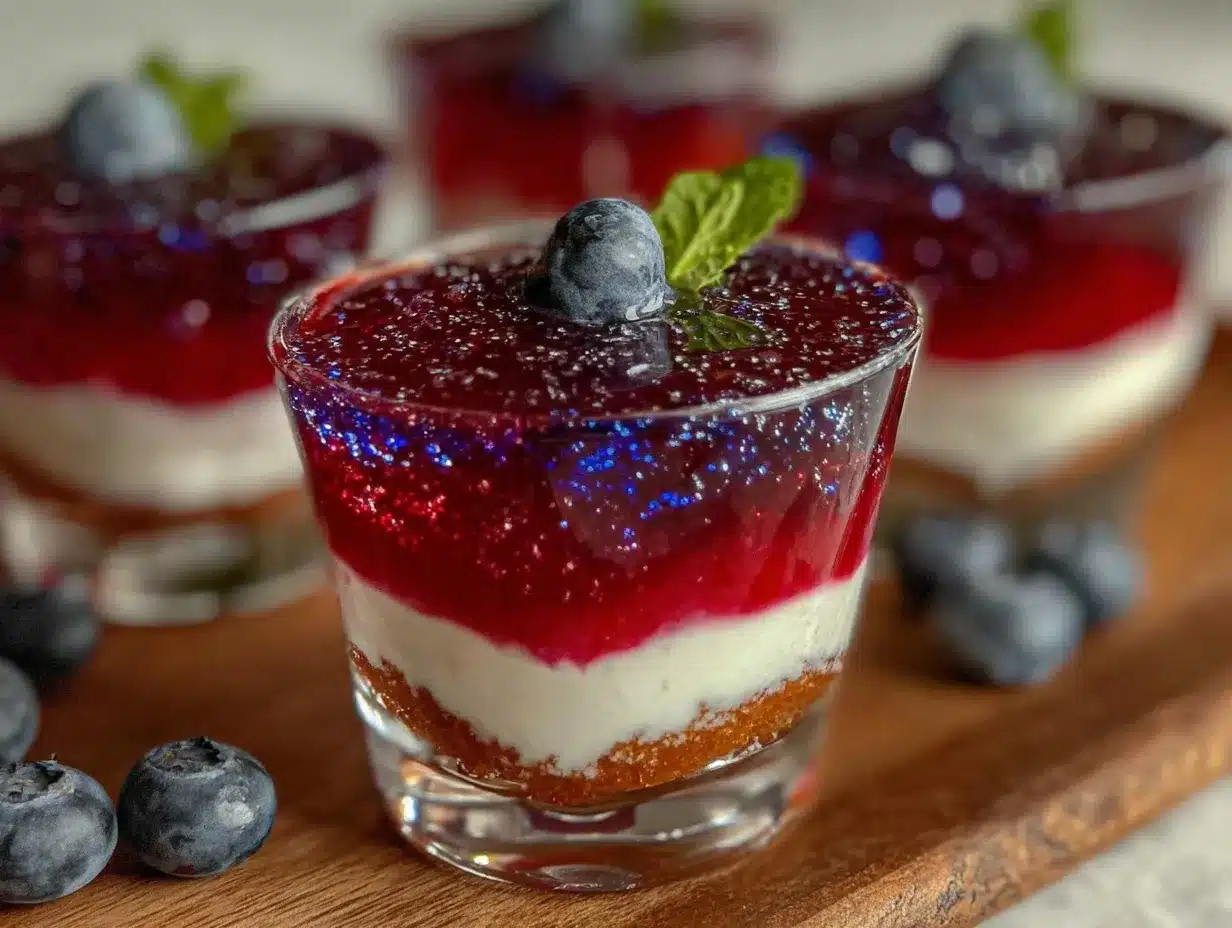
What I love the most about this recipe is how it transforms a simple gelatin mix into a charming red, white, and blue display — perfect for patriotic holidays or any festive occasion where you want a pop of color and a bit of fun. Plus, they’re not just eye candy; these jello shots have a smooth, slightly boozy kick that’s just right for warming up the party vibe without going overboard.
After those first shaky attempts, I realized the key is to treat each layer gently and let the magic happen one step at a time. It’s a recipe that teaches patience but rewards you with a tray of perfectly defined, vibrant layers that almost look too good to eat — almost! If you’ve ever been curious about making jello shots that don’t blur into a rainbow mess, this recipe will quietly convince you that it’s worth the wait.
So, if you want a festive treat that’s both nostalgic and a little cheeky, these Perfect Red White Blue Layered Jello Shots for Festive Celebrations might just become your new party secret.
Why You’ll Love This Recipe
Having made these layered jello shots more times than I can count (seriously, I lost track after the third batch in one week), I can say they’re a crowd-pleaser without the stress. Here’s why you’ll quickly fall for them:
- Quick & Easy: Each layer sets in about 30 minutes, so the entire batch is ready in roughly 2 hours — perfect for prepping ahead of your party.
- Simple Ingredients: No wild or hard-to-find ingredients here — just gelatin, flavored drink mixes, a little sugar, and your choice of liquor or water.
- Perfect for Festive Occasions: Whether it’s Independence Day, Memorial Day, or a fun summer cookout, these shots add that instant celebration vibe.
- Crowd-Pleaser: Kids and adults alike love the bright colors and fun presentation — just remember to keep these away from the little ones if you add alcohol!
- Unbelievably Delicious: The balance of flavors — sweet, tart, and boozy — with the jiggly, smooth texture is a delight every time.
- Distinctive Technique: What sets this recipe apart is the careful layering method that avoids mixing colors and keeps each shade crisp and clean, giving you that sharp red, white, and blue look that wows.
This isn’t your average jello shot — it’s the kind that makes people pause and say, “Wow, did you make those?” And honestly, it feels great to have a recipe that’s festive, fun, and straightforward all at once. If you’re curious about other vibrant patriotic treats that bring big smiles, you might enjoy the perfect mini patriotic cheesecake bites or the stars and stripes edible cookie dough dip for a sweet twist on red, white, and blue desserts.
What Ingredients You Will Need
This recipe relies on straightforward ingredients that come together to create those iconic three layers with a smooth, jiggly finish. The ingredients are pantry staples for many, and you can easily tweak them to suit your preferences or what you have on hand.
- Red Layer:
- 1 package (3 oz / 85 g) red flavored gelatin (cherry or strawberry works well)
- 1 cup (240 ml) boiling water
- ½ cup (120 ml) cold vodka or water (vodka for a boozy version, water for kids or no alcohol)
- White Layer:
- 1 package (3 oz / 85 g) unflavored gelatin powder
- 1 cup (240 ml) boiling water
- ½ cup (120 ml) sweetened condensed milk (for creamy texture) or coconut milk for dairy-free option
- ½ cup (120 ml) cold vodka or water (optional)
- Blue Layer:
- 1 package (3 oz / 85 g) blue flavored gelatin (blue raspberry is my favorite for a tart pop)
- 1 cup (240 ml) boiling water
- ½ cup (120 ml) cold vodka or water
For best results, I recommend using well-known gelatin brands like Knox or Jell-O for consistent texture and flavor. When choosing your liquor, a neutral vodka works best so it doesn’t overpower the fruit flavors. If you prefer a non-alcoholic version, simply swap vodka for cold water or soda water for a little fizz.
Seasonal tips: During summer, feel free to swap the red or blue gelatin with fresh berry purees mixed into unflavored gelatin for a more natural flavor and vibrant color. For a festive twist, the no-bake red white blue strawberry watermelon gelatin squares use fresh fruit flavors in an easy bar form you might love as a side.
Equipment Needed
- Measuring cups and spoons: Accurate measurements make all the difference in gelatin recipes.
- Mixing bowls: At least three medium bowls to prepare each colored layer separately.
- Spoons or small whisks: For dissolving gelatin powder evenly.
- Clear plastic shot glasses or silicone molds: These hold the jello shots perfectly and make serving a breeze.
- Refrigerator: Essential for setting each layer properly.
- Optional: A small ladle or measuring cup with a spout helps pour each layer gently without disturbing the one below.
If you don’t have shot glasses handy, mini muffin tins lined with cupcake liners work well, too. I’ve used both, and silicone molds are especially helpful for popping the shots out easily without any mess. For budget-friendly options, disposable plastic shot cups are a lifesaver and save on cleanup.
Preparation Method
- Prepare the Red Layer: In a medium bowl, dissolve 1 package of red gelatin in 1 cup (240 ml) boiling water. Stir thoroughly for about 2 minutes until completely dissolved.
- Add Cold Liquid: Stir in ½ cup (120 ml) cold vodka or water. This cools the mixture slightly and balances the texture. Pour the red mixture into your shot glasses or molds, filling each about one-third full.
- Chill: Place the tray in the refrigerator for 30 to 45 minutes, or until the red layer is firm enough to hold the next layer without mixing. You’ll know it’s ready when the surface feels set but not fully hard.
- Prepare the White Layer: In a clean bowl, sprinkle 1 package of unflavored gelatin over ½ cup (120 ml) cold water and let it bloom for 5 minutes.
- Dissolve Gelatin: Add 1 cup (240 ml) boiling water to the bloomed gelatin and stir until fully dissolved (about 2 minutes). Stir in ½ cup (120 ml) sweetened condensed milk or coconut milk, and optionally ½ cup vodka or water for the boozy touch.
- Cool Slightly: Let the white layer cool for about 5 minutes at room temperature. This prevents it from melting the red layer when poured.
- Layer the White: Slowly pour the white mixture over the back of a spoon onto the red layer in each cup, filling them up another third. This gentle pouring technique keeps the layers distinct.
- Chill Again: Refrigerate for another 30 to 45 minutes until the white layer is set.
- Prepare the Blue Layer: Repeat the initial steps: dissolve 1 package of blue gelatin in 1 cup boiling water, then stir in ½ cup cold vodka or water.
- Cool Before Pouring: Let the blue layer cool slightly for 5 minutes to avoid melting the white layer.
- Pour the Blue Layer: Carefully pour over the set white layer, filling the glasses to the top.
- Final Chill: Refrigerate for at least 1 hour or until fully firm. The jello shots should jiggle gently but hold their shape when unmolded or served.
Pro tip: If you notice any bubbles or imperfections on the surface of a layer, gently tap the tray on the counter a few times before refrigerating. It helps settle the gelatin for a smoother finish.
Cooking Tips & Techniques
One of the trickiest parts of layered jello shots is timing. Pouring the next layer too soon leads to colors bleeding, but waiting too long can cause the layers not to adhere properly. Here’s what I’ve learned:
- Watch the texture: The ideal moment to pour the next layer is when the previous layer’s surface is firm to the touch but still slightly tacky. This allows the layers to stick without mixing.
- Cool the layers: Before pouring a new gelatin mixture, allow it to cool down to just warm. Pouring boiling-hot gelatin on a chilled layer will melt it and ruin those neat lines.
- Pour slowly: Use the back of a spoon or a ladle with a spout to gently pour each layer. This slows the flow and prevents splashing.
- Don’t rush the chilling: Patience is key. I’ve ruined batches by trying to speed up the process with the freezer — it’s better to stick with consistent fridge chilling for even setting.
- Flavor balance: If you want stronger flavor or more bite, adjust the alcohol content carefully. Too much liquid can prevent the jello from setting solid.
- Practice makes perfect: The first batch might not be flawless, but each time you make these, you get better at judging when the layers are ready.
In my early tries, I learned to prep all the gelatin mixtures in advance and then pour layer-by-layer with breaks, which keeps everything organized and stress-free. If you’re curious about other layered recipes that play with similar techniques, the perfect layered red white and blue jello flag mold is a fun step up for centerpiece-worthy displays.
Variations & Adaptations
While this recipe nails the classic red, white, and blue look, it’s easy to customize based on your preferences or dietary needs.
- Non-alcoholic version: Skip the vodka altogether and replace with water or flavored soda water for fizz. Kids and designated drivers will appreciate this.
- Dairy-free white layer: Swap sweetened condensed milk for canned coconut milk or almond milk mixed with a little sweetener to keep that creamy texture without dairy.
- Flavor swaps: Use different gelatin flavors, like lime for green instead of red, or grape for purple. This is great for other holidays or themed parties.
- Layer shapes: Try pouring layers into mini silicone molds shaped like stars or other festive icons for a playful presentation.
- Low-sugar options: Use sugar-free gelatin mixes and unsweetened milk alternatives for a lighter treat.
One variation I tried recently was adding a splash of fresh lemon juice to the white layer, which gave a subtle tang that cut through the sweetness nicely. It changed up the flavor profile just enough to make the jello shots feel a bit more grown-up and refreshing.
Serving & Storage Suggestions
Serve these jello shots chilled, straight from the fridge, for the best texture and flavor. They jiggle just right and hold their shape when popped out of molds or picked up by the rim of a shot glass.
Presentation tip: Arrange them on a festive tray or tiered stand to make an eye-catching centerpiece that guests will flock to. Pair them with light, refreshing drinks like sparkling water with lime, or balance the party spread with sweet treats such as the creamy patriotic strawberry tres leches poke cake for a full-on red, white, and blue dessert table.
Store leftovers in an airtight container in the refrigerator for up to 3 days. The texture might firm up a bit more over time but remains tasty. Avoid freezing, as it can make the gelatin watery upon thawing.
Reheating isn’t recommended, but if you want a softer texture, let the shots sit at room temperature for 5-10 minutes before serving.
Nutritional Information & Benefits
Each jello shot contains about 80-100 calories, depending on the amount of alcohol and sweetened condensed milk used. The gelatin provides a low-calorie, protein-rich base, plus a fun way to enjoy a small boozy treat without going overboard.
Using real fruit-flavored gelatin adds some antioxidants and vitamins, especially if you swap in fresh fruit purees as a variation. Opting for dairy-free milk keeps this recipe accessible for those with lactose intolerance or dairy allergies.
Keep in mind, these treats contain alcohol unless modified, so they’re best enjoyed responsibly. For a gluten-free dessert option, this recipe fits perfectly as it contains no wheat or gluten ingredients.
Conclusion
These Perfect Red White Blue Layered Jello Shots are more than just a festive treat — they’re a tried-and-true way to bring a splash of color, flavor, and fun to any celebration. The method might test your patience at first, but the results are worth every minute spent layering and chilling.
I love how customizable they are, whether you want to keep things kid-friendly or add a spirited kick for your adult guests. Plus, they make a memorable addition to parties alongside dishes like the roasted grape and brie tart or a simple, festive dessert like the fresh fig and honey crostata.
Give these a try — tweak the flavors and colors to fit your vibe, and I bet they’ll become a party favorite for years to come. When you do, I’d love to hear how your layers turned out or any fun adaptations you came up with!
FAQs About Perfect Red White Blue Layered Jello Shots
Can I make these jello shots ahead of time?
Yes! They keep well in the refrigerator for up to 3 days. Just cover them tightly to prevent drying out.
What’s the best way to prevent layers from mixing?
Make sure each layer is firm but still slightly tacky before pouring the next. Pour the new layer slowly over the back of a spoon to avoid disturbing the layer beneath.
Can I use other alcohol besides vodka?
Absolutely! Light-flavored liquors like rum or gin work well, but avoid strong flavors that overpower the gelatin’s fruity taste.
How do I make a non-alcoholic version?
Simply substitute the vodka with cold water or flavored soda water for a bubbly, kid-friendly option.
What if my jello shots are too watery or don’t set?
This usually happens if too much liquid is added or the gelatin isn’t fully dissolved. Stick to the recipe’s liquid ratios and stir gelatin thoroughly in boiling water before adding cold liquids.
Pin This Recipe!
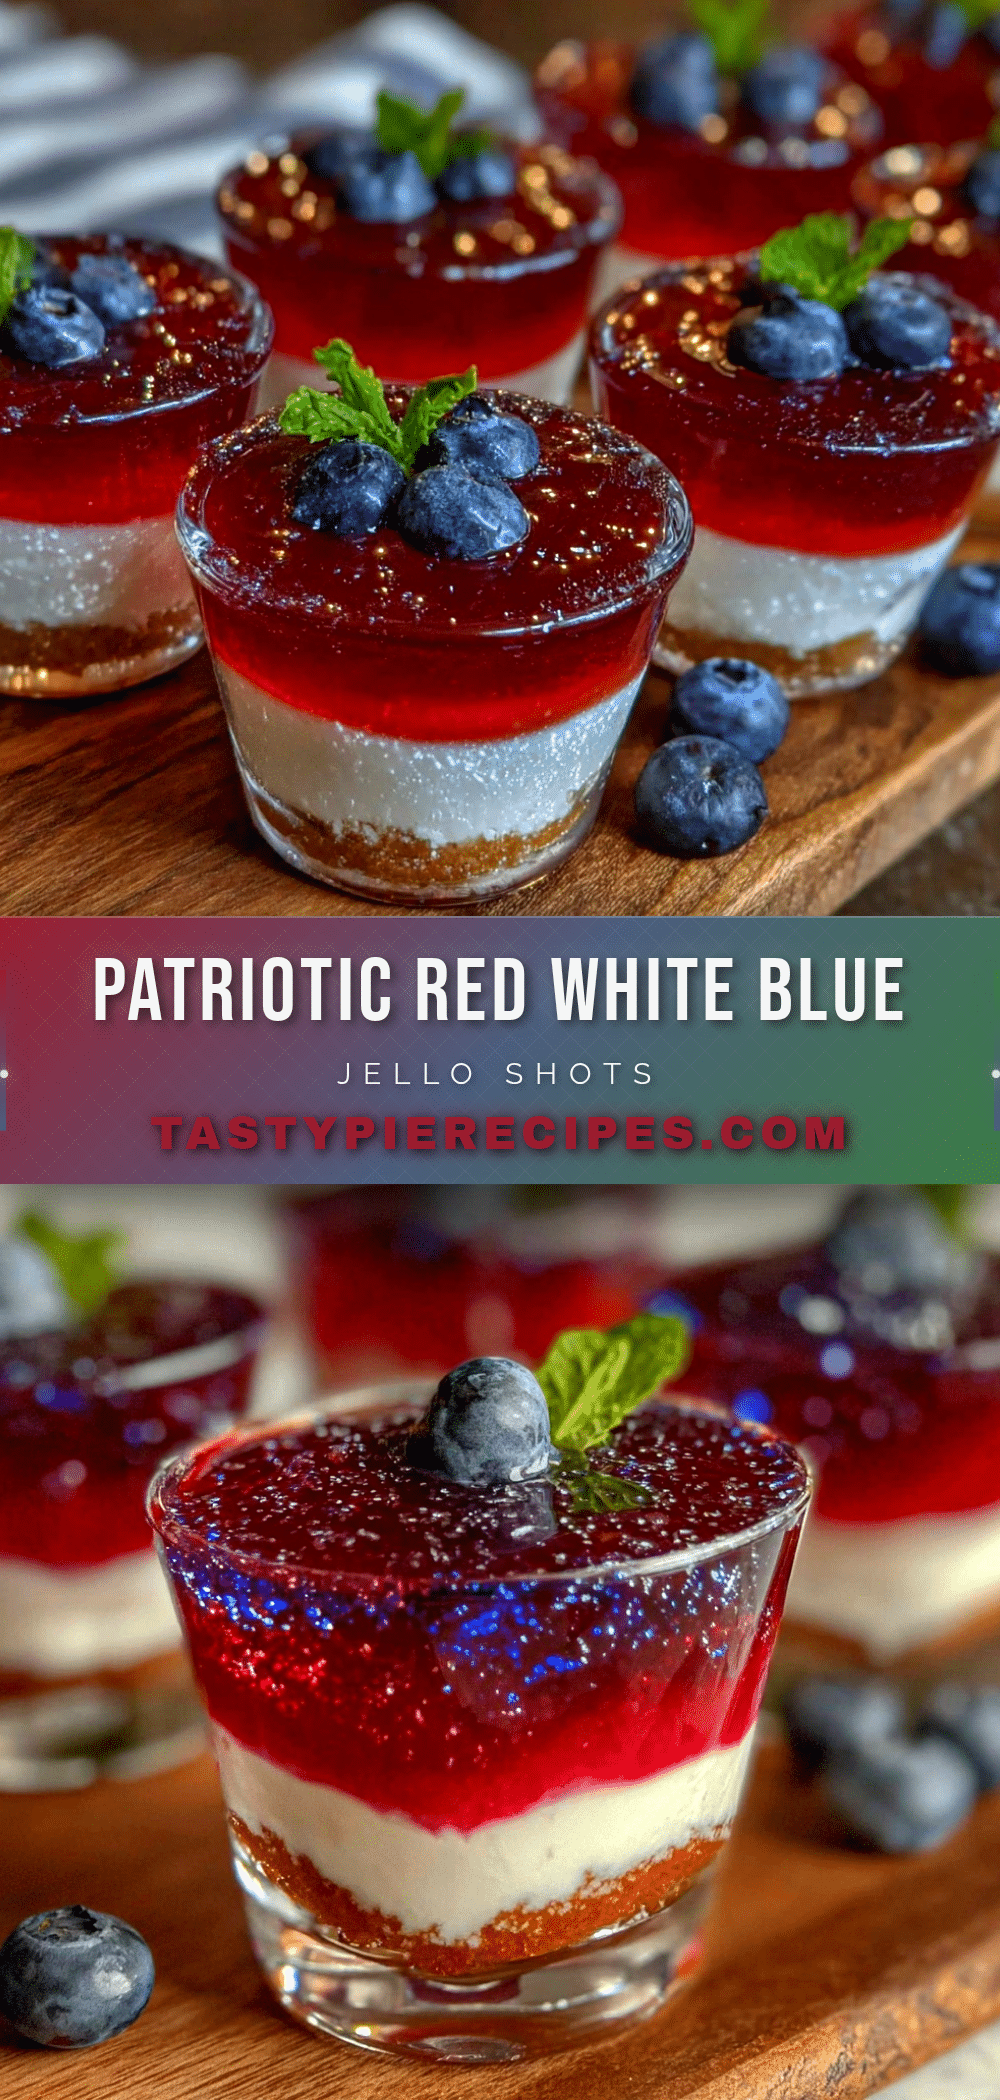
Perfect Red White Blue Layered Jello Shots Easy Festive Party Recipe

A festive and colorful layered jello shot recipe perfect for patriotic holidays and summer parties, featuring distinct red, white, and blue layers with a smooth, slightly boozy kick.
- Prep Time: 15 minutes
- Cook Time: 1 hour 45 minutes
- Total Time: 2 hours
- Yield: 12 servings 1x
- Category: Dessert
- Cuisine: American
Ingredients
- Red Layer: 1 package (3 oz / 85 g) red flavored gelatin (cherry or strawberry)
- 1 cup (240 ml) boiling water
- ½ cup (120 ml) cold vodka or water
- White Layer: 1 package (3 oz / 85 g) unflavored gelatin powder
- 1 cup (240 ml) boiling water
- ½ cup (120 ml) sweetened condensed milk or coconut milk for dairy-free option
- ½ cup (120 ml) cold vodka or water (optional)
- Blue Layer: 1 package (3 oz / 85 g) blue flavored gelatin (blue raspberry recommended)
- 1 cup (240 ml) boiling water
- ½ cup (120 ml) cold vodka or water
Instructions
- Prepare the Red Layer: Dissolve 1 package of red gelatin in 1 cup boiling water, stirring for about 2 minutes until fully dissolved.
- Add ½ cup cold vodka or water to the red gelatin mixture, stir gently.
- Pour the red mixture into shot glasses or molds, filling about one-third full.
- Refrigerate for 30 to 45 minutes until the red layer is firm but slightly tacky.
- Prepare the White Layer: Sprinkle 1 package of unflavored gelatin over ½ cup cold water and let bloom for 5 minutes.
- Add 1 cup boiling water to the bloomed gelatin and stir until dissolved (about 2 minutes).
- Stir in ½ cup sweetened condensed milk or coconut milk, and optionally ½ cup vodka or water.
- Let the white mixture cool for about 5 minutes at room temperature.
- Slowly pour the white layer over the back of a spoon onto the red layer, filling another third of the glass.
- Refrigerate for 30 to 45 minutes until the white layer is set.
- Prepare the Blue Layer: Dissolve 1 package of blue gelatin in 1 cup boiling water, stirring until dissolved.
- Add ½ cup cold vodka or water to the blue gelatin mixture.
- Let the blue mixture cool for 5 minutes.
- Carefully pour the blue layer over the set white layer, filling to the top.
- Refrigerate for at least 1 hour until fully firm.
- Serve chilled. Optionally, tap the tray gently before refrigerating each layer to remove bubbles.
Notes
Use well-known gelatin brands like Knox or Jell-O for best results. Use neutral vodka to avoid overpowering flavors. For non-alcoholic versions, substitute vodka with water or soda water. Pour each layer slowly over the back of a spoon to keep layers distinct. Chill each layer until firm but slightly tacky before adding the next. Avoid rushing the chilling process or using the freezer. Store leftovers in an airtight container in the refrigerator for up to 3 days. Do not freeze.
Nutrition
- Serving Size: 1 shot (approx. 2 oz
- Calories: 90
- Sugar: 10
- Sodium: 50
- Fat: 1
- Saturated Fat: 0.5
- Carbohydrates: 12
- Protein: 2
Keywords: jello shots, layered jello, red white blue, patriotic dessert, party recipe, boozy jello, summer party, Fourth of July


