“You really think you can pull off a red, white, and blue jello flag centerpiece?” my cousin teased me over the phone, laughter barely contained. Honestly, I wasn’t sure either. The idea popped into my head that Fourth of July afternoon when I was staring at my overflowing fridge, trying to figure out how to make something festive without spending hours prepping. I had a vague memory of those childhood jello molds — you know, the ones with layers that wiggle and shimmer in the light? I thought, why not give it a grown-up spin with a patriotic twist?
That first attempt was a bit of a mess — the blue layer bled into the white, and the red was patchy. But somewhere between the third try and the fifth, I figured out the timing, the perfect gelatin ratios, and the secret to getting those crisp, clean layers that make you want to slice into it right away. It became a sort of obsession; I made this red white and blue jello flag mold multiple times in one summer, tweaking flavors and textures until it felt just right.
What stuck with me is how this recipe feels like a quiet celebration in itself. It’s not just about looking festive — it’s about the simple joy of layering flavors and colors that remind you of sun-soaked barbecues, laughter, and the kind of easy, nostalgic fun that feels good to share. So, if you’re looking for a charming centerpiece that doubles as a sweet, nostalgic treat, this red white and blue jello flag mold recipe might just become your go-to for all things patriotic. It’s the kind of recipe that makes you realize sometimes the easiest things turn out to be the most memorable.
Why You’ll Love This Recipe
After making this red white and blue jello flag mold several times (and having friends ask for the recipe), I can honestly say it’s a winner for more than just its looks. Here’s why it’s worth keeping in your recipe box:
- Quick & Easy: Comes together in about 2 hours, including chilling time, making it perfect for last-minute celebrations or casual summer get-togethers.
- Simple Ingredients: No need for specialty shops — most ingredients are pantry staples or findable at any supermarket.
- Perfect for Patriotic Occasions: Whether it’s the Fourth of July, Memorial Day, or a fun summer party, this centerpiece adds that festive flair without fuss.
- Crowd-Pleaser: Kids and adults alike enjoy the jiggly texture and the classic flavors — it’s a nostalgic treat everyone loves.
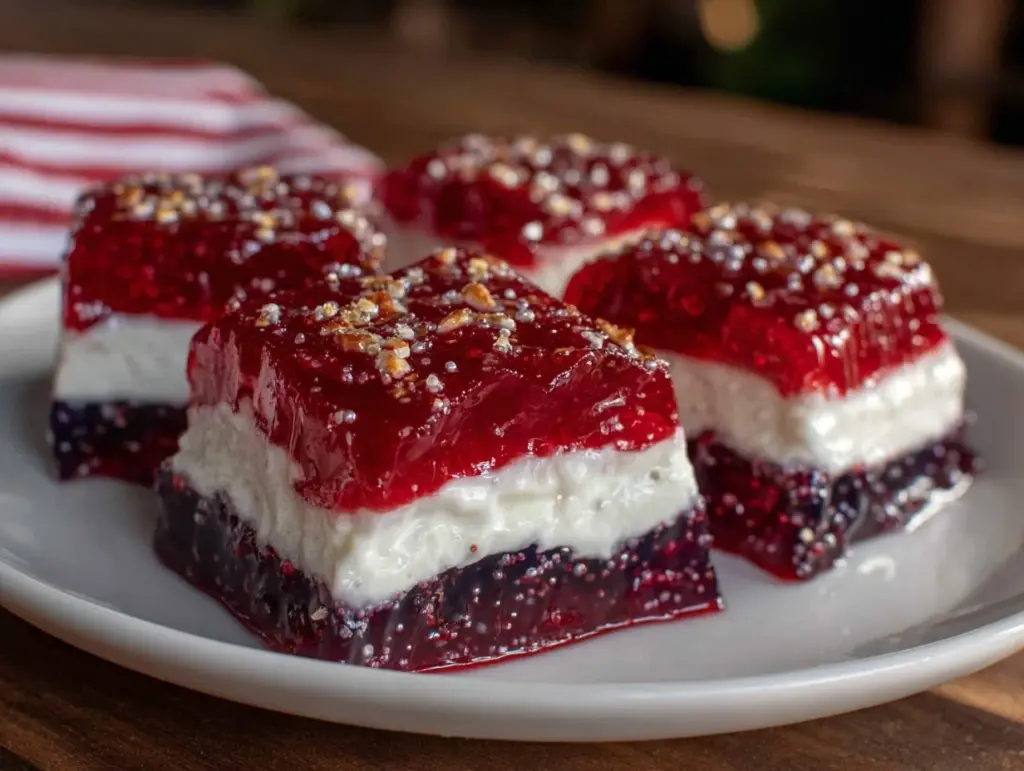
- Unbelievably Delicious: The creamy white layer cuts through the fruity red and blue jello for a texture and flavor combo that’s just right.
This isn’t just another layered jello recipe. The trick is in the perfectly balanced sweetness and the creamy vanilla layer that gives it depth. Plus, the mold I use ensures crisp, clean stripes that look impressive without needing fancy tools. If you’ve ever tried a layered dessert only to have the colors blend together, this recipe’s timing and technique will feel like a breath of fresh air.
Honestly, it’s the kind of recipe that makes you pause and smile after the first bite — a sweet, simple little celebration on your plate. And if you’re juggling a busy schedule (like I often am), it’s a stress-free way to add some sparkle to your holiday table.
What Ingredients You Will Need
This recipe uses simple, wholesome ingredients to deliver bold color and that classic jello texture with a creamy twist. Most are pantry staples, with a few easy-to-find extras that help make each layer pop.
- For the Red Layer:
- 1 (6 oz / 170 g) package strawberry or cherry flavored gelatin (jello)
- 1 cup (240 ml) boiling water
- 1/2 cup (120 ml) cold water
- For the White Layer:
- 1 (3 oz / 85 g) package unflavored gelatin (powdered)
- 1/2 cup (120 ml) boiling water
- 1 cup (240 ml) cold milk (whole milk or 2% for creaminess)
- 1/4 cup (50 g) granulated sugar
- 1 teaspoon vanilla extract (preferably pure)
- For the Blue Layer:
- 1 (6 oz / 170 g) package blue raspberry flavored gelatin (jello)
- 1 cup (240 ml) boiling water
- 1/2 cup (120 ml) cold water
Ingredient tips: I usually pick Jell-O brand for the flavored gelatin because the colors are vibrant and the flavors are just right — not overly sweet. For the white layer, whole milk gives that perfect creamy mouthfeel, but if you want a lighter option, you can swap in almond or oat milk.
If you’re serving folks with dietary needs, you can replace the gelatin with agar agar powder for a vegetarian version, but the texture will be slightly different. Also, fresh berries can be a fun addition, especially in the red layer if you want a bit of natural texture.
Equipment Needed
Here’s what you’ll want handy before starting this red white and blue jello flag mold recipe:
- A rectangular or flag-shaped mold (about 9×13 inches / 23×33 cm) works best for crisp layers and easy slicing. I use a simple glass baking dish, which doubles as a mold and serving tray.
- Mixing bowls — at least three, so you can prepare each layer separately.
- Whisk or fork for mixing gelatin powders smoothly into liquid.
- Measuring cups and spoons for precise liquid and sugar measurements.
- Rubber spatula to gently fold the white layer ingredients without deflating the mixture.
- Refrigerator space — you’ll need room to chill the layers individually.
If you don’t have a specialized mold, no worries — a glass or plastic rectangular container works fine and keeps everything manageable. Personally, I avoid metal pans since gelatin can stick and pull apart when unmolding.
Keeping a digital kitchen timer or a phone timer nearby can help with the chilling times, which is key to getting those perfect layers without mixing. And if you want to get fancy, a serrated knife comes in handy for clean slices.
Preparation Method
- Prepare the Red Layer: In a mixing bowl, dissolve the strawberry or cherry gelatin powder in 1 cup (240 ml) boiling water. Stir for 2 minutes until fully dissolved. Add 1/2 cup (120 ml) cold water and mix well. Pour this mixture into your mold and chill in the refrigerator for about 30 minutes or until it’s just set but still slightly tacky. This helps the next layer stick without blending.
- Make the White Layer: While the red layer chills, sprinkle the unflavored gelatin over 1/2 cup (120 ml) boiling water in a bowl. Let it sit for 5 minutes to bloom, then stir until dissolved. In a separate bowl, whisk together the cold milk, sugar, and vanilla extract until sugar dissolves. Slowly add the gelatin mixture into the milk mixture, stirring gently to combine. Let this cool to room temperature — you want it cool but not set, about 10-15 minutes. Pour carefully over the red layer and refrigerate for another 30 minutes until it firms up.
- Prepare the Blue Layer: Repeat the process used for the red layer: dissolve the blue raspberry gelatin in 1 cup (240 ml) boiling water, stir for 2 minutes, then add 1/2 cup (120 ml) cold water. Let cool slightly before pouring gently over the white layer. Chill the entire mold for at least 1 hour until fully set.
- Unmold and Serve: To unmold, briefly dip the mold’s bottom in warm water (just a few seconds), being careful not to let water seep inside. Run a knife around the edges, then invert onto a serving plate. The neat red, white, and blue layers should pop right out, creating the perfect patriotic centerpiece.
- Troubleshooting Tips: If the layers mix, it usually means the previous layer wasn’t set enough. Patience is key! Also, pouring the cooler layer slowly over the back of a spoon helps reduce splashes that break the layers.
I’ve found that timing is everything here — rushing the chilling steps leads to color blending, and letting layers set too long can make pouring tricky. Setting a gentle rhythm with your timer makes it smoother, and honestly, it’s a relaxing way to prep for a party.
Cooking Tips & Techniques
Getting those iconic layered stripes can feel tricky at first, but a few pointers will have you feeling like a jello pro in no time:
- Blooming Gelatin: Always sprinkle unflavored gelatin over cold or room temp water first so it blooms properly. Skipping this step can leave clumps or a grainy texture.
- Temperature Matters: Pour the next layer only when the previous is cool to the touch but firm. Pouring warm jello on a warm layer? That’s a recipe for color bleeding.
- Pouring Technique: Use the back of a spoon to gently guide the liquid over the previous layer, slowing the pour and protecting the layer below.
- Patience Pays Off: Don’t rush the chilling. Each layer should be firm enough to hold the weight of the next without mixing.
- Flavor Balance: For the white layer, using real vanilla extract and whole milk makes a noticeable difference in richness and smoothness.
I remember my first few attempts where I tried to multitask too much and ended up with a pinkish swirl instead of crisp layers. Lesson learned: give yourself ample fridge time and enjoy the process — it’s oddly calming to watch the colors set.
Variations & Adaptations
This red white and blue jello flag mold recipe is pretty flexible, so you can tailor it to your taste or dietary needs:
- Dietary Swaps: Use agar agar powder instead of gelatin for a vegetarian or vegan-friendly dessert. Keep in mind agar sets faster and firmer, so adjust chilling times accordingly.
- Flavor Twists: Swap the strawberry gelatin for raspberry or watermelon for a different red flavor, or use blueberry instead of blue raspberry for a deeper berry taste. You can even add fresh berries into the red or blue layers for texture.
- Seasonal Versions: For summer berry season, layer fresh pureed berries with gelatin to add natural sweetness and color.
- Mini Molds: Make individual flag molds using silicone molds or small glass dishes for personal patriotic treats — perfect for parties or kids’ lunches.
- Personal Favorite Variation: Once, I replaced the white layer’s milk with coconut milk and added a pinch of cinnamon. It gave the creamy layer a subtle tropical warmth that surprised everyone.
Feel free to experiment with layering order or even add a sparkly edible glitter to the top layer for a festive touch — it’s your centerpiece, after all.
Serving & Storage Suggestions
This red white and blue jello flag centerpiece is best served chilled. After unmolding, slice into squares or flag-shaped pieces and arrange on a festive platter. It pairs beautifully with light summer drinks like lemonade or iced tea.
For parties, I love setting it next to savory crowd-pleasers like savory bacon jam sliders or even a quick cheesy mug pizza for a fun mix of flavors and textures.
Store leftovers covered in the refrigerator for up to 3 days. Jello tends to lose some of its jiggle over time but still tastes great. To re-chill, slice and pop individual pieces back into the fridge for 30 minutes before serving.
A quick tip: avoid freezing as it alters the texture and causes weeping upon thawing.
Nutritional Information & Benefits
Per serving, this layered jello flag dessert is relatively low in calories — roughly 120-150 calories depending on serving size and milk fat content. It’s mostly water and sugar, so it’s a light dessert option.
The white layer’s milk adds a bit of calcium and protein, making it slightly more nourishing than plain gelatin. Choosing lower-sugar gelatin options or natural fruit purees can reduce sweetness if you’re watching sugar intake.
Keep in mind this recipe contains gelatin, which some avoid for dietary or allergen reasons. For gluten-free needs, all ingredients here are naturally gluten-free.
From a wellness perspective, I appreciate this recipe as a fun, nostalgic indulgence that balances flavor with portion control — a perfect way to enjoy celebration treats without overdoing it.
Conclusion
This red white and blue jello flag mold recipe is a charming, fuss-free way to bring a pop of color and fun to your holiday table. It’s approachable enough for any skill level, yet impressive enough to draw compliments and happy smiles.
Whether you stick with the classic flavors or try your own variations, this recipe invites a little creativity and a lot of joy. I love how it brings back simple summer memories while making the celebration feel special and sweet.
If you give it a try, I’d love to hear how your layers turned out or if you put your own spin on it. Sharing those kitchen wins (and funny fails) is what makes cooking together so rewarding!
Here’s to making your next patriotic gathering a little brighter — one jiggly, colorful slice at a time.
FAQs About the Perfect Layered Red White and Blue Jello Flag Mold
How long does it take for each jello layer to set properly?
Each layer typically needs about 30 minutes to become firm but still slightly tacky to the touch. This ensures the next layer sticks without mixing colors.
Can I use flavored milk or non-dairy milk for the white layer?
Yes, you can swap whole milk for almond, oat, or coconut milk. Just be sure the milk is cold and unsweetened for best texture and flavor.
What’s the best way to unmold the jello without it breaking?
Dip the mold briefly in warm water for a few seconds, then run a knife around the edges before inverting onto a plate. This loosens the jello without melting it.
Can I prepare this dessert a day ahead?
Absolutely! It stores well covered in the refrigerator for up to 3 days, making it a great make-ahead option for celebrations.
Is there a vegetarian alternative to gelatin?
Yes, agar agar powder works as a vegetarian substitute, but it sets firmer and faster, so adjust chilling times and quantities accordingly.
Pin This Recipe!
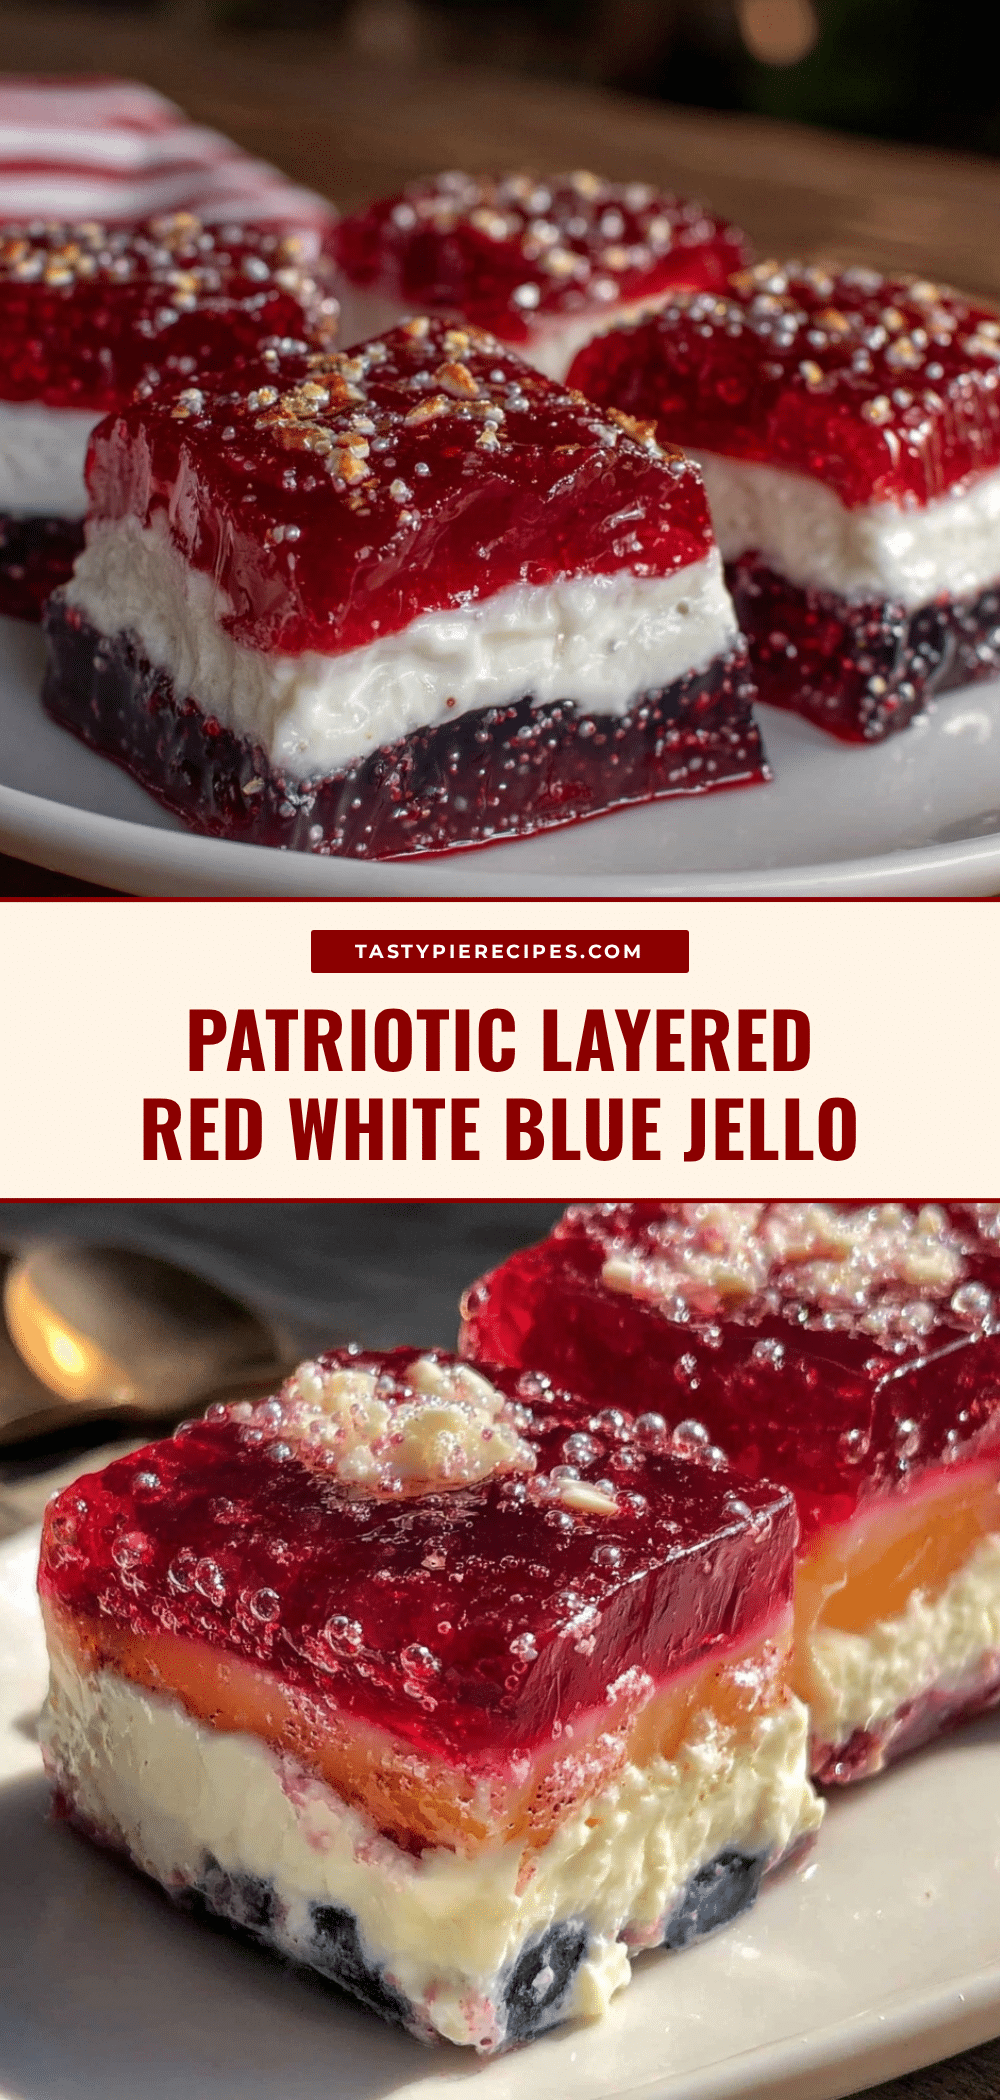
Perfect Layered Red White and Blue Jello Flag Mold Recipe for Easy Patriotic Centerpiece

A quick and easy layered red, white, and blue jello flag mold that creates a festive and nostalgic patriotic centerpiece perfect for summer celebrations.
- Prep Time: 15 minutes
- Cook Time: 2 hours
- Total Time: 2 hours 15 minutes
- Yield: 12 servings 1x
- Category: Dessert
- Cuisine: American
Ingredients
- 1 (6 oz / 170 g) package strawberry or cherry flavored gelatin (jello)
- 1 cup (240 ml) boiling water
- 1/2 cup (120 ml) cold water
- 1 (3 oz / 85 g) package unflavored gelatin (powdered)
- 1/2 cup (120 ml) boiling water
- 1 cup (240 ml) cold milk (whole milk or 2%)
- 1/4 cup (50 g) granulated sugar
- 1 teaspoon vanilla extract
- 1 (6 oz / 170 g) package blue raspberry flavored gelatin (jello)
- 1 cup (240 ml) boiling water
- 1/2 cup (120 ml) cold water
Instructions
- Prepare the Red Layer: Dissolve the strawberry or cherry gelatin powder in 1 cup boiling water. Stir for 2 minutes until fully dissolved. Add 1/2 cup cold water and mix well. Pour into mold and chill for about 30 minutes until just set but slightly tacky.
- Make the White Layer: Sprinkle unflavored gelatin over 1/2 cup boiling water and let bloom for 5 minutes. Stir until dissolved. Whisk cold milk, sugar, and vanilla extract until sugar dissolves. Slowly add gelatin mixture into milk mixture, stirring gently. Cool to room temperature (10-15 minutes). Pour carefully over red layer and refrigerate for 30 minutes until firm.
- Prepare the Blue Layer: Dissolve blue raspberry gelatin in 1 cup boiling water, stir for 2 minutes, then add 1/2 cup cold water. Cool slightly and pour gently over white layer. Chill entire mold for at least 1 hour until fully set.
- Unmold and Serve: Dip mold bottom briefly in warm water, run a knife around edges, then invert onto serving plate. Slice and serve chilled.
- Troubleshooting Tips: Ensure each layer is firm but tacky before pouring the next to avoid mixing. Pour cooler layers slowly over the back of a spoon.
Notes
Use Jell-O brand for vibrant colors and balanced sweetness. Whole milk gives a creamy texture but almond or oat milk can be used for lighter or dairy-free options. Agar agar powder can substitute gelatin for vegetarian/vegan versions but adjust chilling times. Pour layers slowly over the back of a spoon to avoid mixing. Chill each layer until firm but tacky for best results. Avoid freezing as it alters texture.
Nutrition
- Serving Size: 1 slice (approximate
- Calories: 135
- Sugar: 25
- Sodium: 90
- Fat: 1.5
- Saturated Fat: 1
- Carbohydrates: 30
- Protein: 2
Keywords: red white and blue jello, patriotic dessert, layered jello, Fourth of July dessert, easy jello recipe, summer party dessert


