
Third batch in two days, and I finally stopped measuring and just started shaking. The first bag was too salty. The second, not enough ranch. But this one—this one had that perfect dusty coating that sticks to every ridge and curl of the cereal. I was standing over my counter at 10 p.m., bag of Chex in one hand, shredded cheddar powder clinging to my fingers, thinking, “Why did it take me this long to make snack bags that actually taste like something?”
The thing is, I love a good party mix. But the store-bought bags always feel like a compromise. Either they’re drowning in seasoning or they’re so bland you’re just eating crunchy air. And the homemade versions? They’re usually a full sheet pan situation that takes over your oven for an hour. I wanted something I could throw together while my coffee was brewing. Something that felt like a treat but didn’t require a culinary degree or a trip to three different stores.
So I started messing around with a single bowl, a microwave, and a bag of Chex. The first few attempts were, honestly, a mess. But somewhere around attempt number four, it clicked. The butter-to-seasoning ratio balanced out. The ranch and cheddar stopped fighting each other and started singing together. And the texture—crispy but not brittle, coated but not greasy—finally felt right. This recipe is that moment. It’s the snack bag you can make in ten minutes flat and then pretend you didn’t eat half of it before you even sealed the bags.
Why You’ll Love This Recipe
- Quick & Easy: From start to finish, you’re looking at about 10 minutes of active time. No oven preheating, no complicated steps. Just a bowl, a microwave, and a spatula.
- Simple Ingredients: You probably already have most of this stuff in your pantry. Butter, ranch seasoning, cheddar powder, Chex cereal. No weird specialty items that you’ll use once and forget about.
- Perfect for On-the-Go Snacking: These snack bags are ideal for lunchboxes, road trips, movie nights, or post-hike refueling. Portion them out and grab one when you need a quick, satisfying crunch.
- Crowd-Pleaser: I’ve brought these to potlucks and game nights, and they disappear faster than anything else on the table. Kids love them. Adults love them. Even the picky eaters in my family go back for seconds.
- Unbelievably Delicious: The flavor combo is straight-up addictive. The tangy ranch meets the sharp cheddar, and the butter ties it all together in a way that makes you want to keep your hand in the bag.
What makes this recipe different from the rest? It’s the method. Instead of baking the mix on a sheet pan and hoping it doesn’t burn, you microwave it in short bursts. This gives you total control over the coating and keeps everything perfectly crispy without any risk of scorching. Plus, the portion control means you can actually enjoy a reasonable serving without demolishing an entire batch in one sitting.
This isn’t just another snack mix recipe. It’s the one you’ll make on a Tuesday afternoon because you need something crunchy. It’s the one you’ll bring to a friend’s house because it’s impressive without being fussy. It’s comfort food, but portable. And honestly, that’s the best kind.
What Ingredients You Will Need
This recipe relies on a handful of pantry staples to deliver that bold, tangy, cheesy flavor. No complicated shopping list here—just simple ingredients that work together beautifully.
- 9 cups Rice Chex cereal (or Corn Chex, or a mix—use what you have)
- 1/2 cup unsalted butter (melted; if you only have salted butter, reduce the added salt in the seasoning)
- 1 packet (1 oz) ranch seasoning mix (I like Hidden Valley for that classic tang, but any brand works)
- 1/2 cup cheddar cheese powder (you can find this in the spice aisle or online; Hoosier Hill Farm makes a great one)
- 1/4 teaspoon garlic powder (optional, but it adds a nice little kick)
- 1/4 teaspoon onion powder (optional, but I never skip it)
- 1/8 teaspoon cayenne pepper (optional, for a tiny bit of heat—I add it when I’m feeling adventurous)
For the cheddar powder, look for one that’s finely ground so it coats evenly. Some brands are more clumpy than others, so if yours seems lumpy, sift it through a fine-mesh strainer before mixing. And if you can’t find cheddar powder, you can substitute with finely grated sharp cheddar cheese—just know that the texture will be slightly different, and you’ll need to refrigerate the finished snack bags.
For the ranch seasoning, I’ve tried both homemade blends and store-bought packets. The store-bought ones have a certain consistency that works really well here. If you want to make your own, combine dried buttermilk, dried parsley, dried dill, garlic powder, onion powder, salt, and pepper. But honestly, the packet is just easier and tastes great.
One note on the butter: make sure it’s fully melted but not hot. You want it liquid enough to mix with the seasonings, but if it’s too hot, it can make the cereal soggy. Let it cool for a minute or two after melting.
Equipment Needed
You don’t need much for this recipe, which is part of its charm. Here’s what you’ll want to have on hand:
- Large microwave-safe bowl (at least 4-quart capacity—you need room to toss the cereal without spilling)
- Measuring cups and spoons
- Spatula or wooden spoon (for stirring)
- Small bowl (for mixing the seasoning blend)
- Resealable plastic bags (sandwich or snack size, depending on your preferred portion)
- Parchment paper or wax paper (optional, for laying out the mix to cool)
If you don’t have a microwave, you can absolutely make this in the oven. Spread the coated cereal on a baking sheet and bake at 250°F for about 15-20 minutes, stirring halfway through. Just keep an eye on it—oven temperatures vary, and you don’t want it to brown too much.
I’ve made this with both glass and ceramic bowls, and both work fine. Just make sure whatever you use is microwave-safe and big enough to give you room to stir without flinging cereal everywhere. Trust me on that one. I’ve cleaned up more than a few stray Chex off my counter.
Preparation Method
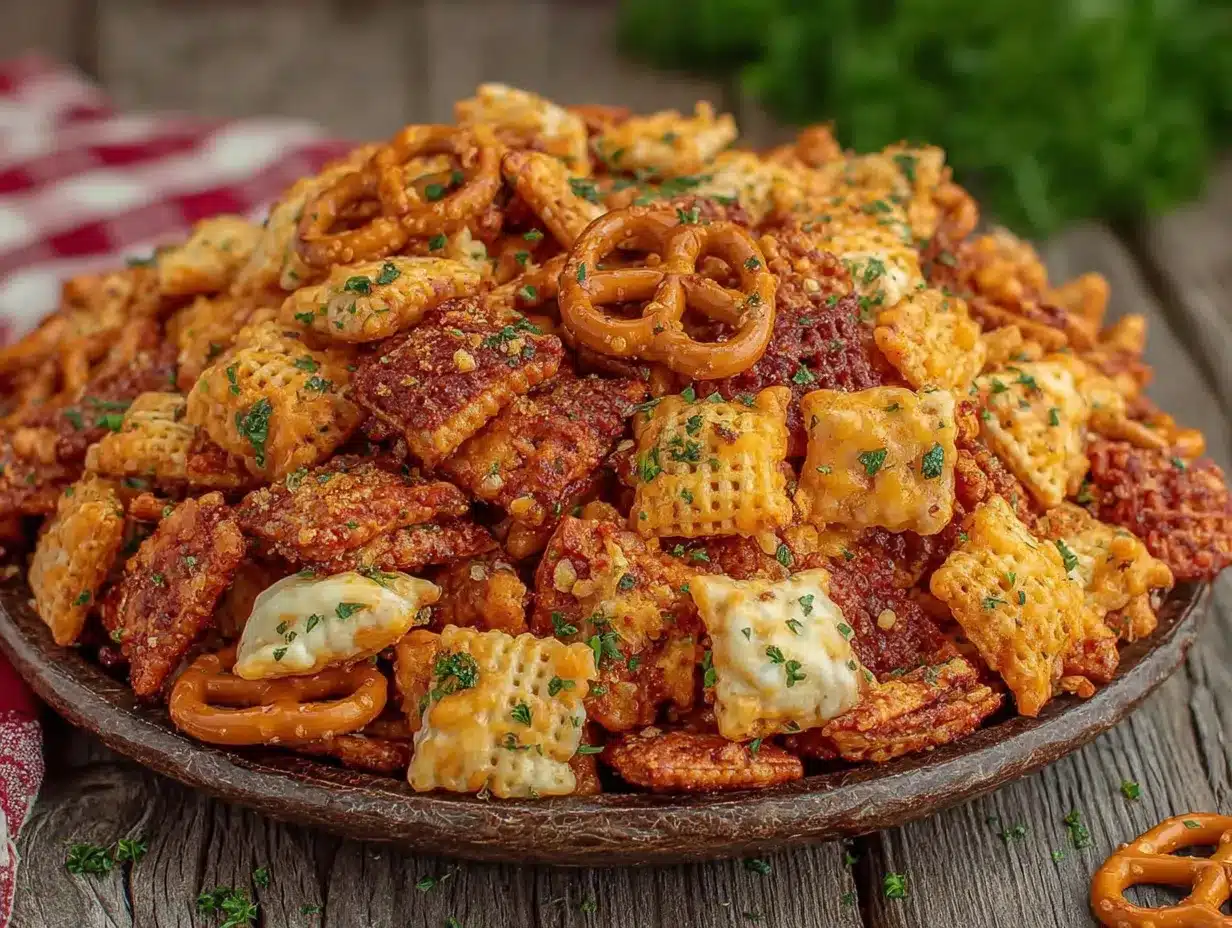
- Melt the butter in your large microwave-safe bowl. Microwave in 30-second bursts until fully melted, then let it cool for a minute. You don’t want it bubbling hot when you add the seasonings.
- Mix the seasonings in a small bowl. Combine the ranch seasoning packet, cheddar cheese powder, garlic powder, onion powder, and cayenne pepper (if using). Stir until everything is evenly distributed. This helps prevent clumps later.
- Combine butter and seasonings. Pour the seasoning mixture into the melted butter and whisk until smooth. It should look like a thick, orange-tinted paste. If it seems too thick, add a teaspoon of water and stir.
- Add the cereal. Pour the 9 cups of Rice Chex into the bowl with the butter-seasoning mixture. Use your spatula to gently fold and toss until every piece is coated. Be patient here—some pieces will want to stick together, but keep gently stirring until everything looks evenly dusted.
- Microwave in bursts. Place the bowl in the microwave and heat on high for 1 minute. Remove and stir well. Repeat this process two more times, for a total of 3 minutes of microwave time. The mixture will look slightly wet at first, but it will dry out as it cools.
- Spread to cool. After the final microwave burst, spread the coated cereal out onto a sheet of parchment paper or wax paper. Use your spatula to break up any clumps. Let it cool completely—about 15-20 minutes. This is crucial for achieving that perfect crispy texture.
- Portion into bags. Once the mix is completely cool, divide it evenly among your resealable bags. I usually get about 12-14 snack-sized bags from this batch. Seal them tight, pressing out as much air as possible before closing.
One thing I learned the hard way: don’t skip the cooling step. If you bag the mix while it’s still warm, the steam will make it soggy. And nobody wants soggy Chex mix. Let it sit out, untouched, until it reaches room temperature. Your patience will be rewarded.
Also, if you notice any clumps forming during the microwave stage, don’t panic. Just break them apart with your spatula after each burst. The heat from the microwave helps the butter and seasonings meld together, but it can also cause temporary sticking. A quick stir fixes that right up.
Cooking Tips & Techniques
I’ve made this recipe more times than I care to count, and I’ve definitely messed it up a few times along the way. Here are the things I wish someone had told me before I started:
Don’t over-microwave. I know it’s tempting to keep nuking it until it looks perfectly dry, but trust the process. Three one-minute bursts with stirring in between is all you need. Any more than that, and you risk burning the butter or making the cereal tough.
Use a light hand with the seasoning. It’s easier to add more than to take away. Start with the amounts listed above, and if you want a stronger flavor, you can always sprinkle a little extra cheddar powder or ranch seasoning on top before the final stir.
Watch for hot spots. Microwaves are notoriously uneven. That’s why stirring between bursts is non-negotiable. If you skip the stir, you’ll end up with some pieces that are overdosed and some that are practically naked.
Let it cool completely. I cannot stress this enough. I once rushed the cooling process because I was in a hurry, and I ended up with a bag of limp, chewy Chex mix. Not my finest moment. Give it the full 20 minutes.
Double-bag if needed. If you’re planning to store these snack bags for more than a few days, consider putting the snack-sized bags inside a larger resealable bag. This extra layer of protection helps keep the mix fresh and crunchy for up to two weeks.
One of my biggest failures? I tried using pre-shredded cheddar cheese instead of cheddar powder. It melted into greasy clumps that stuck to the cereal in all the wrong ways. Learn from my mistake. Stick with the powder.
Variations & Adaptations
This recipe is incredibly flexible. Here are some variations I’ve tried and loved:
- Spicy Ranch: Add an extra 1/4 teaspoon of cayenne pepper and a pinch of chili powder. The heat builds slowly and pairs beautifully with the cool ranch flavor.
- Smoky Cheddar: Substitute half the cheddar powder with smoked cheddar powder. It adds a deep, savory note that’s perfect for fall or winter snacking.
- Gluten-Free Option: Rice Chex is naturally gluten-free, so this recipe is already safe for most gluten-free diets. Just double-check your ranch seasoning packet—some brands contain wheat-based additives.
- Dairy-Free Adaptation: Use a plant-based butter alternative (I like Miyoko’s) and a dairy-free cheddar powder. The texture will be slightly different, but the flavor is still fantastic.
- Add-Ins: After the cooling step, stir in pretzel sticks, peanuts, or mini crackers for extra crunch and variety. Just keep the total volume around 9 cups to maintain the seasoning balance.
My personal favorite variation is the Spicy Ranch. I made it for a Super Bowl party last year, and it was gone before halftime. Something about that heat-and-cool combo just works. If you’re not sure about the spice level, start with a smaller amount and taste as you go. You can always add more, but you can’t take it out.
Serving & Storage Suggestions
These snack bags are perfect for grabbing and going. Serve them at room temperature—no reheating needed. They’re great for:
- Lunchboxes (kids and adults alike)
- Road trips and long car rides
- Movie nights or game nights
- Post-workout refueling (hey, it’s got carbs and a little fat—balance, right?)
- Party favors or hostess gifts
For storage, keep the sealed bags in a cool, dry place. They’ll stay fresh for up to two weeks at room temperature. If you live in a humid climate (I feel your pain), you might want to add a silica gel packet to the storage container to absorb excess moisture. It sounds weird, but it works.
If you want to make a big batch ahead of time, you can store the cooled mix in an airtight container for up to a month. Just portion it into bags when you’re ready to use it. The flavors actually meld together a bit more after a day or two, so it might taste even better on day three.
For reheating, if your mix loses its crunch (which can happen in humid weather), spread it on a baking sheet and pop it in a 300°F oven for 5 minutes. Let it cool completely before re-bagging. This trick has saved many a batch in my kitchen.
Nutritional Information & Benefits
Per serving (about 1/2 cup or one snack bag):
- Calories: 180
- Fat: 9g
- Carbohydrates: 22g
- Protein: 3g
- Fiber: 1g
- Sodium: 320mg
Please note that these values are estimates and can vary based on the specific brands you use. The cheddar powder and ranch seasoning can add sodium, so if you’re watching your salt intake, consider using a low-sodium ranch mix or reducing the amount slightly.
On the plus side, Rice Chex is fortified with iron and several B vitamins, so you’re getting a little nutritional boost with your snack. The butter adds a small amount of vitamin A, and the cheddar powder contributes calcium. It’s not a health food, but it’s a reasonable indulgence that fits into a balanced diet.
For those with dietary restrictions, this recipe is naturally nut-free (unless you add nuts as a variation) and can be made gluten-free and dairy-free with the substitutions mentioned above. Always check your ingredient labels to be sure.
Conclusion
This Easy Cheddar Ranch Chex Mix Snack Bags recipe is the kind of thing you’ll make once and then wonder how you ever lived without it. It’s quick, it’s forgiving, and it delivers that perfect salty, tangy, cheesy crunch every single time. Whether you’re packing lunches for the week, prepping for a road trip, or just need something to munch on during a movie, these little bags have got your back.
I love this recipe because it feels like a small victory every time I make it. It’s proof that you don’t need a lot of time or fancy equipment to create something that tastes like you put in way more effort than you actually did. And honestly, that’s my favorite kind of cooking.
So go ahead—grab a bag of Chex, raid your pantry for the seasonings, and give this a try. Adjust the spice level, throw in some extra add-ins, make it your own. And when you do, come back and tell me about it. I’d love to hear how your batch turned out. Drop a comment below, share a photo, or tag me in your snack bag creations. Happy snacking!
Frequently Asked Questions
Can I use a different type of Chex cereal?
Absolutely! Corn Chex, Wheat Chex, or a mix of all three works great. Just keep the total volume at 9 cups to maintain the seasoning balance. Each type has a slightly different texture, so feel free to experiment and find your favorite combination.
How do I prevent the seasoning from clumping?
Mix the dry seasonings together in a separate bowl before adding them to the melted butter. This helps distribute the ingredients evenly. Also, make sure your cheddar powder is finely ground—if it’s lumpy, sift it through a fine-mesh strainer first.
Can I make this recipe in the oven instead of the microwave?
Yes. Preheat your oven to 250°F. Spread the coated cereal on a baking sheet in a single layer. Bake for 15-20 minutes, stirring halfway through. Keep a close eye on it to prevent burning. The microwave method is faster, but the oven works just as well.
How long do these snack bags stay fresh?
Stored in a cool, dry place, they’ll stay fresh for up to two weeks. For longer storage, keep them in an airtight container for up to a month. If they lose their crunch, spread them on a baking sheet and reheat at 300°F for 5 minutes, then cool completely before re-bagging.
Can I freeze these snack bags?
I don’t recommend freezing them. The moisture in the freezer can make the cereal soggy when thawed. It’s better to make a fresh batch when you need it, or store the cooled mix in an airtight container at room temperature for up to a month.
Pin This Recipe!

Easy Cheddar Ranch Chex Mix Snack Bags

Quick and easy microwave Chex mix snack bags with tangy ranch and sharp cheddar flavor. Perfect for on-the-go snacking, lunchboxes, and party favors.
- Prep Time: 10 minutes
- Cook Time: 3 minutes
- Total Time: 33 minutes
- Yield: 12-14 snack bags 1x
- Category: Snack
- Cuisine: American
Ingredients
- 9 cups Rice Chex cereal (or Corn Chex, or a mix)
- 1/2 cup unsalted butter, melted
- 1 packet (1 oz) ranch seasoning mix
- 1/2 cup cheddar cheese powder
- 1/4 teaspoon garlic powder (optional)
- 1/4 teaspoon onion powder (optional)
- 1/8 teaspoon cayenne pepper (optional)
Instructions
- Melt the butter in a large microwave-safe bowl. Microwave in 30-second bursts until fully melted, then let it cool for a minute.
- Mix the seasonings in a small bowl: combine ranch seasoning packet, cheddar cheese powder, garlic powder, onion powder, and cayenne pepper (if using). Stir until evenly distributed.
- Pour the seasoning mixture into the melted butter and whisk until smooth, forming a thick paste.
- Add the 9 cups of Rice Chex to the bowl. Gently fold and toss with a spatula until every piece is coated.
- Microwave on high for 1 minute. Remove and stir well. Repeat two more times (total of 3 minutes of microwave time).
- Spread the coated cereal onto parchment paper or wax paper. Break up any clumps. Let cool completely, about 15-20 minutes.
- Divide the cooled mix evenly among resealable snack bags. Seal tight, pressing out excess air.
Notes
Do not skip the cooling step—bagging while warm causes sogginess. For oven method: bake at 250°F for 15-20 minutes, stirring halfway. For dairy-free, use plant-based butter and dairy-free cheddar powder. Store in a cool, dry place for up to 2 weeks.
Nutrition
- Serving Size: 1 snack bag (about 1
- Calories: 180
- Sugar: 2
- Sodium: 320
- Fat: 9
- Saturated Fat: 5
- Carbohydrates: 22
- Fiber: 1
- Protein: 3
Keywords: Chex mix, ranch, cheddar, snack bags, microwave, easy, party mix, gluten-free option