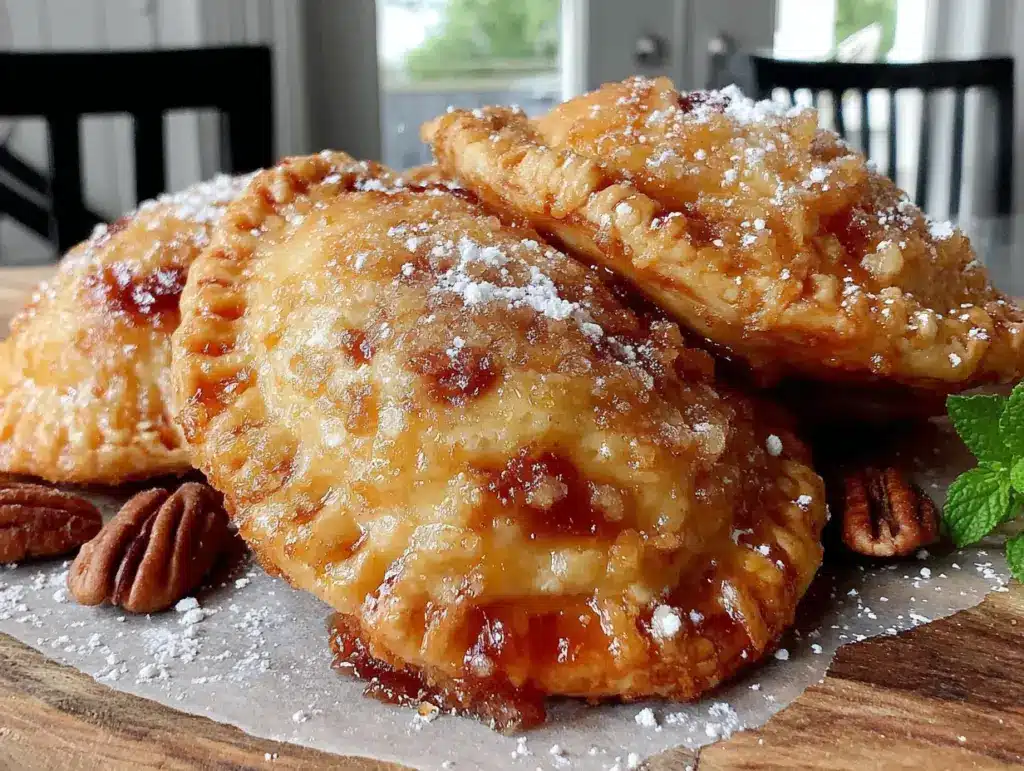
My Aunt June did not trust peaches in a pie crust. Not even a little bit. She’d spent forty years making her famous apple pie—the one with the lattice top and the secret splash of Calvados—and she saw no reason to mess with a good thing. So when I told her I was working on a bourbon peach hand pie recipe for Labor Day, she just raised an eyebrow and said, “Peaches get weepy, honey. You’ll end up with a soggy mess.”
And honestly? The first three batches were exactly that. A sad, leaking disaster of syrupy peach juice and crust that dissolved into mush. I was stubborn though, and the idea of a portable, boozy-sweet peach pie you could eat with one hand while watching fireworks? That was worth fighting for. I wanted something that tasted like the last weekend of summer—warm, a little reckless, and full of golden hour flavor.
It took a few more tries (and one particularly frustrating night where I nearly threw a handful of peaches at the wall) to figure out the trick. You have to coax the moisture out of the fruit first, let the bourbon do its thing, and build a crust that can hold its own. This version is the one that finally made Aunt June take a bite, pause, and then quietly ask for the recipe. That was better than any blue ribbon, honestly. These hand pies are exactly what a Labor Day cookout needs—a little sweet, a little smoky, and completely unpretentious.
Why You’ll Love This Recipe
These bourbon peach hand pies are the kind of dessert that makes people stop mid-conversation. I’ve brought them to three different Labor Day barbecues now, and they disappear faster than the burgers every single time. Here’s why they work so well:
- Totally Portable : No plates or forks required. These little pies are self-contained, which means you can eat one while playing cornhole or chasing a toddler around the backyard. Perfect for Labor Day chaos.
- Simple Ingredients : You probably have most of this in your kitchen already. The bourbon is the only “special” item, and you can use whatever bottle you have hanging around. No fancy grocery store trips needed.
- Make-Ahead Friendly : You can assemble these the night before and bake them right before your guests arrive. The smell alone will make people think you’ve been slaving away all day. I won’t tell if you won’t.
- Crowd-Pleaser : Kids love the hand pie shape, adults love the bourbon kick, and everyone loves the flaky, buttery crust. It’s the rare dessert that gets universal approval.
- Unbelievably Delicious : The secret is roasting the peaches with brown sugar and bourbon before they ever hit the crust. It concentrates the flavor and gets rid of that excess moisture Aunt June warned me about. The filling is jammy, rich, and just boozy enough to feel grown-up without overwhelming the fruit.
What makes these different from every other peach hand pie recipe out there is the technique. Most recipes just toss raw peaches into a crust and hope for the best. Not this one. By pre-cooking the filling, you get a deeply caramelized, bourbon-spiked peach compote that stays put inside the pastry. No soggy bottoms, no leaking seams, no disappointment. Just pure, concentrated summer in a golden-brown pocket.
This is the dessert you bring when you want to impress without stress. It’s comfort food that feels special, but comes together with the kind of ease that lets you actually enjoy the party. And honestly? The first bite—warm bourbon peaches, flaky crust, a tiny drip of syrup running down your chin—that’s the taste of a perfect late-summer evening.
What Ingredients You Will Need
This recipe relies on simple, high-quality ingredients to deliver that big bourbon-peach flavor. Nothing too exotic here—just good fruit, good butter, and a splash of something strong. Here’s what you need:
For the Crust
- 2 ½ cups all-purpose flour (plus extra for dusting)
- 1 tablespoon granulated sugar (adds a hint of sweetness and helps browning)
- 1 teaspoon salt (I use fine sea salt)
- 1 cup cold unsalted butter, cut into small cubes (must be very cold—pop it in the freezer for 10 minutes before cutting)
- 6 to 8 tablespoons ice water (you might not need all of it)
- 1 tablespoon apple cider vinegar (keeps the crust tender—trust me on this one)
For the Bourbon Peach Filling
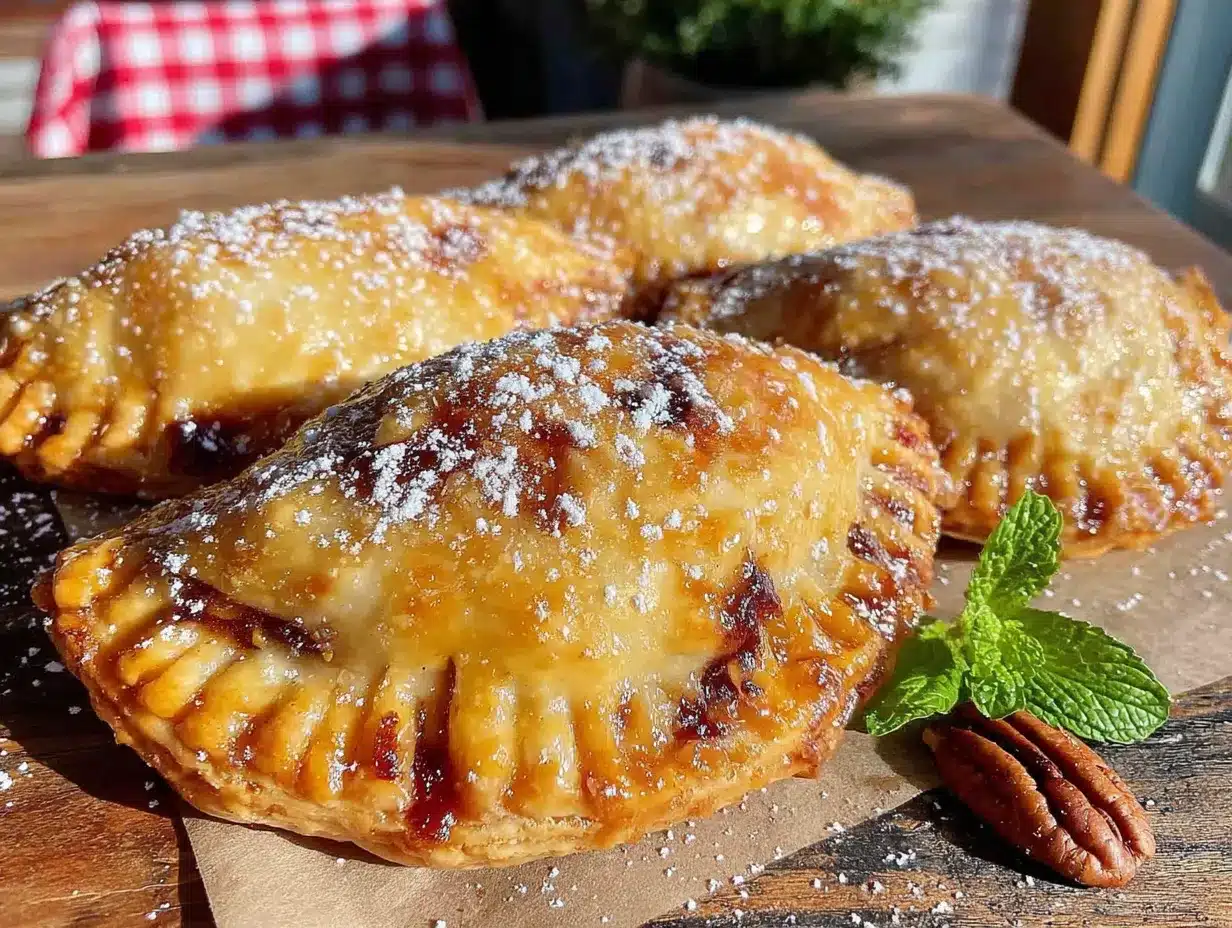
- 4 cups ripe but firm peaches, peeled and diced into ½-inch pieces (about 4-5 medium peaches. Don’t use overripe ones—they’ll turn to mush)
- ½ cup packed light brown sugar
- 3 tablespoons bourbon (I prefer a smoother bourbon like Maker’s Mark or Bulleit, but any decent bottle works)
- 2 tablespoons unsalted butter
- 1 tablespoon fresh lemon juice
- 1 teaspoon vanilla extract
- ½ teaspoon ground cinnamon
- ¼ teaspoon ground nutmeg (freshly grated if you have it)
- Pinch of salt
- 1 tablespoon cornstarch mixed with 1 tablespoon cold water (this is the secret to a non-runny filling)
For Assembly and Topping
- 1 large egg, beaten with 1 tablespoon water (egg wash for that golden shine)
- Turbinado or coarse sugar for sprinkling (gives a lovely crunch)
- Optional: 2 tablespoons bourbon for brushing after baking (because why not?)
A few notes on ingredient choices: I use King Arthur all-purpose flour for my crusts—it has a consistent protein content that gives reliable results. For the peaches, look for ones that yield slightly to pressure but aren’t soft. Freestone peaches are easiest to work with because the pit comes right out. If you only have clingstone peaches, just cut the flesh away from the pit carefully.
If you want to skip the bourbon, you can substitute 2 teaspoons of bourbon extract mixed with 3 tablespoons of apple juice. It won’t be quite the same, but it’ll still taste great for a non-alcoholic version.
Equipment Needed
You don’t need a ton of fancy tools to make these hand pies. Here’s what I use:
- Baking sheets (two, lined with parchment paper)
- Large skillet (for cooking the filling)
- Food processor (for the crust—you can do it by hand with a pastry cutter, but the processor is faster and keeps the butter cold)
- Rolling pin (I have a simple wooden one that cost me twelve bucks)
- 3-inch round cookie cutter (or a drinking glass with a thin rim)
- Pastry brush (for the egg wash)
- Sharp knife or bench scraper
- Cooling rack
If you don’t have a food processor, you can absolutely make the crust by hand. Just cut the butter into the flour using a pastry blender or two forks until it looks like coarse meal with pea-sized butter pieces. It takes a little longer, but the result is just as good. I actually made my first few batches by hand before I got my processor, and those pies were pretty great.
For the cookie cutter, a 3-inch round is perfect, but I’ve used a wide-mouth mason jar ring in a pinch. Works like a charm. Just make sure whatever you use has a sharp edge so it cuts cleanly through the dough.
Preparation Method
Let’s get to the good part. This method might look long, but I promise it’s straightforward. The key is to work smart—make the filling first so it has time to cool, then handle the dough while it chills.
Step 1: Make the Bourbon Peach Filling
Peel your peaches first. If they’re ripe, you can score an X on the bottom and blanch them in boiling water for 30 seconds—the skins slip right off. Or just use a vegetable peeler, which is what I usually do because I’m impatient. Dice them into ½-inch pieces and set aside.
In a large skillet over medium heat, melt 2 tablespoons of butter. Add the diced peaches and brown sugar, then stir gently to coat. Cook for about 3 minutes, stirring occasionally, until the peaches start releasing their juice. Add the bourbon, lemon juice, vanilla, cinnamon, nutmeg, and salt. Let it bubble away for another 4-5 minutes. The kitchen will smell incredible at this point—like a distillery crossed with a peach orchard.
Stir in the cornstarch slurry and cook for 1 more minute, until the mixture thickens into a glossy, jammy consistency. Remove from heat and let it cool completely. I usually spread it on a plate and pop it in the fridge to speed things up. You want it completely cool before filling the pies—warm filling will melt the butter in your crust and ruin everything. Trust me, I learned this the hard way.
Step 2: Make the Pie Crust
In a food processor, pulse together the flour, sugar, and salt. Add the cold butter cubes and pulse about 10-12 times, until the butter is broken down into pea-sized pieces with some larger chunks remaining. You want visible butter here—it creates those flaky layers.
In a small bowl, mix the ice water and apple cider vinegar. With the processor running, drizzle in 6 tablespoons of the water mixture. Pulse until the dough just starts to come together—it should look shaggy and hold together when you squeeze a handful. If it’s too dry, add the remaining water one tablespoon at a time. Don’t overmix, or you’ll get a tough crust.
Turn the dough out onto a lightly floured surface. Divide it in half, shape each half into a flat disc, wrap in plastic, and refrigerate for at least 1 hour. Overnight is even better. Cold dough is happy dough.
Step 3: Assemble the Hand Pies
Preheat your oven to 375°F (190°C) and line two baking sheets with parchment paper.
On a lightly floured surface, roll out one disc of dough to about ⅛-inch thickness. Use your 3-inch cutter to cut out rounds. Gather the scraps, re-roll, and cut more rounds until all the dough is used. You should get about 12-14 rounds per disc. Place half of the rounds on one baking sheet.
Spoon about 1 tablespoon of the cooled filling onto the center of each round, leaving a ½-inch border around the edges. Don’t overfill—I know it’s tempting, but too much filling will leak out during baking. Place another round on top of each filled round. Press the edges together with your fingers, then crimp with a fork to seal. Cut 2-3 small slits on top of each pie for steam to escape.
Repeat with the second disc of dough and the remaining filling. You should end up with about 24-28 hand pies, depending on how thick you roll the dough.
Step 4: Bake the Hand Pies
Brush each pie with the egg wash and sprinkle generously with turbinado sugar. Bake for 18-22 minutes, rotating the pans halfway through, until the pies are deep golden brown and the filling is bubbling through the steam vents. Let them cool on the baking sheet for 5 minutes, then transfer to a cooling rack.
If you’re feeling extra indulgent, brush the warm pies with a little extra bourbon while they’re still hot. It adds a final boozy kick that’s absolutely worth it.
Cooking Tips & Techniques
I’ve made these pies more times than I care to count, and I’ve learned a few things along the way. Here’s what I wish someone had told me:
Don’t skip the cornstarch. I know it sounds like a small thing, but that slurry is what keeps your filling from turning into peach soup. Without it, you’ll end up with a mess. I learned this the hard way when I brought a batch to a picnic and they leaked all over the basket. Not my finest moment.
Keep everything cold. This is the number one rule of pie crust. Cold butter, cold water, cold dough. If at any point your dough feels warm or sticky, pop it back in the fridge for 15 minutes. I once tried to rush the process on a hot August day and ended up with a sticky, unworkable mess. Patience pays off here.
Don’t overwork the dough. When you’re rolling and re-rolling the scraps, handle them as little as possible. Overworking develops gluten and makes the crust tough. I usually aim for two re-rolls max, then I just accept a few less pies. Quality over quantity, you know?
Use a fork to seal. Pressing the edges with a fork does double duty—it seals the pies and creates that classic crimped edge. Make sure you press firmly all the way around, or the filling will find a weak spot and escape. I’ve had pies that looked like little peach volcanoes because I got lazy with the sealing.
Let the filling cool completely. I cannot stress this enough. Warm filling will melt the butter in your crust before it even hits the oven. You’ll end up with tough, greasy pastry. Make the filling first, then chill it while you prepare the dough. Your future self will thank you.
Variations & Adaptations
One of the best things about this recipe is how flexible it is. Here are some ways to make it your own:
Gluten-Free Version: Substitute the all-purpose flour with a good gluten-free flour blend that contains xanthan gum. I’ve had success with Bob’s Red Mill 1-to-1 Baking Flour. The dough is a bit more delicate to work with, so handle it gently. The filling is naturally gluten-free, so that part’s easy.
Vegan Adaptation: Use cold vegan butter (I like Miyoko’s) for the crust and substitute the egg wash with a mixture of 1 tablespoon maple syrup and 1 tablespoon non-dairy milk. The crust won’t be quite as flaky, but it’ll still be delicious. The filling is already vegan-friendly.
Seasonal Swaps: This method works beautifully with other fruits. Try it with diced apples and a splash of dark rum in the fall, or with fresh strawberries and balsamic vinegar in the spring. I made a version last Thanksgiving with pears and brandy that was absolutely killer. The technique stays the same—just adjust the sugar based on the sweetness of your fruit.
Spiced-Up Version: Add a pinch of cayenne pepper or a dash of chipotle powder to the filling for a smoky, spicy kick. The heat plays beautifully with the sweet bourbon peaches. I tried this on a whim once and it was a huge hit at a party.
Mini Version: Use a 2-inch cutter instead of a 3-inch one and reduce the filling to about 1 teaspoon per pie. Bake for 14-16 minutes. These are perfect for parties where people want to try multiple desserts without committing to a full-sized hand pie.
Serving & Storage Suggestions
These hand pies are best served warm, about 10-15 minutes after they come out of the oven. The crust is still flaky, the filling is warm and jammy, and the bourbon flavor is at its peak. I like to serve them with a scoop of vanilla bean ice cream or a dollop of lightly sweetened whipped cream. A drizzle of caramel sauce never hurts either.
For a Labor Day spread, they pair beautifully with a cold glass of sweet tea or a bourbon lemonade. If you’re feeling fancy, set up a little dessert station with the hand pies, some fresh berries, and a pitcher of sparkling rosé mocktail cupcakes for a truly festive finish. Or keep it simple and just pile them on a platter—they’ll disappear either way.
Storage: Baked hand pies keep well at room temperature in an airtight container for up to 2 days. After that, the crust starts to soften. To refresh them, pop them in a 300°F oven for 5-7 minutes. They’ll taste almost as good as fresh.
Freezing: You can freeze the unbaked hand pies on a baking sheet until solid, then transfer them to a freezer bag. Bake directly from frozen, adding 3-5 minutes to the baking time. This is my favorite trick for Labor Day—I make a double batch in August and pull them out whenever I need a quick dessert. The flavors actually seem to get better after a week or two in the freezer.
Reheating: If you’re reheating from room temperature, a toaster oven works best. About 5 minutes at 350°F will get the crust crispy again. The microwave will make them soggy, so avoid it if you can. If you’re in a pinch, a hot skillet works too—just a minute or two per side.
Nutritional Information & Benefits
Let’s be real—these are hand pies made with butter, sugar, and bourbon. They’re a treat, not a health food. But here’s the thing: they’re made with real ingredients, and that counts for something. Each hand pie (based on a batch of 28) contains approximately:
- Calories: 180-200
- Fat: 10g
- Carbohydrates: 22g
- Fiber: 1g
- Sugar: 10g
- Protein: 3g
Peaches are a good source of vitamin C and fiber, and they contain antioxidants that support skin health and immune function. The bourbon… well, the bourbon is for your soul. And honestly? A little butter and sugar in a homemade treat made with love is good for the spirit. I firmly believe that food made from scratch with quality ingredients is better for you than anything processed, even if the numbers look similar on paper.
If you’re watching your sugar intake, you can reduce the brown sugar to ⅓ cup and add an extra tablespoon of bourbon to compensate. The filling will be a little tarter, but still delicious. For a lower-fat version, try using half the butter in the crust and substituting Greek yogurt for the rest. It won’t be as flaky, but it’ll still taste great.
These pies are not gluten-free, dairy-free, or vegan in their standard form, but as I mentioned in the variations section, you can adapt them pretty easily. Just be aware that the nutritional values will change with substitutions.
Conclusion
These bourbon peach hand pies have become my official Labor Day contribution, and for good reason. They’re everything you want in a late-summer dessert—sweet, boozy, portable, and packed with the flavor of fresh peaches. The crust is flaky and buttery, the filling is jammy and rich, and that little hint of bourbon ties it all together like a warm summer evening.
I love that this recipe feels special without being fussy. You can make the components ahead of time, assemble them while the grill is heating up, and serve them warm to a crowd that will absolutely lose their minds. It’s the kind of dessert that makes people ask for the recipe before they’ve even finished eating.
So go ahead—buy some peaches, pour yourself a little bourbon (you’ll have some left after making the filling, right?), and give these a try. Customize them however you like. Add more spice, swap the fruit, make them mini or giant. However you make them, they’ll be perfect. And if you come up with a variation I haven’t tried, drop a comment below. I’m always looking for new ideas.
Happy Labor Day, friends. May your pies be golden, your bourbon be smooth, and your summer end on the sweetest note possible.
Frequently Asked Questions
Can I use frozen peaches instead of fresh?
Yes, you can use frozen peaches, but you’ll need to adjust the cooking time. Thaw them first and drain off any excess liquid. They’ll break down a bit more than fresh peaches, so the filling will be softer. Add an extra teaspoon of cornstarch to help thicken it up. The flavor won’t be quite as bright as fresh summer peaches, but it’ll still be delicious in the colder months.
Do I have to use bourbon, or can I substitute something else?
You can absolutely substitute the bourbon. Try dark rum for a deeper, molasses-like sweetness, or brandy for a fruitier flavor. For a non-alcoholic version, use 3 tablespoons of apple juice or apple cider mixed with ½ teaspoon of vanilla extract and a tiny pinch of almond extract. It won’t have the same boozy depth, but it’ll still taste great. Just don’t skip the liquid entirely—you need it to create that jammy consistency.
Why did my hand pies leak in the oven?
This usually happens for one of three reasons: you overfilled the pies, you didn’t seal the edges properly, or the filling was too warm when you assembled them. Make sure you’re using about 1 tablespoon of filling per pie—it’s less than you think. Press the edges firmly with a fork, and always let the filling cool completely before assembling. A little leak is okay, but if you’re getting puddles of syrup on your baking sheet, you’re probably overfilling.
Can I make these ahead of time for a party?
Absolutely. You have two options: make and freeze the unbaked hand pies up to a month in advance, then bake them straight from frozen (add 3-5 minutes to the baking time). Or bake them a day ahead and reheat them in a 300°F oven for 5-7 minutes before serving. I usually go with the frozen option—it means I can have fresh-baked pies with minimal effort on party day. Just don’t refrigerate the baked pies overnight without reheating, or the crust will get soft.
How do I get my crust extra flaky?
The secret to a flaky crust is visible butter. When you pulse the butter into the flour, leave some pieces the size of small peas. Those chunks of butter create steam pockets as they melt in the oven, which lifts the dough into flaky layers. Also, keep everything cold—cold butter, cold water, cold dough. If the butter melts before it hits the oven, you’ll get a tough, dense crust. And don’t overwork the dough. Handle it as little as possible. If you’re looking for another pie crust recipe to practice with, this salted pecan praline tart uses a similar technique and turns out beautifully every time.
Pin This Recipe!

Perfect Bourbon Peach Hand Pies for Labor Day

These bourbon peach hand pies are the perfect portable dessert for Labor Day. With a flaky, buttery crust and a jammy, bourbon-spiked peach filling, they’re a crowd-pleasing treat that captures the essence of late summer.
- Prep Time: 1 hour 30 minutes
- Cook Time: 20 minutes
- Total Time: 1 hour 50 minutes
- Yield: 24-28 hand pies 1x
- Category: Dessert
- Cuisine: American
Ingredients
- 2 ½ cups all-purpose flour (plus extra for dusting)
- 1 tablespoon granulated sugar
- 1 teaspoon fine sea salt
- 1 cup cold unsalted butter, cut into small cubes
- 6 to 8 tablespoons ice water
- 1 tablespoon apple cider vinegar
- 4 cups ripe but firm peaches, peeled and diced into ½-inch pieces (about 4–5 medium peaches)
- ½ cup packed light brown sugar
- 3 tablespoons bourbon (such as Maker’s Mark or Bulleit)
- 2 tablespoons unsalted butter
- 1 tablespoon fresh lemon juice
- 1 teaspoon vanilla extract
- ½ teaspoon ground cinnamon
- ¼ teaspoon ground nutmeg (freshly grated if available)
- Pinch of salt
- 1 tablespoon cornstarch mixed with 1 tablespoon cold water
- 1 large egg, beaten with 1 tablespoon water (egg wash)
- Turbinado or coarse sugar for sprinkling
- Optional: 2 tablespoons bourbon for brushing after baking
Instructions
- Make the bourbon peach filling: Peel and dice peaches into ½-inch pieces. In a large skillet over medium heat, melt 2 tablespoons butter. Add peaches and brown sugar, cook for 3 minutes, stirring occasionally. Add bourbon, lemon juice, vanilla, cinnamon, nutmeg, and salt. Cook for 4-5 minutes until bubbly. Stir in cornstarch slurry and cook 1 minute until thickened. Remove from heat and cool completely (spread on a plate and refrigerate to speed up).
- Make the pie crust: In a food processor, pulse flour, sugar, and salt. Add cold butter cubes and pulse 10-12 times until pea-sized pieces remain. Mix ice water and apple cider vinegar; with processor running, drizzle in 6 tablespoons. Pulse until dough is shaggy and holds together when squeezed. Add more water if needed. Turn dough out, divide in half, shape into discs, wrap in plastic, and refrigerate at least 1 hour (overnight is better).
- Assemble the hand pies: Preheat oven to 375°F (190°C). Line two baking sheets with parchment paper. On a floured surface, roll one dough disc to ⅛-inch thickness. Cut into 3-inch rounds. Gather scraps, re-roll, and cut more rounds. Place half the rounds on one baking sheet. Spoon about 1 tablespoon cooled filling onto center of each round, leaving ½-inch border. Top with another round, press edges to seal, and crimp with a fork. Cut 2-3 small slits on top for steam. Repeat with remaining dough a…
- Bake the hand pies: Brush each pie with egg wash and sprinkle with turbinado sugar. Bake for 18-22 minutes, rotating pans halfway, until deep golden brown and filling bubbles through vents. Cool on baking sheet for 5 minutes, then transfer to a cooling rack. Optional: brush warm pies with extra bourbon.
Notes
Don’t skip the cornstarch—it prevents a runny filling. Keep all ingredients cold for a flaky crust. Let the filling cool completely before assembling to avoid melting the butter in the crust. For a non-alcoholic version, substitute bourbon with 2 teaspoons bourbon extract mixed with 3 tablespoons apple juice. To freeze unbaked pies, freeze on a baking sheet until solid, then transfer to a freezer bag; bake from frozen, adding 3-5 minutes to baking time.
Nutrition
- Serving Size: 1 hand pie
- Calories: 190
- Sugar: 10
- Sodium: 150
- Fat: 10
- Saturated Fat: 6
- Carbohydrates: 22
- Fiber: 1
- Protein: 3
Keywords: bourbon peach hand pies, hand pies, peach hand pies, bourbon peach, Labor Day dessert, summer dessert, portable dessert, peach recipe, bourbon recipe