Chopped the last of the broccoli and stared into the fridge like it owed me money when I realized I had three bell peppers rolling around the crisper drawer, half a block of cheddar, and exactly zero plans for dinner that anyone was going to get excited about. The kids were already doing that hungry shuffle around the kitchen island, you know the one—opening the fridge, closing it, opening it again like something new might magically appear. Honestly, I was this close to ordering pizza for the third time that week when my eyes landed on the leftover rice from last night’s takeout.
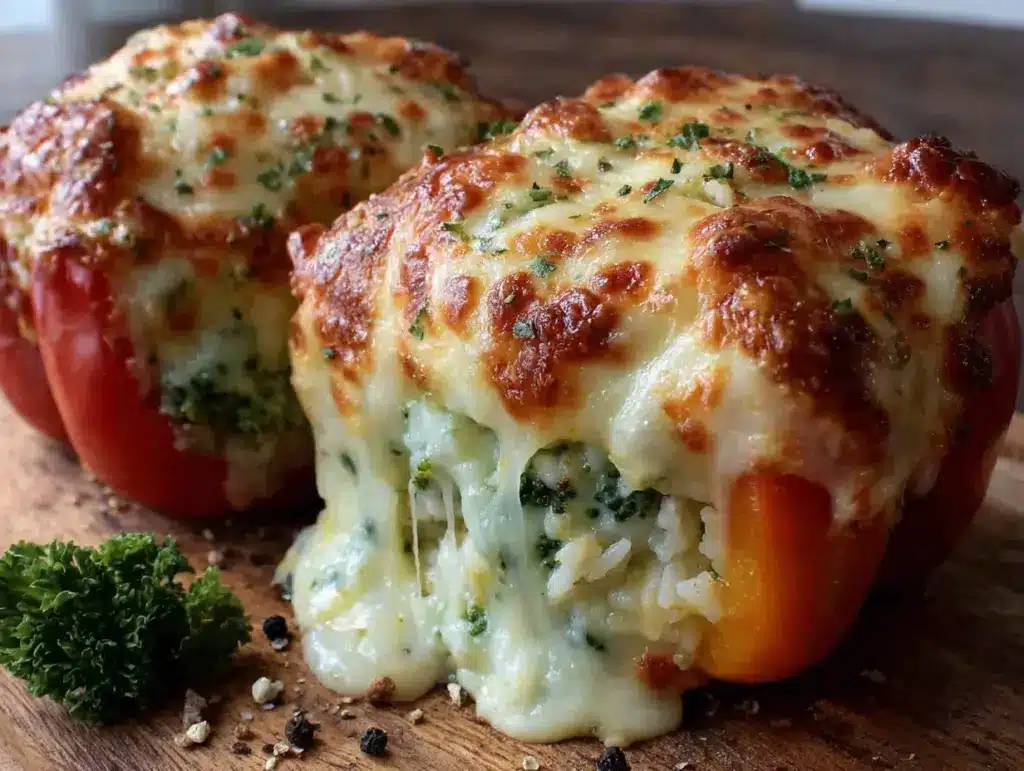
And that’s when it clicked. Not some fancy, planned-out recipe from a magazine spread. Just a tired mom trying to make something that felt like a real meal without a trip to the grocery store. I grabbed the cheddar, found some onion, and started winging it. Twenty-five minutes later, I pulled these cheesy broccoli rice stuffed bell peppers out of the oven, and the kitchen smelled like actual cooking—not microwave buttons or delivery boxes. The kids fought over the last one, and my husband asked if I’d “been holding out on him” with some secret recipe collection.
Nope. Just desperation and a half-empty fridge. But honestly? That’s how the best stuff happens. These stuffed peppers aren’t fancy or fussy, but they’re the kind of meal that makes you feel like you’ve got your act together even when you absolutely don’t. They’re warm, cheesy, filling, and they come together in about half an hour with ingredients you probably already have sitting around. If you’ve ever stood in front of an open fridge hoping dinner would invent itself, this one’s for you.
Why You’ll Love This Recipe
Let me tell you why these cheesy broccoli rice stuffed bell peppers have become a regular in my dinner rotation. I’ve tested this recipe about six different ways—more cheese, less cheese, different grains, extra veggies—and this version is the one that keeps getting requested. Here’s why it works:
- Ready in 30 Minutes : From start to finish, you’re looking at about half an hour. No marinating, no long simmering, no complicated steps. Perfect for those nights when you walk in the door at 5:45 and need food on the table by 6:15.
- Simple Pantry Ingredients : Bell peppers, rice, broccoli, cheese, onion, garlic, and a few seasonings. That’s it. Nothing weird, nothing expensive, nothing you have to hunt down at a specialty store.
- Perfect for Meal Prep : These reheat like a dream. Make a double batch on Sunday, and you’ve got lunches or quick dinners ready to go all week. They actually taste better the next day after the flavors have had time to hang out together.
- Crowd-Pleaser Status : I’ve served these to picky kids, vegetarian friends, and meat-and-potato types, and they disappear every single time. Something about the cheesy filling inside a tender pepper just works for everyone.
- Unbelievably Satisfying : The combination of tender rice, creamy melted cheese, and slightly crisp broccoli packed into a sweet roasted pepper is pure comfort food. It’s hearty enough to be a main dish but works great as a side too.
What makes this version different from all the other stuffed pepper recipes out there? It’s the texture, honestly. Most recipes either overcook the broccoli into mush or leave it too crunchy. This one gets it just right—tender but with a little bite left. Plus, the cheese-to-rice ratio is carefully calibrated so you get gooey, stretchy cheese in every single bite without it turning into a greasy mess. I’ve also found that pre-cooking the peppers for just a few minutes before stuffing them makes a huge difference in getting that perfect tender-but-not-soggy texture.
This is the kind of recipe that makes you close your eyes after the first bite. It’s simple food done really, really well. And honestly? That’s my favorite kind of cooking.
What Ingredients You Will Need
This recipe uses simple, wholesome ingredients that work together to create something way more delicious than the sum of their parts. Most of these are pantry and fridge staples you probably already have on hand.
For the Peppers
- 4 large bell peppers (any color works, but red and orange are sweeter; green are more savory)
- 1 tablespoon olive oil (for brushing the peppers before baking)
For the Filling
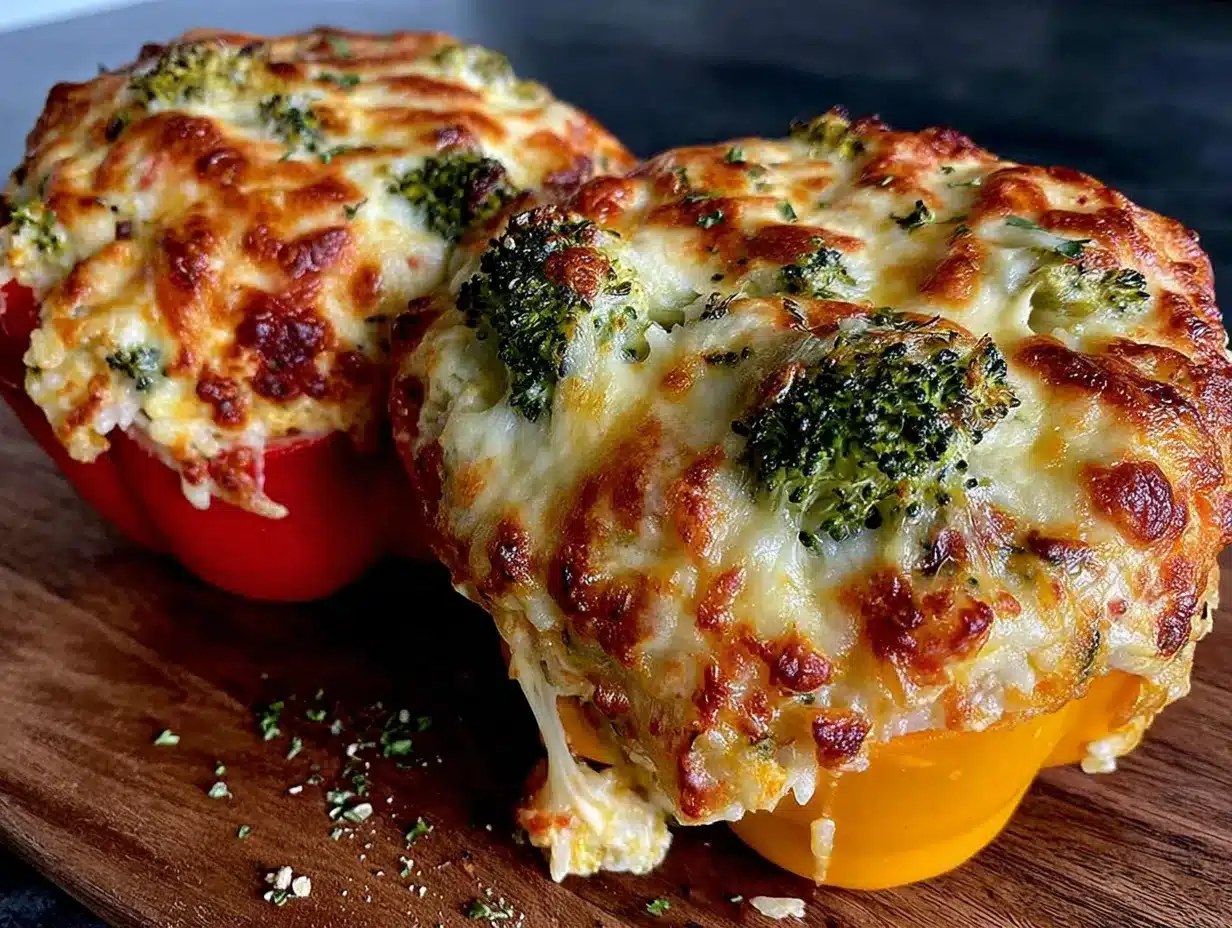
- 2 cups cooked rice (white, brown, or even cauliflower rice for a lower-carb option—leftover rice works perfectly here)
- 2 cups broccoli florets (fresh is best, chopped into small bite-sized pieces; frozen works too, just thaw and pat dry first)
- 1 ½ cups shredded sharp cheddar cheese (divided—1 cup goes in the filling, ½ cup goes on top; I prefer sharp cheddar for maximum flavor, but mild cheddar or a Mexican blend works great too)
- ½ cup finely diced onion (yellow or white onion gives the best savory base)
- 2 cloves garlic, minced (fresh garlic is non-negotiable here—skip the jarred stuff for this one)
- ½ cup sour cream (adds creaminess and a tiny tang that balances the cheese; Greek yogurt works as a substitute)
- 1 teaspoon salt (adjust to taste)
- ½ teaspoon black pepper
- ½ teaspoon smoked paprika (adds a subtle smokiness that makes the filling taste like it cooked all day; regular paprika works too)
- ¼ teaspoon garlic powder (for extra savory depth)
Ingredient Tips from My Kitchen: I’ve made this with both long-grain white rice and brown rice, and honestly, both work beautifully. Brown rice adds a nice nutty flavor and extra fiber, but white rice gives a softer, more traditional texture. If you’re using leftover rice, make sure it’s not too dry—if it’s been in the fridge a few days, sprinkle it with a tablespoon of water and microwave for 30 seconds before mixing it in.
For the broccoli, I recommend chopping the florets pretty small—about the size of your thumbnail. Big chunks of broccoli can make the filling hard to scoop and might not cook through evenly. And please, please don’t skip the smoked paprika. It’s one of those ingredients that doesn’t scream for attention but makes everything taste more “cooked” and developed. I use Savory Spice Shop’s smoked paprika and it’s become my secret weapon in so many dishes.
If you want to swap the cheddar, try Monterey Jack for extra meltiness or pepper jack for a spicy kick. A combination of mozzarella and cheddar also works really well—the mozzarella gives you that gorgeous stretchy pull when you bite into the pepper.
Equipment Needed
You don’t need a lot of fancy equipment for this recipe, which is part of why I love it. Here’s what you’ll need:
- Large pot or saucepan (for cooking the rice and blanching the broccoli if you’re doing it that way)
- Sharp knife and cutting board (a good chef’s knife makes chopping the broccoli and onions so much easier)
- Large mixing bowl (for combining all the filling ingredients)
- 9×13-inch baking dish (glass or ceramic works best; metal is fine too, just watch the cooking time)
- Small skillet or sauté pan (for cooking the onion and garlic before mixing them in—this step adds so much flavor)
- Aluminum foil (for covering the dish during the first part of baking)
- Measuring cups and spoons (because eyeballing cheese is risky business, let’s be real)
- Wooden spoon or spatula (for mixing the filling)
A Note on Baking Dishes: I’ve made these in a glass Pyrex dish for years, and they come out perfectly every time. If you’re using a metal pan, you might need to reduce the baking time by about 5 minutes since metal conducts heat faster. And if you don’t have a 9×13, you can use a smaller dish and just arrange the peppers more tightly—they’ll hold each other up, which actually helps them keep their shape.
One tip I learned the hard way: use a dish that’s just big enough to hold the peppers snugly. If they’re rattling around in a huge dish, they might tip over during baking, and then you’ve got cheesy rice all over the bottom of the pan instead of inside the peppers where it belongs. Ask me how I know.
Preparation Method
Alright, let’s get cooking! This comes together fast once you’ve got everything prepped, so I recommend reading through the whole method first before you start.
- Preheat your oven to 375°F (190°C). Get this going first so it’s nice and hot when you’re ready to bake.
- Cook your rice if you don’t have leftovers. You’ll need about 2 cups of cooked rice. If starting from dry, cook ⅔ cup of uncooked rice according to package directions. This usually takes about 15-18 minutes for white rice. While that’s going, you can prep everything else. Multitasking for the win!
- Prepare the bell peppers. Slice each pepper in half lengthwise through the stem. I know some recipes tell you to cut the tops off and stuff them whole, but I’ve found that halving them gives you more surface area for that gorgeous melted cheese on top. Remove all the seeds and white membranes. Rinse them out and pat dry. Place the pepper halves cut-side up in your baking dish. Brush the outsides lightly with olive oil—this helps them soften and get a little charred edge without drying out.
- Par-cook the peppers. Pop the dish with the peppers into the oven for 8-10 minutes while you make the filling. This step is key—it starts softening the peppers so they finish cooking at the same time as the filling, rather than ending up crunchy while the filling is perfect. Don’t skip this!
- Blanch the broccoli. Bring a small pot of salted water to a boil. Drop in the chopped broccoli florets and cook for exactly 2 minutes. Drain immediately and rinse with cold water to stop the cooking. You want the broccoli tender but still bright green with a little crunch. If you’re using frozen broccoli that’s already been blanched, just thaw it and pat it really dry with paper towels.
- Sauté the aromatics. In a small skillet over medium heat, add a drizzle of olive oil. Toss in the diced onion and cook for 3-4 minutes until it’s translucent and starting to brown at the edges. Add the minced garlic and cook for another 30 seconds until fragrant. Don’t let the garlic burn—it turns bitter fast. Remove from heat.
- Make the filling. In a large mixing bowl, combine the cooked rice, blanched broccoli, sautéed onion and garlic, 1 cup of the shredded cheddar cheese, sour cream, salt, pepper, smoked paprika, and garlic powder. Stir everything together until it’s well combined. Taste it here and adjust the seasoning if needed. The filling should be flavorful and creamy, with the cheese starting to melt from the warmth of the rice and broccoli.
- Stuff the peppers. Pull the par-cooked peppers out of the oven. Spoon the filling generously into each pepper half, mounding it slightly on top. Don’t be shy—really pack it in there. You want each pepper stuffed to the brim. I usually get about ½ cup of filling per pepper half.
- Add the cheese topping. Sprinkle the remaining ½ cup of shredded cheddar evenly over the tops of the stuffed peppers. This is the part that gets all golden and bubbly and makes everyone’s eyes light up when you pull the dish out of the oven.
- Bake. Cover the dish with aluminum foil and bake for 15 minutes. Then remove the foil and bake for another 10-12 minutes, until the cheese is melted, bubbly, and starting to brown in spots. The peppers should be tender when pierced with a fork but still holding their shape nicely.
- Rest and serve. Let the peppers sit in the dish for about 5 minutes before serving. This lets the filling set up a bit so it doesn’t fall apart when you lift the peppers out. Trust me on this—I’ve burned my mouth on impatient bites more times than I’d like to admit.
Sensory Cues: When the peppers are done, the cheese on top will be golden and bubbling around the edges. The peppers themselves should be soft enough that a fork slides in easily but firm enough that they don’t collapse. The filling should be steaming hot throughout, with the cheese pulling into stretchy strands when you lift your fork. The smell? It’s that perfect combination of roasted peppers, melted cheese, and savory rice that just says “dinner’s ready.”
Cooking Tips & Techniques
After making these cheesy broccoli rice stuffed bell peppers more times than I can count, I’ve picked up a few tricks that make a real difference. Here are the ones worth knowing:
Don’t skip the par-baking step. I know it adds an extra step, but it’s the difference between peppers that are perfectly tender and peppers that are still crunchy in the middle. Bell peppers contain a lot of water, and if you stuff them raw and bake them, the filling gets done way before the peppers soften. Par-baking for 8-10 minutes gives them a head start so everything finishes at the same time.
Pat your broccoli dry. This is probably the most important tip I can give you. Whether you’re using fresh or frozen broccoli, excess water is the enemy of a good stuffed pepper. Wet broccoli makes the filling soggy and watery, and nobody wants that. After blanching, spread the broccoli on a clean kitchen towel and pat it dry before adding it to the bowl. If using frozen, thaw it completely, then squeeze it in paper towels to get as much moisture out as possible.
Season in layers. Don’t just dump all the salt and spices into the filling at once. Season the blanching water for the broccoli, add a pinch of salt to the onions while they cook, and season the rice if it’s plain. Layering the seasoning throughout the cooking process gives you a much more complex, well-rounded flavor than adding everything at the end.
The rice matters more than you think. Day-old rice that’s been sitting in the fridge actually works better than freshly cooked rice for this recipe. Fresh rice is stickier and more moist, which can make the filling dense and heavy. Cold rice from yesterday’s takeout or meal prep is drier and fluffier, which means it absorbs the cheese and sour cream better without turning into a mushy mess. If you’re using fresh rice, spread it on a baking sheet and let it cool for 10 minutes before mixing it in.
My biggest failure with this recipe? The first time I made it, I used pre-shredded bagged cheese because I was in a hurry. Big mistake. Pre-shredded cheese is coated with anti-caking agents that prevent it from melting smoothly. It still tasted fine, but the texture was grainy and it didn’t get that beautiful golden-brown crust on top. Grate your own cheese from a block—it takes two extra minutes and makes a noticeable difference in both texture and flavor.
Variations & Adaptations
One of the best things about this recipe is how easy it is to adapt based on what you have in your fridge or what your family likes. Here are some of my favorite variations:
Make It Vegetarian (It Already Is!)
This recipe is naturally vegetarian as written, but you can boost the protein by adding a can of drained and rinsed black beans or chickpeas to the filling. The beans blend right in with the rice and cheese, and they add a nice earthy flavor that complements the broccoli.
Go Gluten-Free
This recipe is naturally gluten-free as long as you’re using plain rice and standard cheese. Just double-check your seasonings and sour cream for any hidden gluten. If you want to swap the rice for quinoa or farro, both work beautifully—just cook them according to package directions first.
Add Some Protein
For a heartier version, add 1 cup of cooked, shredded chicken or ground turkey to the filling. I’ve also made this with crumbled Italian sausage (cooked and drained first), and it was absolutely incredible. The sausage adds a savory, slightly spicy note that pairs perfectly with the sweetness of the peppers.
Change the Cheese
The possibilities are endless here. Try pepper jack for a spicy kick, gouda for a smoky, creamy flavor, or a mix of mozzarella and parmesan for an Italian-inspired twist. I once made these with leftover brie (don’t judge—I was trying to use it up) and it was surprisingly amazing. The creamy brie melted into the rice and created this luxurious, almost risotto-like texture.
Low-Carb Version
Swap the rice for cauliflower rice that’s been cooked and squeezed dry. The rest of the recipe stays the same. It’s still cheesy and satisfying, but with way fewer carbs. My husband (who’s not low-carb at all) actually preferred the cauliflower rice version—he said it felt lighter and let the broccoli and cheese flavors shine more.
Seasonal Swaps
In the summer, I sometimes swap the broccoli for chopped zucchini or yellow squash. In the fall, I add some finely diced mushrooms and a sprinkle of fresh thyme. This recipe is incredibly forgiving, so feel free to experiment with whatever vegetables you have on hand.
Serving & Storage Suggestions
Serving: These stuffed peppers are a complete meal on their own—they’ve got veggies, grains, protein (from the cheese), and healthy fats. But if you want to round things out, here are some ideas:
- Serve with a simple green salad dressed with lemon vinaigrette to cut through the richness of the cheese.
- A side of crusty bread is perfect for sopping up any cheesy bits that escape from the peppers.
- If you’re serving these as a side dish (they’re great alongside grilled chicken or fish), they pair beautifully with roasted vegetables or a simple tomato soup.
- For a heartier meal, serve them over a bed of extra rice or quinoa with a drizzle of hot sauce or sriracha.
Storage: These peppers are meal prep royalty. Let any leftovers cool completely, then store them in an airtight container in the refrigerator for up to 4 days. The flavors actually deepen and meld together overnight, so they might taste even better the next day.
Freezing: You can freeze the stuffed peppers either before or after baking. To freeze unbaked, assemble the peppers completely (including the cheese topping) but don’t bake them. Wrap each pepper individually in plastic wrap, then place them in a freezer bag. They’ll keep for up to 3 months. To bake from frozen, add about 15-20 minutes to the cooking time, keeping them covered with foil for the first 25 minutes.
Reheating: The best way to reheat these is in the oven at 350°F for about 15 minutes, covered with foil. The microwave works in a pinch (about 2 minutes on high), but the peppers will be softer and the cheese won’t be as melty. If you’re reheating from frozen, thaw in the fridge overnight first, then reheat in the oven.
Nutritional Information & Benefits
Here’s the approximate nutritional breakdown for one stuffed pepper half (based on using white rice and full-fat cheddar):
- Calories: 285
- Protein: 12g
- Carbohydrates: 28g
- Fat: 14g
- Fiber: 4g
- Calcium: 25% of daily value
- Vitamin C: 150% of daily value (from the bell peppers and broccoli)
Health Benefits: Bell peppers are packed with vitamin C—in fact, one medium red bell pepper contains more vitamin C than an orange. They’re also rich in vitamin A, which is great for eye health. Broccoli adds fiber, vitamin K, and antioxidants that support your immune system. The cheese provides calcium and protein, while the rice gives you energy to get through your day. This is comfort food that actually does something good for you.
Dietary Considerations: This recipe is naturally vegetarian and gluten-free. To make it vegan, use dairy-free cheese and sour cream alternatives (I’ve had good luck with cashew-based cheeses for melting). It’s also easy to make lower in calories by using reduced-fat cheese and cauliflower rice.
A Note from My Kitchen: I love that this recipe lets me feel good about what I’m feeding my family without sacrificing the “yum” factor. The kids get their veggies hidden in a blanket of melted cheese, and I get to feel like a superhero mom who actually cooked dinner from scratch on a Tuesday night.
Conclusion
These cheesy broccoli rice stuffed bell peppers are exactly what weeknight dinners should be—simple, satisfying, and full of flavor without requiring a culinary degree or a fully stocked pantry. They’ve saved me on countless nights when I had nothing planned and needed something fast that everyone would actually eat. No complaints, no negotiations, just empty plates and requests for leftovers the next day.
What I love most about this recipe is how adaptable it is. You can make it your own by swapping in different cheeses, adding protein, or changing up the vegetables. It’s the kind of recipe that becomes a trusted friend in the kitchen—always there when you need it, always reliable, always delicious.
I’d love to hear how these turn out for you! Did you try a fun variation? Did your picky eater actually eat broccoli without a fight? Drop a comment below and let me know. And if you’re looking for more cozy, comforting dinner ideas, you might also enjoy our perfect giant cookie skillet recipe for a fun dessert night or the creamy butter pecan no-churn ice cream pie for a sweet finish.
Now go make some stuffed peppers. Your fridge (and your family) will thank you.
Frequently Asked Questions
Can I use frozen broccoli instead of fresh?
Absolutely! Just thaw it completely and pat it really dry with paper towels before adding it to the filling. Frozen broccoli has more water content than fresh, so drying it is crucial to avoid a watery filling. You don’t need to blanch it since it’s already been blanched before freezing.
Can I make these stuffed peppers ahead of time?
Yes, and they’re actually perfect for meal prep! Assemble the peppers completely (including the cheese topping), cover the dish tightly with foil, and refrigerate for up to 24 hours before baking. You might need to add 5-10 minutes to the baking time since you’re starting from cold. You can also freeze them unbaked for up to 3 months.
What’s the best rice to use for stuffed peppers?
Day-old white rice is my top pick because it’s drier and fluffier than fresh rice, which means it absorbs the cheese and sour cream better without getting mushy. Brown rice works great too and adds a nutty flavor. Cauliflower rice is a perfect low-carb alternative. Just avoid instant rice if you can—it tends to turn to mush in the filling.
How do I keep the peppers from getting soggy?
Two things make a huge difference: par-baking the peppers before stuffing them (this starts the cooking process and lets some moisture evaporate), and making sure your broccoli is really dry before adding it to the filling. Also, don’t overbake them—once the cheese is melted and bubbly, they’re done. Overcooking releases more moisture from the peppers.
Can I make this recipe dairy-free?
Yes! Use dairy-free shredded cheese (I recommend Follow Your Heart or Daiya for melting) and swap the sour cream for a dairy-free alternative like cashew cream or coconut yogurt. The texture will be slightly different, but it’s still delicious. Just keep in mind that dairy-free cheese doesn’t always brown the same way, so don’t expect that golden crust—it’ll still be melty and tasty though!
Pin This Recipe!
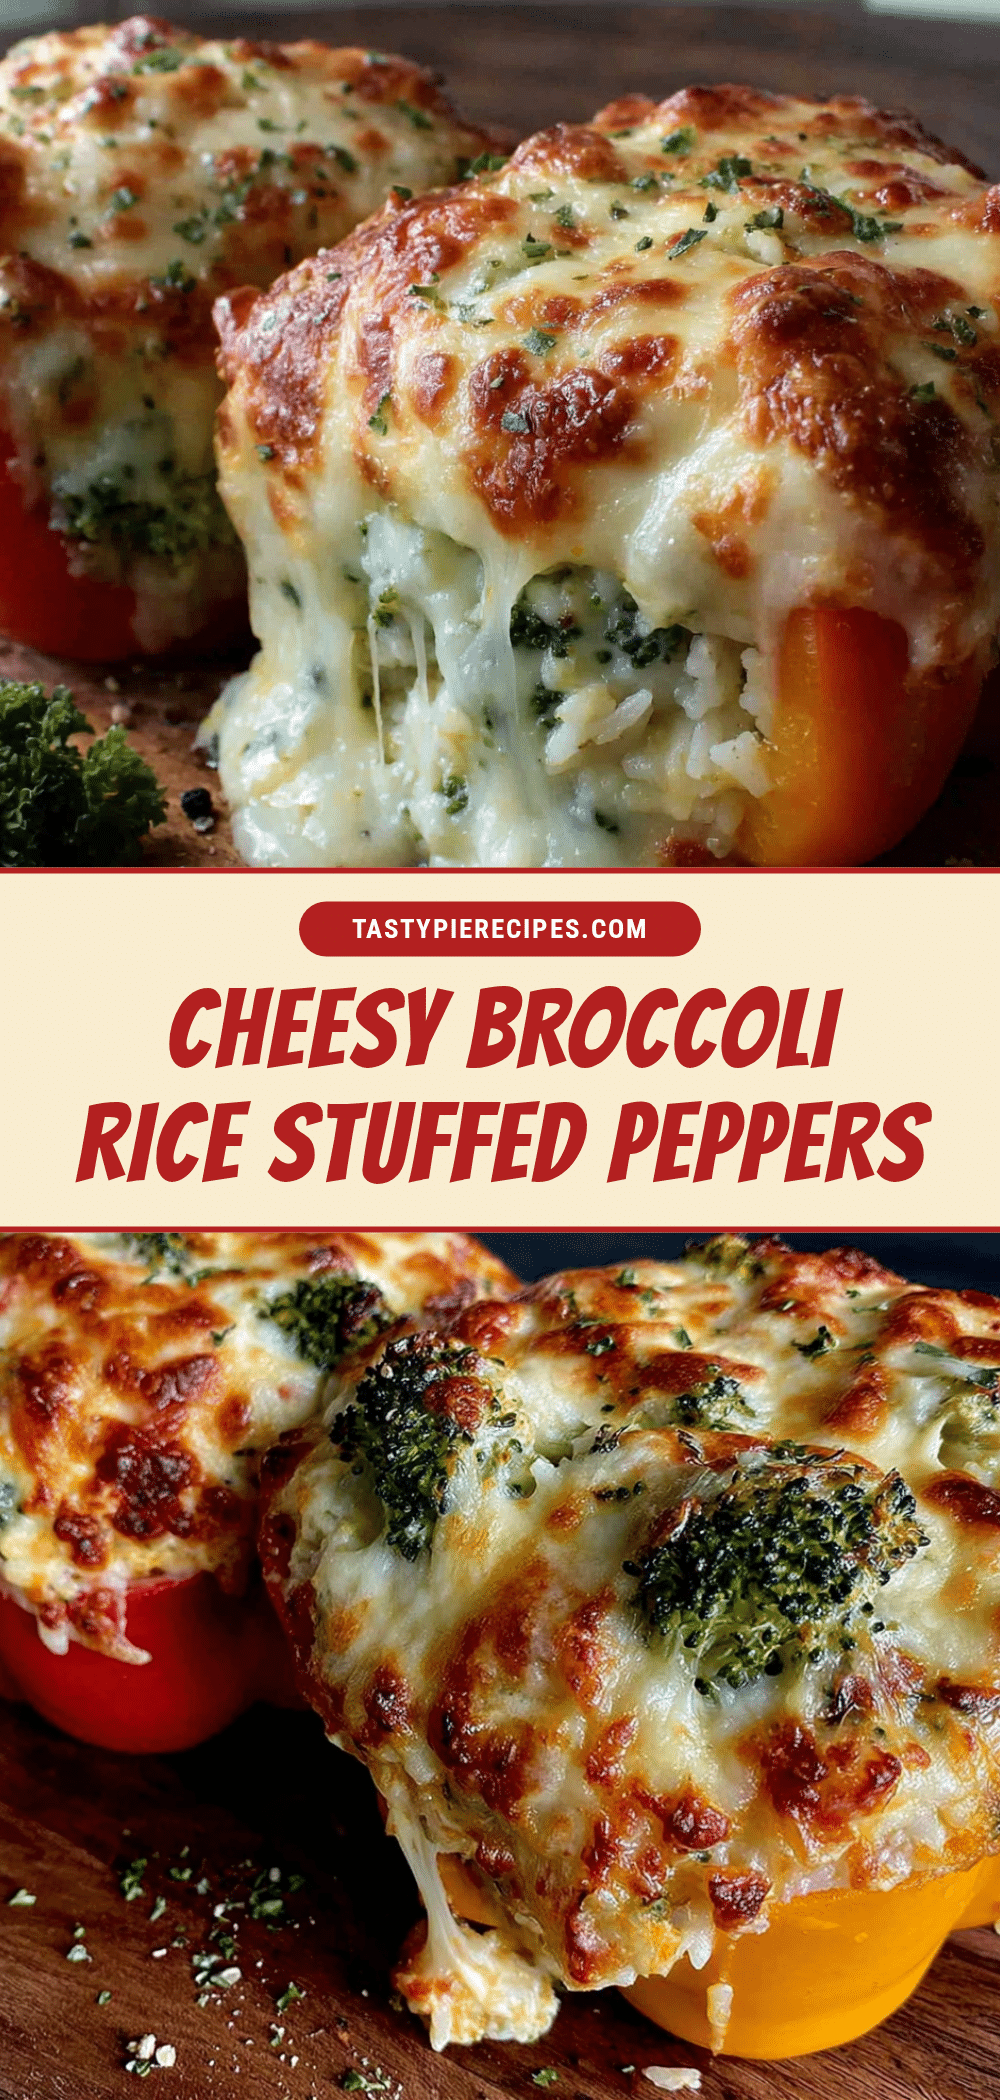
Cheesy Broccoli Rice Stuffed Bell Peppers: Easy 30-Minute Recipe

These cheesy broccoli rice stuffed bell peppers are a quick, satisfying weeknight dinner made with simple pantry ingredients. Ready in 30 minutes, they’re packed with tender rice, melted cheddar, and broccoli inside sweet roasted peppers.
- Prep Time: 10 minutes
- Cook Time: 20 minutes
- Total Time: 30 minutes
- Yield: 4 servings (8 pepper halves) 1x
- Category: Main Course
- Cuisine: American
Ingredients
- 4 large bell peppers (any color)
- 1 tablespoon olive oil
- 2 cups cooked rice (white, brown, or cauliflower rice)
- 2 cups broccoli florets (chopped into small bite-sized pieces)
- 1 ½ cups shredded sharp cheddar cheese (divided: 1 cup for filling, ½ cup for topping)
- ½ cup finely diced onion (yellow or white)
- 2 cloves garlic, minced
- ½ cup sour cream
- 1 teaspoon salt
- ½ teaspoon black pepper
- ½ teaspoon smoked paprika
- ¼ teaspoon garlic powder
Instructions
- Preheat your oven to 375°F (190°C).
- Cook your rice if you don’t have leftovers. You’ll need about 2 cups of cooked rice. If starting from dry, cook ⅔ cup of uncooked rice according to package directions.
- Prepare the bell peppers: Slice each pepper in half lengthwise through the stem. Remove all seeds and white membranes. Rinse and pat dry. Place pepper halves cut-side up in a 9×13-inch baking dish. Brush outsides lightly with olive oil.
- Par-cook the peppers: Place the dish in the oven for 8-10 minutes while you make the filling.
- Blanch the broccoli: Bring a small pot of salted water to a boil. Drop in chopped broccoli florets and cook for exactly 2 minutes. Drain immediately and rinse with cold water to stop cooking.
- Sauté the aromatics: In a small skillet over medium heat, add a drizzle of olive oil. Cook diced onion for 3-4 minutes until translucent. Add minced garlic and cook for 30 seconds until fragrant. Remove from heat.
- Make the filling: In a large mixing bowl, combine cooked rice, blanched broccoli, sautéed onion and garlic, 1 cup shredded cheddar cheese, sour cream, salt, pepper, smoked paprika, and garlic powder. Stir until well combined. Taste and adjust seasoning if needed.
- Stuff the peppers: Pull par-cooked peppers out of the oven. Spoon filling generously into each pepper half, mounding slightly on top.
- Add the cheese topping: Sprinkle remaining ½ cup shredded cheddar evenly over the tops of the stuffed peppers.
- Bake: Cover the dish with aluminum foil and bake for 15 minutes. Remove foil and bake for another 10-12 minutes, until cheese is melted, bubbly, and starting to brown in spots. Peppers should be tender when pierced with a fork.
- Rest and serve: Let peppers sit in the dish for about 5 minutes before serving.
Notes
Don’t skip par-baking the peppers—it ensures they’re tender without being crunchy. Pat broccoli dry after blanching to avoid a watery filling. Use day-old rice for best texture; fresh rice can be spread on a baking sheet to cool for 10 minutes before mixing. Grate your own cheese from a block for smoother melting. For meal prep, assemble completely and refrigerate up to 24 hours before baking, adding 5-10 minutes to baking time. To freeze unbaked, wrap individually in plastic wrap and store in a freezer bag for up to 3 months.
Nutrition
- Serving Size: 1 stuffed pepper hal
- Calories: 285
- Sugar: 6
- Sodium: 620
- Fat: 14
- Saturated Fat: 8
- Carbohydrates: 28
- Fiber: 4
- Protein: 12
Keywords: stuffed bell peppers, cheesy broccoli rice, 30-minute dinner, vegetarian stuffed peppers, easy weeknight meal, meal prep, gluten-free stuffed peppers