“Are you sure these are just Oreos?” my niece asked, eyes wide, as she picked up one of the white chocolate graduation cap Oreos from the platter. Honestly, I wasn’t sure either when I first tried making them. It all started the night before her graduation party. I was juggling a million things and honestly, cake felt like too much work. I needed a quick, festive treat that looked impressive but wouldn’t have me stuck in the kitchen for hours.
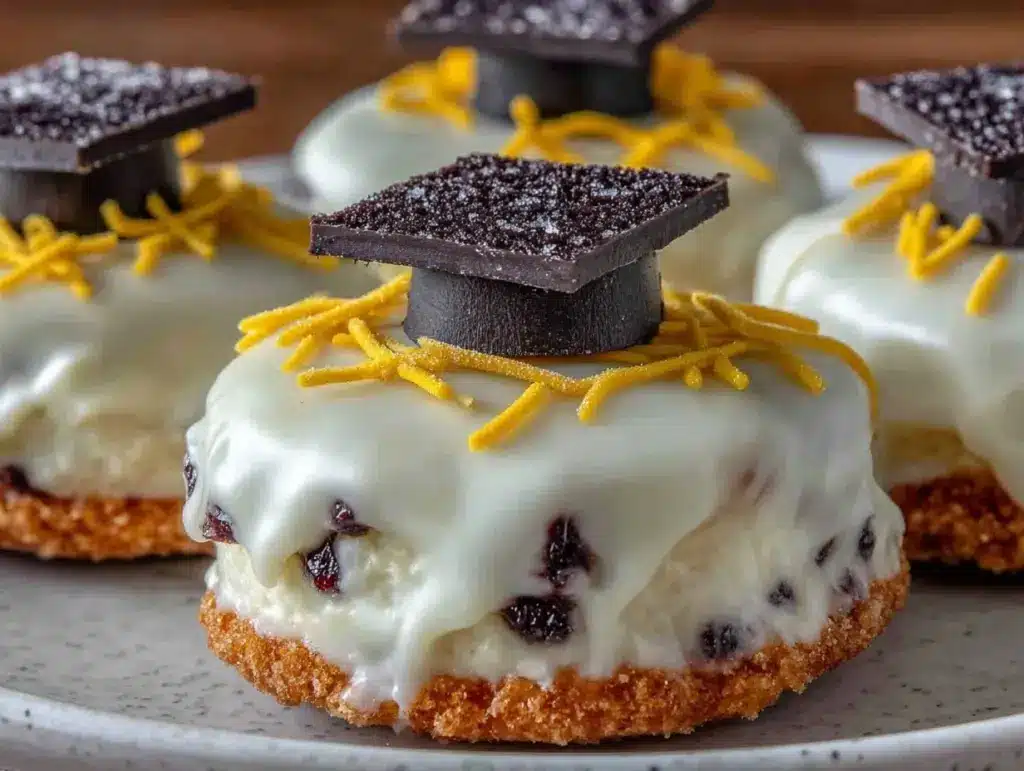
I grabbed a bag of Oreos, some white chocolate, and a handful of sprinkles—thinking it might turn into a messy experiment. But, surprise! The little white chocolate caps with the tiny tassels turned out charming and delicious, and they stole the show. The best part? They took under 30 minutes to make, which felt like a total win after a day that was anything but calm.
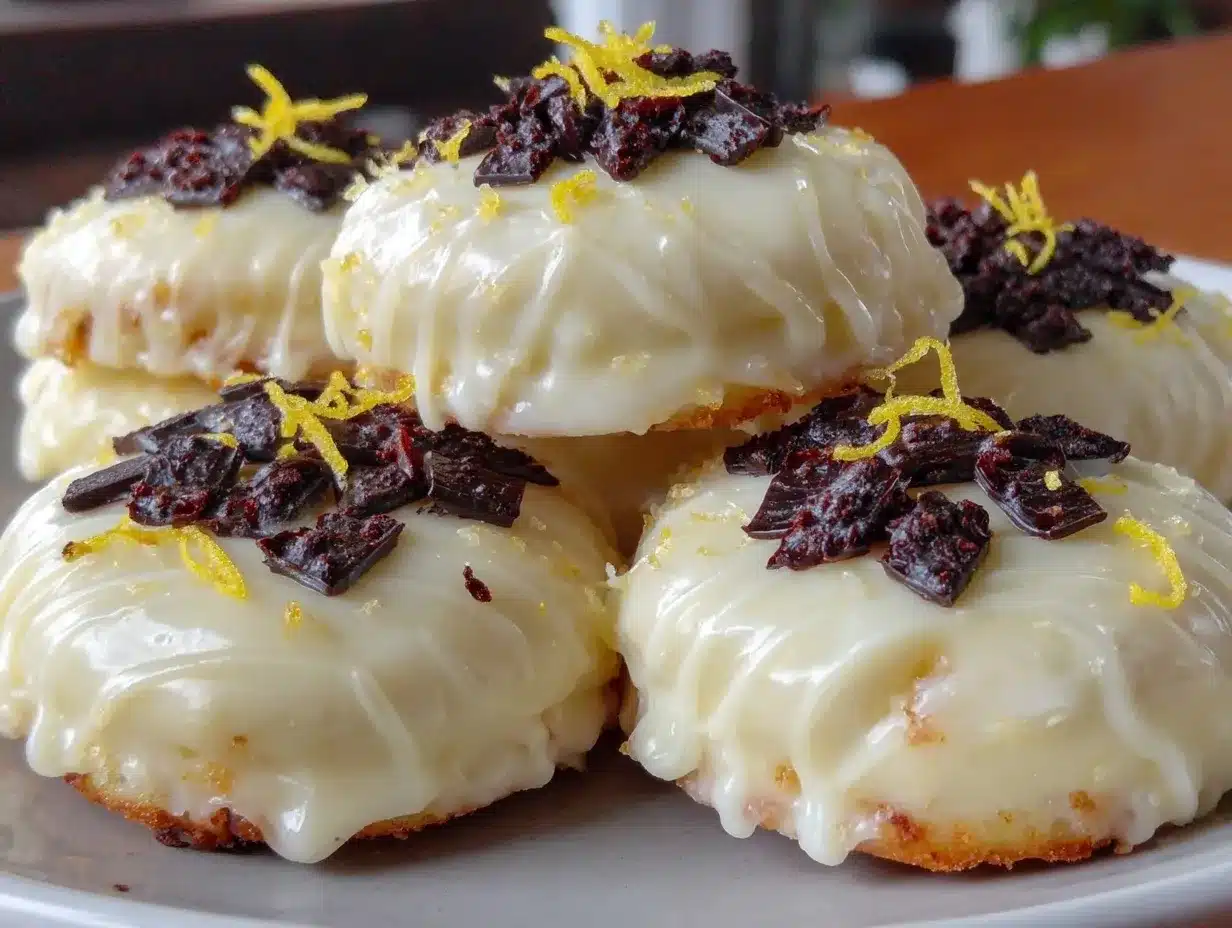
There’s something about those crisp cookies dipped in silky white chocolate that makes you pause and smile—like a small celebration in every bite. Plus, they’re easy enough that I ended up making them again just last weekend for a friend’s milestone. It’s funny how something so simple became my go-to for marking special moments. If you’ve ever felt the pressure to bring something memorable but don’t have hours to spare, these are for you.
These Easy White Chocolate Graduation Cap Oreos stuck with me because they combine that fun, festive vibe with zero fuss—perfect for busy hosts or last-minute party planners who want all the flair without the stress. And honestly, isn’t that what celebrations should be about? Sweet, simple joy shared with the people you care about.
Why You’ll Love This Recipe
After making these white chocolate graduation cap Oreos several times, I can say they’re one of those recipes that keeps you coming back (and your guests asking for more). Here’s why it’s a keeper:
- Quick & Easy: Ready in under 30 minutes, these treats are perfect for those last-minute celebrations or when you want a festive snack without the fuss.
- Simple Ingredients: No hunting down obscure items here—Oreos, white chocolate, and a few sprinkles are probably already in your pantry or easy to grab.
- Perfect for Graduation Parties: They bring a fun, thematic twist that’s ideal for celebrating graduates of all ages.
- Crowd-Pleaser: The familiar Oreo flavor combined with the creamy white chocolate coating makes these irresistible to kids and adults alike.
- Unbelievably Delicious: The contrast of crunchy cookie and smooth chocolate is just so satisfying, and the little touch of edible glitter or sprinkles adds that wow factor.
What sets this recipe apart? It’s the way the white chocolate is melted gently to a silky consistency, allowing for a smooth dip that hardens to a beautiful sheen. Plus, the little mortarboard decoration is surprisingly easy to make with just a few simple steps, so you get a professional look without the professional skill level.
This isn’t just any Oreo treat—it’s a festive, charming, and fuss-free way to make your graduation celebration a bit sweeter and a lot more memorable. If you want to impress guests without sweating it, these are your new best friends.
What Ingredients You Will Need
This recipe uses simple, wholesome ingredients to turn everyday Oreos into festive graduation caps. Most of these are pantry staples or easy to find at any grocery store. Here’s what you’ll need:
- Oreos: Regular or double-stuffed, depending on your preference for cream filling. I like double-stuffed for the extra creamy center.
- White Chocolate Chips or Melting Wafers: About 12 ounces (340 grams). I recommend a brand like Ghirardelli or Merckens for smooth melting and great taste.
- Black Decorating Icing or Black Candy Melts: To pipe the tassel and mortarboard details.
- Mini Square Pretzels or Black Fondant: Optional for making the flat top of the graduation cap if you want an extra realistic look.
- Edible Gold or Colored Sprinkles: For the tassel and a sprinkle of festive flair.
- Wax or Parchment Paper: For cooling the dipped Oreos.
Optional substitutions:
- Use dairy-free white chocolate if you need a vegan or dairy-free option.
- If you don’t have black decorating icing, you can carefully use melted dark chocolate with a piping bag.
- Sprinkles can be swapped for edible glitter or left off entirely for a minimalist look.
Equipment Needed
- Microwave-safe bowl or double boiler: For melting the white chocolate gently without burning.
- Baking sheet or tray: To lay out Oreos as they set.
- Wax paper or parchment paper: To prevent sticking.
- Piping bag or a small resealable plastic bag: For decorating the tassels and cap details.
- Toothpicks or small offset spatula: Helpful for smoothing chocolate or fixing small details.
If you don’t have a piping bag, a zip-top bag with a tiny corner snipped off works just fine and saves cleanup time. For melting chocolate, I prefer the microwave method—short bursts of 20 seconds, stirring in between—because it’s quick and easy, but if you want more control, a double boiler is great too.
Preparation Method
- Melt the white chocolate: Place 12 ounces (340 grams) of white chocolate chips or melting wafers in a microwave-safe bowl. Heat in 20-second increments, stirring well each time, until the chocolate is smooth and fully melted. This usually takes about 1 to 1.5 minutes total. Avoid overheating to prevent seizing.
- Prepare your workspace: Line a baking sheet with wax or parchment paper. This is where you’ll place the dipped Oreos to set.
- Dip the Oreos: Holding an Oreo by the edges, dip it into the melted white chocolate, coating it fully or partially, depending on your design preference. Let excess chocolate drip off.
- Place on the prepared sheet: Set the dipped Oreo on the wax paper-lined tray. Repeat with all Oreos. You can work in batches if needed to keep the chocolate melted and smooth.
- Create the mortarboard caps: Once the dipped Oreos have set slightly (still tacky but not fully hardened), use black decorating icing or melted dark chocolate to pipe a square “cap” on top. If using mini square pretzels or black fondant, gently press these onto the center of each Oreo before the chocolate hardens.
- Add the tassel: Pipe a thin line from the center of the cap to one corner, then add a small dot or sprinkle at the end for the tassel’s tip.
- Let the Oreos set completely: Allow the dipped Oreos to sit at room temperature or chill in the refrigerator for about 15-20 minutes until the chocolate is firm and glossy.
- Optional finishing touches: Dust with edible glitter or add a few sprinkles for extra celebration sparkle.
Pro tip: If your chocolate starts to thicken or seize, add a tiny splash of vegetable oil and stir gently to smooth it out again. Also, working quickly helps keep the chocolate melted and easy to dip.
Cooking Tips & Techniques
Working with chocolate can feel intimidating, but a few simple tips make this so much easier. First, patience is key when melting chocolate. Heat it gently and stir often. If you rush, the chocolate can burn or seize, turning grainy and unusable.
When dipping Oreos, hold them by the edges to avoid fingerprints and to keep the coating even. Letting excess chocolate drip off before placing them on parchment paper reduces mess and creates a cleaner finish.
I learned the hard way that decorating icing dries faster and stays neater if you pipe the tassels right after the chocolate starts to set but before it’s fully hardened. Waiting too long means the icing won’t stick well.
For consistent results, try to keep your workspace cool but not cold. If the room is too warm, the chocolate takes forever to set; too cold and it can crack or bloom with white streaks.
Multitasking is a lifesaver here—you can melt your chocolate while prepping the Oreos, and pipe decorations while the dipped cookies chill. This keeps things moving swiftly, especially when you’re prepping for a party.
Variations & Adaptations
This recipe is a great canvas for creativity. Here are some ideas I’ve tried and loved:
- Flavor twist: Swap white chocolate for milk or dark chocolate for different tastes. Dark chocolate with a pinch of sea salt gives a grown-up edge.
- Color theme: Use colored candy melts to match school colors or party themes. Blue and gold caps? Easy! Just swap the white chocolate for blue and use gold sprinkles.
- Gluten-free option: Use gluten-free sandwich cookies like gluten-free Oreos or similar brands to make these treats safe for gluten-sensitive guests.
- Nut-free variation: Make sure your chocolate and sprinkles are nut-free certified if allergies are a concern.
- Mini versions: Try making these with mini Oreos for bite-sized party snacks that disappear fast.
Personally, I once made a batch using energy balls as the base for a healthier spin, coating them with a thin layer of white chocolate and adding little cap decorations on top—surprisingly festive and slightly less indulgent!
Serving & Storage Suggestions
These graduation cap Oreos are best served at room temperature so the white chocolate isn’t too hard and the cookie stays crisp. Arrange them on a decorative tray or tiered stand for a party-ready presentation that’s sure to catch eyes.
Pair them with a refreshing drink like iced tea or a sparkling lemonade to balance the sweetness. They also make a fun addition to a dessert table alongside treats like chocolate chip waffle sundaes or apple crisp for a little variety.
To store, keep them in an airtight container at room temperature for up to three days. If your house is warm, refrigeration is fine but bring them back to room temperature before serving to avoid a waxy chocolate texture.
They also freeze well—just wrap them individually in plastic wrap and place in a freezer-safe container. Thaw in the fridge overnight, then bring to room temperature before serving. Flavors mellow a bit after chilling, making them taste even richer.
Nutritional Information & Benefits
Each white chocolate graduation cap Oreo is a sweet treat with roughly 90-110 calories, depending on the size and exact brands used. They contain sugar, fat, and carbs typical of a dessert cookie, so I enjoy them as an occasional celebration indulgence.
The key ingredients—Oreos and white chocolate—don’t offer much in terms of health benefits, but the joy and connection these treats bring during milestones make them worth every bite in my book.
If you want to lighten it up, try using reduced-fat white chocolate or smaller portions. And for dairy-free or vegan friends, choosing appropriate chocolate and cookies makes these inclusive without losing any fun.
Conclusion
Easy White Chocolate Graduation Cap Oreos are a fun, festive, and surprisingly simple way to bring a special touch to any graduation celebration. They combine familiar flavors with a charming look that always gets compliments and makes guests smile.
What I love most is how customizable they are—you can tweak colors, sizes, and decorations to suit any party vibe. Plus, they’re quick enough to make even when life is busy or you’re hosting last minute.
Give this recipe a try and see how these little caps can turn an ordinary cookie into a party star. And hey, if you end up loving them as much as I do, I’d love to hear about your own creative twists or go-to celebrations!
FAQs About Easy White Chocolate Graduation Cap Oreos
Can I use other types of cookies besides Oreos?
Absolutely! Sandwich cookies with a flat surface work best for decorating, but feel free to experiment with your favorites.
What’s the best way to melt white chocolate without it seizing?
Heat in short bursts of 20 seconds in the microwave, stirring well between each. Avoid water contact and don’t overheat to keep it smooth.
How do I make the tassel on the graduation cap?
Use black decorating icing or melted chocolate to pipe a thin line from the center of the cap and add a dot or sprinkle at the end for a tassel effect.
Can I prepare these a day ahead?
Yes, they keep well in an airtight container at room temperature for a day or two, just avoid humid environments to keep the chocolate crisp.
Do you have tips for making these gluten-free?
Use gluten-free sandwich cookies and double-check that your chocolate and decorations are free from gluten contamination.
Pin This Recipe!
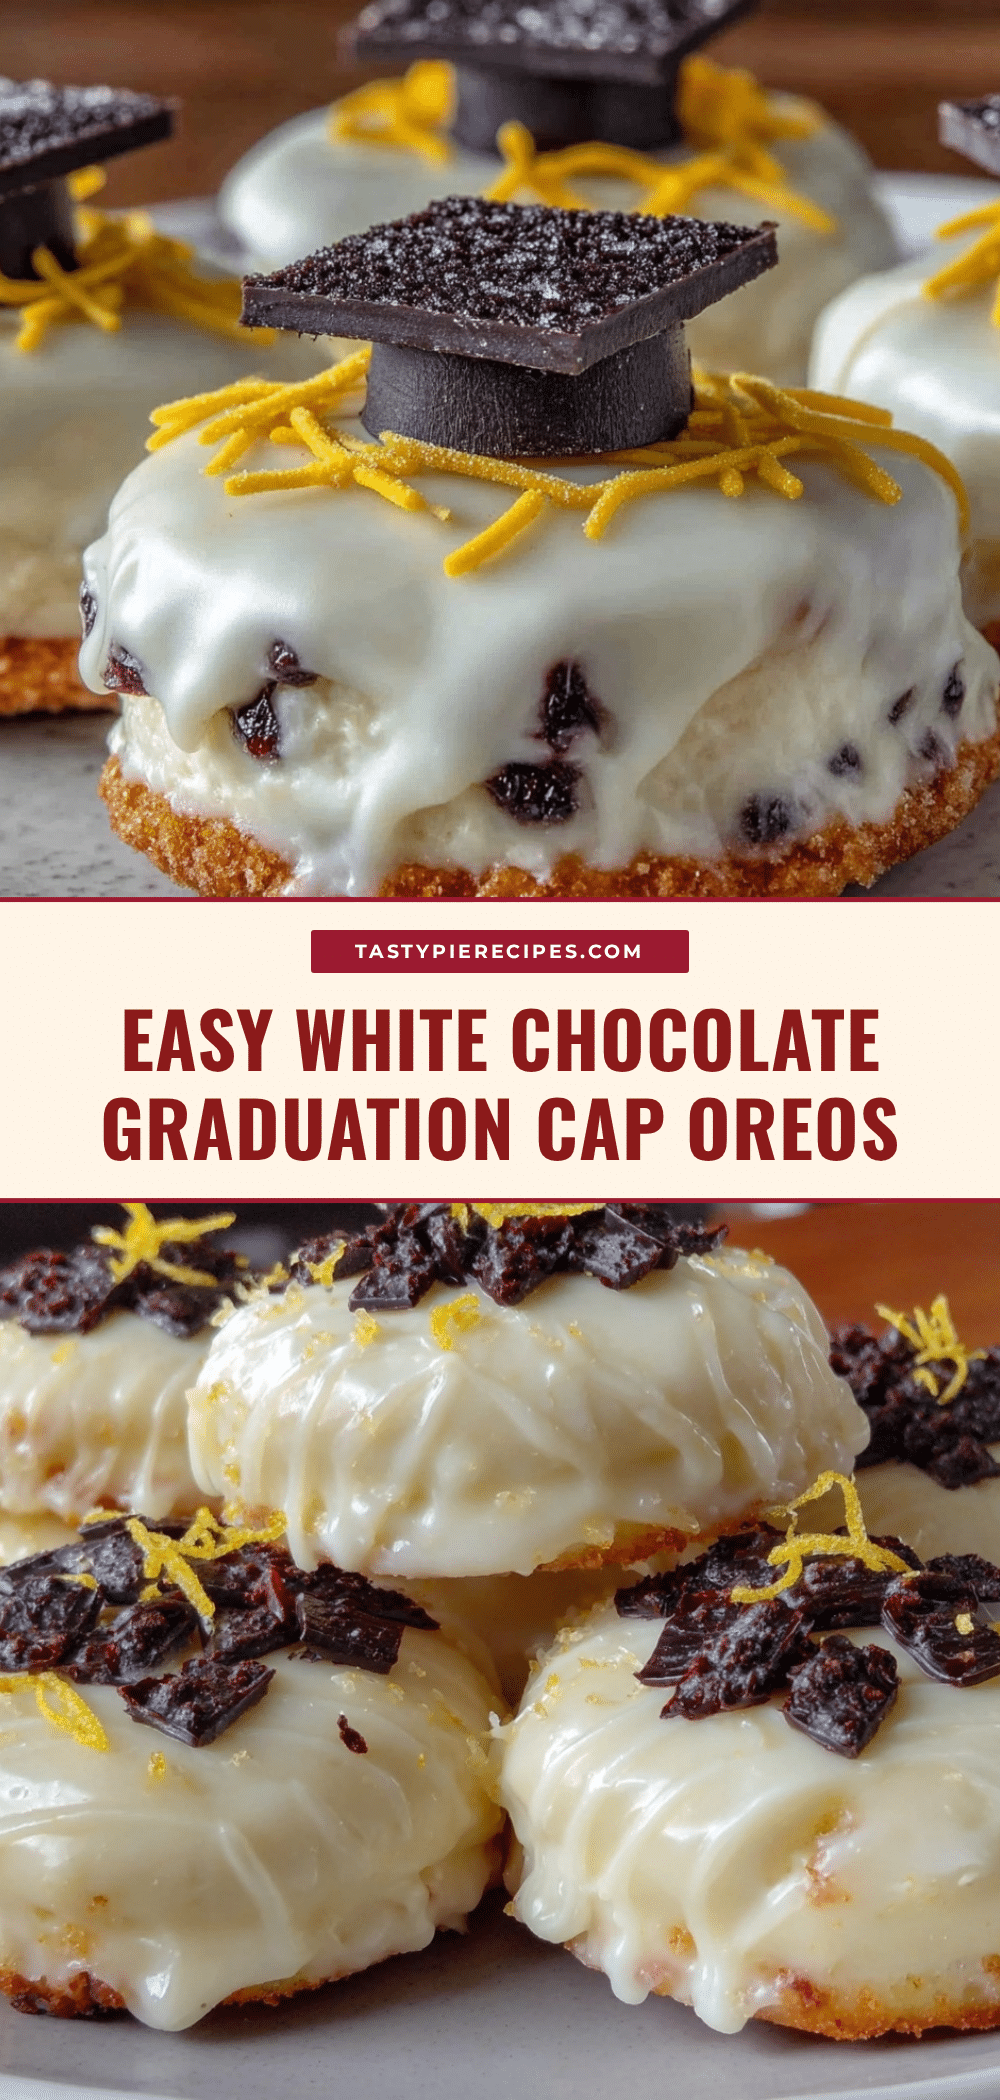
Easy White Chocolate Graduation Cap Oreos Recipe for Perfect Party Treats

These festive white chocolate graduation cap Oreos are a quick and charming treat perfect for graduation parties, combining familiar Oreo flavor with a creamy white chocolate coating and decorative tassels.
- Prep Time: 10 minutes
- Cook Time: 15-20 minutes
- Total Time: 25-30 minutes
- Yield: 24 servings 1x
- Category: Dessert
- Cuisine: American
Ingredients
- Oreos (regular or double-stuffed)
- 12 ounces (340 grams) white chocolate chips or melting wafers
- Black decorating icing or black candy melts
- Mini square pretzels or black fondant (optional)
- Edible gold or colored sprinkles
- Wax or parchment paper
Instructions
- Melt the white chocolate: Place 12 ounces (340 grams) of white chocolate chips or melting wafers in a microwave-safe bowl. Heat in 20-second increments, stirring well each time, until the chocolate is smooth and fully melted (about 1 to 1.5 minutes). Avoid overheating to prevent seizing.
- Prepare your workspace: Line a baking sheet with wax or parchment paper.
- Dip the Oreos: Holding an Oreo by the edges, dip it into the melted white chocolate, coating fully or partially. Let excess chocolate drip off.
- Place on the prepared sheet: Set the dipped Oreo on the wax paper-lined tray. Repeat with all Oreos.
- Create the mortarboard caps: Once the dipped Oreos have set slightly (tacky but not fully hardened), use black decorating icing or melted dark chocolate to pipe a square cap on top. If using mini square pretzels or black fondant, gently press these onto the center before the chocolate hardens.
- Add the tassel: Pipe a thin line from the center of the cap to one corner, then add a small dot or sprinkle at the end for the tassel’s tip.
- Let the Oreos set completely: Allow to sit at room temperature or chill in the refrigerator for 15-20 minutes until chocolate is firm and glossy.
- Optional finishing touches: Dust with edible glitter or add sprinkles for extra sparkle.
Notes
Heat white chocolate gently in short bursts to avoid seizing. Hold Oreos by edges when dipping to avoid fingerprints. Pipe tassels while chocolate is tacky for best adhesion. Add a tiny splash of vegetable oil if chocolate thickens. Store in airtight container at room temperature up to 3 days or freeze individually wrapped.
Nutrition
- Serving Size: 1 Oreo treat
- Calories: 100
- Sugar: 11
- Sodium: 90
- Fat: 6
- Saturated Fat: 4
- Carbohydrates: 13
- Fiber: 0.5
- Protein: 1
Keywords: white chocolate Oreos, graduation treats, party snacks, easy dessert, festive cookies, chocolate dipped Oreos


