“You really have to try this,” my neighbor said one chilly afternoon as she handed over a rustic, steaming cast iron skillet filled with what smelled like autumn itself. I was skeptical—apple dessert in a skillet? Could it really be that simple and still taste like something special? Well, honestly, that first bite surprised me. The crisp, buttery topping paired with warm, tender apples—and just the right touch of cinnamon—made me stop in my tracks. I didn’t expect to love a dessert that was so easy to throw together, but somehow, this cozy cast iron apple crisp with vanilla ice cream quickly became my go-to comfort treat on those evenings when I just wanted a little warmth and sweetness without fussing over complicated baking.
That skillet sat on my stove for days, the scent filling the kitchen and drawing everyone in. I found myself making this apple crisp multiple times in a week, tweaking it here and there (a little less sugar, a sprinkle of nutmeg, a handful of chopped nuts). It’s the kind of recipe that feels both homey and a bit indulgent, perfect for unwinding after a long day or sharing with friends who stop by unannounced. Honestly, pairing it with a scoop of vanilla ice cream (because who doesn’t love that creamy contrast?) just seals the deal.
What I appreciate most is how this apple crisp feels like a gentle hug—warm, familiar, and just a little bit nostalgic. It’s not fancy, but it’s honest. And that’s probably why it stuck around in my kitchen and my heart.
Why You’ll Love This Recipe
After testing this cozy cast iron apple crisp recipe several times, trust me when I say it’s a keeper. Here’s why it’s earned a permanent spot on my dessert rotation:
- Quick & Easy: Ready in less than 45 minutes, it’s perfect for those evenings when you want dessert without the wait.
- Simple Ingredients: No need for exotic items—most of these are pantry staples you likely already have on hand (and if not, they’re easy to grab).
- Perfect for Cozy Nights: Whether it’s a chilly fall evening or a casual weekend treat, this crisp feels like a warm invitation to slow down.
- Crowd-Pleaser: Kids, adults, everyone loves the sweet-tart apple filling with the crunchy, buttery topping.
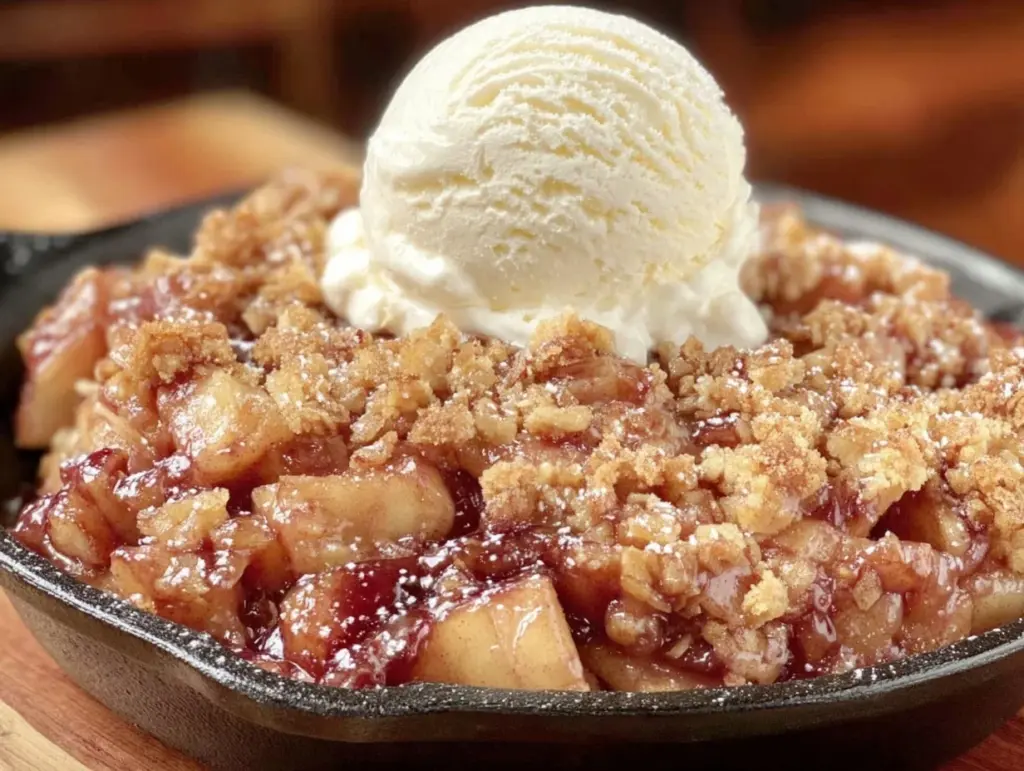
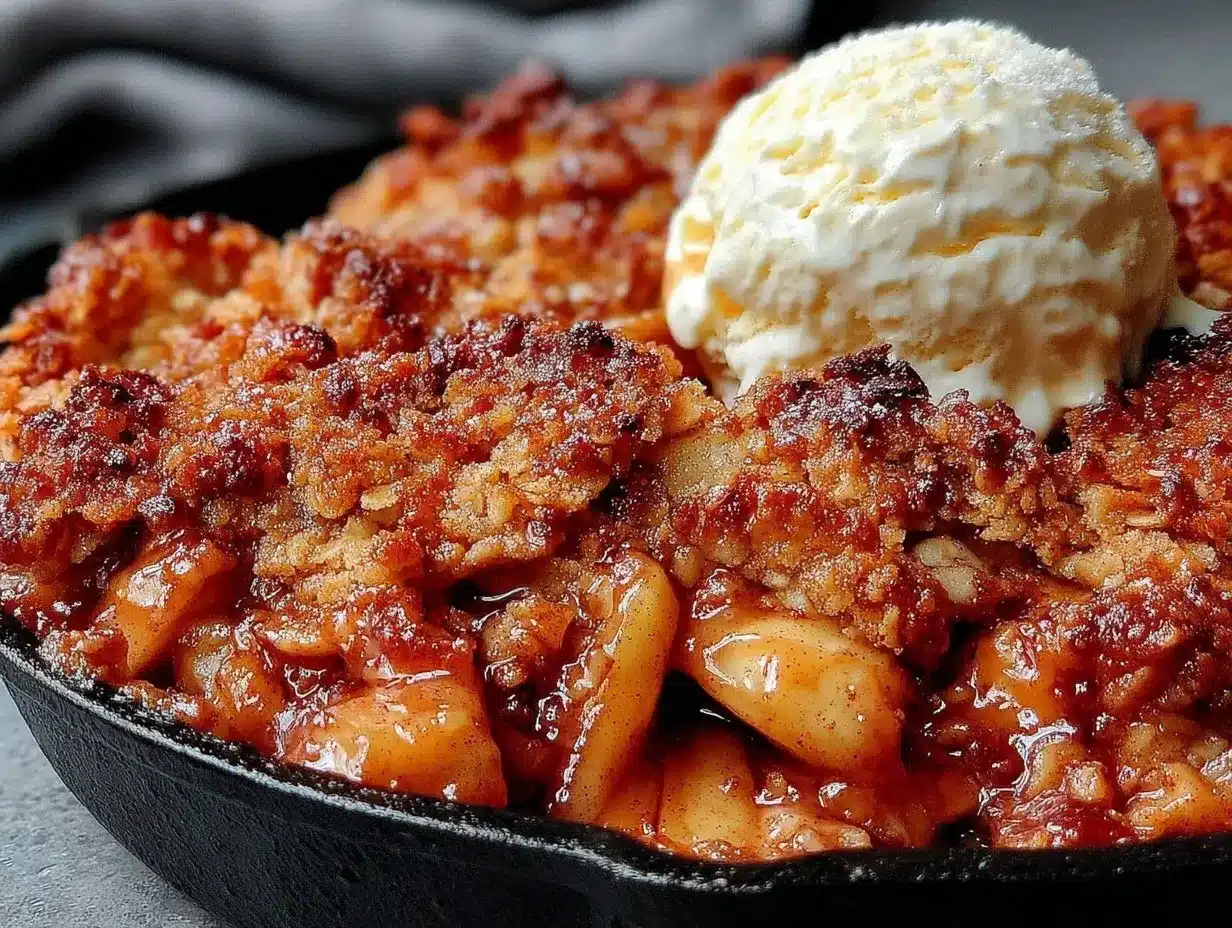
- Unbelievably Delicious: The cast iron skillet helps create a crisp crust that’s just the right texture, and the vanilla ice cream melts into the warm apples for total comfort.
This isn’t just any apple crisp. The secret lies in using a cast iron skillet—it holds heat beautifully, creating a perfectly caramelized crust while keeping the apples tender but not mushy. Plus, I like to toss the apples with just the right blend of cinnamon and a hint of lemon juice to brighten the flavors. It’s the kind of dessert that makes you close your eyes after the first bite, savoring the sweet warmth and crisp textures.
One time, I made this apple crisp after a long, hectic day (you might relate!) and the simple act of baking it felt like a reset button. When I paired it with a generous scoop of vanilla ice cream, it was honestly all the comfort I needed. If you appreciate easy, homemade desserts that feel cozy but don’t require a dozen steps, this recipe is made for you.
What Ingredients You Will Need
This recipe uses simple, wholesome ingredients to deliver bold flavor and satisfying texture without the fuss. Most are pantry staples or easy to find in any grocery store, which is what makes this apple crisp a stress-free treat. Here’s what you’ll need:
- Apples: 6 medium apples (about 3 pounds) – I prefer Granny Smith for tartness mixed with Fuji for sweetness. Peel, core, and slice them evenly.
- Granulated Sugar: 1/2 cup (100 g) – balances the apple tartness nicely.
- Brown Sugar: 1/3 cup (67 g) – adds warmth and depth to the topping and filling.
- Ground Cinnamon: 2 teaspoons – the classic spice that brings the whole thing together.
- Lemon Juice: 1 tablespoon – keeps the apples bright and prevents browning.
- All-Purpose Flour: 3/4 cup (95 g) – for the crisp topping structure.
- Rolled Oats: 3/4 cup (75 g) – adds a hearty, chewy texture to the topping.
- Unsalted Butter: 1/2 cup (113 g), cold and cut into cubes – essential for that flaky, buttery topping.
- Vanilla Extract: 1 teaspoon – a subtle aromatic note for the crisp.
- Salt: 1/4 teaspoon – balances the sweetness.
- Vanilla Ice Cream: For serving – creamy and melts perfectly over the warm crisp.
If you want to swap things up, almond flour works well for a gluten-free topping, and coconut oil can replace butter for a dairy-free version. When I make this for friends who prefer vegan options, I’ve used plant-based butter and coconut sugar with great results. Also, in late summer, I sometimes swap the apples with fresh peaches or pears for a seasonal twist.
Equipment Needed
- Cast Iron Skillet: An 8-inch or 9-inch skillet works best for even heat distribution and that rich, caramelized crust. If you don’t have cast iron, a heavy oven-safe baking dish will do, but the texture won’t be quite the same.
- Mixing Bowls: A couple of medium bowls for tossing apples and mixing the topping.
- Pastry Cutter or Fork: Helpful for cutting cold butter into the flour and oats for that crumbly topping.
- Measuring Cups and Spoons: For accuracy (especially important with flour and sugar).
- Knife and Peeler: For prepping apples.
Personally, I love using a well-seasoned cast iron skillet because it heats evenly and gives the crisp that signature texture. Just remember to avoid soap when cleaning it—warm water and a stiff brush do the trick, then dry it well to keep it rust-free. If you’re on a budget, you can find decent cast iron skillets without breaking the bank, and they last practically forever with proper care.
Preparation Method
- Preheat your oven to 350°F (175°C). This ensures the skillet is ready to create that perfect crust.
- Prepare the apples: Peel, core, and slice 6 medium apples into 1/4-inch thick slices. Toss them in a bowl with 1 tablespoon of fresh lemon juice, 1/2 cup granulated sugar, 1/3 cup brown sugar, and 2 teaspoons ground cinnamon. Mix gently until the apples are evenly coated. The lemon juice helps prevent browning and adds a subtle tang that cuts through the sweetness.
- Transfer the apple mixture to your cast iron skillet. Spread evenly to create a uniform layer for even baking.
- Make the crisp topping: In a separate bowl, combine 3/4 cup all-purpose flour, 3/4 cup rolled oats, 1/3 cup brown sugar, and 1/4 teaspoon salt. Add 1/2 cup cold, cubed unsalted butter. Using a pastry cutter or your fingertips, work the butter into the dry ingredients until the mixture resembles coarse crumbs with some pea-sized pieces.
- Sprinkle the topping evenly over the apples. This crumbly layer will bake into a golden, crunchy crust while the apples soften beneath.
- Bake: Place the skillet in the preheated oven and bake for 40 to 45 minutes, or until the topping is golden brown and the apples are bubbling at the edges. You’ll know it’s ready when the skillet smells wonderfully sweet and cinnamon-y, and you can hear the gentle bubbling of the fruit.
- Cool slightly before serving: Let the apple crisp rest for about 10 minutes. This helps the juices thicken and makes it easier to serve.
- Serve warm topped with a generous scoop of vanilla ice cream. The contrast of hot crisp and cold ice cream is pure magic.
Quick tip: If the topping starts to brown too fast but the apples aren’t done, loosely cover the skillet with foil halfway through baking. Also, be gentle when tossing the apples so they don’t get mushy before baking.
Cooking Tips & Techniques
Making the perfect apple crisp is about balancing textures and flavors, and a few tricks make all the difference.
- Choose the right apples: I always use a mix of tart and sweet apples—Granny Smith combined with Fuji or Honeycrisp gives the filling a nice depth. Avoid super soft varieties like McIntosh that can turn mushy quickly.
- Keep butter cold: Using cold butter for the topping is crucial. It creates those flaky, crumbly bits rather than a dense, doughy crust. You can even chill your flour and oats before mixing in butter if your kitchen is warm.
- Don’t overmix the topping: Stop as soon as you see pea-sized clumps; overworking it can make the topping tough.
- Let the crisp rest: That 10-minute wait after baking helps the juices thicken slightly, so you get that perfect spoonful of crisp topping with tender apple filling.
- Multitasking: While the crisp bakes, it’s a great time to prep a simple salad or even get started on something like a grilled chicken Greek salad for a complete meal that balances indulgence and nutrition.
One time, I forgot to toss the apples with lemon juice—and the color was off, plus the flavor became a bit flat. Lesson learned: that little acid brightens everything wonderfully.
Variations & Adaptations
This recipe is wonderfully flexible, so you can customize it to your taste or dietary needs.
- Gluten-Free: Swap the all-purpose flour for almond flour or a gluten-free baking blend. Make sure your oats are certified gluten-free if needed.
- Nutty Twist: Add 1/2 cup chopped pecans or walnuts to the topping for extra crunch and flavor.
- Spiced Up: Mix in 1/4 teaspoon ground nutmeg or cloves with the cinnamon for a warmer spice profile.
- Dairy-Free: Use coconut oil or vegan butter instead of butter, and pair with a plant-based vanilla ice cream.
- Fruit Mix: Try mixing pears or peaches with the apples for a seasonal variation.
I once added a splash of bourbon to the apple filling for a grown-up version—it added a subtle depth that paired beautifully with the ice cream.
Serving & Storage Suggestions
Serve your cozy cast iron apple crisp warm, straight from the skillet, topped with vanilla ice cream that melts slowly into the crevices. For a special touch, sprinkle a pinch of cinnamon or a few toasted nuts on top.
This crisp pairs nicely with a cup of hot tea or coffee for a relaxing evening treat. If you’re serving it as part of a dinner, it complements hearty mains like a loaded steak and potato soup beautifully—both have that comforting, home-cooked vibe.
To store leftovers, cover the skillet or transfer the crisp to an airtight container and refrigerate for up to 3 days. The flavors actually deepen after resting overnight. Reheat in a 350°F (175°C) oven for 10-15 minutes to revive the crisp topping (avoid microwaving if you want to keep the texture).
If you want to freeze leftovers, wrap tightly and freeze for up to 2 months. Thaw overnight in the fridge, then reheat as above.
Nutritional Information & Benefits
Each serving of this apple crisp offers a comforting balance of natural fruit sugars and wholesome oats. Apples contribute fiber and vitamin C, while cinnamon may help with blood sugar regulation. The oats add whole grain benefits, including beta-glucan fiber, which supports heart health.
While this dessert has sugar and butter, you can adjust sweetness or swap ingredients to fit specific dietary needs. For a lower-carb option, try pairing the warm apples with a keto-friendly topping, similar in spirit to recipes like the creamy keto chicken Alfredo—both celebrate flavor without excess carbs.
Note: Contains gluten, dairy, and potential allergens if nuts are added.
Conclusion
This cozy cast iron apple crisp with vanilla ice cream is a simple, satisfying dessert that never fails to bring a little warmth and sweetness to any day. It’s easy enough for a weeknight but special enough to share with guests or savor solo with a good book. I love how it brings out the best in humble ingredients without fuss or fancy techniques.
Feel free to experiment with your favorite apples, spices, or even add-ins to make it your own. And if you enjoy this, you might appreciate the comforting vibes of my cozy crockpot chicken tikka masala, another recipe that’s perfect for winding down.
Give this apple crisp a try and let me know how you like it—whether you keep it classic or add your own twist. It’s all about making cozy, homemade moments worth savoring.
Frequently Asked Questions
Can I use frozen apples for the apple crisp?
While fresh apples give the best texture and flavor, you can use frozen apples if fresh aren’t available. Just thaw and drain excess liquid before mixing with sugar and spices to avoid a soggy crisp.
What’s the best way to store leftover apple crisp?
Store leftovers in an airtight container in the fridge for up to 3 days. Reheat in the oven to keep the topping crisp or enjoy cold with ice cream if you prefer.
Can I make the apple crisp ahead of time?
Yes! Assemble the crisp topping and apples in the skillet, cover, and refrigerate for up to 24 hours before baking. Just add a few extra minutes to the baking time if chilled.
Is it necessary to peel the apples?
Peeling is recommended for a smoother texture and easier eating, but you can leave the skins on if you prefer a more rustic feel and extra fiber.
How do I prevent the topping from getting soggy?
Using cold butter and not overmixing the topping helps it stay crumbly. Also, baking the crisp in a cast iron skillet helps achieve that golden, crispy crust instead of a soggy topping.
Pin This Recipe!
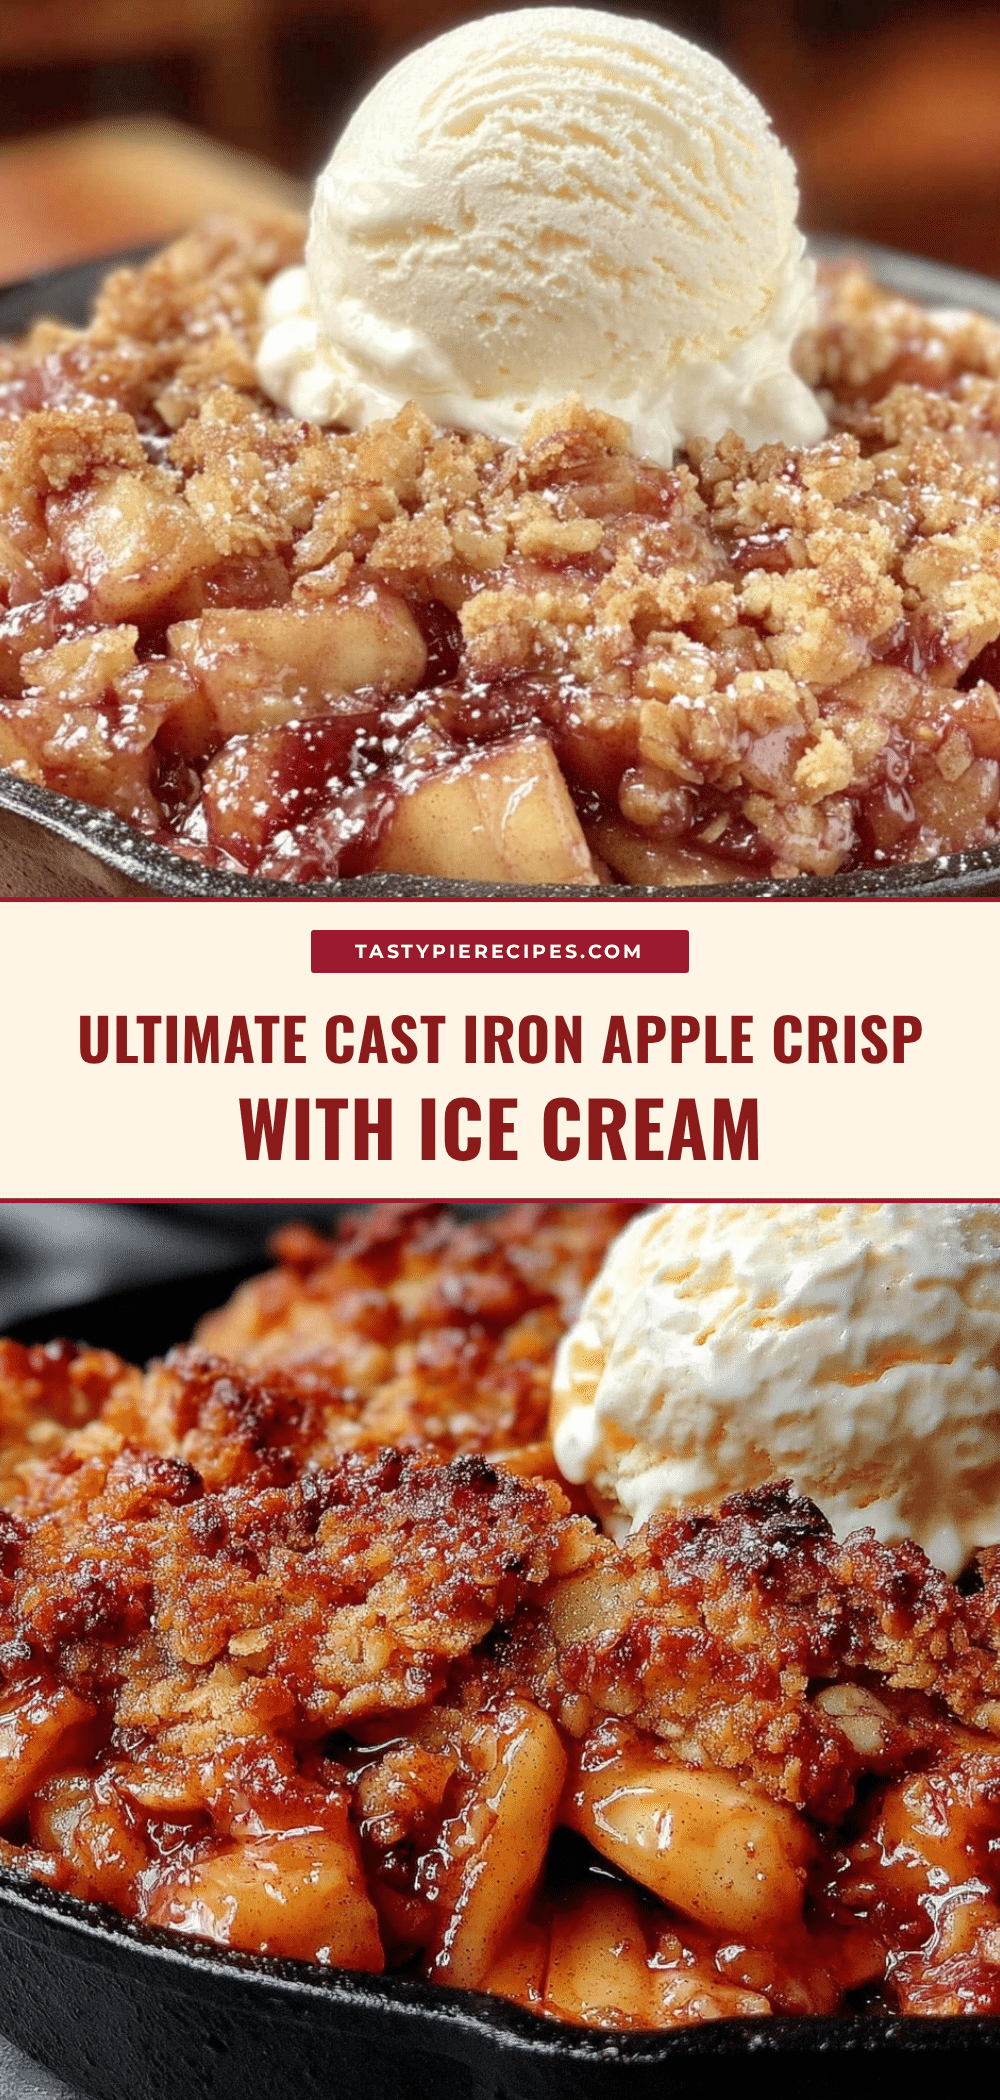
Cozy Cast Iron Apple Crisp Recipe Easy Homemade Dessert with Vanilla Ice Cream

A warm, comforting apple crisp baked in a cast iron skillet with a buttery, crunchy topping and served with vanilla ice cream. Perfect for cozy nights and easy to prepare in under 45 minutes.
- Prep Time: 15 minutes
- Cook Time: 40-45 minutes
- Total Time: 55-60 minutes
- Yield: 6 servings 1x
- Category: Dessert
- Cuisine: American
Ingredients
- 6 medium apples (about 3 pounds) – peeled, cored, and sliced evenly (preferably Granny Smith and Fuji)
- 1/2 cup granulated sugar (100 g)
- 1/3 cup brown sugar (67 g)
- 2 teaspoons ground cinnamon
- 1 tablespoon lemon juice
- 3/4 cup all-purpose flour (95 g)
- 3/4 cup rolled oats (75 g)
- 1/2 cup cold unsalted butter (113 g), cut into cubes
- 1 teaspoon vanilla extract
- 1/4 teaspoon salt
- Vanilla ice cream, for serving
Instructions
- Preheat your oven to 350°F (175°C).
- Peel, core, and slice 6 medium apples into 1/4-inch thick slices. Toss them in a bowl with 1 tablespoon of fresh lemon juice, 1/2 cup granulated sugar, 1/3 cup brown sugar, and 2 teaspoons ground cinnamon. Mix gently until the apples are evenly coated.
- Transfer the apple mixture to your cast iron skillet and spread evenly.
- In a separate bowl, combine 3/4 cup all-purpose flour, 3/4 cup rolled oats, 1/3 cup brown sugar, and 1/4 teaspoon salt. Add 1/2 cup cold, cubed unsalted butter. Using a pastry cutter or your fingertips, work the butter into the dry ingredients until the mixture resembles coarse crumbs with some pea-sized pieces.
- Sprinkle the topping evenly over the apples.
- Bake in the preheated oven for 40 to 45 minutes, or until the topping is golden brown and the apples are bubbling at the edges. If the topping browns too fast, loosely cover the skillet with foil halfway through baking.
- Let the apple crisp rest for about 10 minutes before serving to allow the juices to thicken.
- Serve warm topped with a generous scoop of vanilla ice cream.
Notes
Use a mix of tart and sweet apples like Granny Smith and Fuji for best flavor. Keep butter cold for a flaky topping. If topping browns too quickly, cover with foil halfway through baking. Let crisp rest 10 minutes before serving. For gluten-free, substitute almond flour and certified gluten-free oats. For dairy-free, use coconut oil or vegan butter and plant-based ice cream.
Nutrition
- Serving Size: 1 serving (approxima
- Calories: 350
- Sugar: 30
- Sodium: 150
- Fat: 15
- Saturated Fat: 9
- Carbohydrates: 50
- Fiber: 5
- Protein: 3
Keywords: apple crisp, cast iron skillet dessert, easy apple dessert, homemade apple crisp, vanilla ice cream dessert, fall dessert, cozy dessert


