
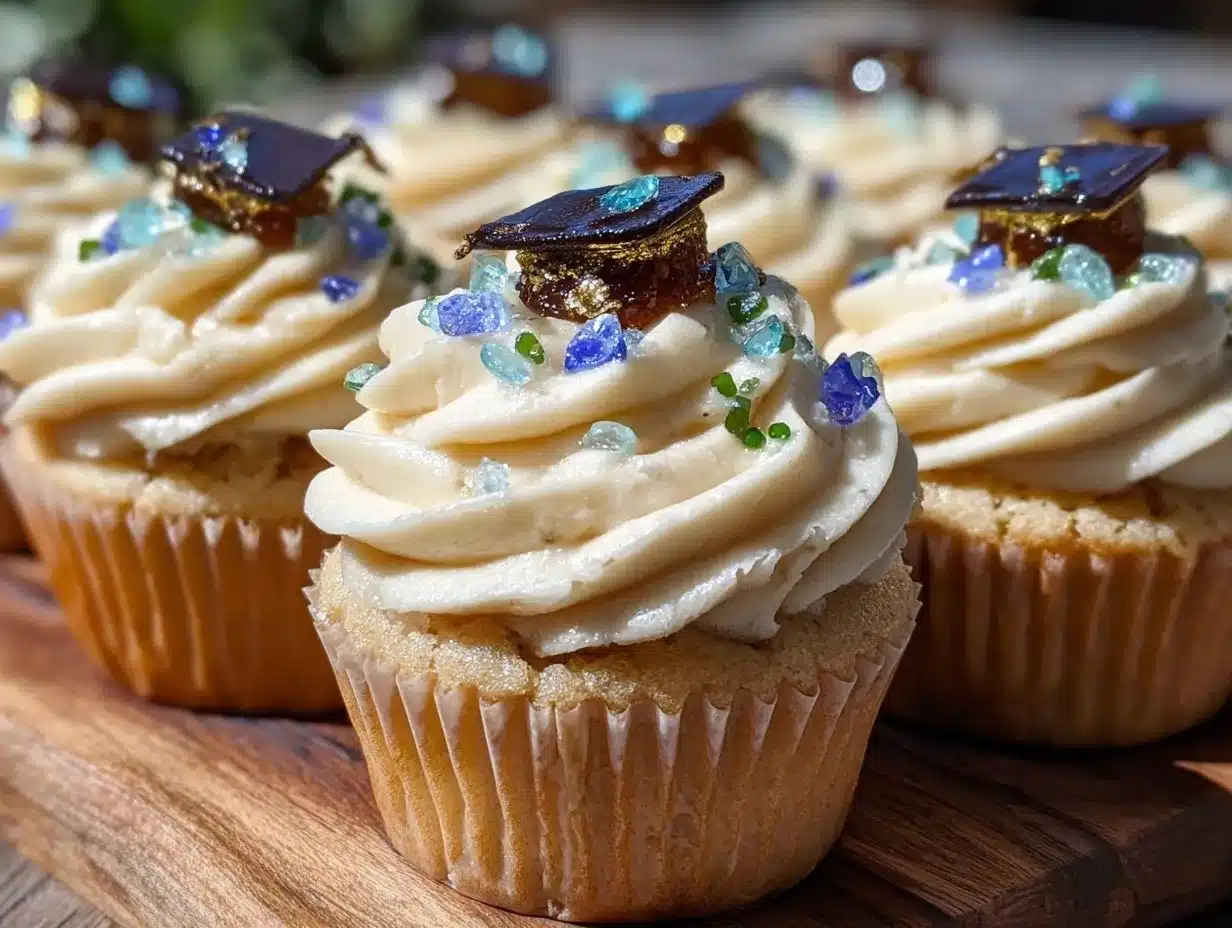
Let me tell you, the sight of colorful little graduation caps and cheerful “Congrats Grad!” flags perched atop moist cupcakes is enough to make anyone’s heart swell with pride and joy. The first time I crafted these easy festive graduation cupcake toppers was at a last-minute get-together for my niece’s big day. Honestly, the kind of moment where you pause, take a deep breath, and just smile because you know you’re onto something truly special. When I was knee-high to a grasshopper, my grandma used to make celebrations feel magical with simple, handmade touches—these toppers remind me of that warm, nostalgic comfort.
My family couldn’t stop sneaking them off the cooling rack (and I can’t really blame them). You know what? These cupcake toppers aren’t just decorations; they’re little bursts of personality that turn ordinary cupcakes into a centerpiece for any graduation party. Perfect for potlucks, sweet treats for your kids, or brightening up your Pinterest cookie board, these toppers add that extra festive vibe without fuss.
I tested this recipe multiple times— in the name of research, of course—tweaking sizes, colors, and materials until I nailed the perfect balance of easy, affordable, and downright adorable. Now, they’re a staple for family gatherings and gifting. If you’ve been hunting for a simple way to bring graduation celebrations to life, you’re going to want to bookmark this one.
Why You’ll Love This Recipe
Creating these easy festive graduation cupcake toppers has been a game-changer in my party planning toolkit. Let me share why this recipe stands apart and why you’ll want to make it your go-to for celebrations.
- Quick & Easy: Comes together in under 30 minutes, perfect for last-minute party prep or spontaneous celebrations.
- Simple Ingredients: No fancy craft store runs needed—you likely have everything at home already.
- Perfect for Graduation Celebrations: Adds that extra sparkle to your cupcakes, whether it’s a small family party or a big bash.
- Crowd-Pleaser: Both kids and adults love these little decorative touches that feel personal and festive.
- Unbelievably Versatile: From classic black and gold to school colors, you can customize these toppers to match any grad’s vibe.
What sets these toppers apart is the balance between handcrafted charm and practicality. Instead of complicated designs, this recipe uses straightforward materials and techniques to create toppers that look professionally done but are dangerously easy to make. Whether you’re blending cardstock colors or assembling simple paper fans, each step is designed to bring out your creativity without overwhelming you.
Plus, this recipe isn’t just about looks—it’s about the feeling you get when you serve cupcakes that make everyone say, “Wow, you really thought of everything!” It’s comfort food with a festive twist, perfect for impressing guests without breaking a sweat.
What Ingredients You Will Need
This recipe uses simple, wholesome materials to deliver bold visual impact and satisfying texture without the fuss. Most ingredients are easy to find at home or your local craft store, making this project accessible for everyone.
- Cardstock Paper: In black, gold, white, and your school colors (sturdy and smooth for crisp shapes)
- Wooden Toothpicks or Bamboo Skewers: About 3-inch length (for easy insertion into cupcakes)
- Glue: Craft glue or hot glue (handle with care!) for quick drying and strong hold
- Scissors or Craft Knife: Sharp and precise for clean cuts
- Ruler: For measuring shapes accurately
- Black Marker or Pen: For adding details like tassels or “Congrats!” text
- Glitter or Metallic Stickers (Optional): Adds sparkle and festive flair
- Double-sided Tape: Handy for layering paper pieces without mess
- Circle Punch or Template: About 1 inch diameter (for creating round bases or embellishments)
If you want to get a bit fancy, I recommend using a quality cardstock like Neenah Classic Crest for the best texture and sturdiness. However, if budget is a concern, standard craft cardstock or even recycled greeting cards can work just fine. For glue, I prefer Aleene’s Tacky Glue for its strong hold without warping paper—plus, dries clear!
Seasonally, you could swap the black and gold for pastel colors if your graduation party falls in spring—fresh, bright toppers are always a hit in warmer months. Also, if you’re aiming for a gluten-free or allergy-safe cupcake, topping these beauties won’t interfere with any dietary needs.
Equipment Needed
- Cutting Mat: Protects your surfaces when using craft knives
- Precision Scissors: Small, sharp scissors make detailed cuts easier and cleaner
- Bone Folder or Scoring Tool: Great for making crisp folds on cardstock
- Ruler and Pencil: Essential for measuring and marking guides
- Glue Gun (Optional): Speeds up assembly but requires caution around kids
- Circle Punch: If you don’t have one, you can create a circle template from a cup or lid
If you don’t have a bone folder, an old credit card or the back of a butter knife works just as well to crease paper. For those on a budget, precision scissors and basic glue are enough to get the job done beautifully. I once tried using regular tape instead of glue and ended up with toppers falling apart mid-party—lesson learned!
Preparation Method
- Gather Materials and Set Up Workspace (5 minutes): Clear a flat surface, lay down your cutting mat, and arrange all ingredients and tools within reach. This makes the process smooth and enjoyable.
- Cut the Graduation Caps (15 minutes): Using black cardstock, measure and cut small squares approximately 1.5 inches (3.8 cm) per side for the cap tops. Cut small rectangles about 0.5 inch (1.3 cm) by 1 inch (2.5 cm) for the cap base. Use your ruler for precise cuts.
- Assemble Caps (10 minutes): Glue the rectangle pieces perpendicularly under each square to create the cap shape. Hold for a few seconds until secure. Let dry to avoid warping.
- Create Tassels (10 minutes): Cut thin strips of gold cardstock about 2 inches (5 cm) long and 0.1 inch (0.25 cm) wide. Bundle and glue one end to the center of the black cap square. Use the black marker to add detail lines if desired.
- Make Circular Tags (10 minutes): Punch or cut circles from white cardstock about 1 inch (2.5 cm) diameter. Write celebratory messages like “Congrats,” “Class of 2024,” or initials with the black marker. Add glitter or stickers for sparkle.
- Attach Toothpicks (5 minutes): On the back of each cap or circle, use glue or double-sided tape to affix a toothpick vertically. Allow to dry completely before handling.
- Final Touches (5 minutes): Inspect each topper for loose edges or uneven cuts. Trim or reinforce glue spots as needed. Let everything dry thoroughly before inserting into cupcakes.
Pro tip: When gluing, less is more to prevent wrinkling cardstock. If you’re in a hurry, a hot glue gun speeds things up but be careful not to burn yourself! Also, keep toothpicks away from little hands until cupcakes are served.
Cooking Tips & Techniques
Honestly, making these cupcake toppers is as much about patience as precision. Here are some tips I’ve picked up along the way:
- Cutting: Always use a sharp blade or scissors. Dull tools cause jagged edges and frustration.
- Measuring: Use a ruler and light pencil marks to guide cuts—eyeballing it rarely looks as neat.
- Folding: Score the cardstock before folding to avoid cracking or uneven creases.
- Gluing: Apply glue sparingly. Excess glue can cause paper to warp or take forever to dry.
- Drying: Let glued pieces dry flat under a heavy book if they curl up—patience pays off!
- Assembly Line: Batch your steps—cut all shapes first, then glue, then decorate. It’s faster and less messy.
Common mistakes include rushing through cuts, which leads to uneven shapes, or using too much glue, which weakens the paper. I once glued all my caps with a thick layer of glue and had to redo half of them because they warped—lesson learned the hard way! Multitasking helps, but don’t sacrifice quality for speed.
Variations & Adaptations
Changing up these easy festive graduation cupcake toppers can make them fit any party vibe or dietary need. Here are some ideas:
- Color Variations: Swap the classic black and gold for your school colors or a pastel palette for spring graduations. Using metallic cardstock adds instant glam.
- Material Switch: For eco-friendly options, use recycled paper or biodegradable toothpicks. Felt or foam sheets can add texture and sturdiness but may require stronger glue.
- Shape Twists: Instead of caps, create mortarboards with tassels hanging off, or star-shaped toppers with graduation messages. You can also add mini diplomas rolled and tied with string.
- Dietary & Safety Adaptations: If serving to young kids, avoid toothpicks and use paper straws or flat sticks to reduce sharp edges.
- Personalized Touch: Try printing photos or names on sticker paper and attaching them for a custom look—my niece loved seeing her name on hers!
Serving & Storage Suggestions
These cupcake toppers are best served fresh, perched on your cupcakes just before presenting. They look fantastic at room temperature, and the paper holds up well for several hours, so you can prepare them ahead of time.
Store any leftover toppers flat in a dry, cool place inside a sealed envelope or box to prevent bending or moisture damage. Avoid refrigeration, as humidity can warp the cardstock.
If you want to prep in advance, make the toppers up to two days before the event. They will still look crisp and festive, and the flavors of your cupcakes will stay fresh.
When reheating cupcakes, remove the toppers first—they can’t take the heat. After warming, gently reinsert toppers for that fresh-from-the-oven look. Over time, the toppers maintain their charm and add a nice touch of nostalgia if saved as keepsakes.
Pair these cupcakes with sparkling cider or a hot cup of coffee for adults. For kids, colorful punch or milk works perfectly. Presentation-wise, arrange cupcakes on a tiered stand to showcase those festive toppers and make your celebration sparkle.
Nutritional Information & Benefits
While cupcake toppers don’t add calories, the cupcakes they adorn can be tailored for health-conscious guests. Using simple, wholesome ingredients in your cupcakes—like whole wheat flour, less sugar, or dairy-free options—can keep your celebration guilt-free.
The cardstock and toothpicks are purely decorative and safe when handled properly. Just be mindful of small parts around little ones.
From a wellness perspective, these toppers encourage homemade celebrations that bring family and friends together—something that’s good for the soul and mental health. Plus, crafting them can be a relaxing, creative outlet on a busy party prep day.
Conclusion
In summary, these easy festive graduation cupcake toppers are a simple way to add big personality and celebratory spirit to your party. They come together quickly, use minimal supplies, and pack a punch visually. Trust me, once you make them, you’ll find endless ways to customize and share them.
Don’t be afraid to play with colors, shapes, and materials to make these toppers uniquely yours. I love this recipe because it turns ordinary cupcakes into a heartfelt tribute to graduates, capturing the excitement and pride of the moment.
If you try these toppers, I’d love to hear how you customized them or what tips you discovered along the way. Share your photos and experiences in the comments below—let’s celebrate creativity together!
Here’s to making your graduation celebrations not just tasty but unforgettable with these charming cupcake toppers. You got this!
FAQs
How long does it take to make these cupcake toppers?
It typically takes about 30-45 minutes from start to finish, depending on how detailed you want to get with decorations.
Can I make these toppers ahead of time?
Yes! They can be made up to two days in advance and stored flat in a dry place to keep their shape.
Are these toppers safe for kids?
With supervision, they’re safe. For young children, consider using paper straws or flat sticks instead of toothpicks to avoid sharp points.
What if I don’t have cardstock paper?
You can use sturdy construction paper or even recycled greeting cards, but cardstock holds the shape best for a polished look.
Can I customize these toppers for other occasions?
Absolutely! Change colors, shapes, and messages to fit birthdays, baby showers, or any celebration you want to brighten up.
Pin This Recipe!
Easy Festive Graduation Cupcake Toppers Perfect for Celebration Decor

Create charming and colorful graduation cupcake toppers quickly and easily to add a festive touch to your celebration. These handcrafted toppers are simple to make, customizable, and perfect for any graduation party.
- Prep Time: 15 minutes
- Cook Time: 0 minutes
- Total Time: 30-45 minutes
- Yield: Varies depending on number of toppers made
- Category: Decoration
- Cuisine: N/A
Ingredients
- Cardstock Paper in black, gold, white, and school colors (sturdy and smooth)
- Wooden Toothpicks or Bamboo Skewers, about 3-inch length
- Craft glue or hot glue
- Scissors or Craft Knife
- Ruler
- Black Marker or Pen
- Glitter or Metallic Stickers (optional)
- Double-sided Tape
- Circle Punch or Template about 1 inch diameter
Instructions
- Gather materials and set up workspace on a flat surface with cutting mat and tools within reach (5 minutes).
- Cut graduation caps: measure and cut black cardstock squares approximately 1.5 inches per side and rectangles about 0.5 inch by 1 inch for the cap base (15 minutes).
- Assemble caps by gluing rectangles perpendicularly under each square to form the cap shape; hold until secure and let dry (10 minutes).
- Create tassels by cutting thin strips of gold cardstock about 2 inches long and 0.1 inch wide; bundle and glue one end to the center of the black cap square; add detail lines with black marker if desired (10 minutes).
- Make circular tags by punching or cutting circles from white cardstock about 1 inch diameter; write celebratory messages and add glitter or stickers (10 minutes).
- Attach toothpicks by gluing or taping them vertically on the back of each cap or circle; allow to dry completely (5 minutes).
- Final touches: inspect toppers for loose edges or uneven cuts; trim or reinforce glue spots as needed; let dry thoroughly before inserting into cupcakes (5 minutes).
Notes
Use less glue to prevent warping cardstock. Hot glue gun speeds assembly but requires caution. Keep toothpicks away from young children or substitute with paper straws or flat sticks. Store toppers flat in a dry, cool place to prevent bending or moisture damage. Make up to two days in advance. Remove toppers before reheating cupcakes.
Nutrition
- Serving Size: One cupcake with one
Keywords: graduation cupcake toppers, festive cupcake decorations, easy cupcake toppers, graduation party decor, handmade cupcake toppers


