Introduction
The first time I made these crispy homemade bread and butter pickle chips was totally unplanned. I was knee-deep in a chaotic summer weekend, juggling backyard grilling and a fridge that was pretty much begging for some TLC. I grabbed a bag of cucumbers that were just about to go soft and thought, “Why not try making my own pickles instead of running to the store?” Honestly, I was skeptical. I mean, homemade pickles? Would they even turn out crispy? But a few days later, when I finally popped open the jar, the tangy-sweet crunch surprised me so much that my family started asking for them at every meal. It’s funny how something so simple can turn into a staple that everyone looks forward to.
What really stuck with me was how that perfect balance of sweetness and vinegar, paired with the irresistible crispness, made these pickle chips a star on the picnic table or alongside a juicy sandwich. And you know, they’re so easy to whip up that I keep a batch in the fridge now—ready to brighten up everything from burgers to salads without any fuss. There’s just something about the way these pickles snap and zing that feels like summer in a jar, even when the weather’s not cooperating. So yeah, this recipe isn’t just about pickles—it’s about those little moments that make cooking feel like a win, even on the busiest days.
Why You’ll Love This Recipe
After testing countless variations, I can say this recipe for crispy homemade bread and butter pickle chips really nails the crave-worthy pickle experience. Here’s why you’ll want to make it your go-to:
- Quick & Easy: You can have the pickles prepped in under 20 minutes, perfect for those last-minute cravings or when you want something fresh without a ton of effort.
- Simple Ingredients: No weird additives or preservatives—just cucumbers, vinegar, sugar, and spices you probably already stock in your kitchen.
- Perfect for Summer: These pickles make a fantastic side for grilling season; they bring a crisp, sweet bite that pairs beautifully with smoky meats.
- Crowd-Pleaser: From kids who usually turn their noses up at veggies to adults who love a good tangy snack, these pickles get raves every time.
- Unbelievably Delicious: The texture is just right—crisp, with a little snap—while the flavor strikes that perfect balance between sweet and tangy with a hint of spice.
What sets this recipe apart is the way the sugar and vinegar are balanced to create that classic bread and butter flavor, but with a homemade freshness you just can’t get in a jar from the store. Plus, a quick blanch before pickling locks in that crunch, which honestly took me a couple tries to perfect (lesson learned!). Whether you’re adding a zing to your grilled chicken Greek salad or layering them on a sandwich, these pickle chips bring a little homemade magic to every bite. There’s a quiet satisfaction in knowing you made these from scratch and nailed the texture and flavor, making your summer meals just a bit brighter.
What Ingredients You Will Need
This recipe uses simple, wholesome ingredients to deliver bold flavor and satisfying texture without the fuss. Most of these are pantry staples, and if you keep a vinegar or spice cabinet, you’re halfway there already.
- Kirby cucumbers (about 4 medium-sized, sliced into thin chips) – These small, firm cucumbers hold their crunch best; I usually grab them from the farmers market.
- White distilled vinegar (2 cups / 475 ml) – Provides the classic tang; you can swap with apple cider vinegar for a slightly fruitier note.
- Granulated sugar (1 cup / 200 g) – Brings the sweet element that balances the vinegar bite perfectly.
- Water (1 cup / 240 ml) – Used to mellow the vinegar and help the pickling brine.
- Salt (2 tablespoons / 30 g, preferably pickling or kosher salt) – Enhances flavor and aids in preserving crispness.
- Mustard seeds (1 tablespoon) – Adds a subtle spicy note classic to bread and butter pickles; I like using McCormick brand for consistent quality.
- Celery seeds (1 teaspoon) – Gives a mild earthy undertone.
- Ground turmeric (1/2 teaspoon) – For that golden color and gentle warmth.
- Ground cloves (1/4 teaspoon) – A whisper of aromatic spice that rounds out the flavor.
- Onion (1 small, thinly sliced) – Optional but highly recommended for that extra layer of sweetness and texture.
Feel free to swap out granulated sugar with coconut sugar for a less refined option, or use sea salt if you prefer. For a gluten-free brine, all these ingredients are naturally safe. And if you want to experiment, adding a few slices of fresh jalapeño can add a nice kick without overpowering the classic taste.
Equipment Needed
Making these crispy homemade bread and butter pickle chips doesn’t require fancy tools, but having the right basics helps:
- Sharp knife or mandoline slicer: Thin, even slices are key for perfect pickle chips. I use a mandoline for speed but a sharp chef’s knife works fine if you’re careful.
- Large mixing bowl: To toss the cucumbers and onions with salt so they release moisture.
- Medium saucepan: For heating the brine evenly without scorching.
- Glass jars or airtight containers: Quart-sized mason jars are perfect for storing your pickles in the fridge.
- Measuring cups and spoons: Accurate measurements keep the flavor balanced.
If you don’t have mason jars handy, any sealable container that fits the sliced cucumbers will do. Also, I’ve found that using a wooden spoon to stir the brine prevents any metal flavor transfer from happening. For a budget-friendly option, thrift stores often have perfectly good jars for pickling, so keep an eye out!
Preparation Method
- Slice the cucumbers and onion: Using a mandoline or sharp knife, slice about 4 medium Kirby cucumbers into 1/8-inch (3 mm) thick rounds. Peel and slice 1 small onion thinly. Aim for uniform thickness for even pickling. (Prep time: 10 minutes)
- Salt the vegetables: Place cucumber and onion slices in a large bowl. Sprinkle 2 tablespoons (30 g) of pickling or kosher salt over them and toss gently. Let sit for 1 hour to draw out excess water—this step is crucial for crispness. You’ll see moisture pooling at the bottom. Drain and rinse under cold water, then pat dry with paper towels.
- Make the brine: In a medium saucepan, combine 2 cups (475 ml) white distilled vinegar, 1 cup (240 ml) water, 1 cup (200 g) granulated sugar, 1 tablespoon mustard seeds, 1 teaspoon celery seeds, 1/2 teaspoon ground turmeric, and 1/4 teaspoon ground cloves. Bring to a boil over medium heat, stirring occasionally until sugar dissolves. Once boiling, reduce heat and simmer for 2 minutes.
- Pack the jars: Tightly pack the salted, dried cucumber and onion slices into clean quart-sized mason jars. Pour the hot brine over the pickles, leaving about 1/2 inch (1.25 cm) headspace at the top. Use a clean utensil to release any air bubbles. Seal jars with lids.
- Cool and refrigerate: Let jars cool at room temperature for about 30 minutes, then transfer to the fridge. The pickles will be ready to enjoy after 24 hours but taste even better after 3 days.
Tip: If the pickles turn out too soft, it usually means the cucumbers were too thick or the salting step was rushed. Next time, slice thinner and don’t skip salting—it really locks in that crunch. Also, storing the pickles in the coldest part of your fridge helps maintain texture longer.
Cooking Tips & Techniques
From several batches and happy accidents, here are some tips to get your crispy homemade bread and butter pickle chips just right:
- Salting is your secret weapon: This step draws out excess water, preventing soggy pickles. Don’t rush it! Patience here equals crunch later.
- Uniform slicing is key: Using a mandoline slicer helps create consistent thickness, which means even pickling and texture. Uneven slices can lead to some mushy bits.
- Simmer the brine but don’t overboil: Boiling too long can concentrate the vinegar too much and overpower the sweetness; just a couple minutes after sugar dissolves is perfect.
- Cool before refrigerating: Letting jars cool at room temp prevents condensation inside, which can dilute your brine.
- Experiment with spice blends: I’ve had success adding a cinnamon stick or star anise for a subtle twist, but start small—you don’t want to mask the classic bread and butter flavor.
One time I accidentally used iodized table salt instead of kosher salt, and the pickles ended up cloudy and a bit bitter—lesson learned to always check the salt type! Also, multitasking during the salting hour is a great time to prep other dishes, like whipping up an easy crockpot soup or marinating meat for dinner.
Variations & Adaptations
This recipe is wonderfully adaptable to fit different tastes and dietary needs. Here are some ideas to try:
- Spicy Bread and Butter Pickles: Add thin slices of jalapeño or a pinch of red pepper flakes to your jars for a mild heat that balances the sweetness.
- Low-Sugar Version: Cut the sugar in half or swap it with a natural sweetener like honey or maple syrup. Keep in mind, this changes the flavor profile and may slightly impact preservation time.
- Vinegar Swaps: Using apple cider vinegar instead of white vinegar adds a fruitier tang and softer color; balsamic vinegar can be used for a richer taste but will darken your pickles.
- Herb-Infused Pickles: Toss in fresh dill sprigs or thyme for a herby twist that complements the traditional spices.
- Quick Pickles: Skip the salting step and refrigerate immediately after brining for a milder, softer pickle ready in 12 hours. I tried this for a last-minute snack, and while tasty, the crunch isn’t quite the same.
These tweaks let you personalize the pickles for different occasions or preferences. Personally, I love adding fresh dill for a summer BBQ, while the spicy version pairs perfectly with a juicy grilled picanha steak.
Serving & Storage Suggestions
Serve these crispy homemade bread and butter pickle chips chilled straight from the fridge for maximum crunch. They’re fantastic as a tangy side with sandwiches, burgers, or charcuterie boards. I particularly enjoy them alongside a smoky grilled chicken dish or layered on a fresh salad.
Store pickles in airtight glass jars in the refrigerator where they keep well for up to 4 weeks. Over time, the flavors deepen and the pickles soften slightly, which is great for recipes that benefit from a milder bite.
For reheating, if you want to warm them to infuse other dishes, do so gently on the stove or in the microwave for just a few seconds—too much heat will make them limp. But honestly, they taste best cold and crisp!
Nutritional Information & Benefits
These crispy homemade bread and butter pickle chips are low in calories, with about 15-20 calories per serving (about 1/4 cup or 30 g). They contain no fat and are naturally gluten-free, making them a great snack or condiment for various diets.
Vinegar, one key ingredient, has been known to support digestion and blood sugar regulation, and cucumbers provide hydration and small amounts of vitamins K and C. Using a moderate amount of sugar keeps the sweetness balanced without going overboard.
For those watching sodium intake, you can reduce salt slightly, but keep in mind that salt also helps maintain that signature crunch. Overall, these pickles offer a flavorful way to enjoy vegetables with minimal calories and plenty of zest.
Conclusion
Making crispy homemade bread and butter pickle chips is surprisingly simple, and once you try them, you’ll see why they become a staple in my kitchen. They bring that perfect sweet-and-tart crunch that brightens meals and snacks alike. The best part? You can tweak the recipe to suit your taste, whether you want them spicy, herby, or a little less sweet.
Honestly, there’s a quiet pride in knowing you made these pickles yourself, from the fresh cucumbers to the perfectly balanced brine. They’re a small touch that makes summer meals feel a little more special, and I hope they do the same for you. If you try this recipe, I’d love to hear how you put your own spin on it or what dishes you paired them with!
FAQs
- How long do bread and butter pickles last in the fridge?
They typically keep well for about 3 to 4 weeks when stored in airtight jars. - Can I use regular cucumbers instead of Kirby cucumbers?
Yes, but Kirby cucumbers tend to be firmer and hold their crunch better for pickling. - Do I have to refrigerate these pickles?
Yes, this recipe is for refrigerator pickles and should be kept cold for safety and freshness. - Can I make these pickles without sugar?
You can reduce or swap sugar with alternatives like honey, but it will change the flavor and texture slightly. - Why are my pickles not crispy?
Common causes include skipping the salting step, slicing cucumbers too thick, or storing them in too warm a spot. Salting and using firm cucumbers help keep them crunchy.
Pin This Recipe!
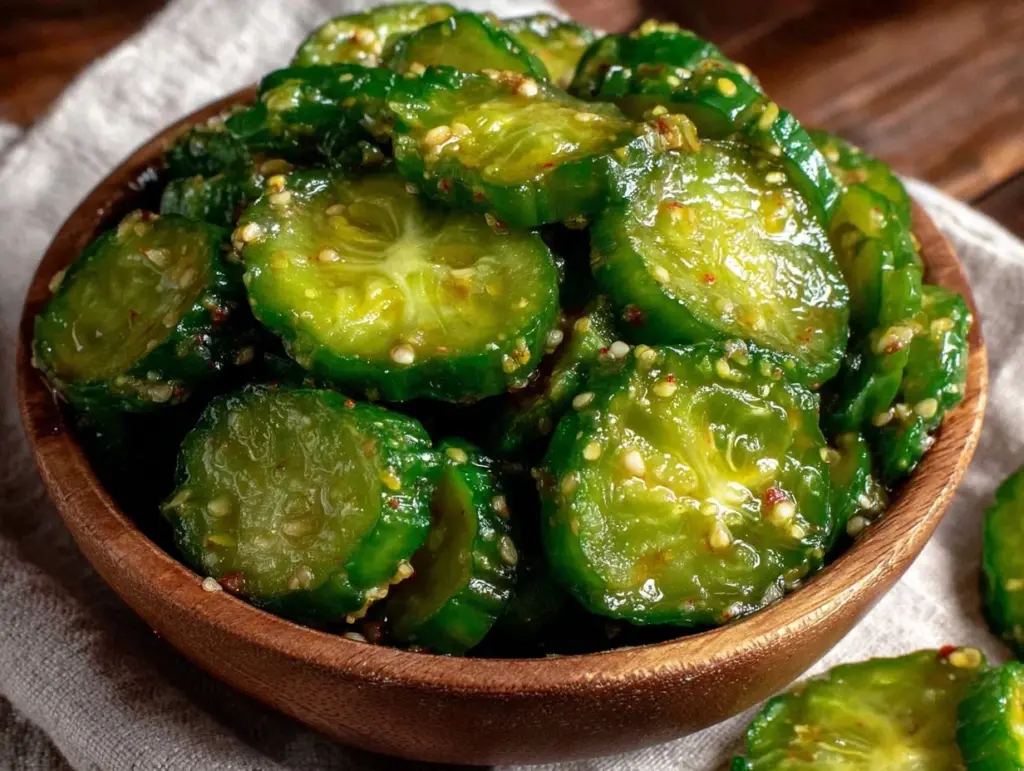
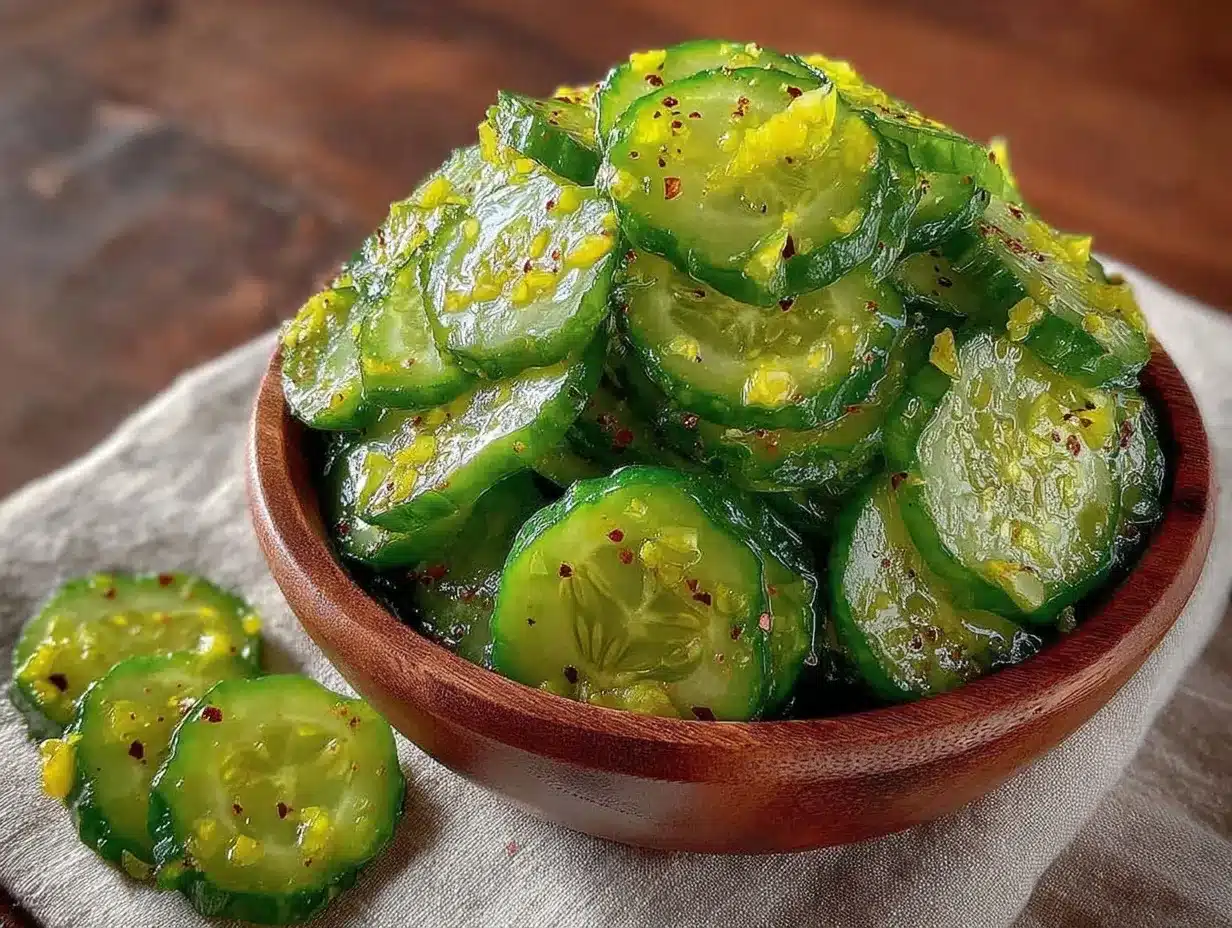
Crispy Homemade Bread and Butter Pickle Chips
These crispy homemade bread and butter pickle chips offer a perfect balance of sweet and tangy flavors with an irresistible crunch, ideal for summer meals and snacks.
- Prep Time: 10 minutes
- Cook Time: 10 minutes
- Total Time: 1 hour 40 minutes
- Yield: About 4 cups of pickle chips 1x
- Category: Condiment
- Cuisine: American
Ingredients
- 4 medium Kirby cucumbers, sliced into thin 1/8-inch (3 mm) chips
- 2 cups (16 fl oz) white distilled vinegar
- 1 cup (7 oz) granulated sugar
- 1 cup (8 fl oz) water
- 2 tablespoons (30 g) pickling or kosher salt
- 1 tablespoon mustard seeds
- 1 teaspoon celery seeds
- 1/2 teaspoon ground turmeric
- 1/4 teaspoon ground cloves
- 1 small onion, thinly sliced (optional)
Instructions
- Slice the cucumbers and onion into 1/8-inch (3 mm) thick rounds using a mandoline or sharp knife.
- Place cucumber and onion slices in a large bowl. Sprinkle with 2 tablespoons of pickling or kosher salt and toss gently. Let sit for 1 hour to draw out excess water.
- Drain and rinse the salted vegetables under cold water, then pat dry with paper towels.
- In a medium saucepan, combine 2 cups white distilled vinegar, 1 cup water, 1 cup granulated sugar, 1 tablespoon mustard seeds, 1 teaspoon celery seeds, 1/2 teaspoon ground turmeric, and 1/4 teaspoon ground cloves. Bring to a boil over medium heat, stirring occasionally until sugar dissolves. Reduce heat and simmer for 2 minutes.
- Tightly pack the salted, dried cucumber and onion slices into clean quart-sized mason jars.
- Pour the hot brine over the pickles, leaving about 1/2 inch headspace. Use a clean utensil to release any air bubbles. Seal jars with lids.
- Let jars cool at room temperature for about 30 minutes, then transfer to the refrigerator.
- Pickles are ready to enjoy after 24 hours but taste better after 3 days.
Notes
Salting the cucumbers and onions for 1 hour is crucial to draw out moisture and ensure crispness. Use uniform thin slices for even pickling. Cool jars before refrigerating to prevent condensation. For a spicy twist, add jalapeño slices or red pepper flakes. Store pickles in the coldest part of the fridge for best texture. Avoid iodized table salt to prevent cloudiness and bitterness.
Nutrition
- Serving Size: 1/4 cup (30 g)
- Calories: 15
- Sugar: 3.5
- Sodium: 600
- Carbohydrates: 4
Keywords: bread and butter pickles, homemade pickles, pickle chips, summer pickles, crispy pickles, easy pickles, refrigerator pickles


