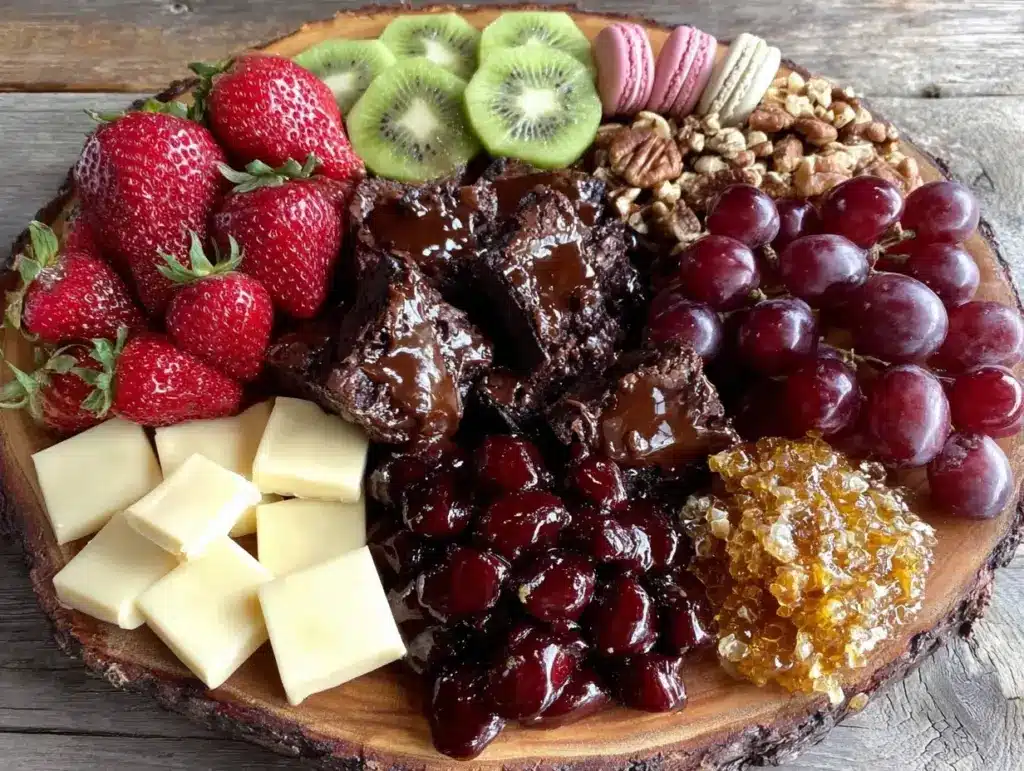
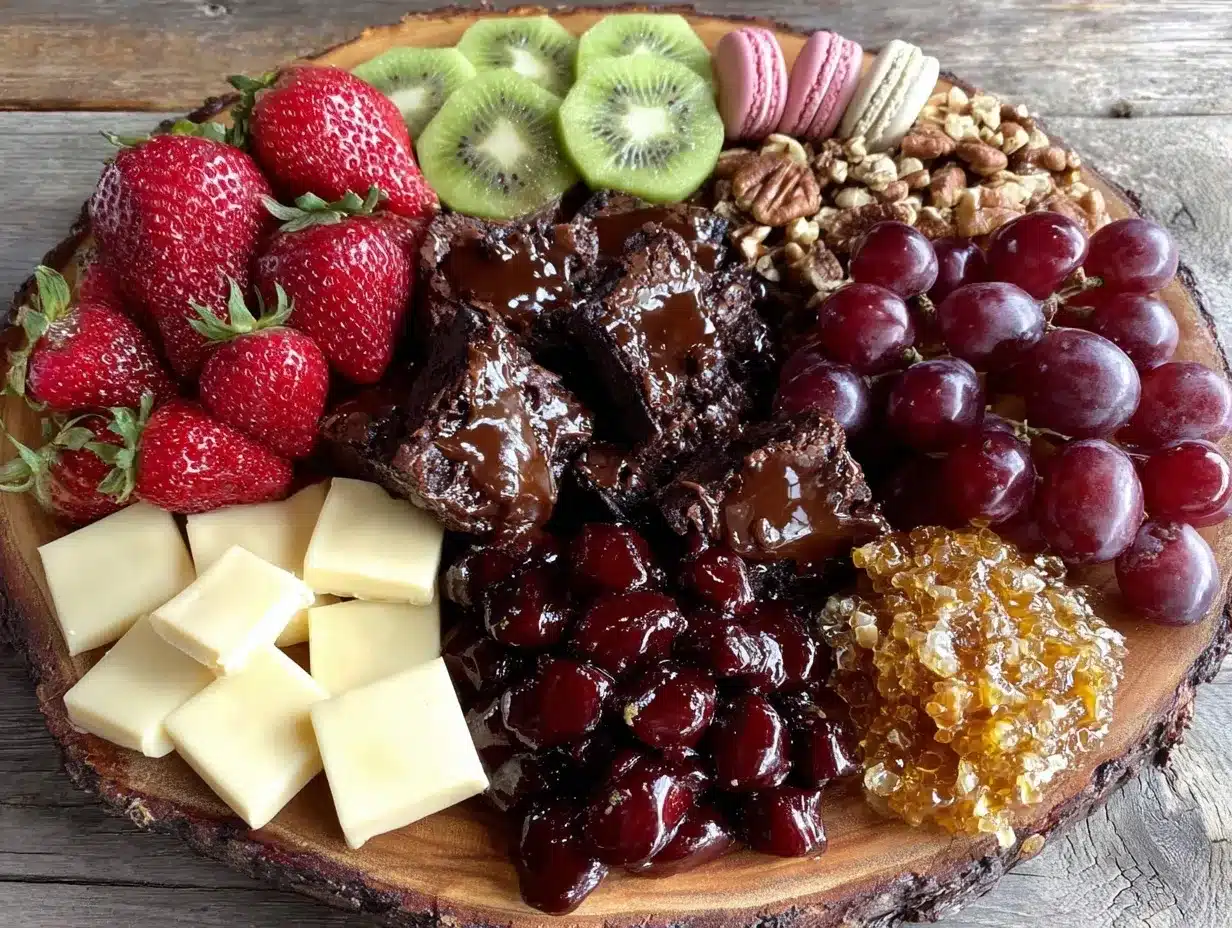
Let me tell you, the sight of a dessert charcuterie board laden with glossy chocolates, fresh berries, and golden cookies is enough to make anyone’s mouth water. The first time I put together my ultimate decadent dessert charcuterie board, I was instantly hooked—the kind of moment where you pause, take a deep breath, and just smile because you know you’re onto something truly special. Years ago, when I was knee-high to a grasshopper, my grandma used to spread out a simple plate of treats during holiday gatherings, but I never knew you could turn that into a full-on showstopper until I stumbled upon this idea on a rainy weekend.
Honestly, my family couldn’t stop sneaking bites off the board while I was still arranging it—and I can’t really blame them. This dessert charcuterie board is dangerously easy to customize and perfect for potlucks, birthday parties, or just a sweet treat for your kids after school. You know what? It’s the kind of dessert that brightens up your Pinterest cookie board and leaves everyone asking for more. After testing this recipe multiple times in the name of research, of course, it’s now a staple for family gatherings and gifting. It feels like a warm hug wrapped in chocolate and berries, and you’re going to want to bookmark this one.
Why You’ll Love This Recipe
From my kitchen to yours, this ultimate decadent dessert charcuterie board has been chef-tested, family-approved, and honestly, a crowd-pleaser every single time. Here’s why you’re going to love it:
- Quick & Easy: Comes together in under 30 minutes, perfect for busy weeknights or last-minute celebrations.
- Simple Ingredients: No fancy grocery trips needed; you likely already have everything in your pantry and fridge.
- Perfect for Every Occasion: Great for bridal showers, game nights, holiday gatherings, or cozy dinner parties.
- Crowd-Pleaser: Always gets rave reviews from kids and adults alike—there’s something for everyone.
- Unbelievably Delicious: The mix of textures and flavors—from silky caramel to crunchy nuts and fresh fruit—is pure, nostalgic comfort.
This isn’t just another dessert board. The secret is in the perfectly balanced selection—a little salt here, a touch of sweetness there, and a splash of tartness that keeps your taste buds dancing. Whether it’s the creamy ganache or the fresh mint sprigs, this board feels like a mini dessert buffet you can tailor to your mood or guest list. You’ll close your eyes after the first bite, trust me.
What Ingredients You Will Need
This ultimate decadent dessert charcuterie board uses simple, wholesome ingredients to deliver bold flavor and satisfying texture without the fuss. Most are pantry staples, with a few fresh items to brighten the presentation and taste.
- Chocolate & Sweets:
- Dark chocolate squares or chunks (preferably 70% cocoa for richness)
- Milk chocolate truffles (your favorite brand)
- Caramel sauce (store-bought or homemade)
- Mini marshmallows (adds a soft, sweet contrast)
- Fruits:
- Fresh strawberries, hulled and halved (adds vibrant color and tartness)
- Seedless grapes (red or green for variety)
- Raspberries or blueberries (seasonal; swap as preferred)
- Crunchy Elements:
- Assorted nuts like almonds and pecans (lightly toasted for extra flavor)
- Honey-roasted peanuts (for a sweet-salty punch)
- Gourmet cookies or biscotti (choose a mix of flavors and textures)
- Cheese & Creamy Treats:
- Mascarpone cheese or cream cheese (soft and spreadable, adds richness)
- Whipped cream or flavored yogurt (optional, for dipping)
- Extras & Garnishes:
- Fresh mint leaves (for aroma and a pop of green)
- Edible flowers (optional, for wow factor)
- Sprinkles or mini chocolate chips (for a playful touch)
For substitutions, you can swap nuts for seeds if allergies are a concern, or use dairy-free chocolate and cream cheese alternatives to make it vegan-friendly. I personally recommend brands like Lindt for chocolate and local bakery cookies for freshness. When berries aren’t in season, frozen (thawed) works fine—just pat them dry to avoid sogginess.
Equipment Needed
- Large wooden or slate serving board: This is your canvas; something with a rustic feel works beautifully.
- Small bowls or ramekins: To hold sauces, dips, and smaller items like nuts or marshmallows.
- Cheese knives and spreaders: For the creamy elements and cutting cookies or larger sweets.
- Tongs or small spoons: Helpful for guests to pick up items hygienically.
- Sharp paring knife: For slicing fruits and trimming garnishes.
If you don’t have a wooden board, a large platter or even a clean baking sheet lined with parchment paper can work. I’ve tried both, and while a wooden board looks prettier, the baking sheet is handy for easy cleanup. For budget-friendly options, thrift stores often have beautiful boards at a fraction of the cost, and they add a charming, well-loved vibe.
Preparation Method
- Gather and prep all your ingredients: Wash and dry fruits thoroughly. Hull and halve strawberries, slice any larger cookies or biscotti into bite-size pieces. Toast nuts lightly in a dry pan over medium heat for 3-5 minutes until fragrant, stirring frequently. (Watch closely to avoid burning!)
- Arrange the board’s base: Start by placing small bowls or ramekins around the board to hold caramel sauce and whipped cream. This prevents sogginess and keeps things tidy. (Tip: use contrasting colors to make the board pop visually.)
- Place the larger items first: Position chocolate chunks, truffles, and bigger cookies spaced evenly around the board. This creates a balanced look and gives structure to your design.
- Fill in with fruits and nuts: Scatter grapes, berries, and nuts in the gaps. Nestle strawberries near the cream cheese or mascarpone for easy dipping. (You want to create clusters of colors and textures.)
- Add creamy elements: Spoon dollops of mascarpone or cream cheese onto the board, or spread thinly on a few cookies for guests to try. Place a small spreader knife nearby.
- Garnish and finish: Tuck in fresh mint leaves and edible flowers around the edges and between items. Sprinkle mini chocolate chips or sprinkles over the whipped cream for extra fun.
- Final touch: Drizzle caramel sauce lightly over some cookies or directly onto the board for a luscious look. (You can always add more at the table.)
Overall, this method takes about 25-30 minutes, but it’s worth taking your time to get the layout just right. The visual appeal is as important as taste here. If you find one side looks a bit bare, add more nuts or berries to balance it out. You know you’re done when the board looks inviting and rich without feeling overcrowded.
Cooking Tips & Techniques
Crafting the ultimate decadent dessert charcuterie board is as much about the technique as it is the ingredients. Here are some tips I’ve learned through trial and error:
- Keep fruits fresh: Wash and dry berries thoroughly, then refrigerate until just before serving. Wet or mushy fruit can quickly ruin the board’s look and taste.
- Toast nuts evenly: Use medium heat and stir constantly. Burnt nuts can add bitterness, and under-toasted ones lose flavor.
- Balance flavors and textures: Mix sweet, salty, creamy, and crunchy elements for a board that never feels one-note. Honestly, that’s what keeps people coming back for more.
- Use small bowls for wet ingredients: This keeps the board neat and prevents spreading or sogginess, especially with sauces or whipped cream.
- Arrange for accessibility: Don’t cluster all one type of item in one spot. Spread them so guests can easily reach everything without crowding.
- Multitasking tip: Prep your ingredients while toasting nuts or washing fruit. It saves time and keeps things flowing.
One mistake I made early on was overcrowding the board, thinking more is better. It’s not! Negative space is your friend—it helps each item shine. Also, if you’re using soft cookies, add them last to avoid them getting soggy. And remember, a quick chill before serving can help keep everything fresh and firm, especially in warmer weather.
Variations & Adaptations
The beauty of this dessert charcuterie board is how easy it is to tweak for different tastes and dietary needs. Here are a few ideas I’ve personally tried and loved:
- Seasonal swaps: In the fall, switch berries for sliced apples, pears, or figs. Add a sprinkle of cinnamon to nuts for warmth.
- Diet-friendly: Use gluten-free cookies and dairy-free chocolate for gluten or lactose intolerance. Coconut yogurt instead of cream cheese works wonders for a vegan twist.
- International flair: Add biscotti dipped in espresso or mini churros with chocolate sauce. This adds a cultural spin that’s fun and unexpected.
For cooking methods, you can roast nuts with spices like smoked paprika for a savory-sweet combo, or melt chocolate and drizzle it over fruit for a decorative touch. When I tried a tropical version with mango slices, coconut flakes, and macadamia nuts, it was a hit at summer parties! Feel free to customize the board with flavors you love—you can’t really go wrong here.
Serving & Storage Suggestions
Serve your dessert charcuterie board at room temperature for the best flavor and texture. If you refrigerated it, take it out 15 minutes before serving so the chocolate isn’t too hard and the mascarpone softens slightly. Presentation-wise, a rustic wooden board or a marble slab adds an elegant touch.
Complement the board with a pot of coffee, a glass of dessert wine, or a simple sparkling water with lemon slices to keep the palate refreshed. This board pairs beautifully with casual gatherings or special occasions alike.
Store leftovers (if there are any!) in an airtight container in the fridge for up to 2 days. Keep wet and dry ingredients separate to avoid sogginess. To reheat, gently warm any chocolate-covered treats or cookies in a 300°F (150°C) oven for 3-5 minutes—watch closely so they don’t burn. Flavors actually deepen over time, so sometimes preparing the board a few hours ahead (covered tightly) can let the tastes meld beautifully.
Nutritional Information & Benefits
While this ultimate decadent dessert charcuterie board is a treat, it also offers some nutritional perks when balanced right. Per serving (estimated 1/6th of the board), you get approximately:
| Calories | 350-400 kcal |
|---|---|
| Protein | 5-7 g |
| Fat | 22-25 g (mostly from nuts and chocolate) |
| Carbohydrates | 30-35 g (from fruits, cookies, and sweet sauces) |
Key health benefits come from the antioxidant-rich dark chocolate and fresh berries loaded with vitamins. Nuts provide heart-healthy fats and protein, making this dessert a bit more satisfying and less of a sugar rush. Keep in mind, this recipe contains common allergens like nuts and dairy—substitutions can be made for sensitive guests.
From a wellness perspective, indulging in a thoughtfully prepared dessert like this feels less guilty when you know fresh fruit and wholesome nuts are part of the mix. Plus, sharing this board brings joy and connection—sometimes that’s the best kind of nourishment.
Conclusion
So there you have it—the ultimate decadent dessert charcuterie board that’s as impressive as it is delicious. Whether you stick to the classic ingredients or make it your own with seasonal twists, this recipe is worth trying over and over. Honestly, I love how it brings people together, sparks conversation, and lets you flex your creativity without stress.
Feel free to customize the board based on your favorites or what you have on hand. I’d love to hear how you make it your own, so drop a comment or share your photos. Trust me, once you get the hang of this, it’s your go-to for every occasion. So grab your board, gather your goodies, and get ready to impress with a dessert that tastes as good as it looks!
FAQs
What types of chocolate work best on a dessert charcuterie board?
Dark chocolate with at least 70% cocoa offers rich flavor and pairs well with fruits and nuts. Milk chocolate adds creaminess and sweetness. Choose a mix for variety, and consider including truffles or chocolate-covered nuts for texture.
Can I prepare the dessert charcuterie board in advance?
Yes! Prepare and assemble most components a few hours ahead, then cover tightly and refrigerate. Add fresh fruits and delicate garnishes just before serving for best freshness.
What are some good alternatives if I have nut allergies?
Replace nuts with seeds like pumpkin or sunflower seeds, or add extra crunchy cookies and dried fruits. Just be mindful of cross-contamination if serving guests with allergies.
How do I keep berries from getting soggy on the board?
Wash berries just before assembling and dry them very well with paper towels. Avoid cutting berries too far ahead to preserve texture.
What drinks pair well with a dessert charcuterie board?
Try coffee, dessert wines like Moscato or Port, sparkling water with a twist of lemon, or a light bubbly cocktail. These complement the sweetness without overwhelming the palate.
Pin This Recipe!
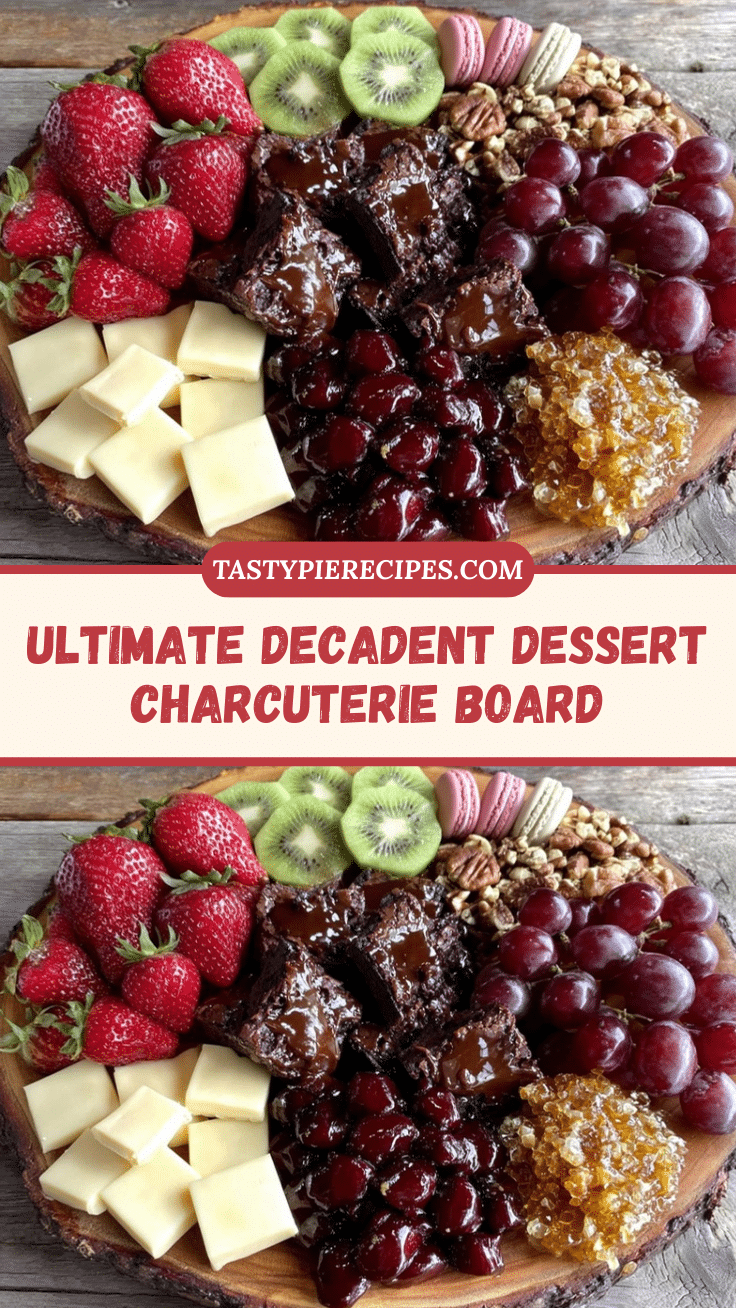
Ultimate Decadent Dessert Charcuterie Board

A customizable and crowd-pleasing dessert charcuterie board featuring a balanced selection of chocolates, fresh berries, nuts, cookies, and creamy treats, perfect for any occasion.
- Prep Time: 15 minutes
- Cook Time: 5 minutes
- Total Time: 20 minutes
- Yield: 6 servings
- Category: Dessert
- Cuisine: American
Ingredients
- Dark chocolate squares or chunks (preferably 70% cocoa for richness)
- Milk chocolate truffles (your favorite brand)
- Caramel sauce (store-bought or homemade)
- Mini marshmallows
- Fresh strawberries, hulled and halved
- Seedless grapes (red or green)
- Raspberries or blueberries (seasonal; swap as preferred)
- Assorted nuts like almonds and pecans (lightly toasted)
- Honey-roasted peanuts
- Gourmet cookies or biscotti (mixed flavors and textures)
- Mascarpone cheese or cream cheese
- Whipped cream or flavored yogurt (optional)
- Fresh mint leaves
- Edible flowers (optional)
- Sprinkles or mini chocolate chips
Instructions
- Wash and dry fruits thoroughly. Hull and halve strawberries. Slice larger cookies or biscotti into bite-size pieces.
- Toast nuts lightly in a dry pan over medium heat for 3-5 minutes, stirring frequently to avoid burning.
- Place small bowls or ramekins around the board to hold caramel sauce and whipped cream to prevent sogginess.
- Position chocolate chunks, truffles, and bigger cookies spaced evenly around the board for balance.
- Scatter grapes, berries, and nuts in the gaps, nestling strawberries near the cream cheese or mascarpone for easy dipping.
- Spoon dollops of mascarpone or cream cheese onto the board or spread thinly on a few cookies. Place a small spreader knife nearby.
- Tuck fresh mint leaves and edible flowers around the edges and between items. Sprinkle mini chocolate chips or sprinkles over whipped cream.
- Drizzle caramel sauce lightly over some cookies or directly onto the board for a luscious look.
Notes
Keep fruits fresh by washing and drying thoroughly and refrigerate until just before serving. Toast nuts evenly over medium heat to avoid bitterness. Use small bowls for wet ingredients to prevent sogginess. Arrange items with negative space to avoid overcrowding. Add soft cookies last to keep them from getting soggy. Chill the board briefly before serving in warm weather. Store leftovers in airtight container for up to 2 days, keeping wet and dry ingredients separate.
Nutrition
- Serving Size: Approximately 1/6th
- Calories: 350400
- Sugar: 1520
- Sodium: 100150
- Fat: 2225
- Saturated Fat: 810
- Carbohydrates: 3035
- Fiber: 35
- Protein: 57
Keywords: dessert charcuterie board, chocolate, berries, nuts, easy dessert, party dessert, crowd-pleaser, sweet treat


