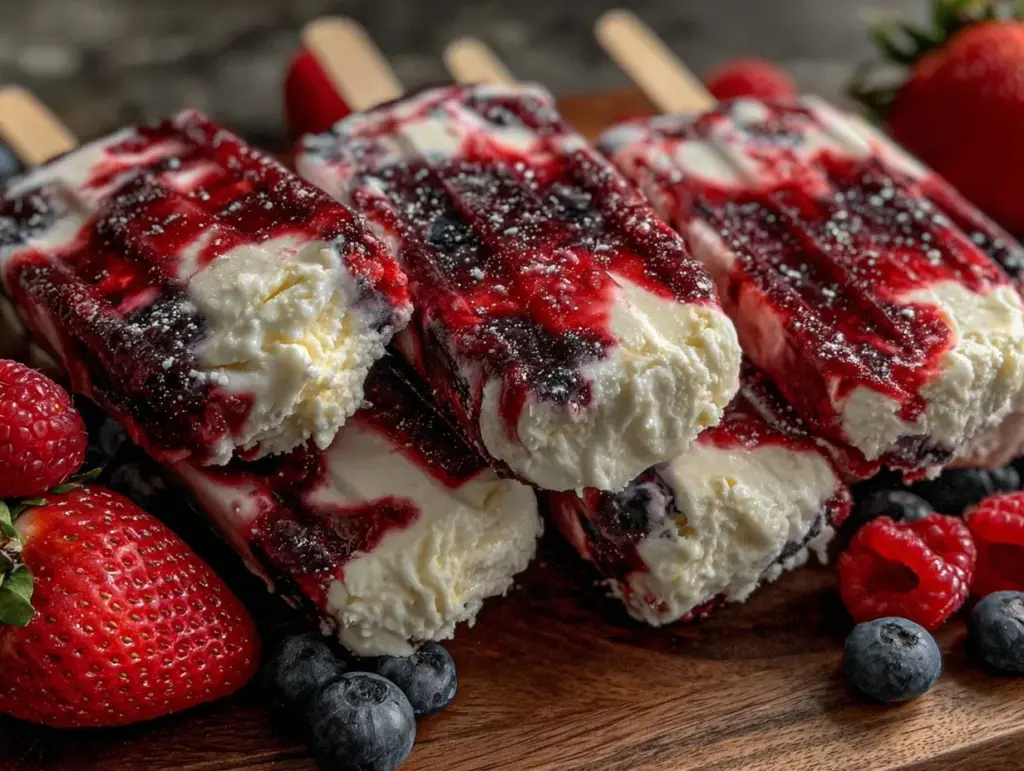
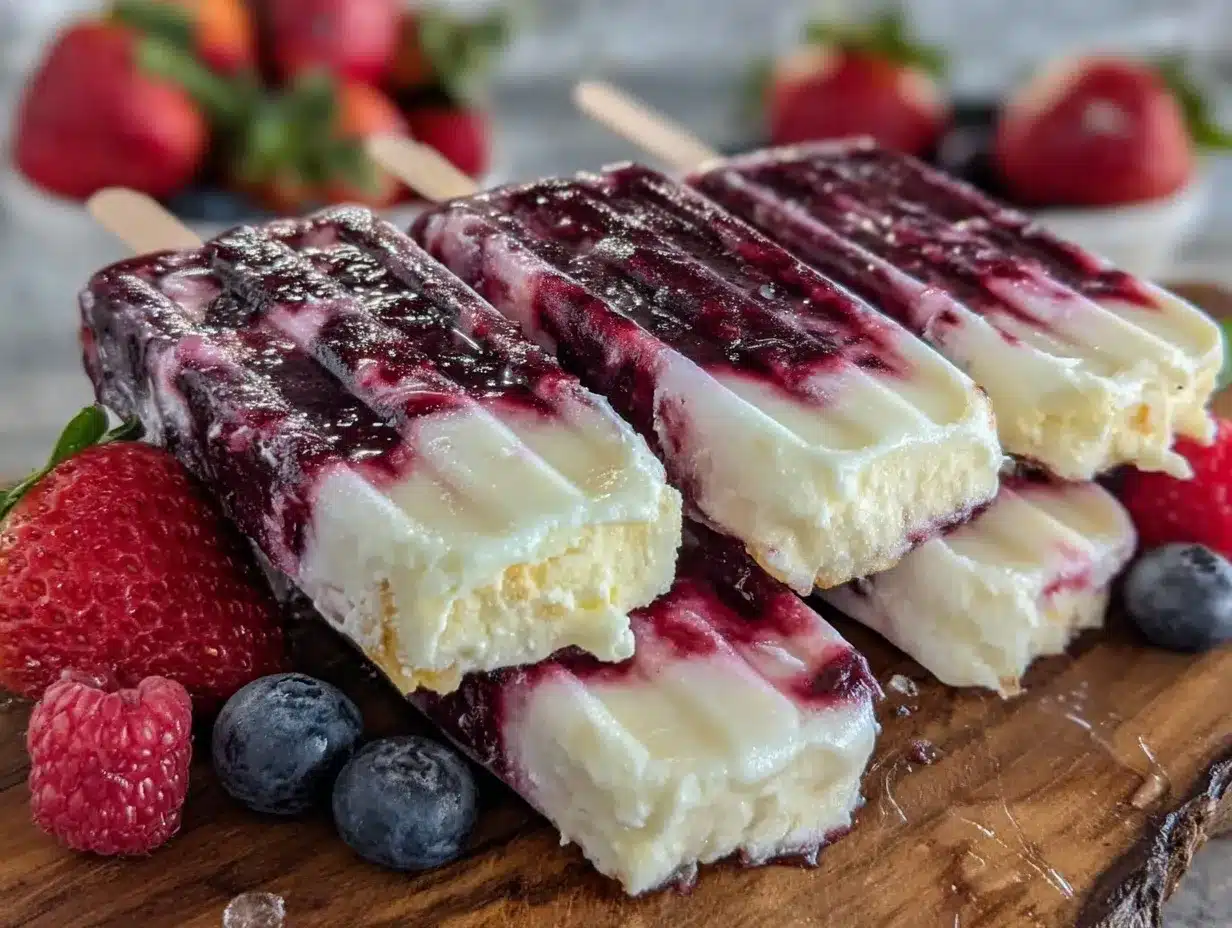
“Hey, you’ve got to try these popsicles I whipped up for the backyard barbecue,” my neighbor called out last summer, waving a frosty red-white-and-blue treat. Honestly, I was skeptical at first—layered cream popsicles? Would they even taste good or just look pretty? But by the third bite, I was hooked. The creamy layers, bright berry flavors, and that cool, refreshing feel were just the right fix for a scorching afternoon. It wasn’t a fancy recipe or some complicated dessert; this was born from a spur-of-the-moment idea when I realized I had a few leftover berries and some cream in the fridge.
It kind of became my go-to summer snack that week, showing up at every picnic and pool day. What stuck with me was how simple it was to make something that looked so festive but didn’t taste like a sugar bomb or an artificial snack. The fresh strawberries, creamy yogurt, and blueberry layer all came together like a little edible flag on a stick—perfect for that Fourth of July vibe without any fuss. Somehow, making these popsicles felt like a small, personal celebration every time I pulled one from the freezer.
What’s funny is how this recipe became a quiet little tradition for me, especially after a long day. Just sitting on the porch with one of these in hand always felt like a tiny victory, a reminder that simple pleasures can be bold and bright. I think that’s why this recipe stuck—it’s not just about the red, white, and blue. It’s about finding joy in the small moments, with a little cream and fresh fruit to sweeten the deal.
Why You’ll Love This Fresh Red White and Blue Layered Cream Popsicles Recipe
Honestly, these layered cream popsicles have been tested over and over in my kitchen, and every batch just nails that balance of flavor and texture. I’ve tweaked the layers a bit here and there, but this recipe hits the sweet spot—literally and figuratively. Here’s why I keep coming back to it:
- Quick & Easy: You can have these ready in under 30 minutes, plus freezing time, which makes them perfect for last-minute summer treats or patriotic parties.
- Simple Ingredients: No exotic stuff here—just fresh fruit, cream, yogurt, and a touch of honey. Chances are, you already have everything in your kitchen pantry or fridge.
- Perfect for Summer Occasions: These popsicles are a hit at everything from backyard barbecues to casual picnics, even casual poolside hangouts.
- Crowd-Pleaser: Kids love them for their fun colors, and adults appreciate the fresh, creamy flavors without overwhelming sweetness.
- Unbelievably Delicious: That creamy white layer isn’t just plain yogurt—it’s whipped with a bit of honey for a silky, smooth texture that softens the tang of the berries.
- Unique Layering Technique: The secret is letting each layer freeze just enough before adding the next, so you get those clean, vibrant stripes and every bite has a bit of everything.
This recipe isn’t your average popsicle. It’s a little celebration of fresh flavors, creaminess, and patriotism all rolled into one. And I’ve found it pairs wonderfully with lighter summer meals—kind of like how fresh tomato basil bruschetta brings brightness to a table. That combo of fresh and creamy is just unbeatable.
What Ingredients You Will Need
This recipe uses simple, wholesome ingredients to deliver bold flavor and satisfying texture without the fuss. Most of these are pantry or fridge staples, with fresh fruit bringing the star power. Here’s what you’ll gather before starting:
- Strawberries, fresh and hulled (about 1 cup) – for that vibrant red layer. If fresh aren’t available, frozen work fine too, just thaw and drain well.
- Blueberries, fresh or frozen (about 1 cup) – adds the deep blue color and natural sweetness.
- Plain Greek yogurt (1 cup) – thick and creamy, this is the base for the white layer. I prefer brands like Fage or Chobani for texture.
- Heavy cream (1 cup) – whipped lightly to add richness and smoothness to the white layer.
- Honey (3 tbsp) – a natural sweetener to balance tartness without overpowering.
- Lemon juice (1 tsp) – brightens the berry layers and balances sweetness.
- Vanilla extract (1 tsp) – adds a subtle warmth to the creamy layer.
If you want to keep things dairy-free, swap the heavy cream for coconut cream and use a plant-based yogurt. For a little twist, adding a pinch of cinnamon to the strawberry layer can bring some unexpected warmth to the flavor profile. Over the years, I’ve found that using fresh, ripe berries makes a huge difference — and if you’re in the mood for a slightly tart kick, a splash of lime juice instead of lemon is excellent. These popsicles are a great way to enjoy seasonal fruit, and in summer, fresh berries really shine.
Equipment Needed
Luckily, this recipe doesn’t demand fancy tools, which is part of the charm. Here’s what you’ll want on hand:
- Popsicle molds – any shape works, but I like the classic rectangular silicone molds because they’re easy to pop out.
- Mixing bowls – at least three, one for each layer.
- Whisk or electric mixer – to whip the cream just right for that fluffy white layer.
- Measuring cups and spoons – for precise ingredient amounts.
- Blender or food processor – for pureeing the berries smoothly.
- Spoons or small spatulas – for layering the mixtures into the molds.
If you don’t have popsicle molds, small paper cups with wooden sticks work well as a budget-friendly alternative. I’ve used them plenty when hosting unexpected guests, and they still come out great. Just be sure to cover the top of the cups with foil and poke the sticks through to keep them upright in the freezer. Keeping your popsicle molds clean and dry between uses is key — a quick rinse and dry after every batch will keep them from retaining odors or stains.
Preparation Method
- Prepare the strawberry layer: Rinse and hull 1 cup of fresh strawberries. Puree them in a blender with 1 teaspoon of lemon juice and 1 tablespoon of honey until smooth. Pour this mixture into a bowl and set aside.
- Prepare the blueberry layer: Repeat the same process with 1 cup of blueberries, lemon juice, and honey. Blend until smooth and pour into a separate bowl.
- Make the creamy white layer: In a mixing bowl, whip 1 cup of heavy cream until soft peaks form (about 2-3 minutes with an electric mixer). In another bowl, mix the plain Greek yogurt with 1 teaspoon of vanilla extract and 2 tablespoons of honey. Gently fold the whipped cream into the yogurt mixture until well combined but still light and airy.
- Assemble the popsicles – red layer: Spoon a few tablespoons of the strawberry puree into the bottom of each popsicle mold. Tap the mold gently on the counter to remove air bubbles. Freeze for about 30-40 minutes, until the layer is firm but not rock solid.
- White layer: Add a spoonful of the creamy yogurt mixture over the strawberry layer. Smooth it gently with the back of a spoon. Freeze again for another 30-40 minutes.
- Blue layer: Finally, spoon in the blueberry puree as the top layer. Insert popsicle sticks carefully into the center of each mold. Freeze for at least 4 hours or overnight until fully solid.
- Unmold and serve: To release the popsicles, briefly run warm water over the outside of the molds for 10-15 seconds. Pull gently on the sticks and enjoy the creamy, fruity layers all in one bite.
Pro tip: Timing is everything here. If you rush the freezing between layers, they may mix and lose those beautiful stripes. But if you wait too long, adding the next layer can cause cracking. I’ve found that the 30-40 minute window nails it almost every time. Also, if you don’t have time for all the layers, you can make a simplified version with just strawberry and cream — it’s still pretty amazing.
Cooking Tips & Techniques
When making these layered popsicles, a few tricks learned from trial and error can make the difference between a good treat and an unforgettable one.
- Puree consistency matters: Too thick and the berry layers won’t spread smoothly; too thin and the colors bleed together. Aim for a slightly thick but pourable texture.
- Whip the cream just right: Over-whipped cream can turn grainy, and under-whipped leaves the white layer too runny. Soft peaks are your sweet spot, giving a luscious mouthfeel without collapsing.
- Layer freezing timing: Let each layer freeze just enough to set on top but remain slightly tacky so the next layer sticks well. This prevents cracking or peeling.
- Use a small spatula or spoon for layering: Gently smooth each layer to avoid mixing colors, but don’t overwork it.
- Temperature control: Keep your berries chilled before pureeing to preserve vibrant colors and fresh flavor.
From my experience, rushing or skipping steps usually leads to a messy swirl instead of neat stripes. These popsicles also handle best when kept in airtight containers or wrapped well to avoid freezer burn and odor absorption. If you want to multitask, while the layers freeze, you can prep toppings or other dish components for a full summer spread like these savory bacon jam sliders which pair surprisingly well with fresh, fruity desserts.
Variations & Adaptations
These popsicles are incredibly versatile, and I love mixing things up depending on the season or mood. Here are some of my favorite variations:
- Dairy-Free Version: Swap Greek yogurt for coconut yogurt and heavy cream for coconut cream. The tropical notes complement the berries beautifully.
- Mint-Infused Layers: Add a handful of fresh mint leaves to the berry purees before blending for a refreshing twist.
- Chocolate Drizzle: Once unmolded, drizzle melted dark chocolate over the popsicles for a decadent touch.
- Seasonal Fruit Swap: In fall, try layering pureed peaches, vanilla cream, and blackberries for a cozy alternative.
- Sweetener Alternatives: Use maple syrup or agave instead of honey for different sweetness profiles suitable for vegan diets.
One personal favorite is adding a little fresh basil to the strawberry layer — it sounds unusual, but it brings a subtle herbaceous note that’s surprisingly addictive. For a kid-friendly variation, you can swap the yogurt layer for vanilla pudding, making it ultra-creamy and sweet.
Serving & Storage Suggestions
These popsicles are best enjoyed straight from the freezer — cold, creamy, and refreshing. Serve them as a fun finale to a summer meal or as a cooling snack on a hot afternoon. They look fantastic lined up on a platter, adding a festive touch to any gathering.
Pair these treats with light dishes like fresh salads or grilled chicken. If you want a full dessert spread, they complement fruity waffles or even a crispy Belgian waffle topped with whipped cream.
Store popsicles in an airtight container or keep them inside the molds covered tightly with plastic wrap to prevent freezer burn. For longer storage, they hold well up to 2 weeks. When reheating, just run warm water over the molds briefly to loosen them instead of leaving popsicles out at room temperature to avoid melting.
One cool thing is that the flavors mellow and blend just a bit if you let them sit a day or two frozen, giving a subtle softness to the sharp berry notes. So if you’re prepping ahead for a party, that can actually improve the taste rather than detract.
Nutritional Information & Benefits
These popsicles offer a refreshing treat with some nutritional perks thanks to their fresh ingredients.
| Serving Size | 1 popsicle (approx. 100g) |
|---|---|
| Calories | 110 kcal |
| Protein | 4 g |
| Fat | 5 g |
| Carbohydrates | 14 g |
| Sugar | 11 g (natural and added) |
Greek yogurt brings protein and probiotics, while berries are rich in antioxidants and vitamin C. The heavy cream adds a creamy indulgence but can be swapped for lighter options if you prefer. These popsicles are naturally gluten-free and can be made vegan with ingredient swaps.
For those watching sugar intake, reducing honey or using a sugar substitute works well, though it may affect texture slightly. Personally, I appreciate how this recipe balances indulgence with fresh fruit nutrition, making it a treat that feels a bit more wholesome than the average popsicle.
Conclusion
These Fresh Red White and Blue Layered Cream Popsicles are a simple way to celebrate summer with a sweet, creamy, and fruity treat that feels homemade and special. Whether you’re planning a holiday cookout or just craving something cool and colorful, this recipe delivers on both flavor and fun. I’ve loved how easy they are to make, how flexible the layers can be, and how they bring a little festive joy without complicated steps.
Make it your own by swapping in favorite fruits or sweeteners, and don’t be shy about trying the different variations. Honestly, it’s a recipe that invites a bit of creativity along with a lot of smiles. If you enjoy playful desserts, you might also like my quick cheesy mug pizza for a savory snack or the crispy air fryer avocado fries for something crunchy and zesty on the side.
Give these popsicles a try and share your favorite tweaks or flavor combos — I’m always curious how others put their spin on this fresh, creamy classic. Happy summer snacking!
Frequently Asked Questions
Can I make these popsicles without heavy cream?
Yes! You can substitute heavy cream with full-fat coconut cream or even use extra Greek yogurt for a lighter option. Just note the texture may be less rich but still creamy and delicious.
How long do these popsicles take to freeze completely?
Each layer needs about 30-40 minutes to set before adding the next, and the final freezing step should be at least 4 hours or overnight for best results.
Can I prepare these popsicles ahead of time for a party?
Absolutely. You can make them a day or two in advance and keep them stored in an airtight container in the freezer. The flavors actually mellow nicely with a bit of resting time.
What if I don’t have popsicle molds?
No worries! Small paper cups or silicone muffin cups with wooden sticks work well too. Just cover with foil and poke the sticks through to keep them upright during freezing.
Are these popsicles suitable for kids?
Yes, definitely. They’re naturally sweetened with honey and fruit, and the creamy texture tends to be a hit with kids. Just be sure to supervise younger children when eating popsicles to avoid choking hazards.
Pin This Recipe!
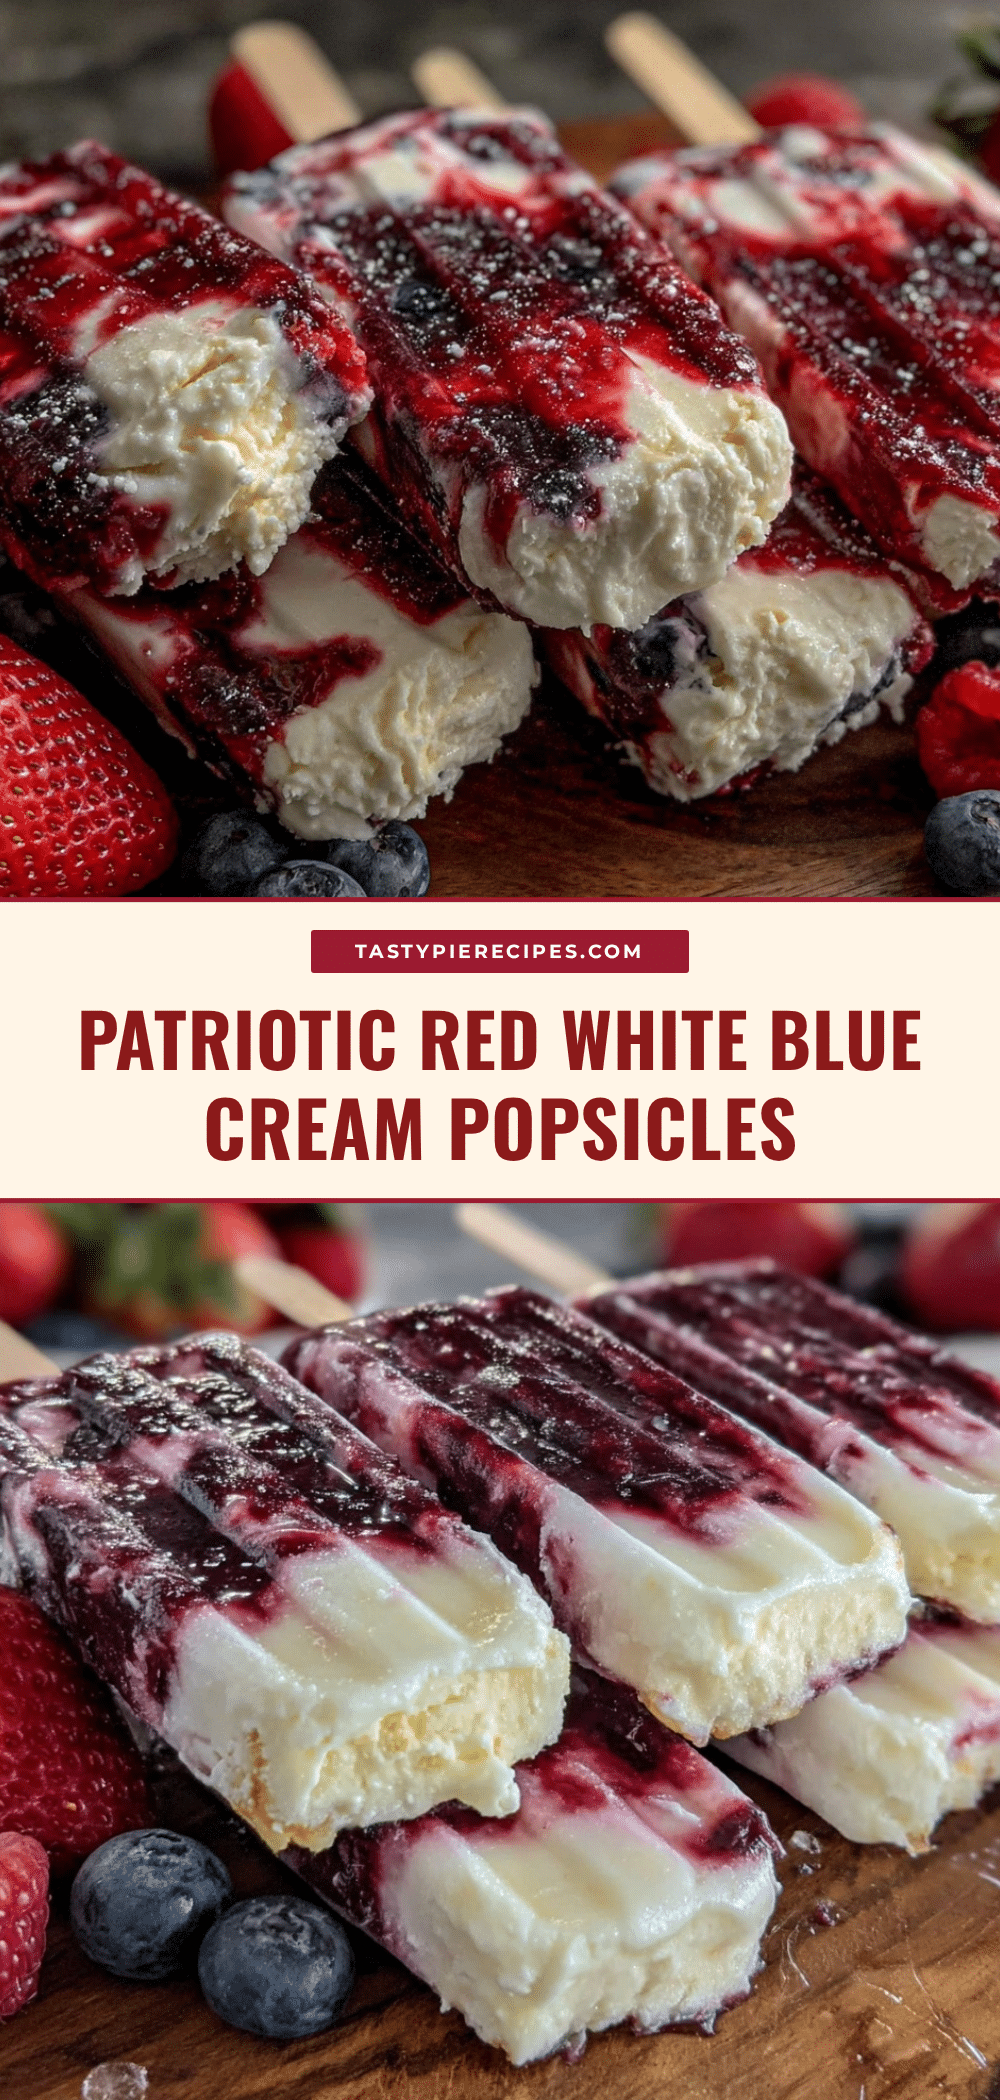
Fresh Red White and Blue Layered Cream Popsicles

A simple and festive layered cream popsicle recipe featuring fresh strawberries, blueberries, and a creamy yogurt layer, perfect for summer treats and patriotic celebrations.
- Prep Time: 15 minutes
- Cook Time: 5 hours
- Total Time: 5 hours 15 minutes
- Yield: 8 popsicles 1x
- Category: Dessert
- Cuisine: American
Ingredients
- 1 cup fresh strawberries, hulled (or thawed frozen strawberries)
- 1 cup fresh or frozen blueberries
- 1 cup plain Greek yogurt
- 1 cup heavy cream
- 3 tablespoons honey
- 1 teaspoon lemon juice
- 1 teaspoon vanilla extract
Instructions
- Prepare the strawberry layer: Rinse and hull 1 cup of fresh strawberries. Puree them in a blender with 1 teaspoon of lemon juice and 1 tablespoon of honey until smooth. Pour this mixture into a bowl and set aside.
- Prepare the blueberry layer: Repeat the same process with 1 cup of blueberries, lemon juice, and honey. Blend until smooth and pour into a separate bowl.
- Make the creamy white layer: In a mixing bowl, whip 1 cup of heavy cream until soft peaks form (about 2-3 minutes with an electric mixer). In another bowl, mix the plain Greek yogurt with 1 teaspoon of vanilla extract and 2 tablespoons of honey. Gently fold the whipped cream into the yogurt mixture until well combined but still light and airy.
- Assemble the popsicles – red layer: Spoon a few tablespoons of the strawberry puree into the bottom of each popsicle mold. Tap the mold gently on the counter to remove air bubbles. Freeze for about 30-40 minutes, until the layer is firm but not rock solid.
- White layer: Add a spoonful of the creamy yogurt mixture over the strawberry layer. Smooth it gently with the back of a spoon. Freeze again for another 30-40 minutes.
- Blue layer: Finally, spoon in the blueberry puree as the top layer. Insert popsicle sticks carefully into the center of each mold. Freeze for at least 4 hours or overnight until fully solid.
- Unmold and serve: To release the popsicles, briefly run warm water over the outside of the molds for 10-15 seconds. Pull gently on the sticks and enjoy the creamy, fruity layers all in one bite.
Notes
Let each layer freeze for 30-40 minutes until firm but not rock solid before adding the next layer to achieve clean stripes. Use a small spatula or spoon to smooth layers gently. If you don’t have popsicle molds, small paper cups with wooden sticks work well. Store popsicles in airtight containers or covered molds to prevent freezer burn. Variations include dairy-free swaps, mint-infused layers, chocolate drizzle, and seasonal fruit substitutions.
Nutrition
- Serving Size: 1 popsicle (approx.
- Calories: 110
- Sugar: 11
- Sodium: 40
- Fat: 5
- Saturated Fat: 3
- Carbohydrates: 14
- Fiber: 2
- Protein: 4
Keywords: popsicles, layered popsicles, summer treats, patriotic dessert, red white and blue, creamy popsicles, fresh fruit popsicles


