
Introduction
“Are you sure you want to make these at home?” my friend asked with a mix of skepticism and curiosity when I first mentioned my plan to bake authentic Portuguese Pastel de Nata. Honestly, I wasn’t sure myself. The idea of nailing those perfectly flaky shells with that creamy, caramelized custard inside felt like chasing a pastry myth. But then, one rainy afternoon, with nothing but a stubborn craving and a half-empty fridge, I took a chance. The kitchen filled with the warm scent of caramelizing sugar and vanilla, and I watched the little tarts puff up, golden and crackling. That first bite? A quiet moment of surprise, the kind that makes you close your eyes just a little to soak it all in. Since then, I’ve made these flaky homemade Pastel de Nata Portuguese custard tarts so many times that I can almost hear the gentle crackle of the pastry before the first taste. It’s not just a recipe anymore—it’s this cozy ritual that turns any ordinary day into a small celebration, no matter how hectic life gets.
Why You’ll Love This Recipe
After making these flaky homemade Pastel de Nata Portuguese custard tarts a handful of times, I can say with some confidence they’re worth every minute in the kitchen. Here’s what makes this recipe stand out:
- Quick & Easy: You can whip up the custard and prep the pastry in about 45 minutes, perfect for a spontaneous treat or a last-minute dessert.
- Simple Ingredients: No need for fancy or hard-to-find items—just pantry staples and a few fresh basics.
- Perfect for Any Occasion: Whether it’s a casual brunch, a coffee date, or an impressive finish to dinner, these tarts fit right in.
- Crowd-Pleaser: Friends and family always ask for the recipe, and kids love the creamy sweetness paired with that irresistible crunch.
- Unbelievably Delicious: The contrast of flaky, buttery pastry with smooth, slightly caramelized custard is pure magic on the palate.
This recipe isn’t just another custard tart—it’s my best version because of the flaky puff pastry technique I picked up after a few trial runs, and the custard’s gentle balance of cinnamon and lemon zest that gives it just the right hint of warmth without overpowering the creamy base. It’s the kind of recipe that makes you pause for a moment, savoring the layers of texture and flavor that feel both traditional and refreshingly homemade. You know, it’s the kind of dessert that invites you back to the kitchen again and again.
What Ingredients You Will Need
This recipe uses simple, wholesome ingredients to deliver bold flavor and that satisfyingly flaky texture without fussing over specialty items. Most are pantry staples, and substitutions are easy if needed.
- For the Pastry:
- 1 sheet of store-bought puff pastry (about 8 oz/225 g), thawed (I recommend Pepperidge Farm for consistent flakiness)
- Flour for dusting (all-purpose or gluten-free if needed)
- For the Custard Filling:
- 1 cup (240 ml) whole milk
- 1/2 cup (100 g) granulated sugar
- 3 tablespoons (24 g) all-purpose flour
- 3 large egg yolks, room temperature
- 1 teaspoon pure vanilla extract
- Zest of 1 lemon (adds a subtle brightness)
- A pinch of ground cinnamon (optional but traditional)
If you want to make your own puff pastry, that’s a whole other adventure, but using a quality store-bought sheet gets you those signature layers with way less stress. For a dairy-free version, swap whole milk for unsweetened almond or oat milk, and keep in mind the custard texture will be slightly different. Also, if you can’t find fresh lemons, a few drops of lemon extract work in a pinch. Just try to avoid skipping the citrus altogether; it’s what gives the custard its lively edge.
Equipment Needed

- Standard muffin tin or tartlet pans (12-cup size works best)
- Mixing bowls (medium and small)
- Whisk and wooden spoon
- Small saucepan for heating milk and sugar mixture
- Fine mesh sieve (optional, for straining custard)
- Rolling pin and pastry brush (if rolling out puff pastry)
- Measuring cups and spoons
If you don’t have a tartlet pan, regular muffin tins do the trick just fine. I’ve also made these tarts in mini silicone molds when short on metal pans, but the crust crispness is best with metal. A fine mesh sieve helps smooth the custard filling by removing any lumps, but honestly, I’ve skipped it when I was in a rush and the tarts still turned out fantastic. For puff pastry maintenance, keep it well chilled until just before use—that’s the secret to the perfect flaky layers.
Preparation Method
- Prepare the puff pastry: Lightly flour your work surface and roll out the thawed puff pastry sheet into a rectangle roughly 12 x 10 inches (30 x 25 cm). Roll it evenly but don’t overwork it; you want to keep those delicate layers intact. Cut the pastry into 12 equal squares, just big enough to fit into your muffin tin cups.
- Line the muffin tin: Gently press each puff pastry square into the muffin cup, making sure it fits snugly and comes up the sides. If it resists, let it rest for a couple of minutes and try again—puff pastry can be temperamental! Place the tin in the fridge while you make the custard.
- Make the custard filling: In a small bowl, whisk the flour with about ¼ cup (60 ml) of the milk until smooth. In a saucepan, combine the remaining milk and sugar. Warm over medium heat until sugar dissolves and the mixture is hot but not boiling (about 5 minutes). Slowly whisk the milk-flour mixture into the hot milk, stirring constantly until it thickens slightly (around 2-3 minutes).
- Temper the egg yolks: In a separate bowl, whisk the egg yolks lightly. Gradually add a few spoonfuls of the warm milk mixture to the yolks while whisking to prevent scrambling. Then, pour the yolk mixture back into the saucepan. Continue cooking over low heat, stirring constantly, until the custard thickens enough to coat the back of a spoon (about 3-4 minutes). Remove from heat.
- Flavor the custard: Stir in the vanilla extract, lemon zest, and a pinch of cinnamon. Taste carefully—the lemon zest should brighten the custard without overpowering. Let the filling cool slightly.
- Fill the pastry shells: Take the muffin tin out of the fridge. Spoon the custard evenly into each pastry shell, filling almost to the top but leaving room for the custard to bubble up during baking.
- Bake the tarts: Preheat your oven to 475°F (245°C). Bake the tarts for 12-15 minutes or until the pastry is deep golden and the custard has characteristic dark spots (caramelized blisters). Watch closely—the custard can burn quickly if left too long.
- Cool before serving: Remove from the oven and let the tarts cool in the tin for 5 minutes before transferring them to a wire rack. They’re best enjoyed warm, but the flavors deepen if you wait a bit.
If the custard seems too runny before baking, don’t panic—it will firm up as it cools. I’ve found that using fresh egg yolks at room temperature really helps the custard set properly. Also, rotating the baking tray halfway through ensures even caramelization. If you want, sprinkle a tiny bit of powdered cinnamon on top right before serving for that extra cozy touch.
Cooking Tips & Techniques
Making flaky homemade Pastel de Nata Portuguese custard tarts is easier when you know a few insider tips. For instance, keeping the puff pastry cold is key—warm pastry loses its layers and becomes tough. I usually pop the shaped shells back in the fridge for 10 minutes before filling them.
When cooking the custard, constant stirring is your best friend. It prevents lumps and stops the milk from scorching. If you’re nervous about lumps, whisk the flour into the cold milk first—that little step saved me from many a bumpy custard attempt. And don’t rush the caramelization step in the oven; those dark spots are the hallmark of a true Pastel de Nata, giving the custard that signature bittersweet bite.
One mistake I made at first was overfilling the pastry cups. The custard bubbles up and can spill over, making a mess and burning on the tray. Leaving a small gap at the top keeps things neat and helps the custard cook evenly. Finally, if you want to speed up the process, try chilling the custard filling for 15 minutes before baking; it firms up faster and bakes more evenly.
Variations & Adaptations
The beauty of these tarts is how flexible they are while still holding onto their classic charm. Here are a few ways you can switch things up:
- Gluten-Free Option: Use a gluten-free puff pastry brand or make your own with almond flour and gluten-free flour blends.
- Vegan Twist: Substitute dairy milk with full-fat coconut milk and replace egg yolks with a silken tofu-based custard. Texture varies, but flavor stays sweetly satisfying.
- Spiced Variations: Add cardamom or a dash of nutmeg to the custard for a warm, aromatic spin that’s perfect for fall and winter.
- Fruit-Infused: Fold in finely chopped dried apricots or swirl in some homemade berry compote before baking for a fruity surprise (a nod to my berry compote recipe pairs beautifully).
Personally, I love sprinkling a tiny pinch of sea salt flakes over the custard before baking—sounds odd, but that salty-sweet combo hits all the right notes. These tweaks let you put your own stamp on a beloved classic without losing its soul.
Serving & Storage Suggestions
These Pastel de Nata are best served warm, fresh out of the oven, with that flaky crust still crisp and custard just set. A light dusting of cinnamon or powdered sugar adds a nice touch. Pair them with a strong espresso or a creamy latte for a perfect afternoon indulgence.
If you have leftovers (and sometimes there are none!), keep them in an airtight container at room temperature for up to 24 hours or in the fridge for 2-3 days. Reheat gently in a 350°F (175°C) oven for 5-7 minutes to refresh the crispness. Avoid microwaving—it makes the crust soggy, and you lose that signature flakiness.
Flavors actually deepen after resting, so if you’re patient, these tarts taste even better the next day. They also freeze well—wrap tightly and freeze for up to a month. Thaw overnight in the fridge and reheat as above for a quick treat anytime.
Nutritional Information & Benefits
Each tart contains approximately 210 calories, with a balance of carbs, fat, and protein that makes it a reasonable indulgence. The custard provides calcium and vitamin A from the milk and egg yolks, while the lemon zest adds a tiny boost of vitamin C.
This recipe uses real ingredients without preservatives or artificial flavors, making it a better choice than many store-bought versions heavy on additives. You can also adjust sugar levels to suit your preference—try a bit less sugar for a subtly sweet custard.
While not low-carb or vegan by default, it’s easy to adapt (see Variations & Adaptations) for dietary needs. Just a heads-up for those with egg or dairy allergies: this recipe contains both, so substitutions are necessary.
Conclusion
Flaky homemade Pastel de Nata Portuguese custard tarts are one of those recipes that quietly prove you don’t need fancy skills or ingredients to make something truly delightful. The perfect balance of buttery layers and creamy custard, with that little caramelized top, makes any day feel just a bit cozier. I love how this recipe invites a bit of patience and care but rewards you with big flavor and a small moment of joy.
Feel free to tweak the flavors, experiment with the pastry, or share these with friends who appreciate a good homemade treat. I’m always curious to hear how you make them your own, so don’t hesitate to leave a comment or share your version. Cooking these tarts has become one of my favorite ways to slow down and savor simple pleasures, and I hope they do the same for you.
Frequently Asked Questions
- Can I use store-bought puff pastry for this recipe?
Yes! Using quality store-bought puff pastry saves time and still gives you that flaky, buttery crust essential to Pastel de Nata. - How do I get the custard to caramelize on top?
Bake at a high temperature (475°F/245°C) to encourage the custard to blister and darken, creating that classic caramelized surface. - Can I make the custard ahead of time?
You can prepare the custard a few hours ahead and keep it chilled. Just give it a gentle whisk before filling the pastry shells. - What’s the best way to store leftover tarts?
Store them in an airtight container at room temperature for a day or refrigerate for up to 3 days. Reheat in the oven to refresh the pastry’s crispness. - Are Pastel de Nata gluten-free?
Traditional recipes use wheat flour in puff pastry, but you can use gluten-free pastry alternatives to make them gluten-free.
For those who enjoy experimenting with breakfast treats, these tarts pair wonderfully with dishes like fluffy blueberry lemon scones or even a savory bite like savory candied bacon to balance the sweet richness. The kitchen possibilities are endless when you have a recipe this adaptable and satisfying.
Pin This Recipe!
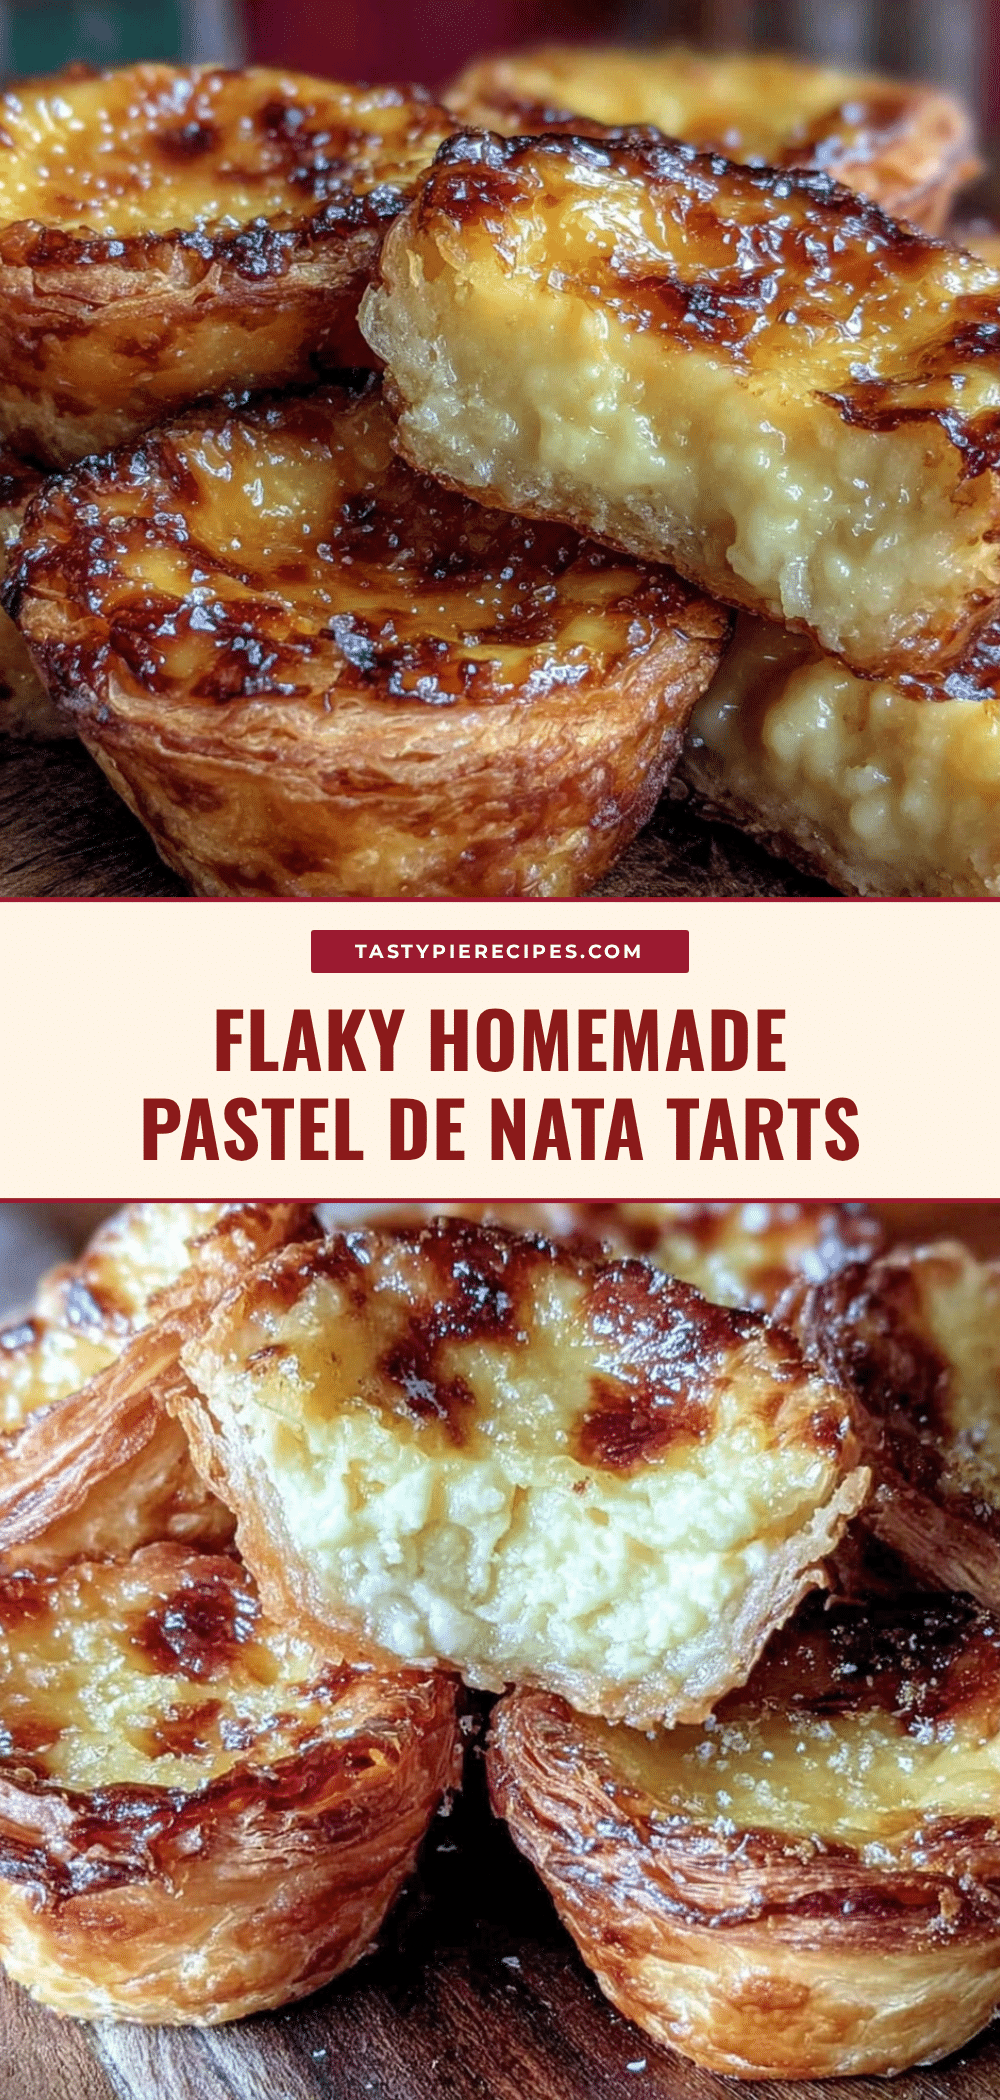
Flaky Homemade Pastel de Nata Recipe Easy Portuguese Custard Tarts

This recipe delivers authentic Portuguese Pastel de Nata with perfectly flaky puff pastry shells and creamy, caramelized custard filling. Easy to make with simple ingredients, it’s a delightful treat for any occasion.
- Prep Time: 15 minutes
- Cook Time: 15 minutes
- Total Time: 30 minutes
- Yield: 12 tarts 1x
- Category: Dessert
- Cuisine: Portuguese
Ingredients
- 1 sheet of store-bought puff pastry (about 8 oz/225 g), thawed
- Flour for dusting (all-purpose or gluten-free if needed)
- 1 cup (240 ml) whole milk
- 1/2 cup (100 g) granulated sugar
- 3 tablespoons (24 g) all-purpose flour
- 3 large egg yolks, room temperature
- 1 teaspoon pure vanilla extract
- Zest of 1 lemon
- A pinch of ground cinnamon (optional)
Instructions
- Lightly flour your work surface and roll out the thawed puff pastry sheet into a rectangle roughly 12 x 10 inches (30 x 25 cm). Cut the pastry into 12 equal squares.
- Gently press each puff pastry square into the muffin tin cups, making sure it fits snugly and comes up the sides. Place the tin in the fridge while you make the custard.
- In a small bowl, whisk the flour with about 1/4 cup (60 ml) of the milk until smooth.
- In a saucepan, combine the remaining milk and sugar. Warm over medium heat until sugar dissolves and the mixture is hot but not boiling (about 5 minutes).
- Slowly whisk the milk-flour mixture into the hot milk, stirring constantly until it thickens slightly (2-3 minutes).
- In a separate bowl, whisk the egg yolks lightly. Gradually add a few spoonfuls of the warm milk mixture to the yolks while whisking to prevent scrambling.
- Pour the yolk mixture back into the saucepan. Continue cooking over low heat, stirring constantly, until the custard thickens enough to coat the back of a spoon (3-4 minutes). Remove from heat.
- Stir in the vanilla extract, lemon zest, and a pinch of cinnamon. Let the filling cool slightly.
- Spoon the custard evenly into each pastry shell, filling almost to the top but leaving room for the custard to bubble up during baking.
- Preheat oven to 475°F (245°C). Bake the tarts for 12-15 minutes or until the pastry is deep golden and the custard has characteristic dark spots.
- Remove from oven and let the tarts cool in the tin for 5 minutes before transferring to a wire rack. Serve warm.
Notes
Keep puff pastry cold until just before use to maintain flakiness. Rotate baking tray halfway through baking for even caramelization. Avoid overfilling pastry cups to prevent spilling. Custard firms up as it cools. For dairy-free version, substitute milk with almond or oat milk and adjust custard texture accordingly.
Nutrition
- Serving Size: 1 tart
- Calories: 210
- Sugar: 12
- Sodium: 90
- Fat: 11
- Saturated Fat: 5
- Carbohydrates: 24
- Fiber: 0.5
- Protein: 4
Keywords: Pastel de Nata, Portuguese custard tarts, flaky pastry, custard tart, easy dessert, homemade tarts


