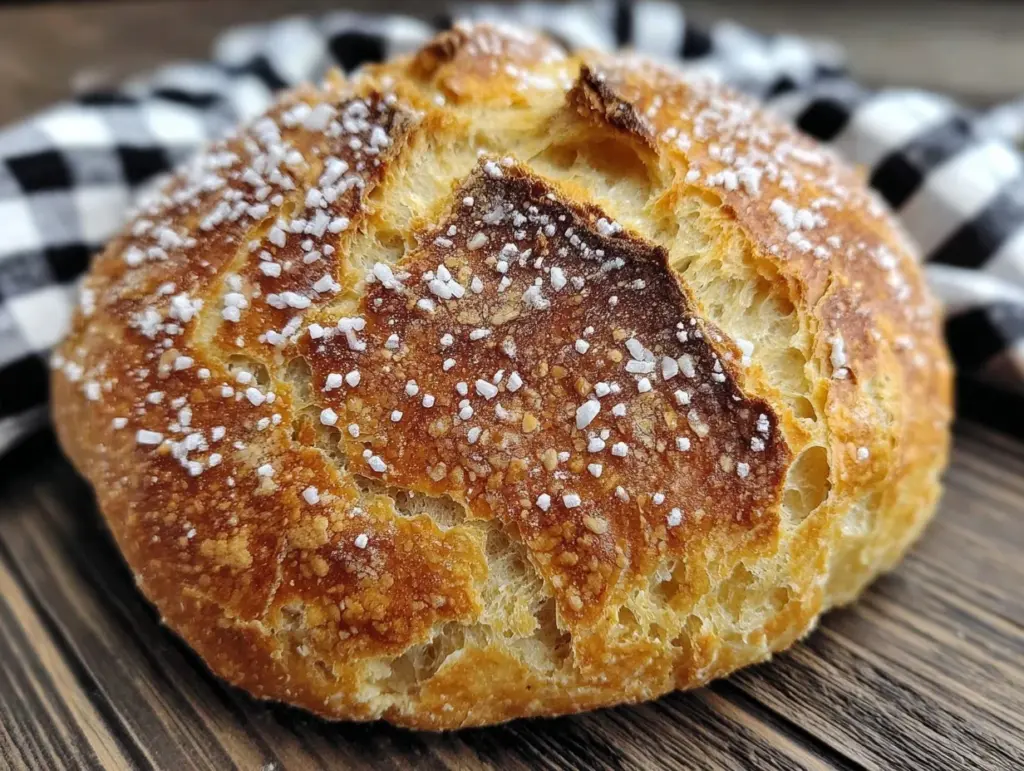
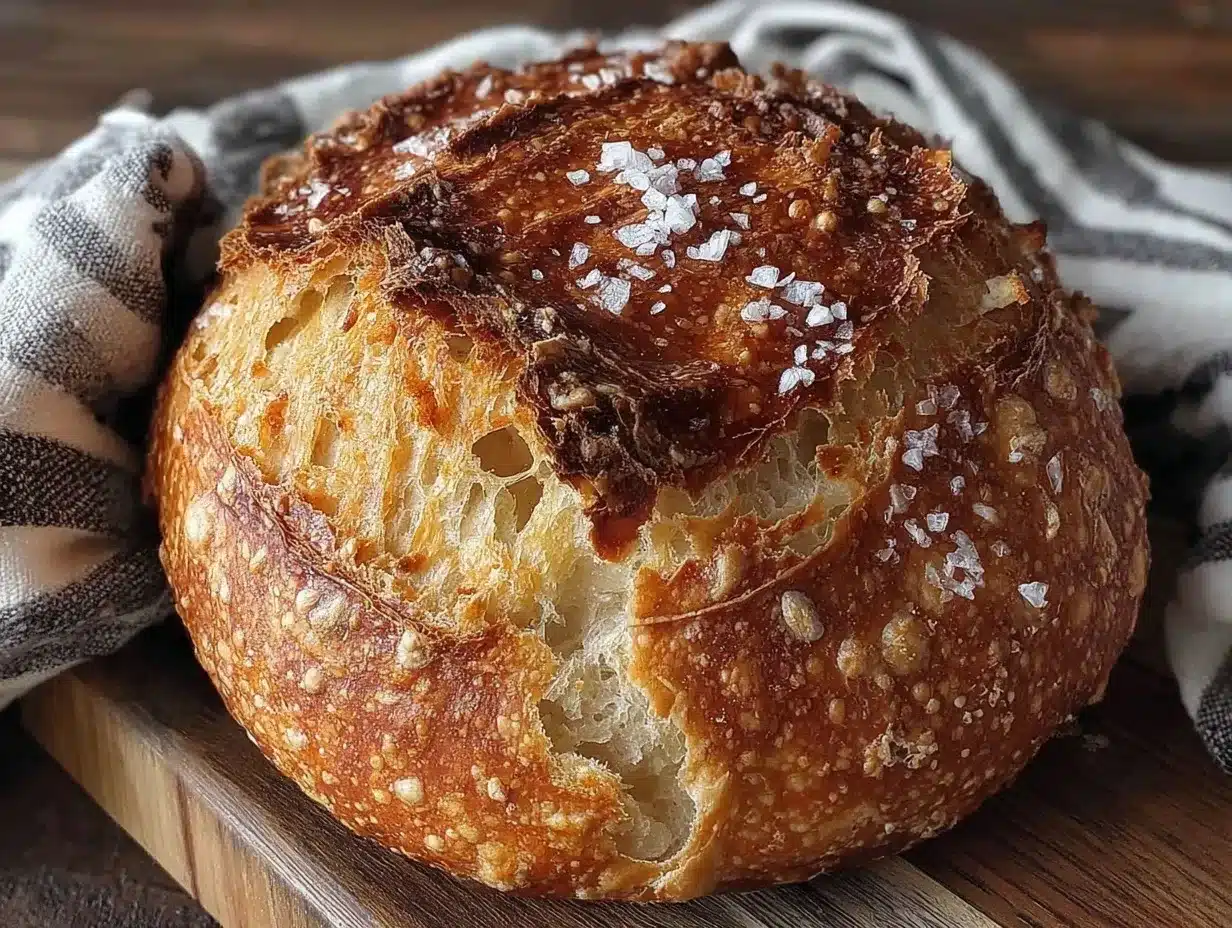
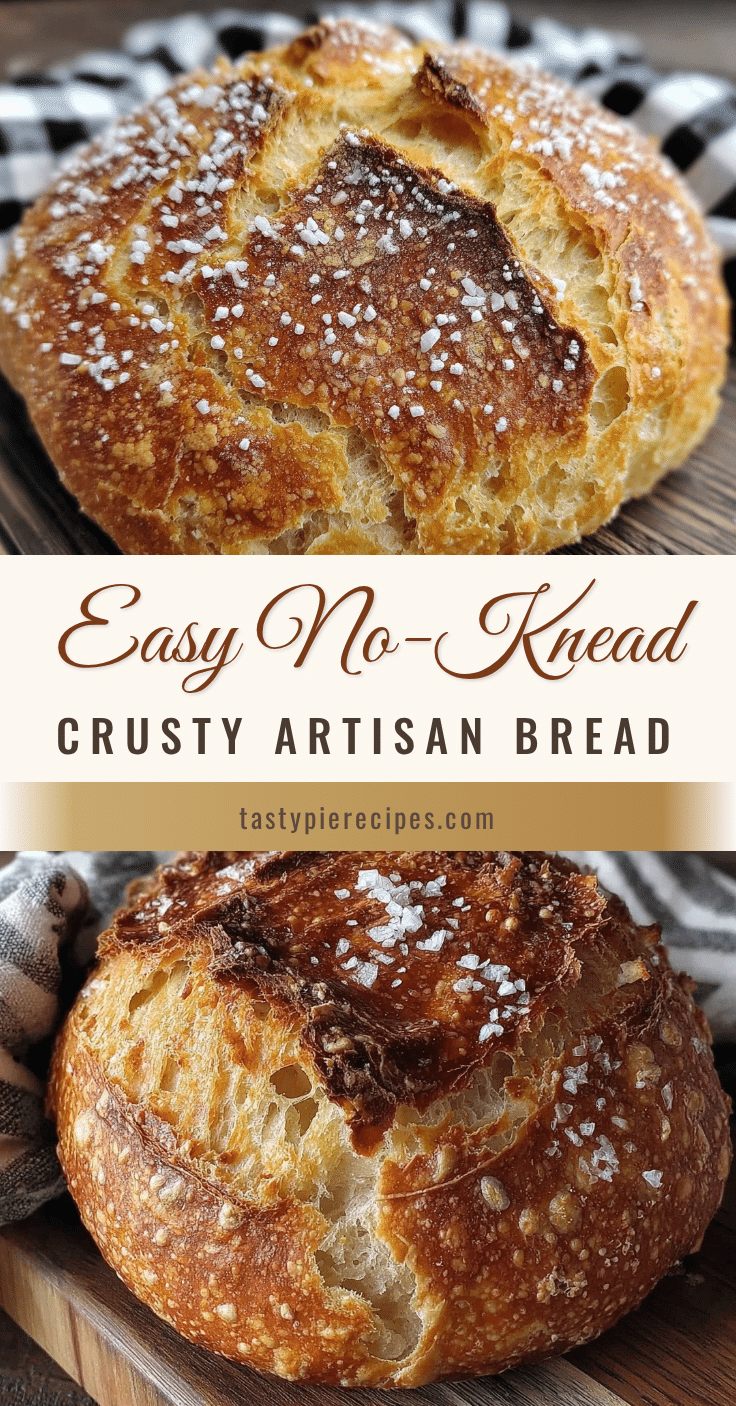
I wasn’t expecting much when I tossed together this easy no-knead crusty artisan bread loaf one hectic Sunday afternoon. Honestly, the oven was already on for something else, and I just wanted a quick fix for some fresh bread without the usual arm workout kneading demands. The dough was sloppy and sticky, more like a batter than the traditional bread dough I was used to fussing over. I thought, “Well, this might turn into a kitchen mess.”
Fast forward to pulling that golden, crackling loaf out of the oven — and wow, it had that perfect crust, airy crumb, and the kind of rustic charm you’d expect from a bakery. No kneading, no fancy machines, just waiting and a bit of faith. I found myself making it three times that week, each loaf better than the last (and yes, a little less skeptical each time). It quickly became my go-to bread when I needed something wholesome but zero-fuss.
What stuck with me was how this easy no-knead crusty artisan bread loaf feels like a little victory in simplicity. It’s honest bread, no tricks or shortcuts, but without the usual time and effort. It’s the kind of recipe that makes you realize sometimes less really is more — especially when the reward is that satisfying crackle and tender bite. So, here’s the story behind my favorite beginner-friendly bread, one that’s surprisingly addictive and always welcomed at the table.
Why You’ll Love This Recipe
Over the weeks, this easy no-knead crusty artisan bread loaf has earned its place in my kitchen arsenal for so many reasons. It’s not just about the delicious end product but how approachable it makes bread baking — even for those who’ve never tried before. Here’s why it’s a standout:
- Quick & Easy: From mixing to baking, it takes about 3 hours total, but hands-on time is under 15 minutes, making it perfect for busy weeknights or last-minute bread cravings.
- Simple Ingredients: No specialty flours or fancy yeast needed — just pantry staples you probably already have.
- Perfect for Cozy Dinners: Whether you’re serving soup, cheese, or a simple olive oil dip, this crusty loaf brings a comforting, rustic feel.
- Crowd-Pleaser: Family, friends, and even the pickiest eaters love the crispy crust and soft, airy inside.
- Unbelievably Delicious: The secret lies in the long fermentation that develops flavor and texture without any kneading.
What sets this recipe apart is the no-knead technique itself. You mix, cover, and wait — that’s it. The result? A crust that crackles just right and a crumb so tender it almost melts in your mouth. It’s bread baking made accessible without sacrificing soul or taste. Honestly, it’s become my favorite way to impress guests casually, especially when paired with something as elegant as a roasted grape and brie tart — a combo that’s surprisingly easy but feels so special.
What Ingredients You Will Need
This easy no-knead crusty artisan bread loaf uses straightforward ingredients that work together to create its signature crust and airy interior. The magic is in the simplicity and patience.
- All-purpose flour (3 cups / 360g) – I like King Arthur for consistent texture
- Instant yeast (1/4 teaspoon) – a small amount for slow fermentation and flavor
- Salt (1 1/4 teaspoons) – fine sea salt is ideal for even seasoning
- Warm water (1 1/2 cups / 355ml) – about 80°F (26°C), not too hot to avoid killing the yeast
That’s literally it! No oil, sugar, or extra additives needed. This recipe is designed to highlight the flour and yeast working in harmony over time. For a slight twist, you can use bread flour instead of all-purpose if you want a chewier texture.
If you want to experiment, substituting up to half the flour with whole wheat adds a nutty depth but may require slightly longer hydration time. Also, if gluten-free is your thing, almond or oat flour won’t work here due to structure needs, but some readers have had success with a gluten-free blend designed for bread.
Pro tip: Use filtered water if your tap water is heavily chlorinated, as it can impact yeast activity.
Equipment Needed
One of the best parts of this recipe is its minimal equipment requirements. Here’s what you’ll need:
- A large mixing bowl – glass, metal, or ceramic works fine
- A sturdy spatula or wooden spoon for mixing
- A kitchen scale (optional but recommended for accuracy)
- A Dutch oven or heavy oven-safe pot with lid (around 5-6 quarts) – this creates the steamy environment crucial for crust development
- Parchment paper – helps with easy transfer of dough
If you don’t own a Dutch oven, a heavy cast iron pot or even a deep oven-safe skillet covered tightly with foil can work. I once used a large ceramic casserole dish with a lid and still got decent results. Just be mindful of heat retention.
Investing in a good kitchen thermometer can also help you check water temperature and baking environment, especially if you’re new to bread baking.
Preparation Method
- Mix the dough: In your large mixing bowl, combine 3 cups (360g) of all-purpose flour, 1/4 teaspoon of instant yeast, and 1 1/4 teaspoons of salt. Stir these dry ingredients for even distribution. Slowly add 1 1/2 cups (355ml) of warm water (about 80°F/26°C) to the bowl while stirring with a spatula. Mix until no dry flour remains, and the dough is sticky and shaggy. Don’t worry if it looks loose; that’s how it should be. This step takes about 5 minutes.
- Let it rest: Cover the bowl tightly with plastic wrap or a clean kitchen towel. Leave it at room temperature for 12 to 18 hours. The dough will rise and bubble during this time, developing flavor and texture. A good sign is when it’s doubled in size and full of air bubbles. For me, leaving it overnight works perfectly for a morning bake.
- Preheat your oven: About 30 minutes before baking, place your Dutch oven (or heavy pot with lid) inside the oven and preheat to 450°F (230°C). This step is crucial to get that crusty exterior.
- Shape the dough: Lightly flour a work surface and turn the dough out gently (it will be sticky). Fold it over itself a couple of times to form a rough ball. Place the dough seam-side down on a piece of parchment paper and dust the top with a little flour. Cover loosely with a towel and let it rest for 30 to 45 minutes.
- Bake the bread: Carefully remove the hot Dutch oven from the oven. Lift the dough by the parchment paper and lower it into the pot. Cover with the lid and bake for 30 minutes. Then, remove the lid and bake for an additional 15 to 20 minutes until the loaf is a deep golden brown and crusty.
- Cool and enjoy: Transfer the bread to a wire rack and let it cool completely before slicing. This resting step helps the crumb finish setting.
Some troubleshooting tips: If your dough feels dry, add a tablespoon or two of water next time. If your crust isn’t crispy enough, try baking uncovered for a few extra minutes. And don’t skip preheating the pot — it’s the game changer for that artisan crunch.
Cooking Tips & Techniques
This easy no-knead crusty artisan bread loaf hinges on a few key techniques that I learned the hard way. First, don’t rush the fermentation. The long rise is what builds flavor and structure without kneading. I once tried to speed it up with more yeast and less time — the bread was dense and lacked character.
Next, handling the dough carefully is key because it’s extremely sticky. Avoid adding too much flour when shaping; a light dusting is just enough to prevent sticking without drying the dough out.
Using a preheated Dutch oven traps steam released during baking, which keeps the crust soft initially, allowing the loaf to expand, then crisps up beautifully when uncovered. I experimented with baking without a lid, and the crust was tough and the loaf less airy.
Timing is also your friend here. Set reminders for each stage — that overnight rise, the resting after shaping, and the baking intervals. Multitasking by prepping a simple side dish or even a dessert like the fresh fig and honey crostata while the dough ferments can make the process feel less like waiting and more like a kitchen rhythm.
Variations & Adaptations
Once you’ve nailed the basic loaf, there’s plenty of room to tweak this recipe to your liking or dietary needs:
- Herb-infused: Add 1-2 tablespoons of fresh herbs like rosemary or thyme to the dry ingredients for a fragrant touch.
- Whole wheat blend: Substitute up to half the all-purpose flour with whole wheat flour for a nuttier, denser loaf. Just add a splash more water if the dough feels too stiff.
- Gluten-free adaptation: While tricky, some readers have had success using a gluten-free flour blend designed for bread, combined with xanthan gum. Expect a different texture but still tasty.
- Seeded crust: Before baking, brush the dough lightly with water and sprinkle with sesame, poppy, or sunflower seeds for extra crunch and flavor.
For alternative cooking methods, you can try baking the loaf on a pizza stone instead of a Dutch oven, but be sure to create steam in the oven by placing a pan of water below or spritzing water inside right after placing the dough.
My favorite personal twist is stirring in a handful of caramelized onions before the rise — it adds a sweet, savory surprise that pairs wonderfully with a simple cheese board.
Serving & Storage Suggestions
This bread shines when served fresh and warm, ideally within a few hours of baking. A light spread of salted butter or drizzled olive oil with a sprinkle of flaky sea salt brings out its rustic character beautifully. It also pairs wonderfully with hearty soups, cheeses, or even alongside the strawberry tres leches poke cake for a sweet and savory contrast at brunch.
If you have leftovers — which might be rare — wrap the cooled loaf tightly in plastic wrap and store at room temperature for up to two days. For longer storage, slice and freeze in a resealable bag for up to a month.
To refresh frozen bread, toast slices directly or warm the whole loaf in a 350°F (175°C) oven for 10-15 minutes wrapped loosely in foil to keep moisture. The crust will regain some of its crunch, and the inside softens nicely.
Over time, the flavors mellow and deepen, making day-old bread perfect for croutons or bread pudding.
Nutritional Information & Benefits
This simple bread recipe is naturally free from added sugars, oils, and preservatives. A typical serving (about 1/12th of the loaf) contains roughly:
| Calories | Carbohydrates | Protein | Fat | Fiber |
|---|---|---|---|---|
| 150 | 30g | 5g | 1g | 1g |
Using all-purpose flour means it’s not gluten-free, but it’s a good source of energy and provides some protein. The simple ingredients highlight whole, unprocessed staples, making it a wholesome choice over many commercial breads loaded with additives.
From a wellness perspective, baking your own bread can help you avoid unnecessary chemicals and control salt content. It’s a satisfying ritual that pairs well with mindful eating habits.
Conclusion
This easy no-knead crusty artisan bread loaf is proof that you don’t need to be a pro baker or have fancy gear to enjoy fresh, bakery-quality bread at home. The no-knead method breaks down the barriers of intimidation and time investment, turning bread baking into a relaxed, rewarding experience.
Feel free to make this recipe your own — swap flours, add herbs, or experiment with toppings. It’s a versatile base that welcomes creativity while delivering reliable results every time. For me, this loaf is more than just bread; it’s a little moment of calm and accomplishment in a busy day.
If you try it, I’d love to hear how you make it yours or what dishes you pair it with (maybe alongside a creamy strawberry basil lemonade panna cotta?). Your feedback and stories make this kitchen journey richer for everyone.
Frequently Asked Questions
Can I use active dry yeast instead of instant yeast?
Yes, but you’ll need to proof it first in warm water with a pinch of sugar for about 5-10 minutes until foamy. Use about 1/2 teaspoon of active dry yeast to replace 1/4 teaspoon instant yeast.
Why is my bread not crusty enough?
Make sure you preheat your Dutch oven thoroughly and bake covered for the first 30 minutes to trap steam. Also, remove the lid for the last part of baking to crisp the crust.
Can I make this bread without a Dutch oven?
You can bake it on a preheated baking stone or sheet, but add a pan of hot water to the oven to create steam. Covering the dough loosely with foil during the first 20 minutes can help too.
How long does the dough need to rise?
Ideally 12 to 18 hours at room temperature. This slow fermentation develops the flavor and airy texture. Colder environments may require longer rise times.
Is this bread suitable for freezing?
Absolutely. Once completely cooled, slice and freeze in airtight bags. Toast or warm slices directly from frozen for best texture.
Pin This Recipe!
Easy No-Knead Crusty Artisan Bread Loaf Recipe Perfect for Beginners
A simple, beginner-friendly no-knead artisan bread loaf with a crusty exterior and airy crumb, requiring minimal hands-on time and basic pantry ingredients.
- Prep Time: 15 minutes
- Cook Time: 45 minutes
- Total Time: 13 hours
- Yield: 1 loaf (about 12 servings) 1x
- Category: Bread
- Cuisine: American
Ingredients
- 3 cups (360g) all-purpose flour
- 1/4 teaspoon instant yeast
- 1 1/4 teaspoons fine sea salt
- 1 1/2 cups (355ml) warm water (about 80°F/26°C)
Instructions
- Mix the dough: In a large mixing bowl, combine 3 cups (360g) all-purpose flour, 1/4 teaspoon instant yeast, and 1 1/4 teaspoons salt. Stir dry ingredients evenly. Slowly add 1 1/2 cups (355ml) warm water (about 80°F/26°C) while stirring with a spatula until no dry flour remains and dough is sticky and shaggy. Takes about 5 minutes.
- Let it rest: Cover bowl tightly with plastic wrap or kitchen towel. Leave at room temperature for 12 to 18 hours until dough doubles in size and is bubbly.
- Preheat oven: About 30 minutes before baking, place Dutch oven or heavy oven-safe pot with lid inside oven and preheat to 450°F (230°C).
- Shape the dough: Lightly flour work surface and gently turn dough out. Fold over itself a couple of times to form a rough ball. Place seam-side down on parchment paper, dust top with flour, cover loosely with towel, and rest 30 to 45 minutes.
- Bake the bread: Remove hot Dutch oven from oven. Lift dough with parchment paper and lower into pot. Cover with lid and bake 30 minutes. Remove lid and bake additional 15 to 20 minutes until deep golden brown and crusty.
- Cool and enjoy: Transfer bread to wire rack and cool completely before slicing.
Notes
Use filtered water if tap water is heavily chlorinated to avoid impacting yeast activity. Preheating the Dutch oven is crucial for crust development. If dough feels dry, add a tablespoon or two of water next time. For a crispier crust, bake uncovered a few extra minutes. Avoid adding too much flour when shaping to prevent drying out dough.
Nutrition
- Serving Size: 1 slice (1/12th of l
- Calories: 150
- Fat: 1
- Carbohydrates: 30
- Fiber: 1
- Protein: 5
Keywords: no-knead bread, artisan bread, crusty bread, easy bread recipe, beginner bread, homemade bread, no-knead artisan loaf


