Late Sunday morning, the kitchen is quiet except for the soft hum of the refrigerator. The sunlight filters through the window just right, casting a warm glow on the counter where a simple bowl waits, ready for a ritual that’s become a small, satisfying part of my weekends—the making of easy no-bake 5-ingredient nut-free peanut butter granola bars. It’s not flashy or rushed; it’s calm and unhurried, a moment set apart from the usual chaos. I like that these bars fit perfectly into that stillness—a gentle, straightforward recipe that needs no oven, no fuss, just simple ingredients and a little patience.
The peanut butter smell starts to fill the air as I stir, thick and comforting, mingling with the subtle sweetness of honey. These bars have been my quiet go-to when I want a snack that feels wholesome without the fuss of complicated baking or a mess of ingredients. Honestly, it’s the kind of recipe that makes you realize how little you need to make something genuinely satisfying. No nuts means it’s easy to pack for the kids’ school lunches or a quick bite at work without worrying about allergies. And the five ingredients? Just enough to keep it interesting but never overwhelming.
There’s a softness to the oats once they’re all mixed and pressed into the pan—a texture that’s chewy but not tough, with that gentle peanut butter richness holding everything together. I don’t know why, but every time I make this recipe, it feels like a small act of care, both for myself and for whoever I’m sharing with. It’s not showy, just reliable, like a familiar melody playing softly in the background of a quiet morning.
This easy no-bake 5-ingredient nut-free peanut butter granola bars recipe stuck with me because it’s the kind of snack that matches the pace of a slow Sunday. It’s simple, thoughtful, and honest. That’s why it’s worth having in your repertoire for those moments when you want something homemade but don’t want to overthink it.
Why You’ll Love This Recipe
After trying countless granola bars, both homemade and store-bought, this easy no-bake 5-ingredient nut-free peanut butter granola bars recipe stands out for a handful of reasons. I’ve tested it repeatedly to get the texture just right, and honestly, it’s become a kitchen staple for quick snacks that satisfy without any stress.
- Quick & Easy: Comes together in under 15 minutes, no baking needed—perfect for busy mornings or afternoon cravings.
- Simple Ingredients: Just five pantry staples that you likely already have on hand, no fancy or hard-to-find items required.
- Perfect for Allergies: Completely nut-free except for peanut butter (which is often tolerated separately), making it safer for many allergy-sensitive households.
- Crowd-Pleaser: My family and friends always ask for more, and it’s a hit with both kids and adults.
- Unbelievably Delicious: The chewy texture combined with the natural sweetness from honey and the creamy peanut butter flavor is truly comforting.
This recipe isn’t just another granola bar. The trick lies in using a smooth peanut butter that binds everything effortlessly, avoiding the dryness or crumbliness of some bars. Plus, the no-bake method means you get that fresh, chewy bite every time without worrying about overcooking or drying out. It’s a little slice of comfort that’s as fast as it is tasty.
Whether you’re preparing snacks for a family road trip or need a quick nibble to carry you through the afternoon slump, these bars fit the bill with no extra fuss. And hey, if you’re a fan of other easy treats, you might appreciate how these bars pair nicely with something like the stars and stripes edible cookie dough dip—a fun way to mix up your snack game once in a while.
What Ingredients You Will Need
This easy no-bake 5-ingredient nut-free peanut butter granola bars recipe keeps things straightforward with wholesome, accessible ingredients. Each plays a role in delivering a chewy, flavorful bar without a complicated ingredient list.
- Rolled oats (1 ½ cups / 135g): The base of the bars, providing that classic granola texture. Use old-fashioned rolled oats for the best chewiness. Quick oats tend to get mushy.
- Smooth peanut butter (½ cup / 125g): Acts as the binder and flavor star. Choose a natural, smooth variety without added sugar or hydrogenated oils. I’ve had great results with Smucker’s Natural.
- Honey (⅓ cup / 113g): Adds natural sweetness and helps hold the bars together. Raw or regular honey works fine.
- Vanilla extract (1 tsp / 5 ml): Just a small splash to round out the flavor and add warmth.
- Salt (¼ tsp / 1.5g): Enhances the flavors and balances the sweetness. Use fine sea salt or kosher salt.
All ingredients are common pantry staples, which means no last-minute runs to the store. If you want a gluten-free version, be sure to grab certified gluten-free oats. For a dairy-free twist, you can swap honey with maple syrup, though that changes the flavor subtly.
In summer months, I sometimes toss in a handful of freeze-dried berries for a tart pop, but those are optional extras. If you want to keep things nut-free and simple, stick to the original five ingredients.
Equipment Needed
- Mixing bowl: A medium to large bowl to combine all ingredients. I prefer glass or stainless steel for easy cleaning.
- Measuring cups and spoons: Accurate measurements help keep the bars from being too dry or too sticky.
- Spatula or wooden spoon: For stirring. A silicone spatula works best to scrape the sides clean.
- 8×8-inch (20×20 cm) baking pan or dish: To press the mixture into shape. Line it with parchment paper for easy removal.
- Plastic wrap or wax paper: Handy for pressing the mixture evenly without sticking to your hands.
If you don’t have an 8×8-inch pan, any shallow rectangular dish will do—just adjust the thickness of your bars accordingly. I’ve even used disposable aluminum pans for easy cleanup when making extras for potlucks.
Preparation Method
- Line your pan: Start by lining your 8×8-inch baking dish with parchment paper, leaving about an inch hanging over the edges. This helps lift the bars out smoothly later. Prep time: 2 minutes.
- Mix the wet ingredients: In your mixing bowl, combine the smooth peanut butter and honey. Use a spatula to stir them together until the mixture is smooth and glossy, about 1-2 minutes. Adding vanilla extract and salt now ensures they’re evenly distributed.
- Add the oats: Pour in the rolled oats and gently fold them into the peanut butter mixture. Be careful not to over-stir; you want the oats fully coated but still intact for that chewy texture. This takes about 2-3 minutes.
- Press into the pan: Transfer the sticky mixture into your prepared pan. Place a piece of plastic wrap or wax paper over the top and press down firmly with your hands or the bottom of a flat measuring cup. Aim for an even thickness, about ¾ inch (2 cm). This step is key—if you don’t press firmly, the bars might crumble later.
- Chill: Refrigerate the pan for at least 2 hours, or until the bars are set and firm to the touch. If you’re in a rush, 1 hour in the freezer can speed this up, but watch carefully so they don’t freeze solid.
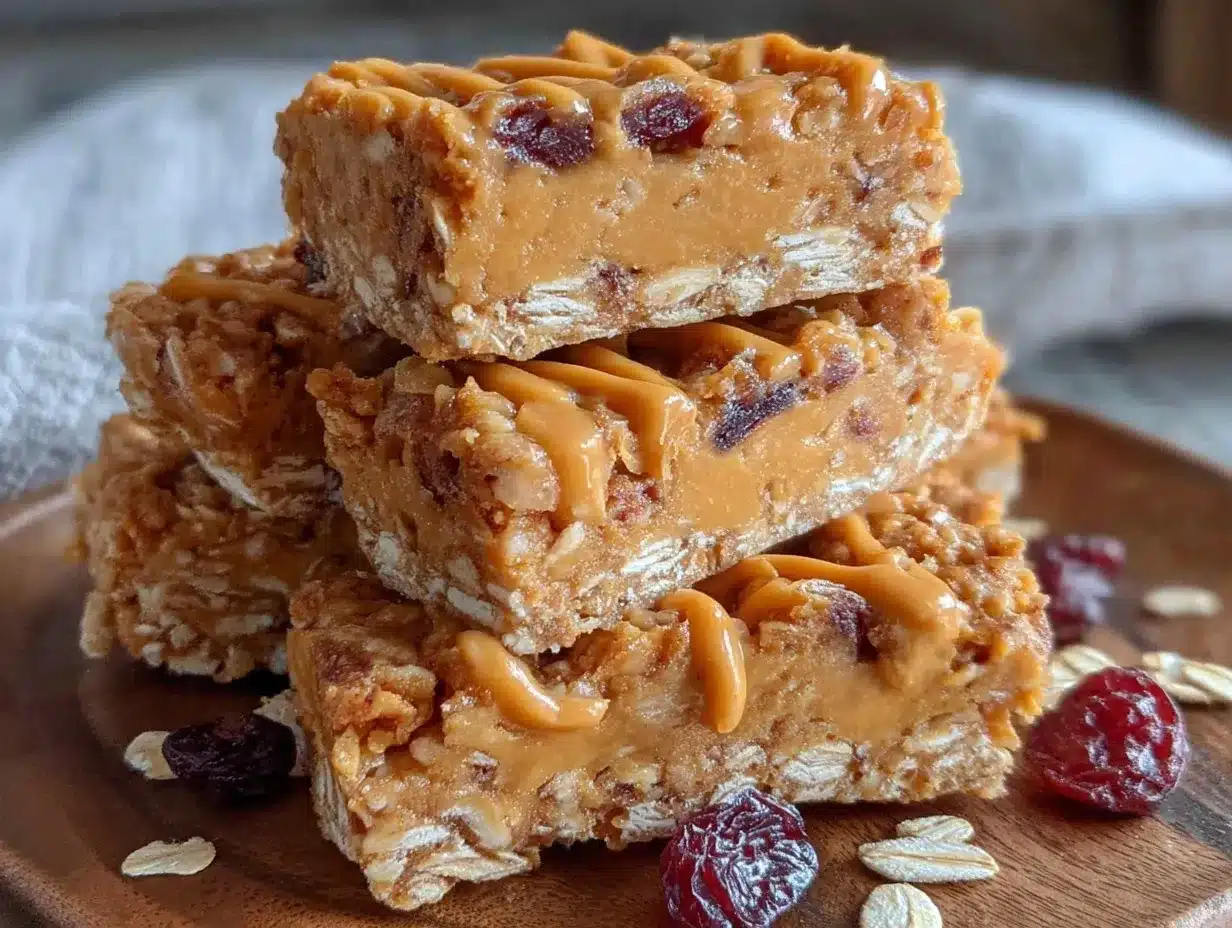
- Cut and serve: Once chilled, use the parchment edges to lift the block from the pan. Place on a cutting board and slice into 8 or 10 bars with a sharp knife. Wipe the knife clean between cuts to keep edges neat.
If the bars seem too sticky or soft after cutting, pop them back into the fridge for 15-20 minutes to firm up. They should hold together well but still be pleasantly chewy and not hard.
Cooking Tips & Techniques
I’ve learned a few things over time that make these easy no-bake 5-ingredient nut-free peanut butter granola bars come out just right, every time.
- Use smooth peanut butter: Chunky versions make binding tricky, and the texture gets uneven. Smooth peanut butter creates that perfect cohesive chew.
- Don’t skimp on pressing: Firmly pressing the mixture into the pan is crucial. It’s tempting to rush, but a solid press means less crumbling later.
- Measure carefully: Too much honey or peanut butter can make the bars sticky and hard to cut. Too little, and they’ll dry out. Follow measurements closely.
- Chill thoroughly: The bars need time to set. Cutting too early will turn your bars into a crumbly mess.
- Storage matters: Keep the bars refrigerated if you like them firm, or room temperature for a softer bite. Just note that at room temp, they may get a little stickier.
One time I tried to speed things up by skipping the chilling step—big mistake. The bars fell apart instantly. Lesson learned. Now, I always plan ahead just enough to give them their chill time. It’s worth the wait.
Variations & Adaptations
While the original recipe is beautiful in its simplicity, I’ve played around with a few variations that keep things interesting, especially when feeding different tastes or dietary needs.
- Chocolate Drizzle: Melt a bit of dairy-free chocolate and drizzle over the cooled bars for a touch of decadence without overpowering the peanut butter.
- Seed Mix: For nut-free crunch, add pumpkin or sunflower seeds in place of nuts. They add texture and nutritional punch without allergy worries.
- Maple Syrup Swap: Replace honey with pure maple syrup for a vegan version. The flavor shifts slightly but remains delicious.
- Flavor Boost: Add a pinch of cinnamon or a few drops of almond extract (if no allergies) for a subtle twist.
I once adapted the recipe using gluten-free oats and sprinkling in some dried figs for a sweet surprise. It was a hit and felt like a little treat that still kept the easy vibe intact.
Serving & Storage Suggestions
These easy no-bake 5-ingredient nut-free peanut butter granola bars are best served chilled or at room temperature, depending on your texture preference. They make an excellent grab-and-go snack for busy days or a quick energy boost before or after workouts.
Pair them with a cup of tea or a cold glass of milk for a simple snack break. For a fun party idea, they accompany well with other no-bake treats like the patriotic strawberry tres leches poke cake, making a colorful spread.
Store the bars in an airtight container in the refrigerator for up to one week. If you want to keep them longer, wrap individually and freeze for up to 3 months. Thaw in the fridge overnight before eating.
Over time, these bars tend to soften slightly in the fridge but maintain their chewiness. If they get a bit sticky, a quick 10-minute chill before serving helps firm them back up.
Nutritional Information & Benefits
Each bar provides a balanced mix of protein, fiber, and natural sugars, making it a smart snack choice. The rolled oats offer slow-release carbohydrates and fiber, supporting steady energy, while peanut butter adds protein and healthy fats.
Using natural peanut butter and honey keeps added sugars in check compared to many commercial granola bars. The recipe is free from added oils and artificial ingredients, which I appreciate when I want a wholesome snack that feels good inside and out.
This recipe is naturally gluten-free if you select certified gluten-free oats, and it’s free of tree nuts, making it suitable for many allergy-conscious diets. Just watch for peanut allergies, as this is the key ingredient.
Conclusion
These easy no-bake 5-ingredient nut-free peanut butter granola bars are proof that simple can be satisfying. They’re quick to make, use ingredients you likely have on hand, and deliver a chewy, comforting snack without any complicated steps or lengthy baking times. I love how they fit effortlessly into my slow Sunday mornings or busy weekday lunchboxes.
Feel free to tweak the flavors or mix-ins to suit your taste or dietary needs—the recipe is forgiving and versatile. The best part? They always bring a little quiet joy with each bite, which is why I keep coming back to them.
Let me know how your bars turn out or if you’ve tried a fun twist—I’d love to hear your thoughts and adaptations!
Frequently Asked Questions
Can I use crunchy peanut butter instead of smooth?
Crunchy peanut butter isn’t ideal because it makes the bars crumbly and harder to hold together. Smooth peanut butter creates the best texture and binding.
Are these granola bars gluten-free?
They can be if you use certified gluten-free rolled oats. Regular oats may be cross-contaminated with gluten.
Can I substitute honey with another sweetener?
Yes, maple syrup is a great vegan alternative. Just note the flavor will be a bit different and the bars might be slightly softer.
How long do these bars last?
Stored in an airtight container in the fridge, they last up to a week. You can freeze them for up to 3 months.
Can I add chocolate chips or dried fruit?
Absolutely! Fold in mini chocolate chips or dried fruit after mixing the oats for extra flavor and texture. Just keep the total volume similar to avoid affecting the bar structure.
Pin This Recipe!
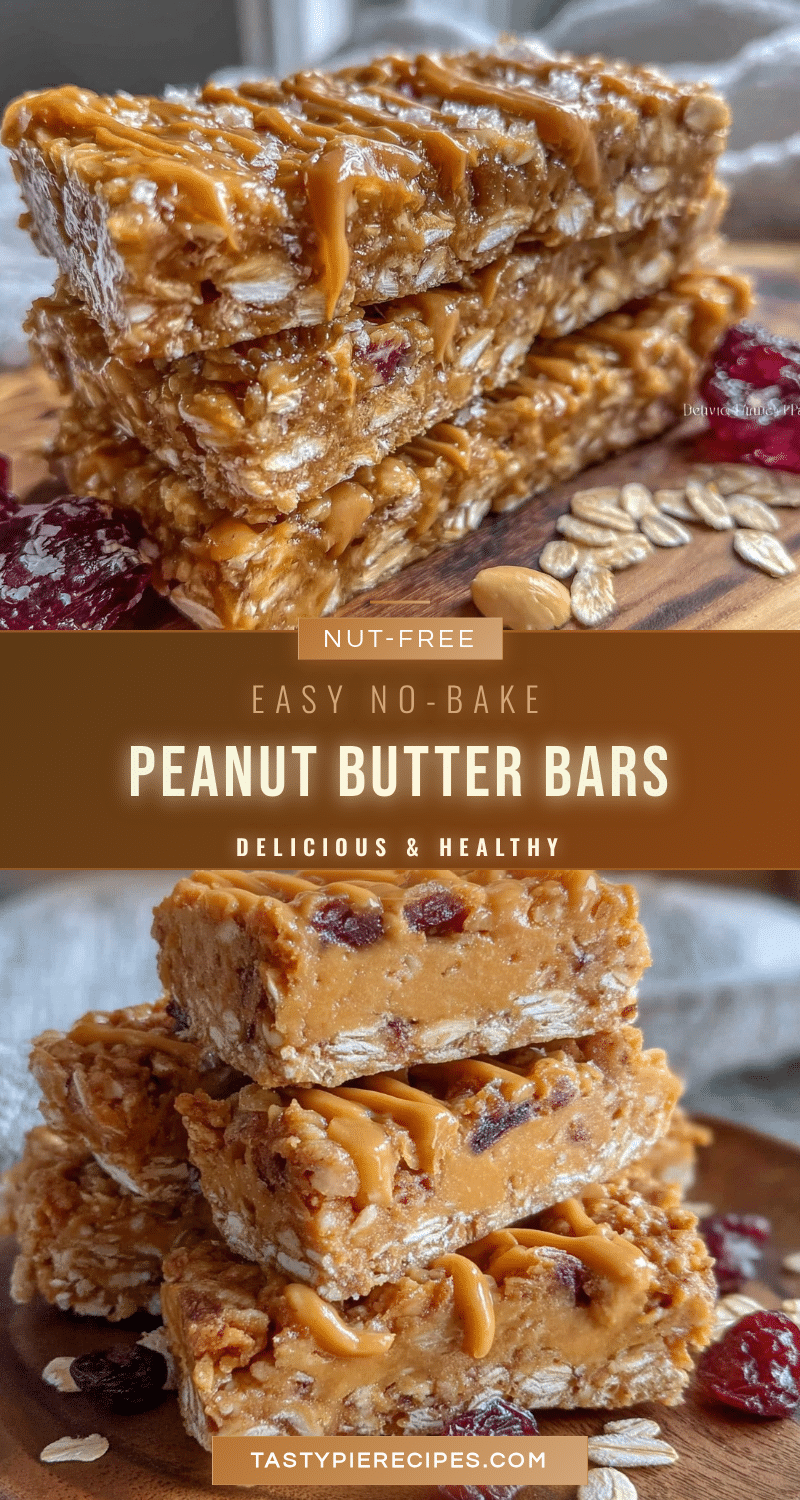
Easy No-Bake 5-Ingredient Nut-Free Peanut Butter Granola Bars

A simple, no-bake recipe for chewy, nut-free peanut butter granola bars made with just five pantry staples. Perfect for quick snacks, allergy-friendly, and requires no oven.
- Prep Time: 7 minutes
- Cook Time: 0 minutes
- Total Time: 2 hours 7 minutes
- Yield: 8 to 10 bars 1x
- Category: Snack
- Cuisine: American
Ingredients
- 1 ½ cups (135g) rolled oats (old-fashioned)
- ½ cup (125g) smooth natural peanut butter
- ⅓ cup (113g) honey (raw or regular)
- 1 tsp (5 ml) vanilla extract
- ¼ tsp (1.5g) salt (fine sea salt or kosher salt)
Instructions
- Line an 8×8-inch (20×20 cm) baking dish with parchment paper, leaving about an inch hanging over the edges.
- In a mixing bowl, combine smooth peanut butter and honey. Stir with a spatula until smooth and glossy, about 1-2 minutes. Add vanilla extract and salt, mixing evenly.
- Add rolled oats to the peanut butter mixture and gently fold until oats are fully coated but still intact, about 2-3 minutes.
- Transfer the mixture into the prepared pan. Cover with plastic wrap or wax paper and press firmly to an even thickness of about ¾ inch (2 cm).
- Refrigerate for at least 2 hours until bars are set and firm. Alternatively, freeze for 1 hour to speed up chilling, but do not freeze solid.
- Lift the block from the pan using parchment edges and cut into 8 to 10 bars with a sharp knife, wiping the knife clean between cuts.
- If bars are too sticky or soft after cutting, chill in the fridge for an additional 15-20 minutes.
Notes
Use smooth peanut butter for best binding and texture. Press mixture firmly into the pan to avoid crumbling. Chill thoroughly before cutting. Store bars in an airtight container in the refrigerator for up to one week or freeze for up to 3 months. For gluten-free, use certified gluten-free oats. Maple syrup can replace honey for a vegan version but may soften bars slightly.
Nutrition
- Serving Size: 1 bar (if cut into 1
- Calories: 180
- Sugar: 11
- Sodium: 90
- Fat: 9
- Saturated Fat: 1.5
- Carbohydrates: 22
- Fiber: 3
- Protein: 5
Keywords: no-bake granola bars, peanut butter granola bars, nut-free snacks, quick snacks, easy granola bars, allergy-friendly snacks, no oven granola bars