I did not trust sliders in a lunchbox. To me, a slider was a party food—something you ate standing up with a napkin tucked into your collar, sauce dripping down your wrist. The thought of packing one into a bento box at 6:30 AM, knowing it would sit there for four hours before my kid even pried the lid off? Honestly, I thought it sounded like a recipe for a soggy, sad little sandwich that would come home uneaten. I had a whole mental list of reasons why it would fail: the bread would get wet, the meat would dry out, and the cheese would turn into a weird, sweaty film.
But then my youngest, Leo, started this thing where he would trade his lunch. Not just any trade—he was specifically hunting for the “good stuff.” He came home one day raving about a friend’s “tiny hamburger,” and I felt a weird pang of defeat. My carefully packed sun butter sandwiches were getting benched. So, I went into the kitchen with a grudge and a mission: make a slider that could survive the lunchbox gauntlet. I tested five different buns, three types of cheese, and two cooking methods before I landed on this version.
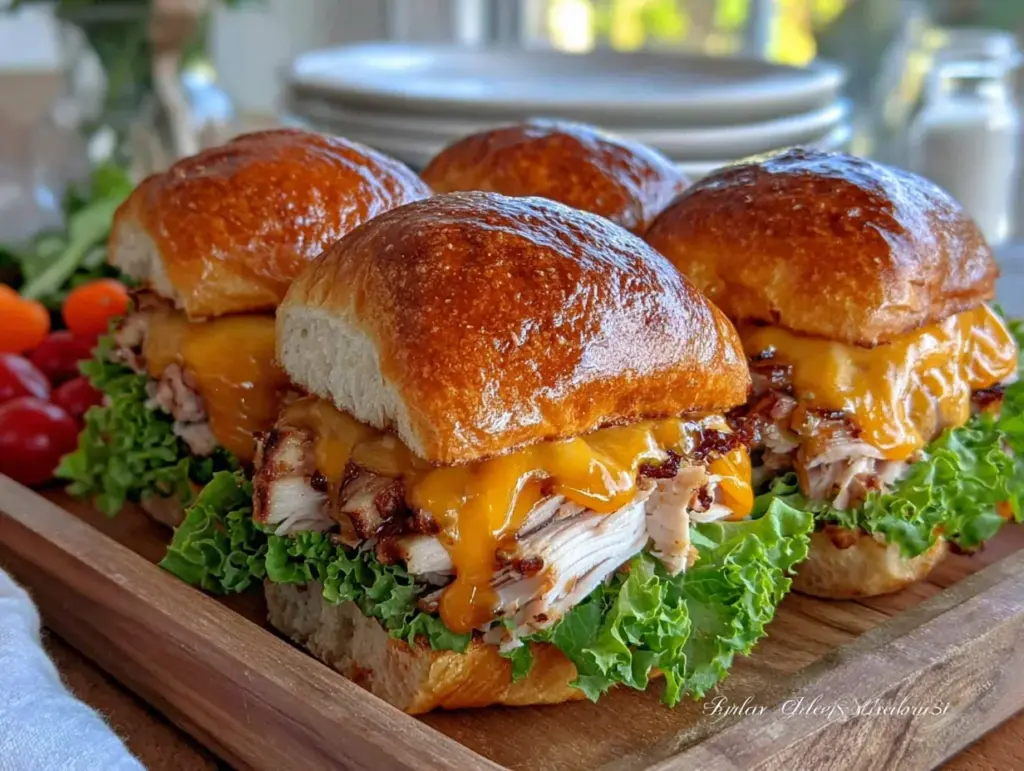
The trick, I found, was in the barrier—a thin layer of something that keeps the bun from absorbing the moisture from the meat and sauce. And you know what? The first time I packed these, Leo came home with an empty container and asked for two the next day. That quiet victory was better than any recipe award. These Easy Mini Turkey and Cheddar Sliders aren’t just a lunchbox filler—they’re a lunchbox hero you can actually trust.
Why You’ll Love This Recipe
I have tested these sliders about a dozen times to make sure they actually work for real life. This isn’t one of those recipes that looks good on Pinterest but falls apart in a brown paper bag. These hold up, taste great cold or at room temperature, and take almost no time to throw together on a Sunday afternoon.
- Quick & Easy: From start to finish, you are looking at about 20 minutes of active time. Perfect for meal prep on a lazy Sunday or a frantic Wednesday morning.
- Simple Ingredients: You probably have most of these in your fridge and pantry right now. No hunting for obscure ingredients at a specialty store.
- Perfect for Meal Prep: Make a batch on Sunday, and you have lunch sorted for the week. They actually taste better on day two or three after the flavors have had time to get friendly.
- Crowd-Pleaser: My kids eat these. My husband steals them from the fridge. I have even brought them to a potluck, and they disappeared before the main course.
- Unbelievably Delicious: The combination of savory turkey, melty cheddar, and a buttery, slightly sweet bun is just pure comfort food. It is simple, but it hits every single time.
What makes these different from every other slider recipe out there is the “barrier method.” I brush the inside of the buns with a thin layer of butter before assembling. It sounds weird, but it creates a seal that stops the juices from the turkey from turning your bun into a mess. It is a small step that makes a huge difference, and it is the kind of trick you only learn from making a mistake and getting mad about it.
What Ingredients You Will Need
This recipe relies on pantry staples and a few quality ingredients to deliver big flavor without any fuss. Here is what you need to grab:
For the Sliders
- 12 slider buns (I prefer Martin’s or King’s Hawaiian for their soft texture and slight sweetness; they hold up really well)
- 1 lb (450g) deli-sliced turkey breast (look for oven-roasted or smoked; avoid anything too watery or pre-sliced super thin)
- 8 slices sharp cheddar cheese (I recommend Tillamook or Cabot for a good melt and strong flavor)
- 3 tablespoons unsalted butter, softened (this is for the barrier and the topping)
- 1 tablespoon Dijon mustard (adds a nice tang; you can use yellow mustard if that’s all you have)
- 1 tablespoon honey (balances the mustard and adds a subtle sweetness)
- 1 teaspoon poppy seeds (optional, but adds a nice crunch and visual appeal)
- 1/2 teaspoon garlic powder
- 1/2 teaspoon onion powder
- Salt and black pepper to taste
For the Barrier (Secret Step)
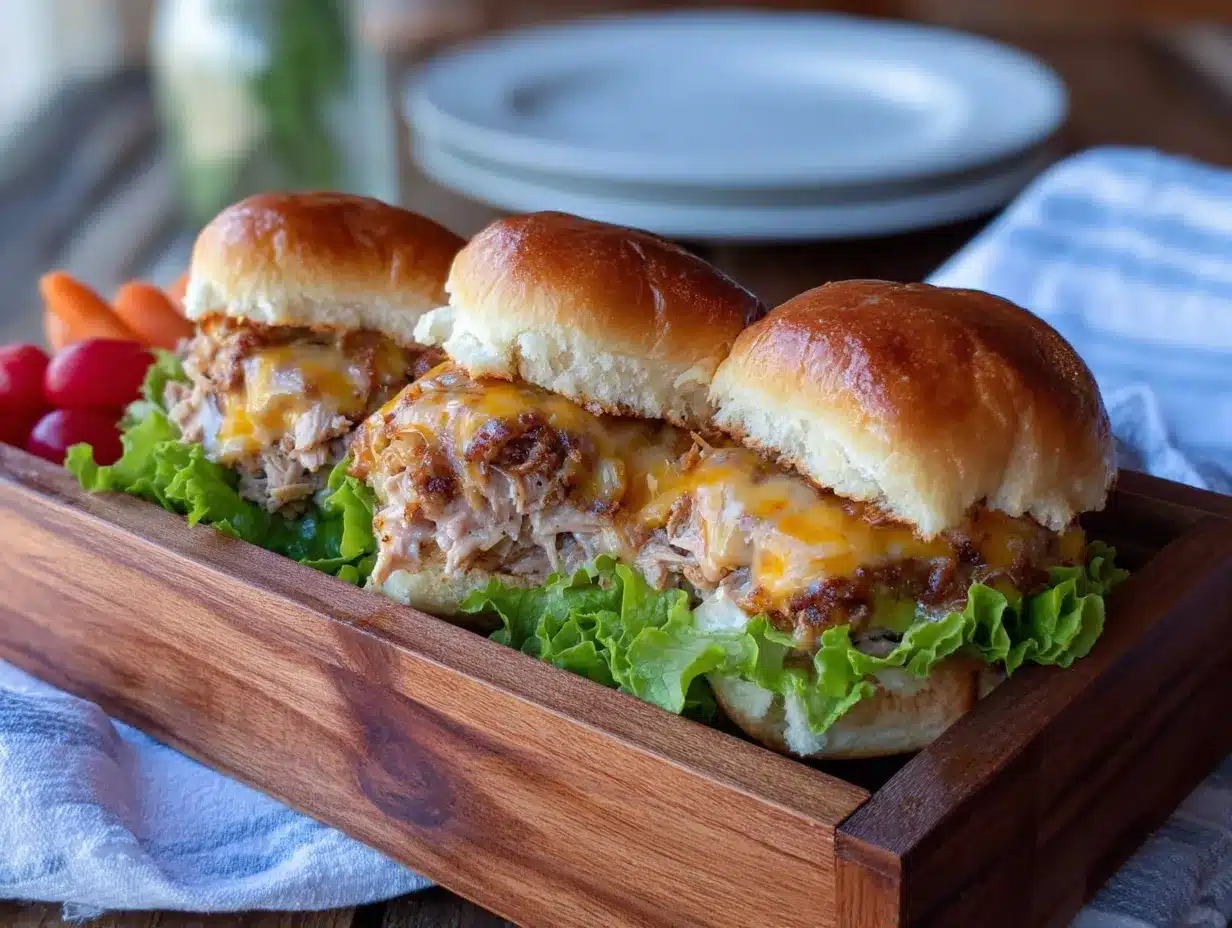
- 1 tablespoon unsalted butter, softened (extra, specifically for brushing the inside of the buns)
When you are picking your turkey, look for a brand that isn’t too wet. Some deli meats have a lot of added water, which will make your sliders soggy. I usually go with Boar’s Head or a store-brand oven-roasted turkey that feels relatively dry to the touch. For the cheese, sharp cheddar gives you the most flavor bang for your buck. If you want to switch it up, provolone or Swiss also work beautifully here.
If you are dairy-free, you can use a plant-based butter and a dairy-free cheddar-style shred, but I will warn you—the melt won’t be quite the same. It will still be tasty, just different. For a gluten-free option, grab your favorite gluten-free slider buns. They tend to be a little more fragile, so handle them gently.
Equipment Needed
You do not need any fancy gadgets for this recipe, which is part of why I love it. Here is what you will need:
- 9×13-inch baking dish (or any oven-safe dish that fits 12 sliders snugly)
- Small mixing bowl (for the butter and seasoning mixture)
- Pastry brush (for spreading the butter; a silicone one is easiest to clean)
- Sharp knife (to slice the buns in half if they aren’t pre-split)
- Aluminum foil (to cover the dish while baking)
If you don’t have a pastry brush, you can use the back of a spoon to spread the butter. It is not as neat, but it works. I have also used my fingers in a pinch—just make sure they are clean! A good baking dish is worth investing in. I use an old Pyrex dish that has seen better days, but it heats evenly and is easy to clean. If you are using a metal pan, just keep an eye on the bottoms of the buns; metal conducts heat faster and can burn them.
Preparation Method
Alright, let’s get to the good part. Follow these steps, and you will have the best lunchbox sliders of your life.
- Preheat your oven to 350°F (175°C). While it is heating up, take your slider buns and slice them in half horizontally if they aren’t already split. Place the bottom halves in your 9×13-inch baking dish, cut side up.
- Make the barrier. Take that extra tablespoon of softened butter and use your fingers or a small spatula to spread a very thin layer on the cut side of each bottom bun. This is the step that saves your sliders from sogginess. It sounds like a pain, but it takes about 90 seconds and is totally worth it.
- Layer the turkey. Fold your deli turkey slices in half and lay them evenly over the bottom buns. Don’t be shy with the meat—you want a good, hearty layer. I usually use about 1.5 to 2 ounces of turkey per slider.
- Add the cheese. Place a slice of cheddar over the turkey on each slider. If your cheese slices are large, you can tear them in half and overlap them slightly. Make sure every bit of turkey is covered if you can—this helps hold everything together.
- Top with the bun tops. Place the top halves of the buns over the cheese, cut side down. Press down gently to make sure everything is sitting nicely.
- Make the topping. In your small bowl, combine the 3 tablespoons of softened butter, Dijon mustard, honey, poppy seeds, garlic powder, and onion powder. Mix until everything is well combined. It will look like a thick, slightly grainy paste.
- Brush the tops. Using your pastry brush, generously brush the butter mixture over the tops of the buns. Try to get some down the sides if you can. Don’t skip this—it is what gives the sliders that gorgeous, golden, slightly crispy top.
- Bake covered. Cover the baking dish tightly with aluminum foil. Bake for 15 minutes. This steams the inside and melts the cheese perfectly without drying out the buns.
- Bake uncovered. Remove the foil and bake for another 5-7 minutes, until the tops are golden brown and the cheese is bubbly around the edges. Keep an eye on them—every oven runs a little differently, and you don’t want burnt tops.
- Rest and slice. Let the sliders rest in the dish for 5 minutes. This is critical. If you try to cut them immediately, they will fall apart. Use a sharp knife to cut between the buns, and serve warm or let them cool completely for lunchboxes.
One thing I learned the hard way: do not overpack the dish. If the sliders are squished too tight, the centers won’t cook evenly, and the buns will get dense. They should fit snugly but not be crammed in there.
Cooking Tips & Techniques
I have made these sliders more times than I can count, and I have definitely made my share of mistakes. Here is what I have learned so you don’t have to repeat my errors.
The butter barrier is non-negotiable. I know I keep saying it, but the first time I made these, I skipped it because I was in a hurry. By lunchtime, the bottom buns were completely soaked through. It was a tragedy. That thin layer of fat creates a waterproof seal between the bread and the filling. Trust me on this one.
Let the sliders rest. I know you are hungry. I know they smell amazing. But if you cut into them right out of the oven, the cheese will ooze out, and the structure will collapse. Five minutes is all it takes. Use that time to clean up your workspace or pack the rest of the lunchboxes.
Toast the buns if you want extra crunch. If you like a little more texture, you can toast the top buns under the broiler for 1-2 minutes before assembling. Just watch them closely—broilers work fast, and burnt buns are a bummer.
Double the batch for crowds. This recipe scales beautifully. For a party or a big family gathering, just double everything and use two baking dishes. The cooking time stays roughly the same, but you might need an extra minute or two under the foil.
Use room temperature butter. Cold butter doesn’t spread well and will tear your buns. Leave it out on the counter for about 20 minutes before you start. If you forget, you can microwave it in 5-second bursts, but be careful—melted butter won’t work the same way for the barrier.
Variations & Adaptations
One of the best things about this recipe is how flexible it is. Here are a few ways I have switched it up depending on what I have in the fridge or who I am feeding.
Cheese Swap: If cheddar isn’t your thing, try provolone for a milder flavor, Swiss for a nutty twist, or pepper jack if you want a little heat. I made a batch with smoked gouda once, and it was absolutely incredible—deep, smoky, and rich.
Meat Swap: You can use roasted chicken, ham, or even roast beef instead of turkey. The cooking time stays the same. I have also made a vegetarian version using thick slices of grilled portobello mushrooms and roasted red peppers, and it was a huge hit with my friend who doesn’t eat meat.
Spicy Version: Add a thin layer of sriracha mayo or chipotle aioli to the bottom buns before layering the turkey. You can also sprinkle some red pepper flakes into the butter topping for an extra kick.
Breakfast Sliders: Swap the turkey for scrambled eggs and cooked breakfast sausage. Use American cheese instead of cheddar. These are perfect for a busy morning or a brunch gathering.
Low-Carb Option: Skip the buns entirely and use large lettuce leaves to wrap the turkey and cheese. You lose the bun texture, but the filling is still delicious. You can also use keto-friendly cloud bread if you want something more bread-like.
Serving & Storage Suggestions
These sliders are incredibly versatile when it comes to serving. For a lunchbox, I let them cool completely to room temperature before packing them. I wrap each one individually in a piece of parchment paper, then place them in the lunchbox. This keeps them from getting squished and helps maintain the bun texture.
If you are serving them for dinner or a party, serve them warm right out of the oven. They pair beautifully with a simple side salad, some sweet potato fries, or a bowl of tomato soup. For a game day spread, put them out on a platter with some pickles, potato chips, and a few dipping sauces like ranch or honey mustard.
Refrigerator Storage: Store leftover sliders in an airtight container in the fridge for up to 4 days. The flavors actually meld together and get better after a day or two. I usually make a batch on Sunday and we eat them through Thursday.
Freezer Storage: These freeze like a dream. Wrap each cooled slider tightly in plastic wrap, then place them in a freezer-safe bag or container. They will keep for up to 3 months. To reheat, unwrap and microwave for 45-60 seconds, or pop them in a 350°F oven for about 10 minutes.
Reheating: The best way to reheat a slider is in a toaster oven or air fryer at 350°F for about 5 minutes. This crisps the bun back up without drying out the turkey. If you are in a rush, the microwave works fine—just wrap it in a damp paper towel to add a little steam.
Nutritional Information & Benefits
Here is an approximate nutritional breakdown for one slider (based on 12 servings):
| Nutrient | Amount per Slider |
|---|---|
| Calories | 285 |
| Protein | 18g |
| Fat | 14g |
| Carbohydrates | 22g |
| Fiber | 1g |
| Sugar | 6g |
| Sodium | 620mg |
Turkey is a fantastic source of lean protein, which helps keep you full and satisfied throughout the afternoon. Cheddar provides calcium for strong bones and teeth, plus a good dose of vitamin A. The butter and buns add some healthy fats and carbohydrates for energy. If you are watching your sodium, look for low-sodium deli turkey and reduce the added salt.
These sliders are not low-carb, but they are balanced enough to fit into a well-rounded diet. For a lighter option, you can use a whole wheat slider bun and reduced-fat cheese. The protein-to-fat ratio makes them a great choice for active kids and adults who need sustained energy without a crash.
Conclusion
These Easy Mini Turkey and Cheddar Sliders have genuinely changed our lunchbox game in this house. They are the recipe I turn to when I want something that feels special but takes almost no effort. There is something deeply satisfying about knowing my kids are eating a lunch they actually look forward to, and that I didn’t have to spend hours in the kitchen to make it happen.
I love that this recipe is a canvas—you can tweak it, swap things out, and make it your own based on what you have in the fridge or what your family craves. That is the kind of cooking I believe in: practical, flexible, and rooted in real life. If you try these, I would love to hear how they turned out. Did you add something unexpected? Did your kids ask for seconds? Drop a comment below and let me know. And if you are looking for another easy lunchbox idea, you might enjoy these creamy no-churn treats for a fun dessert swap. Happy cooking, friends!
Frequently Asked Questions
Can I make these sliders ahead of time?
Absolutely. You can assemble the sliders completely (without the butter topping) and store them covered in the fridge for up to 24 hours. When you are ready to bake, add the butter topping and follow the baking instructions. You might need to add 2-3 extra minutes to the covered baking time since they are starting from cold.
Can I use ground turkey instead of deli slices?
You can, but it changes the texture quite a bit. Cook the ground turkey with some salt, pepper, and a little onion powder, then drain any excess fat before layering. The sliders will be a little more rustic and crumbly, but still delicious. Just make sure the meat is fully cooked and cooled slightly before assembling.
How do I keep the buns from getting soggy in a lunchbox?
The butter barrier is your best friend here. Also, make sure the sliders are completely cool before you pack them. If you pack them while they are still warm, the steam will condense inside the container and make everything wet. Let them sit on a wire rack for at least 20 minutes after baking.
Can I use a different type of cheese?
Yes, absolutely. Provolone, Swiss, mozzarella, and pepper jack all work great. Just avoid cheeses that are very soft or crumbly, like brie or feta, as they won’t hold up as well in the baking process. If you want to get fancy, a mix of cheddar and gouda is my personal favorite.
How do I reheat frozen sliders without making them soggy?
The best method is to thaw them in the fridge overnight, then reheat in a toaster oven or air fryer at 350°F for about 5 minutes. If you are in a rush, you can microwave them from frozen for about 60-90 seconds, but the bun will be softer. To crisp it back up, pop it under the broiler for 30 seconds after microwaving.
Pin This Recipe!
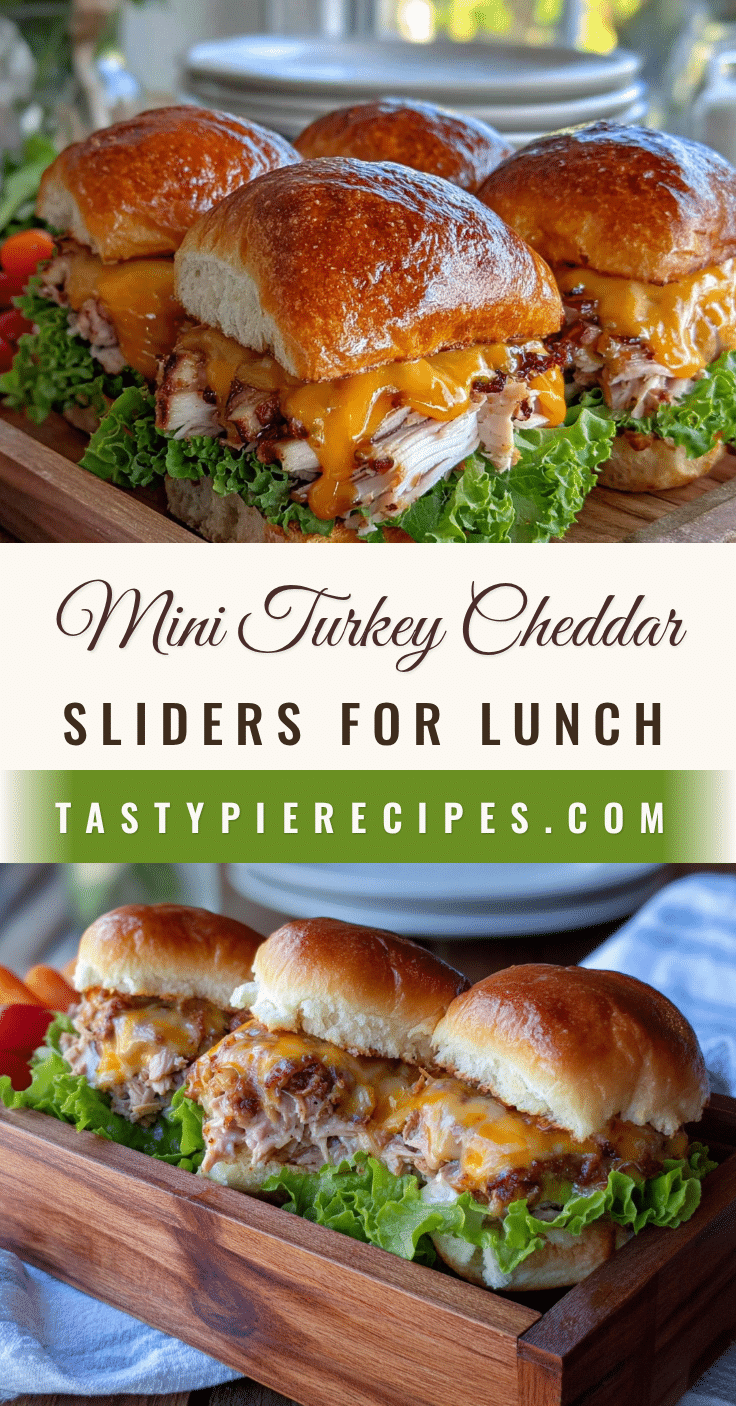
Easy Mini Turkey and Cheddar Sliders: Best Lunchbox Recipe

These Easy Mini Turkey and Cheddar Sliders are a lunchbox hero you can actually trust. They hold up, taste great cold or at room temperature, and take almost no time to throw together on a Sunday afternoon.
- Prep Time: 20 minutes
- Cook Time: 22 minutes
- Total Time: 42 minutes
- Yield: 12 servings 1x
- Category: Main Course
- Cuisine: American
Ingredients
- 12 slider buns (preferably Martin’s or King’s Hawaiian)
- 1 lb (450g) deli-sliced turkey breast (oven-roasted or smoked)
- 8 slices sharp cheddar cheese (recommend Tillamook or Cabot)
- 3 tablespoons unsalted butter, softened
- 1 tablespoon Dijon mustard
- 1 tablespoon honey
- 1 teaspoon poppy seeds (optional)
- 1/2 teaspoon garlic powder
- 1/2 teaspoon onion powder
- Salt and black pepper to taste
- 1 tablespoon unsalted butter, softened (for the barrier)
Instructions
- Preheat your oven to 350°F (175°C). Slice slider buns in half horizontally if not already split. Place bottom halves in a 9×13-inch baking dish, cut side up.
- Make the barrier: Spread a thin layer of the extra softened butter on the cut side of each bottom bun.
- Layer the turkey: Fold deli turkey slices in half and lay them evenly over the bottom buns.
- Add the cheese: Place a slice of cheddar over the turkey on each slider.
- Top with the bun tops: Place top halves of buns over the cheese, cut side down. Press down gently.
- Make the topping: In a small bowl, combine 3 tablespoons softened butter, Dijon mustard, honey, poppy seeds, garlic powder, and onion powder. Mix until well combined.
- Brush the tops: Generously brush the butter mixture over the tops of the buns, getting some down the sides.
- Bake covered: Cover the baking dish tightly with aluminum foil. Bake for 15 minutes.
- Bake uncovered: Remove foil and bake for another 5-7 minutes, until tops are golden brown and cheese is bubbly.
- Rest and slice: Let sliders rest in the dish for 5 minutes. Use a sharp knife to cut between the buns. Serve warm or let cool completely for lunchboxes.
Notes
The butter barrier is non-negotiable to prevent sogginess. Let sliders rest for 5 minutes before cutting. Use room temperature butter for easy spreading. For extra crunch, toast the top buns under the broiler for 1-2 minutes before assembling.
Nutrition
- Serving Size: 1 slider
- Calories: 285
- Sugar: 6
- Sodium: 620
- Fat: 14
- Saturated Fat: 7
- Carbohydrates: 22
- Fiber: 1
- Protein: 18
Keywords: turkey sliders, cheddar sliders, lunchbox recipe, easy sliders, mini sliders, meal prep, kid-friendly