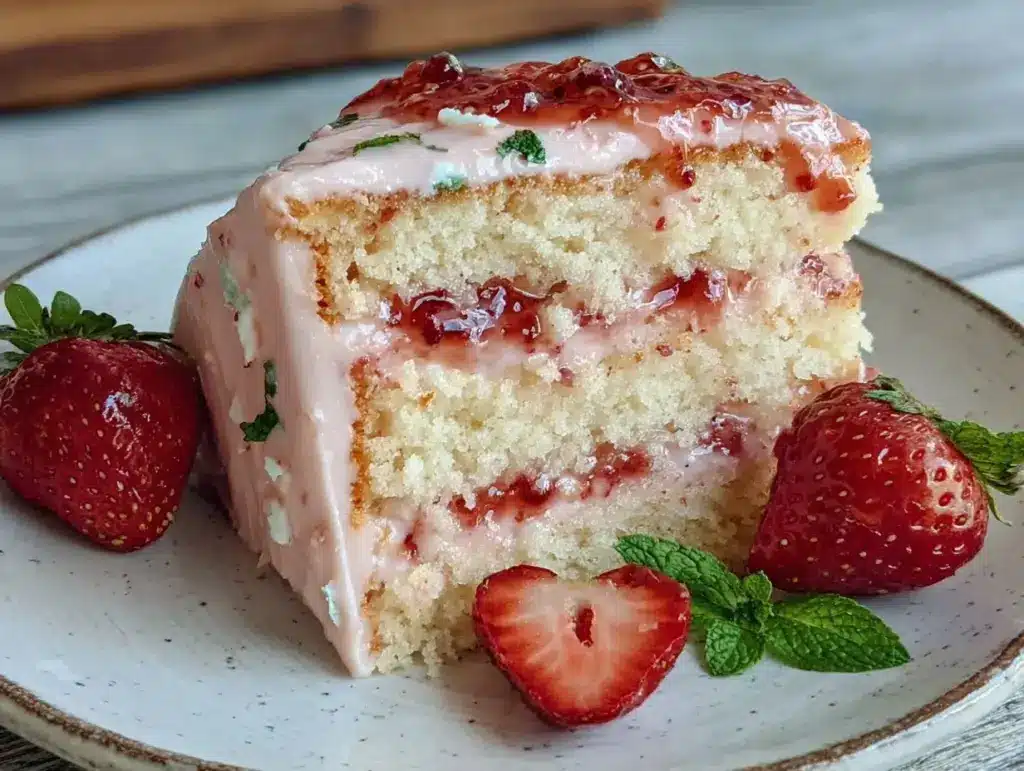
“You’ve got to try this cake,” my friend texted me on a gloomy Wednesday afternoon. Honestly, I was knee-deep in a mountain of emails and about to give up on dinner when that message popped up. Later that evening, as I sliced into the Dreamy Ombre Strawberry Milk Cake with Hidden Jam Center, I realized why she was so insistent. The soft gradient of pink layers looked almost too pretty to eat, yet the moment I bit into the tender crumb with its little surprise of strawberry jam inside, all the day’s chaos melted away.
It wasn’t just the cake’s looks that hooked me, though that ombre effect had me staring for a solid five minutes before even cutting a slice. It was the way the subtle strawberry flavor mingled with the creamy milkiness of the batter — like a nostalgic nod to childhood strawberry milk but transformed into an elegant, grown-up dessert. Somehow, it felt both comforting and special, the kind of thing you’d want to serve when you want to impress without the fuss.
What I love is that the jam center isn’t just an afterthought; it’s this hidden gem that brings a little burst of sweetness and texture right in the heart of the cake. I can’t help but think back to the times we spread homemade jams on flaky biscuits — speaking of which, if you’re into sweet spreads, you might enjoy my savory bacon jam recipe for a totally different kind of jam adventure.
Anyway, this cake quickly became a weekend obsession. I found myself tweaking the layers, testing how pink I could get the batter without it tasting artificial, and even swapping different berry jams for that hidden center. The best part? It’s straightforward enough to throw together even when you’re juggling a million things, but it feels like a treat you bought from a fancy bakery. By the time I finished that first slice, I knew this recipe was going to stick around for good.
It’s funny how a simple cake can turn a regular evening into something that feels a little magical — and that’s exactly why the Dreamy Ombre Strawberry Milk Cake with Hidden Jam Center is so special to me. Let’s just say, this one’s a keeper.
Why You’ll Love This Dreamy Ombre Strawberry Milk Cake Recipe
After making this strawberry milk cake more times than I care to admit, I can confidently say it’s a winner for so many reasons. Here’s what makes it stand out:
- Quick & Easy: You’ll have it ready to bake in under 30 minutes — perfect for those “I want cake now” moments.
- Simple Ingredients: No need for specialty shops. The ingredients are pantry staples, plus fresh strawberries or your favorite jam.
- Perfect for Special Occasions: Whether it’s a cozy afternoon tea or a birthday surprise, the ombre layers bring that wow factor.
- Crowd-Pleaser: Kids love the pretty pink shades, and adults appreciate the delicate balance of fruit and creaminess.
- Unbelievably Delicious: The silky texture and hidden jam center give it a subtle complexity you won’t find in every strawberry cake.
This isn’t your average, run-of-the-mill strawberry cake. The layered ombre effect isn’t just for show — it’s a gentle progression of strawberry intensity that’s totally dreamy. Plus, the hidden jam center is a technique I picked up after experimenting with layered desserts. It locks in moisture and adds that lovely surprise bite. Honestly, it’s like the cake’s little secret weapon.
And if you want to mix things up, you can try swapping the jam for a tangy cream cheese filling or even a luscious berry compote — much like the fresh berry compote I love to pair with waffles, reminiscent of the ones in my crispy sourdough discard waffles. It’s a recipe that always impresses without demanding too much time or effort.
Ultimately, this strawberry milk cake has that rare ability to feel both simple and special — the kind of dessert that makes you close your eyes after the first bite and savor the moment.
What Ingredients You Will Need
This recipe uses simple, wholesome ingredients to deliver bold strawberry flavor and a satisfying, tender texture without the fuss. Most are pantry basics, with fresh strawberry elements to keep it bright and fresh.
- For the Cake Batter:
- All-purpose flour – 2 ½ cups (320g), sifted (I prefer King Arthur for consistent texture)
- Baking powder – 2 ½ teaspoons
- Salt – ½ teaspoon
- Unsalted butter – 1 cup (227g), softened (room temperature for easy creaming)
- Granulated sugar – 1 ¾ cups (350g)
- Large eggs – 4, room temperature (helps with emulsion and fluffiness)
- Whole milk – 1 cup (240ml), warmed slightly (about 100°F / 38°C)
- Pure vanilla extract – 2 teaspoons
- Strawberry milk powder or freeze-dried strawberry powder – 3 tablespoons (optional, for that subtle strawberry milk flavor)
- Pink food coloring – a few drops (to create the ombre effect, use gel for vibrant color)
- For the Hidden Jam Center:
- Strawberry jam – ¾ cup (approximately 240g), homemade or store-bought (I love using a jam with visible fruit pieces for texture)
- Optional: a spoonful of lemon juice to brighten the jam flavor
- For the Frosting (Optional):
- Heavy cream – 1 cup (240ml), chilled
- Powdered sugar – ¼ cup (30g)
- Vanilla extract – 1 teaspoon
For substitutions: You can swap the all-purpose flour for a gluten-free blend if needed, though texture will vary slightly. Use almond or oat milk instead of whole milk for a dairy-free option, and coconut cream whipped with powdered sugar makes a lovely frosting alternative.
Note: If you want to try a different jam center, raspberry or mixed berry jams work well too, giving a tangier contrast to the sweet cake layers.
Equipment Needed
- Two 8-inch (20 cm) round cake pans – metal pans work best for even baking; if you only have one, you can bake layers in batches.
- Mixing bowls – at least two, preferably glass or metal for easy mixing and temperature control.
- Electric mixer or stand mixer – for creaming butter and sugar thoroughly (makes a big difference in texture).
- Measuring cups and spoons – precise measurements = better cake every time.
- Spatula – for folding in dry ingredients gently without knocking out air.
- Small offset spatula or butter knife – to spread the jam evenly between layers.
- Cooling rack – essential to cool cakes evenly and prevent sogginess.
If you don’t have an electric mixer, vigorous hand whisking works but expect a little more arm workout! Also, non-stick pans or parchment paper lining can save your cake from sticking — something I learned after one too many pan disasters. Budget-friendly baking pans from brands like Wilton or Nordic Ware work well and last for years.
Preparation Method
- Preheat your oven to 350°F (175°C). Grease and flour two 8-inch round cake pans or line them with parchment paper circles. This helps the cakes release cleanly after baking.
- Mix dry ingredients: In a medium bowl, sift together 2 ½ cups (320g) all-purpose flour, 2 ½ teaspoons baking powder, and ½ teaspoon salt. Set aside.
- Cream butter and sugar: Using an electric mixer, beat 1 cup (227g) softened unsalted butter with 1 ¾ cups (350g) granulated sugar on medium speed until light and fluffy, about 3-5 minutes. This step is crucial for a tender crumb, so don’t rush it.
- Add eggs: Beat in 4 large eggs, one at a time, fully incorporating each before adding the next. This helps with the batter’s structure and moisture.
- Incorporate vanilla and strawberry flavor: Mix in 2 teaspoons vanilla extract and 3 tablespoons strawberry milk powder or freeze-dried strawberry powder for that subtle, nostalgic flavor.
- Add dry and wet ingredients alternately: Reduce mixer speed to low. Add the dry flour mixture in three parts, alternating with 1 cup (240ml) warm whole milk in two parts, beginning and ending with flour. Mix just until combined — overmixing can make the cake dense.
- Divide and color the batter: Scoop the batter evenly into 4 bowls. Leave one plain (white), then add a few drops of pink gel food coloring to the others, increasing the amount for each bowl to create a gradient from light to dark pink. Stir each gently to combine without deflating.
- Layer the batter: Starting with the lightest pink, spoon the batter into the cake pans in layers, gently smoothing each layer. Alternate pans or do one at a time. This layering creates the dreamy ombre effect. You’ll want about 4 layers total (2 layers per pan).
- Bake: Place the pans in the oven and bake for 30-35 minutes, or until a toothpick inserted near the center comes out clean. The cakes should spring back lightly when pressed. Avoid opening the oven door too often.
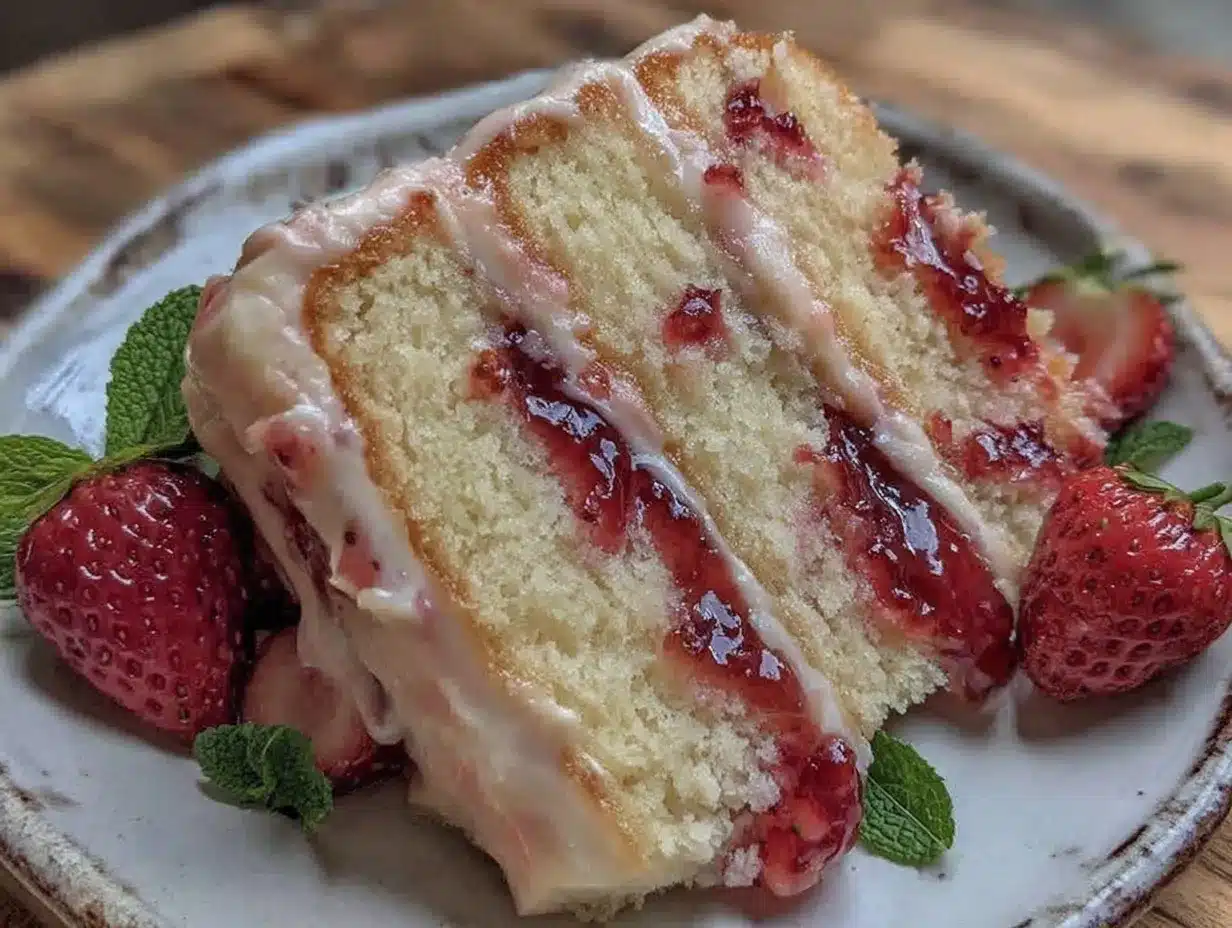
- Cool and assemble: Let the cakes cool in the pans for 10 minutes, then run a knife around the edges and invert onto cooling racks. Once completely cool, carefully slice each cake horizontally to add your hidden jam center.
- Add the jam center: Spread about ¼ cup (80g) strawberry jam evenly over the bottom half of one layer, then gently place the top half back. Repeat for the other cake. Stack the two cakes on top of each other to create a tall, luscious dessert.
- Optional frosting: Whip 1 cup (240ml) chilled heavy cream with ¼ cup (30g) powdered sugar and 1 teaspoon vanilla until soft peaks form. Frost the top and sides of the cake for extra creaminess.
- Chill before serving: Refrigerate for at least 1 hour to let the jam set and the layers meld. Bring to room temperature for 15 minutes before slicing for best texture.
Pro tip: When slicing the cake, use a sharp serrated knife and wipe it clean between cuts to keep the layers neat and the jam from smearing.
Cooking Tips & Techniques for Success
Getting the perfect ombre strawberry milk cake takes a few tricks I picked up through trial and error:
- Softened butter is key. If your butter’s too cold, it won’t cream properly, leading to a dense cake. Let it sit at room temp for at least 30 minutes before baking.
- Don’t overmix the batter. Once the flour is added, fold gently to keep the crumb light and airy.
- Use gel food coloring. Liquid can thin your batter and dull the colors. Gel gives that vibrant ombre without changing texture.
- Layer carefully. Pour batter gently and try not to swirl colors together. Patience here pays off in the final look.
- Jam thickness matters. Too runny, and it will seep out; too thick, and it’s hard to spread. I like a jam with natural fruit chunks for texture and fresh flavor.
- Test doneness with a toothpick. The layers bake unevenly sometimes — check a few spots to avoid overbaking.
When I first made this cake, I learned the hard way that rushing the cooling step leads to a messy jam center. Let the cake cool completely before slicing and assembling, or you’ll end up with a jammy mess, no matter how delicious it tastes!
Multitasking tip: While the cake bakes, whip up the frosting or clean your workspace to streamline the process. This recipe is surprisingly forgiving if you keep things moving.
Variations & Adaptations to Try
Here are some ways to tailor this cake to your tastes or dietary needs:
- Vegan version: Use dairy-free butter and milk alternatives like almond or oat milk. Replace eggs with flax eggs (1 tablespoon ground flaxseed + 3 tablespoons water per egg) and swap heavy cream frosting for whipped coconut cream.
- Berry swap: Try raspberry or blueberry jam for the center and adjust the powder or puree in the batter accordingly. A lemon zest addition brightens flavors nicely.
- Chocolate twist: Add ¼ cup (25g) cocoa powder to the darkest ombre layer for a strawberry-chocolate combo. Use dark chocolate ganache instead of jam for the center.
- Mini cakes: Make individual ombre cupcakes with a dollop of jam inside — perfect for parties or lunchbox treats.
- Gluten-free: Use a 1:1 gluten-free baking blend. Expect a slightly different texture but equally delicious.
Personally, I once tried a version with a tangy cream cheese center instead of jam — it was a surprising hit at a brunch party. For a lighter touch, just a thin layer of fresh sliced strawberries inside the layers adds freshness without extra sweetness.
Serving & Storage Suggestions
This cake is best served slightly chilled or at room temperature to fully enjoy the creamy, tender crumb. Slice it into generous wedges to showcase the ombre layers and that secret jam center — it’s quite the conversation starter!
Pair it with a cup of hot tea or a simple glass of cold milk for a nostalgic combo. For a fancier spread, serve alongside lightly whipped cream or fresh strawberries macerated with a splash of lemon.
To store, wrap tightly with plastic wrap or keep in an airtight container in the refrigerator for up to 3 days. The jam center keeps the cake moist, but it’s best eaten fresh. You can freeze individual slices wrapped well for up to 1 month; thaw overnight in the fridge.
Reheat gently in a microwave for 10-15 seconds if you want that “just-baked” warmth. Flavors tend to deepen after a day, so leftovers often taste even better — if you can resist!
Nutritional Information & Benefits
Each slice (about 1/12th of the cake) roughly contains:
| Calories | Fat | Carbohydrates | Protein |
|---|---|---|---|
| 320 kcal | 15g | 42g | 5g |
This cake provides a nice balance of carbohydrates and fats to satisfy sweet cravings without going overboard. The strawberry components add antioxidants, vitamin C, and a natural fruity sweetness, which softens the indulgence. Using whole milk and butter means you get some calcium and fat-soluble vitamins, but if you want a lighter option, swapping for dairy alternatives works well.
Keep in mind this recipe contains gluten, dairy, and eggs, so it’s not suitable for those with allergies to these ingredients. However, the flexible nature of this cake lets you adapt it for gluten-free or vegan diets without losing much of the charm.
Conclusion
The Dreamy Ombre Strawberry Milk Cake with Hidden Jam Center is one of those recipes that makes you feel like you’ve uncovered a little secret — a dessert that’s easy enough to make on a whim, but special enough to bring a smile with every bite. It’s perfect for anyone who loves strawberry flavors with a touch of nostalgia, wrapped up in a pretty package.
Feel free to switch up the jams, try different frostings, or even turn it into cupcakes for smaller treats. It’s a recipe that invites creativity while delivering comforting, reliable results every time.
Personally, this cake reminds me that sometimes the simplest ingredients and a little patience can create something truly magical in the kitchen. So go ahead — make it your own, share it with friends, and enjoy every dreamy slice.
FAQs about Dreamy Ombre Strawberry Milk Cake
How do I get the perfect ombre effect in the cake?
Divide your batter evenly into separate bowls and add increasing amounts of pink gel food coloring to each. Pour each color layer gently into the pan without mixing, creating smooth transitions from light to dark.
Can I use homemade strawberry jam for the hidden center?
Absolutely! Homemade jam adds a fresh, natural flavor. Just make sure it’s not too runny to avoid leaking during assembly.
What if I don’t have strawberry milk powder?
You can skip it or substitute with freeze-dried strawberry powder, fresh strawberry puree, or a few drops of natural strawberry extract for flavor.
How do I store leftovers to keep the cake fresh?
Wrap the cake tightly in plastic wrap or store in an airtight container in the fridge for up to 3 days. You can also freeze slices individually for longer storage.
Is this cake suitable for a party or special occasion?
Yes! Its stunning ombre layers and hidden jam make it a lovely centerpiece dessert for birthdays, showers, or any celebration that calls for something pretty and delicious.
Pin This Recipe!
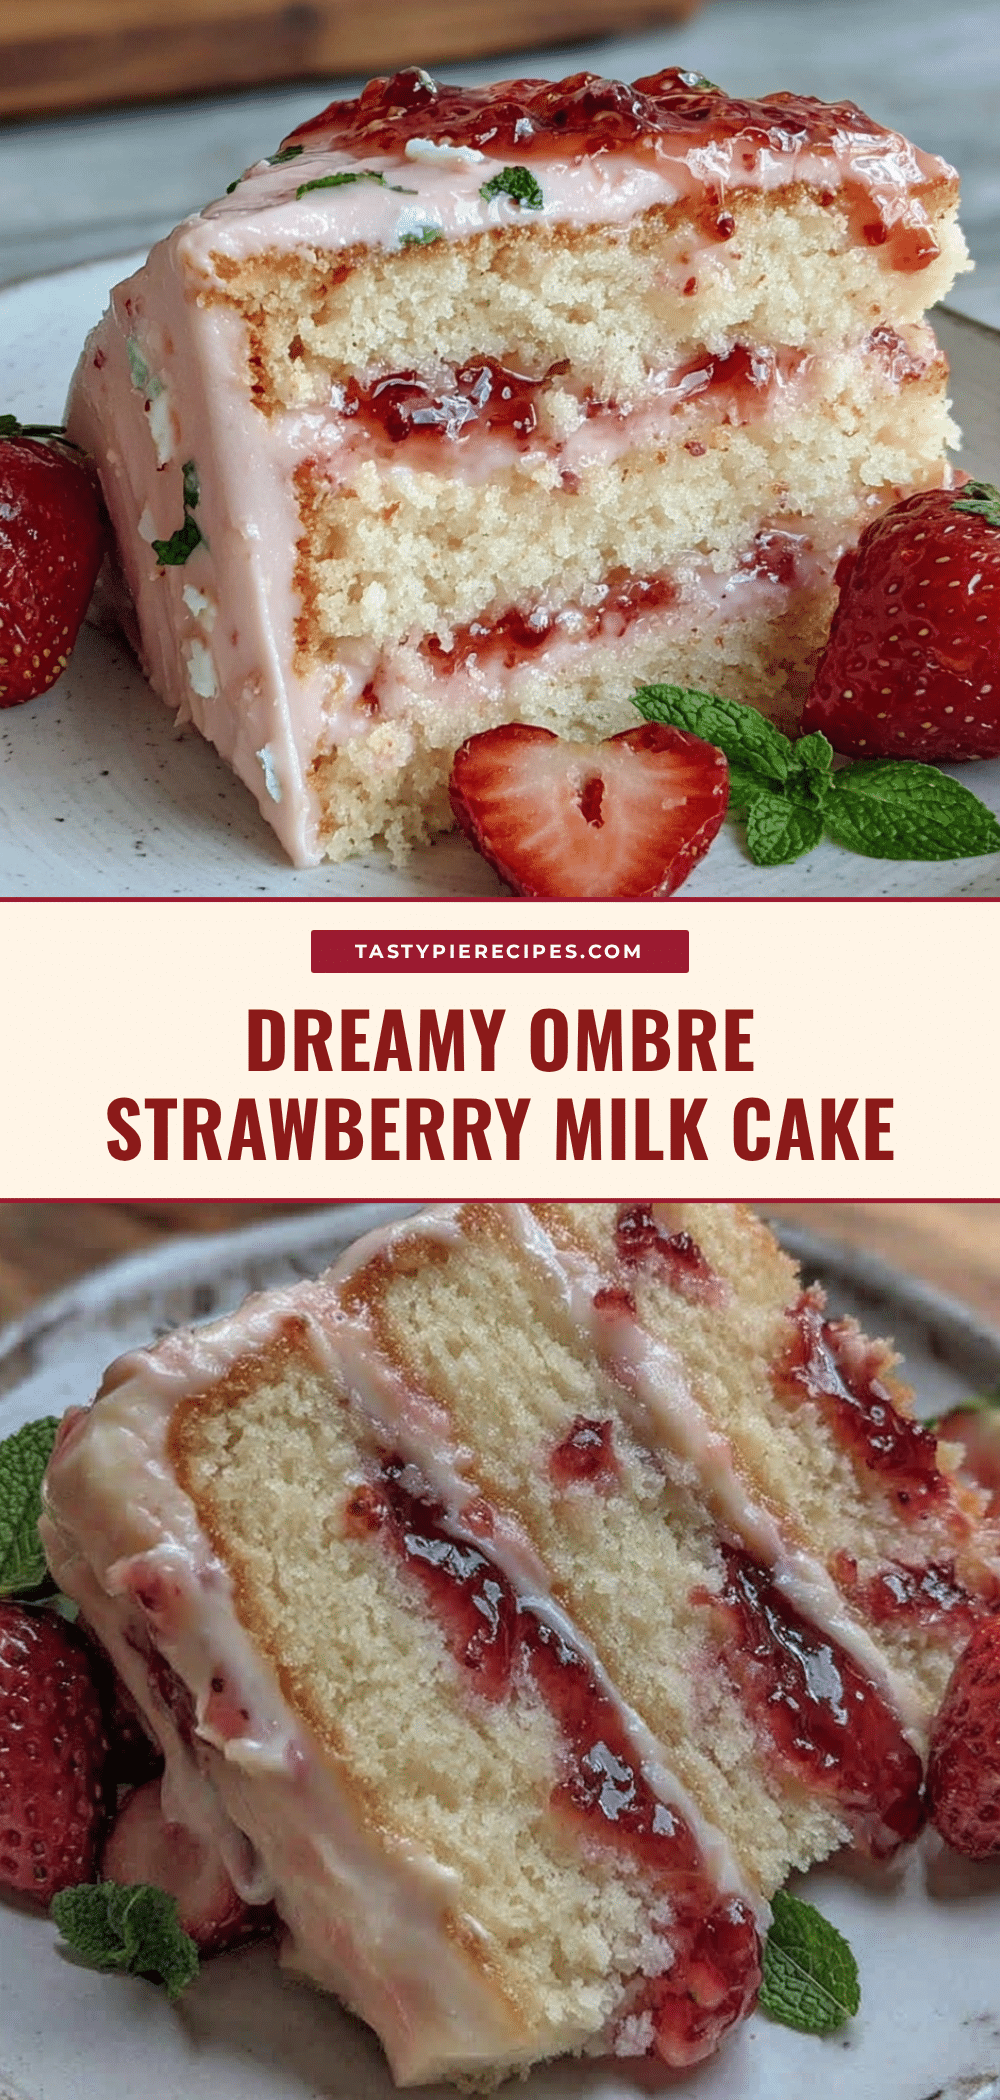
Dreamy Ombre Strawberry Milk Cake with Hidden Jam Center

A soft, elegant strawberry milk cake featuring beautiful ombre pink layers and a hidden strawberry jam center, perfect for special occasions and easy to make.
- Prep Time: 25 minutes
- Cook Time: 30-35 minutes
- Total Time: 1 hour 15 minutes
- Yield: 12 servings 1x
- Category: Dessert
- Cuisine: American
Ingredients
- 2 ½ cups (320g) all-purpose flour, sifted
- 2 ½ teaspoons baking powder
- ½ teaspoon salt
- 1 cup (227g) unsalted butter, softened
- 1 ¾ cups (350g) granulated sugar
- 4 large eggs, room temperature
- 1 cup (240ml) whole milk, warmed slightly (about 100°F / 38°C)
- 2 teaspoons pure vanilla extract
- 3 tablespoons strawberry milk powder or freeze-dried strawberry powder (optional)
- A few drops pink gel food coloring
- ¾ cup (approximately 240g) strawberry jam (homemade or store-bought)
- Optional: a spoonful of lemon juice to brighten the jam flavor
- For frosting (optional):
- 1 cup (240ml) heavy cream, chilled
- ¼ cup (30g) powdered sugar
- 1 teaspoon vanilla extract
Instructions
- Preheat oven to 350°F (175°C). Grease and flour two 8-inch round cake pans or line with parchment paper.
- Sift together flour, baking powder, and salt in a medium bowl; set aside.
- Using an electric mixer, beat softened butter and granulated sugar on medium speed until light and fluffy, about 3-5 minutes.
- Beat in eggs one at a time, fully incorporating each before adding the next.
- Mix in vanilla extract and strawberry milk powder or freeze-dried strawberry powder.
- Reduce mixer speed to low. Add dry flour mixture in three parts, alternating with warm milk in two parts, beginning and ending with flour. Mix just until combined.
- Divide batter evenly into 4 bowls. Leave one plain, add increasing drops of pink gel food coloring to the others to create a gradient from light to dark pink. Stir gently.
- Layer batter into cake pans starting with the lightest pink, smoothing each layer gently to create the ombre effect. About 4 layers total (2 layers per pan).
- Bake for 30-35 minutes or until a toothpick inserted near the center comes out clean. Cakes should spring back lightly when pressed.
- Cool cakes in pans for 10 minutes, then invert onto cooling racks. Once completely cool, slice each cake horizontally to add the hidden jam center.
- Spread about ¼ cup (80g) strawberry jam evenly over the bottom half of one layer, then place the top half back. Repeat for the other cake. Stack the two cakes.
- Optional: Whip heavy cream with powdered sugar and vanilla until soft peaks form. Frost the top and sides of the cake.
- Refrigerate for at least 1 hour to let jam set and layers meld. Bring to room temperature for 15 minutes before slicing.
Notes
Use softened butter for best texture. Do not overmix batter after adding flour to keep cake light. Use gel food coloring for vibrant ombre effect. Let cakes cool completely before slicing and adding jam to avoid mess. Use a sharp serrated knife and wipe clean between cuts for neat slices. Jam should not be too runny to prevent leaking.
Nutrition
- Serving Size: 1 slice (1/12th of c
- Calories: 320
- Fat: 15
- Carbohydrates: 42
- Protein: 5
Keywords: strawberry cake, ombre cake, hidden jam center, layered cake, easy dessert, strawberry milk cake, birthday cake, special occasion cake


