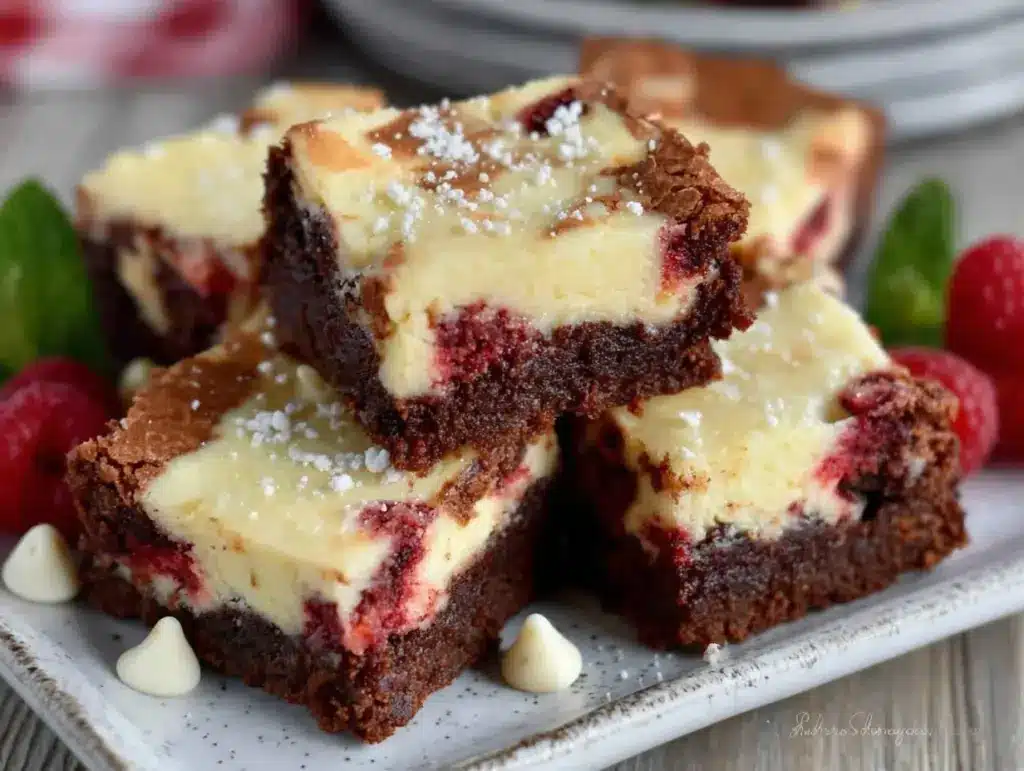
Let me tell you, the scent of rich cocoa mingling with tangy cream cheese wafting from my oven is enough to make anyone’s mouth water. The vibrant red velvet brownie base, topped with swirls of luscious cheesecake, is the kind of dessert that makes your heart skip a beat—especially when shaped into charming little hearts. The first time I baked these decadent heart-shaped red velvet cheesecake brownies, I was instantly hooked. It was one of those rare moments where you pause, take a deep breath, and just smile because you know you’re onto something truly special.
Years ago, when I was knee-high to a grasshopper, my grandma used to bake the most incredible treats for Valentine’s Day, but none quite like these beauties. I stumbled upon the idea on a rainy weekend, trying to recreate that nostalgic feeling with a modern twist. Honestly, I wish I’d discovered this recipe years ago—it brings pure, nostalgic comfort with a dangerously easy preparation method. My family couldn’t stop sneaking them off the cooling rack (and I can’t really blame them). You know what? These brownies aren’t just for Valentine’s Day. They’re perfect for potlucks, sweet treats for your kids, or to brighten up your Pinterest cookie board any day of the year.
After testing this recipe multiple times in the name of research, of course, it’s become a staple for family gatherings and gifting. It feels like a warm hug in dessert form, and trust me, you’re going to want to bookmark this one.
Why You’ll Love This Decadent Heart-Shaped Red Velvet Cheesecake Brownies Recipe
From my many trials and delicious fails, here’s why these decadent heart-shaped red velvet cheesecake brownies stand out in a crowded dessert world:
- Quick & Easy: Comes together in under 45 minutes, perfect for busy weeknights or last-minute celebrations.
- Simple Ingredients: No fancy grocery trips needed; you likely already have most ingredients in your pantry or fridge.
- Perfect for Valentine’s Day: The heart shape and festive red velvet flavor make it a natural choice for love-filled occasions.
- Crowd-Pleaser: Always gets rave reviews from kids and adults alike—no leftovers here!
- Unbelievably Delicious: The creamy cheesecake swirls perfectly balance the moist, tender red velvet brownie base, crafting a next-level comfort dessert.
What makes this recipe different? Well, it’s all about the silky cheesecake layer that’s blended to perfection, creating a dreamy texture that melts in your mouth. Plus, the red velvet base isn’t overly sweet, letting the cocoa notes shine through with just the right hint of tang from buttermilk. The heart-shaped presentation? Oh, that’s just the cherry on top. It’s not just a dessert; it’s a statement.
When you take your first bite, you’ll close your eyes and savor the harmony of flavors—the kind of comfort food that feels like a warm embrace. Whether you’re impressing guests without stress or turning a simple moment into something memorable, this recipe’s got you covered.
What Ingredients You Will Need
This recipe uses simple, wholesome ingredients to deliver bold flavor and satisfying texture without the fuss. Most are pantry staples, and the few fresh ingredients add that special touch.
- For the Red Velvet Brownie Base:
- Unsalted butter, 1/2 cup (113g), melted — I recommend Kerrygold for richness
- Granulated sugar, 1 cup (200g)
- Large eggs, 2, room temperature
- All-purpose flour, 3/4 cup (90g)
- Cocoa powder, 2 tbsp (unsweetened, Dutch-process preferred)
- Buttermilk, 1/4 cup (60ml), room temperature (adds tang and moisture)
- Red food coloring, 2 tbsp (gel-based for vibrant color)
- Vanilla extract, 1 tsp
- Baking powder, 1/2 tsp
- Salt, 1/4 tsp
- For the Cheesecake Swirl:
- Cream cheese, 8 oz (225g), softened — Philadelphia brand works beautifully
- Granulated sugar, 1/4 cup (50g)
- Large egg, 1, room temperature
- Vanilla extract, 1 tsp
Substitution tips: Use almond flour for a gluten-free option, though texture will be slightly different. Swap buttermilk with plain yogurt mixed with a splash of lemon juice if you don’t have buttermilk on hand. For dairy-free versions, plant-based cream cheese and vegan butter work well, just expect a slight change in texture.
Equipment Needed
- 8×8 inch (20×20 cm) square baking pan — glass or metal both work; I personally prefer metal for crispier edges
- Mixing bowls (one large for brownie base, one medium for cheesecake swirl)
- Hand mixer or stand mixer — makes cream cheese blending smooth and easy
- Rubber spatula for folding batter and scraping down bowls
- Measuring cups and spoons (accurate measurements matter here!)
- Toothpick or thin skewer for creating cheesecake swirls
- Heart-shaped cookie cutter (optional but perfect for Valentine’s Day presentation)
If you don’t have a stand mixer, no worries — a sturdy hand mixer or even a whisk and some elbow grease will do. For budget-friendly baking pans, nonstick aluminum pans are a solid choice. Just make sure to grease or line your pan well to avoid sticking.
Preparation Method

- Preheat your oven to 350°F (175°C). Grease your 8×8 inch pan or line it with parchment paper, leaving a bit of overhang for easy removal later.
- Prepare the red velvet brownie base: In a large bowl, whisk the melted unsalted butter and granulated sugar together until smooth and shiny, about 2 minutes. Add the eggs one at a time, beating well after each addition.
- Mix in the red food coloring, vanilla extract, and buttermilk until combined. The batter should be bright and smooth (the color is half the fun!).
- In a separate bowl, sift together the all-purpose flour, cocoa powder, baking powder, and salt. Gradually add the dry ingredients to the wet ingredients, folding gently with a spatula until just combined — don’t overmix or the brownies will get tough.
- Make the cheesecake swirl: Using a hand or stand mixer, beat the softened cream cheese and sugar until fluffy and smooth, about 2-3 minutes. Add the egg and vanilla extract, mixing until fully incorporated.
- Pour half of the red velvet brownie batter into the prepared pan and spread evenly. Dollop half the cheesecake mixture in spoonfuls over the brownie layer.
- Add the remaining brownie batter on top, then the rest of the cheesecake mixture in dollops.
- Use a toothpick or skewer to swirl the cheesecake gently through the brownie batter, creating a marbled effect — but don’t overdo it!
- Bake for 30-35 minutes, until the edges are set and a toothpick inserted near the center comes out with only a few moist crumbs. The center will still be slightly soft — that’s perfect.
- Cool completely in the pan on a wire rack. Once cooled, chill in the fridge for at least 2 hours to help the cheesecake set fully before cutting.
- Optional: Use a heart-shaped cookie cutter to cut out adorable individual brownies, perfect for gifting or impressing your Valentine.
Pro tip: If your cream cheese mixture is too soft, pop it in the fridge for 10 minutes before swirling. This helps keep the layers distinct and pretty. Also, don’t rush the cooling process — cutting too soon can make the brownies messy.
Cooking Tips & Techniques
Here are some tips I picked up after a few trial runs (and a couple of “oops” moments):
- Use room temperature eggs and cream cheese: It helps everything mix smoothly and prevents lumps.
- Don’t skip sifting your cocoa and flour: It keeps the batter light and prevents clumps that mess with texture.
- Be gentle when folding in dry ingredients: Overmixing develops gluten and makes brownies chewy rather than tender.
- Watch your oven closely: Every oven bakes differently, so start checking at 30 minutes. You want moist crumbs, not a toothpick that’s totally clean.
- Swirling technique: Use a light hand and swirl only a few times — too much blending and your cheesecake pattern disappears.
- Multitasking tip: While the brownies bake, clean up your mixing bowls and prep for chilling to save time.
- Storage tip: Wrap tightly or use an airtight container to keep brownies moist.
Variations & Adaptations
Want to mix things up? Here are some fun ways to customize these decadent heart-shaped red velvet cheesecake brownies:
- Dietary: Swap all-purpose flour for gluten-free blend. Use dairy-free cream cheese and coconut oil instead of butter for a vegan-friendly version.
- Seasonal: Add fresh raspberries or chopped strawberries into the brownie batter for a fruity surprise that pairs beautifully with red velvet.
- Flavor twists: Mix a teaspoon of instant espresso powder into the brownie batter to deepen the chocolate flavor.
- Cooking method: Try making these as cupcakes by dividing the batter into lined muffin tins and baking for 20-25 minutes.
- Personal variation: I once sprinkled chopped toasted pecans on top before swirling the cheesecake — added a delightful crunch and nutty contrast.
Serving & Storage Suggestions
Serve these brownies chilled or at room temperature, depending on your mood. The cheesecake swirl tastes especially creamy when slightly chilled but melts beautifully when left out for 10 minutes.
Pair them with a dollop of whipped cream or a scoop of vanilla ice cream for an indulgent dessert experience. A cup of strong coffee or a glass of cold milk complements the rich, tangy flavors perfectly.
Store leftovers in an airtight container in the refrigerator for up to 5 days. For longer storage, freeze the brownies in a sealed container for up to 3 months. When reheating, allow them to thaw in the fridge overnight and warm briefly in the microwave for that fresh-baked feel.
Flavors actually deepen after a day or two, so if you can resist, letting them rest slightly before serving is worth it.
Nutritional Information & Benefits
Each decadent heart-shaped red velvet cheesecake brownie (assuming 12 servings) contains approximately:
| Calories | 280 |
|---|---|
| Fat | 16g |
| Carbohydrates | 30g |
| Protein | 4g |
Thanks to cream cheese and eggs, these brownies provide a modest amount of protein and calcium. The cocoa powder offers antioxidants, and using buttermilk adds a nice probiotic touch. For those watching carbs, swapping sugar for a granulated sugar substitute can help reduce the sugar content.
Keep in mind, this recipe contains dairy, eggs, gluten, and food coloring, so it’s not suitable for all allergies. Personally, I find this treat balances indulgence with a bit of nutritional value, making it a sweet but satisfying choice on special occasions.
Conclusion
If you’re looking for a dessert that’s as beautiful as it is delicious, these decadent heart-shaped red velvet cheesecake brownies are your new best friend. The perfect balance of tender red velvet and creamy cheesecake makes every bite a moment to savor. You can customize the recipe to fit your taste or dietary needs, and the heart shape adds that extra touch of love—ideal for Valentine’s Day but truly wonderful any time.
Honestly, I love how this recipe feels like a little celebration in every bite, a sweet way to show you care or just treat yourself. So grab your mixing bowls and get ready to make something you and your loved ones will talk about for years.
Don’t forget to leave a comment below if you try it out or have a fun twist of your own. Sharing is caring, and I can’t wait to hear how your baking adventure goes!
FAQs About Decadent Heart-Shaped Red Velvet Cheesecake Brownies
Can I make these brownies ahead of time?
Absolutely! They taste great chilled and keep well in the fridge for up to 5 days. You can also freeze them for longer storage.
What if I don’t have cream cheese?
You could try mascarpone or ricotta cheese, but the texture and tanginess might differ slightly.
How do I prevent the cheesecake from cracking?
Don’t overmix the cheesecake batter and avoid overbaking. Also, swirling gently helps keep the texture smooth and pretty.
Can I use a different pan size?
Yes, but adjust the baking time accordingly. A smaller pan will need more time, and a larger pan less.
Is there a way to make these brownies vegan?
Use dairy-free cream cheese, vegan butter, and flax eggs (1 tbsp flaxseed meal + 3 tbsp water per egg) to make a vegan-friendly version.
Pin This Recipe!
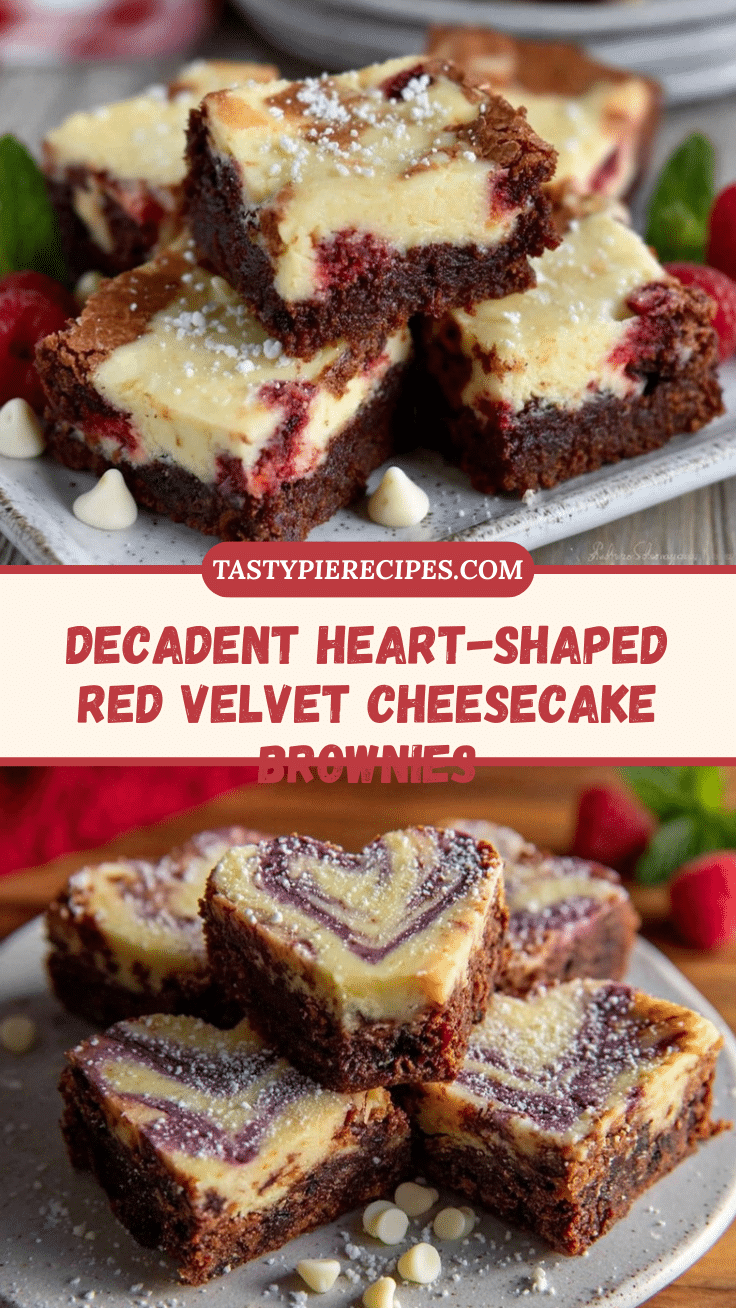
Decadent Heart-Shaped Red Velvet Cheesecake Brownies

Rich red velvet brownie base topped with luscious cheesecake swirls, shaped into charming hearts. Perfect for Valentine’s Day or any special occasion.
- Prep Time: 15 minutes
- Cook Time: 30-35 minutes
- Total Time: 45-50 minutes plus 2 hours chilling
- Yield: 12 servings 1x
- Category: Dessert
- Cuisine: American
Ingredients
- 1/2 cup (113g) unsalted butter, melted
- 1 cup (200g) granulated sugar
- 2 large eggs, room temperature
- 3/4 cup (90g) all-purpose flour
- 2 tbsp unsweetened cocoa powder (Dutch-process preferred)
- 1/4 cup (60ml) buttermilk, room temperature
- 2 tbsp red food coloring (gel-based)
- 1 tsp vanilla extract
- 1/2 tsp baking powder
- 1/4 tsp salt
- 8 oz (225g) cream cheese, softened
- 1/4 cup (50g) granulated sugar
- 1 large egg, room temperature
- 1 tsp vanilla extract
Instructions
- Preheat oven to 350°F (175°C). Grease an 8×8 inch pan or line with parchment paper, leaving overhang for easy removal.
- In a large bowl, whisk melted butter and granulated sugar until smooth and shiny, about 2 minutes. Add eggs one at a time, beating well after each.
- Mix in red food coloring, vanilla extract, and buttermilk until combined and smooth.
- In a separate bowl, sift together flour, cocoa powder, baking powder, and salt. Gradually fold dry ingredients into wet ingredients until just combined; do not overmix.
- Using a mixer, beat cream cheese and sugar until fluffy and smooth, about 2-3 minutes. Add egg and vanilla extract, mixing until fully incorporated.
- Pour half of the brownie batter into the prepared pan and spread evenly. Dollop half the cheesecake mixture over the brownie layer.
- Add remaining brownie batter on top, then dollop the rest of the cheesecake mixture.
- Use a toothpick or skewer to gently swirl the cheesecake through the brownie batter, creating a marbled effect without overmixing.
- Bake for 30-35 minutes until edges are set and a toothpick inserted near the center comes out with a few moist crumbs; center will be slightly soft.
- Cool completely in the pan on a wire rack. Chill in the fridge for at least 2 hours to set before cutting.
- Optional: Use a heart-shaped cookie cutter to cut individual brownies for presentation.
Notes
Use room temperature eggs and cream cheese for smooth mixing. Sift cocoa and flour to avoid clumps. Be gentle folding dry ingredients to keep brownies tender. Swirl cheesecake gently to maintain pattern. Chill brownies for at least 2 hours before cutting. Store in airtight container in fridge up to 5 days or freeze up to 3 months.
Nutrition
- Serving Size: 1 brownie (1/12 of r
- Calories: 280
- Fat: 16
- Carbohydrates: 30
- Protein: 4
Keywords: red velvet brownies, cheesecake brownies, Valentine's Day dessert, heart-shaped brownies, easy brownies, chocolate dessert


