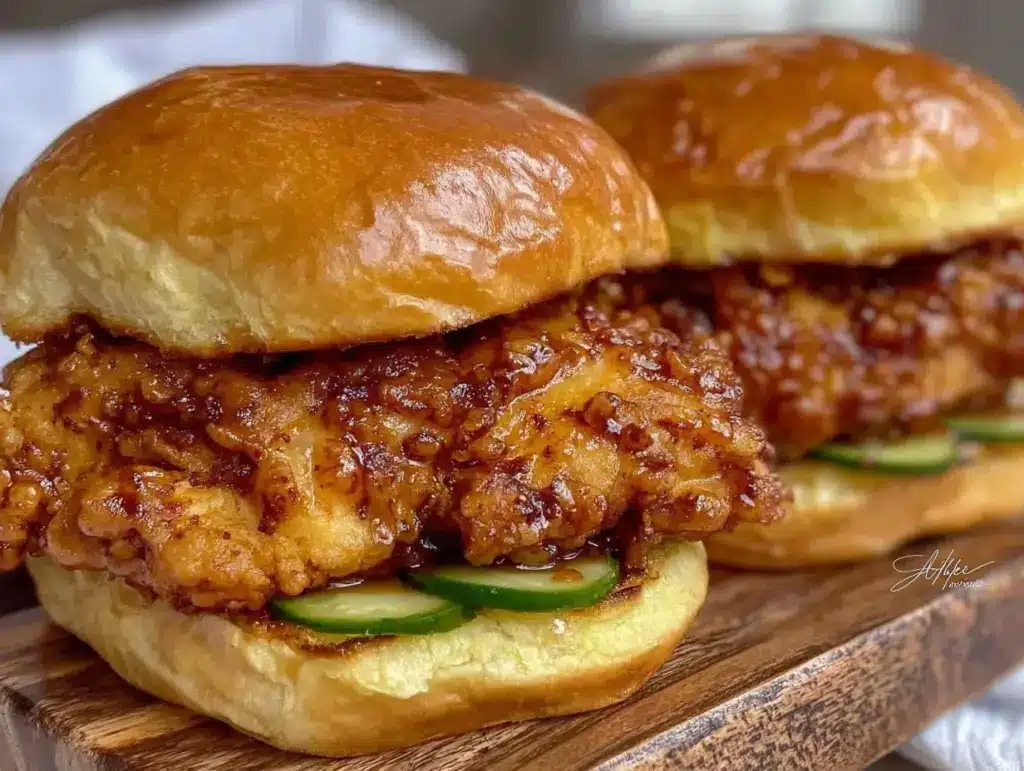
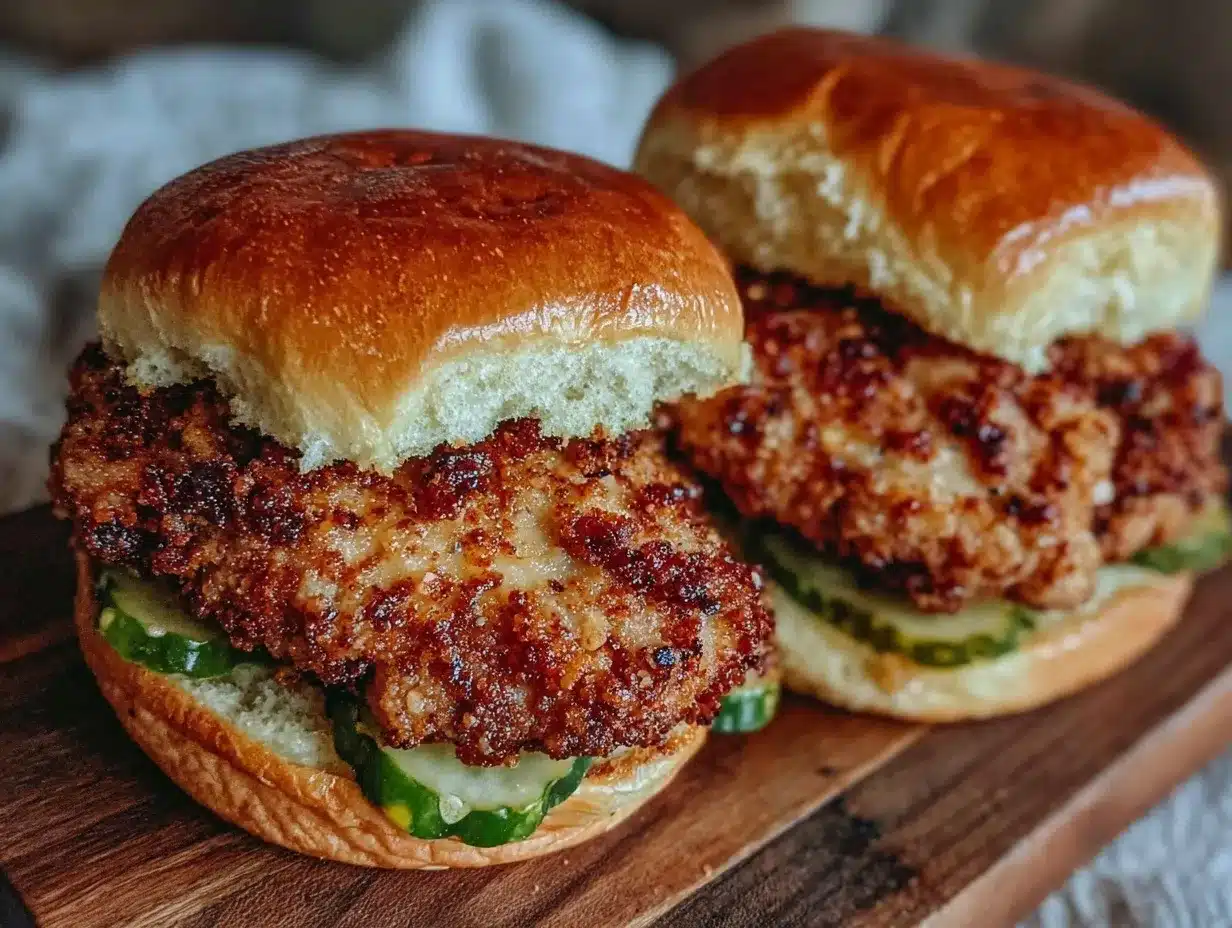
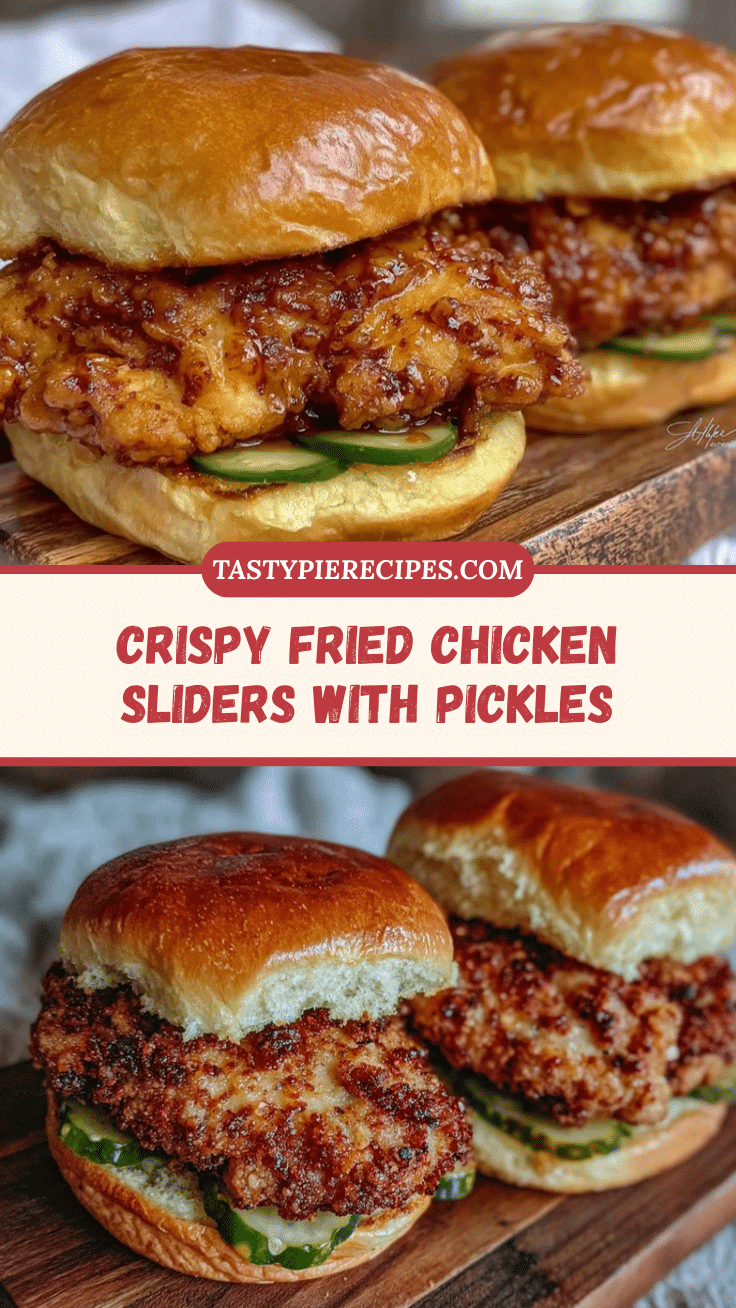
Let me tell you, the scent of sizzling chicken crusted in golden, crunchy batter mingling with the tangy zip of fresh pickles is enough to make anyone’s mouth water. The first time I made these crispy fried chicken sliders with pickles, I was instantly hooked. It was one of those moments where you pause, take a deep breath, and just smile because you know you’re onto something truly special. The magic is in that perfect crunch paired with the bright pickle bite, wrapped in a soft, buttery slider bun. When I was knee-high to a grasshopper, my grandma used to serve chicken sandwiches that had this same irresistible snap and tang, but I never quite nailed the recipe myself—until now.
Years ago, on a rainy weekend, I decided to recreate that nostalgic comfort food with a little twist. My family couldn’t stop sneaking these sliders off the cooling rack (and I can’t really blame them). Honestly, these sliders are dangerously easy to make and deliver pure, nostalgic comfort wrapped into one small, handheld package. Perfect for potlucks, casual weekend lunches, or just brightening up your Pinterest cookie board with something savory and addictive, these sliders quickly became a staple for family gatherings and gifting alike. After testing this recipe multiple times (in the name of research, of course), I’m confident you’re going to want to bookmark this one.
Why You’ll Love This Crispy Fried Chicken Sliders Recipe
Over the years, I’ve tried countless fried chicken recipes, but this one stands out for a bunch of reasons. It’s not just tasty—it’s got the kind of texture and flavor combo that makes you close your eyes after the first bite. Here’s why this recipe is a keeper:
- Quick & Easy: Comes together in under 30 minutes, ideal for busy weeknights or last-minute cravings.
- Simple Ingredients: No fancy grocery trips needed; you probably have everything in your pantry already.
- Perfect for Gatherings: Great for potlucks, game day snacks, or casual family dinners.
- Crowd-Pleaser: Kids and adults alike rave about the crispiness and tangy pickle pairing.
- Unbelievably Delicious: The crunchy coating with juicy chicken and the zing of pickles creates next-level comfort food.
What makes these sliders different? Well, I use a buttermilk soak for the chicken that tenderizes it beautifully and ensures a juicy bite every time. Plus, the secret is double-dipping the chicken in seasoned flour and a light egg wash for that extra crispy, flaky crust. And those pickles? I use house-made dill slices that cut through the richness perfectly. This isn’t just another fried chicken slider recipe—it’s the best version you’ll find, balancing crispy, juicy, and tangy flavors like a charm. Whether you’re impressing guests or just treating yourself, these sliders hit the spot—comfort food with soul but without the fuss.
What Ingredients You Will Need
This recipe uses simple, wholesome ingredients to deliver bold flavor and satisfying texture without the fuss. Most are pantry staples, and substitutions are easy if you need them.
- For the Chicken:
- 2 large boneless, skinless chicken breasts (about 1 pound / 450g), sliced into small slider-sized pieces
- 1 cup buttermilk (240ml) – tenderizes and adds tang (use dairy-free milk with 1 tbsp vinegar if needed)
- 1 teaspoon hot sauce (optional, adds a subtle kick)
- For the Coating:
- 1 1/2 cups all-purpose flour (180g) – for that crisp crust (I recommend King Arthur brand for best texture)
- 1 teaspoon paprika (smoked or sweet)
- 1 teaspoon garlic powder
- 1 teaspoon onion powder
- 1 teaspoon salt
- 1/2 teaspoon black pepper
- 1/2 teaspoon cayenne pepper (optional, for heat)
- 2 large eggs, lightly beaten
- For the Sliders:
- 8 slider buns, soft and slightly toasted (buttery brioche or potato buns work great)
- Pickle slices (dill or bread-and-butter, freshly sliced or store-bought)
- Mayonnaise or special sauce (optional: mix mayo with a teaspoon of hot sauce or mustard)
- Butter for toasting buns (adds richness)
- For Frying:
- Vegetable oil or peanut oil, enough for 2-inch deep frying (about 4 cups / 1 liter)
If you want a gluten-free version, swap the all-purpose flour with almond flour or a gluten-free blend. For a dairy-free option, use coconut or almond milk with vinegar in place of buttermilk. The key is balancing moisture and coating for that perfect crunch.
Equipment Needed
- Large mixing bowls – for marinating chicken and mixing coating ingredients
- Deep frying pan, Dutch oven, or heavy-bottomed pot – ideal for maintaining steady oil temperature
- Cooking thermometer – to monitor oil temperature (crucial for crispy, non-greasy chicken)
- Wire rack and baking sheet – for draining fried chicken to keep crispiness intact
- Tongs or slotted spoon – for safely handling hot chicken pieces
- Measuring cups and spoons – for precision
If you don’t have a thermometer, you can test oil heat by dropping a small bit of batter; it should sizzle immediately without burning. For budget-friendly frying, a heavy skillet works fine but keep a close eye on temperature. Personally, I find a Dutch oven perfect for even oil heat and safety.
Preparation Method
- Prep the Chicken: Slice chicken breasts into slider-sized pieces, about 3-4 ounces (85-115g) each. Place in a large bowl with buttermilk and hot sauce. Stir gently to coat. Cover and refrigerate for at least 30 minutes, up to 4 hours. This soak tenderizes the meat and adds flavor.
- Make the Coating: In a separate bowl, whisk together flour, paprika, garlic powder, onion powder, salt, black pepper, and cayenne. Set up a dredging station with the beaten eggs in another bowl.
- Heat the Oil: Pour oil into your frying pan or Dutch oven to a depth of about 2 inches (5 cm). Heat oil to 350°F (175°C). Use a cooking thermometer for accuracy; overheating causes burning, underheating makes greasy chicken.
- Coat the Chicken: Remove chicken pieces from the buttermilk, letting excess drip off. Dip each piece in the seasoned flour, then into the egg wash, then back into the flour for a double coating. Press flour firmly for a thick crust.
- Fry the Chicken: Carefully place chicken pieces in hot oil without overcrowding (fry in batches). Cook about 4-5 minutes per side, until golden brown and internal temperature reaches 165°F (74°C). Use tongs to flip gently.
- Drain and Rest: Transfer fried chicken to a wire rack set over a baking sheet to drain excess oil. Let rest 5 minutes to keep crust crispy and juices locked in.
- Toast the Buns: Butter slider buns lightly and toast in a pan or oven until golden and warm.
- Assemble Sliders: Spread mayo or special sauce on buns, add fried chicken piece, top with pickle slices, then crown with the top bun.
Pro tip: If you notice the coating getting soggy, let the chicken rest on the wire rack longer before assembling. Also, keep the oil temperature steady between batches to avoid greasy results. I like to keep a plate lined with paper towels nearby just in case.
Cooking Tips & Techniques for Perfect Crispy Fried Chicken Sliders
Getting that perfect crispy crust with juicy chicken inside isn’t always easy, but a few tricks help make it happen every time.
- Buttermilk soak: Don’t skip this step! It tenderizes the meat and adds a subtle tang that balances the richness.
- Double dredging: The twice-floured coating traps moisture inside and creates that flaky crunch you want.
- Oil temperature: Keep it steady around 350°F (175°C). Too hot, and the crust burns before chicken cooks; too low, and it soaks up oil and gets greasy.
- Don’t overcrowd the pan: Fry in batches to maintain oil heat and avoid steaming the chicken.
- Drain properly: Use a wire rack, not paper towels, if possible. Paper towels trap steam and soften the crust.
- Use fresh oil: Old or reused oil can affect flavor and frying quality.
Honestly, my first few attempts were a bit soggy because I rushed the resting step and crowded the pan. Learning to be patient pays off big time. Also, multitasking by prepping your buns and pickles while the chicken marinates saves time and keeps the workflow smooth.
Variations & Adaptations
Want to switch things up? Here are some fun ways to customize these sliders:
- Spicy Variation: Add cayenne pepper or chili powder to the flour mix and use spicy pickles. Toss the chicken in hot sauce after frying for extra heat.
- Gluten-Free: Use almond flour or a gluten-free flour blend for coating. Swap regular buns for gluten-free slider rolls.
- Air Fryer Method: Instead of deep frying, air fry at 400°F (200°C) for 12-15 minutes, flipping halfway. Spray chicken lightly with oil for crispiness.
- BBQ Twist: Spread a thin layer of smoky barbecue sauce on the bun and add coleslaw instead of pickles for a southern flair.
- Personal Favorite: I once added a smear of honey mustard on the bottom bun and swapped pickles for quick-pickled red onions. It was a tangy, sweet surprise that my family loved.
Serving & Storage Suggestions
These crispy fried chicken sliders with pickles are best served hot and fresh for maximum crunch. Toast the buns just before serving to keep that buttery softness. They pair beautifully with classic sides like French fries, coleslaw, or a crisp green salad. For drinks, iced tea or a cold craft beer complements the salty, tangy flavors wonderfully.
To store leftovers, place the chicken and buns separately in airtight containers in the refrigerator for up to 2 days. Reheat chicken in a 375°F (190°C) oven for 10 minutes to restore crispiness, avoiding the microwave which can make it soggy. Assemble the sliders fresh after warming. Flavors actually develop nicely after a day in the fridge, especially if you like your pickles a bit more mellow.
Nutritional Information & Benefits
Each slider roughly contains:
| Calories | 280-320 kcal |
|---|---|
| Protein | 18-22 g |
| Fat | 15-20 g |
| Carbohydrates | 20-25 g |
Chicken breast provides lean protein, essential for muscle repair. The pickles add a low-calorie crunch with probiotics if fermented, aiding digestion. Using buttermilk adds calcium and vitamin B12. Opting for whole grain or multigrain slider buns boosts fiber. This recipe can fit into balanced diets and can be adapted for gluten-free and dairy-free needs easily.
Conclusion
If you’re looking for a recipe that’s easy, tasty, and guaranteed to impress, these crispy fried chicken sliders with pickles are it. They combine juicy, tender chicken with a satisfyingly crunchy crust and just the right tang from pickles. Feel free to customize the heat level, breading, or sauces to suit your taste buds. I love this recipe because it brings back fond memories and creates new ones every time I make it. Please share your thoughts or any fun twists you try—I love hearing from fellow food lovers!
Go ahead, make these sliders, and watch them disappear fast. You won’t regret it. Happy cooking!
FAQs About Crispy Fried Chicken Sliders with Pickles
Can I make these sliders ahead of time?
You can prep the chicken and marinade a day in advance, but fry just before serving for best crispiness.
What’s the best oil for frying chicken?
Vegetable, peanut, or canola oil works well due to high smoke points and neutral flavor.
How do I keep the chicken crispy after frying?
Drain on a wire rack, not paper towels, and avoid stacking pieces. Serve promptly or reheat in the oven.
Can I bake instead of fry the chicken?
Yes! Coat chicken as usual and bake at 425°F (220°C) on a greased rack for 20-25 minutes, flipping halfway.
What kind of pickles work best?
Dill pickles are classic, but bread-and-butter or quick-pickled red onions add a nice twist.
Pin This Recipe!
Crispy Fried Chicken Sliders Recipe Easy Homemade Pickle Sliders

These crispy fried chicken sliders feature juicy chicken with a crunchy, flaky crust paired with tangy pickle slices, all served on soft, buttery slider buns. Perfect for quick meals, gatherings, and nostalgic comfort food lovers.
- Prep Time: 10 minutes
- Cook Time: 20 minutes
- Total Time: 30 minutes
- Yield: 8 sliders 1x
- Category: Main Course
- Cuisine: American
Ingredients
- 2 large boneless, skinless chicken breasts (about 1 pound / 450g), sliced into small slider-sized pieces
- 1 cup buttermilk (240ml) – tenderizes and adds tang (use dairy-free milk with 1 tbsp vinegar if needed)
- 1 teaspoon hot sauce (optional)
- 1 1/2 cups all-purpose flour (180g)
- 1 teaspoon paprika (smoked or sweet)
- 1 teaspoon garlic powder
- 1 teaspoon onion powder
- 1 teaspoon salt
- 1/2 teaspoon black pepper
- 1/2 teaspoon cayenne pepper (optional)
- 2 large eggs, lightly beaten
- 8 slider buns, soft and slightly toasted (buttery brioche or potato buns recommended)
- Pickle slices (dill or bread-and-butter, freshly sliced or store-bought)
- Mayonnaise or special sauce (optional: mix mayo with a teaspoon of hot sauce or mustard)
- Butter for toasting buns
- Vegetable oil or peanut oil, enough for 2-inch deep frying (about 4 cups / 1 liter)
Instructions
- Slice chicken breasts into slider-sized pieces, about 3-4 ounces (85-115g) each. Place in a large bowl with buttermilk and hot sauce. Stir gently to coat. Cover and refrigerate for at least 30 minutes, up to 4 hours.
- In a separate bowl, whisk together flour, paprika, garlic powder, onion powder, salt, black pepper, and cayenne pepper. Set up a dredging station with the beaten eggs in another bowl.
- Pour oil into a frying pan or Dutch oven to a depth of about 2 inches (5 cm). Heat oil to 350°F (175°C). Use a cooking thermometer for accuracy.
- Remove chicken pieces from the buttermilk, letting excess drip off. Dip each piece in the seasoned flour, then into the egg wash, then back into the flour for a double coating. Press flour firmly for a thick crust.
- Carefully place chicken pieces in hot oil without overcrowding. Fry about 4-5 minutes per side, until golden brown and internal temperature reaches 165°F (74°C). Use tongs to flip gently.
- Transfer fried chicken to a wire rack set over a baking sheet to drain excess oil. Let rest 5 minutes to keep crust crispy and juices locked in.
- Butter slider buns lightly and toast in a pan or oven until golden and warm.
- Spread mayo or special sauce on buns, add fried chicken piece, top with pickle slices, then crown with the top bun.
Notes
Keep oil temperature steady at 350°F to avoid greasy or burnt chicken. Use a wire rack to drain fried chicken instead of paper towels to maintain crispiness. Let chicken rest before assembling sliders to prevent soggy coating. For gluten-free, substitute flour with almond or gluten-free flour blend and use gluten-free buns. For dairy-free, use dairy-free milk with vinegar instead of buttermilk.
Nutrition
- Serving Size: 1 slider
- Calories: 280320
- Fat: 1520
- Carbohydrates: 2025
- Protein: 1822
Keywords: crispy fried chicken sliders, homemade pickle sliders, fried chicken recipe, slider recipe, comfort food, easy chicken sliders


