
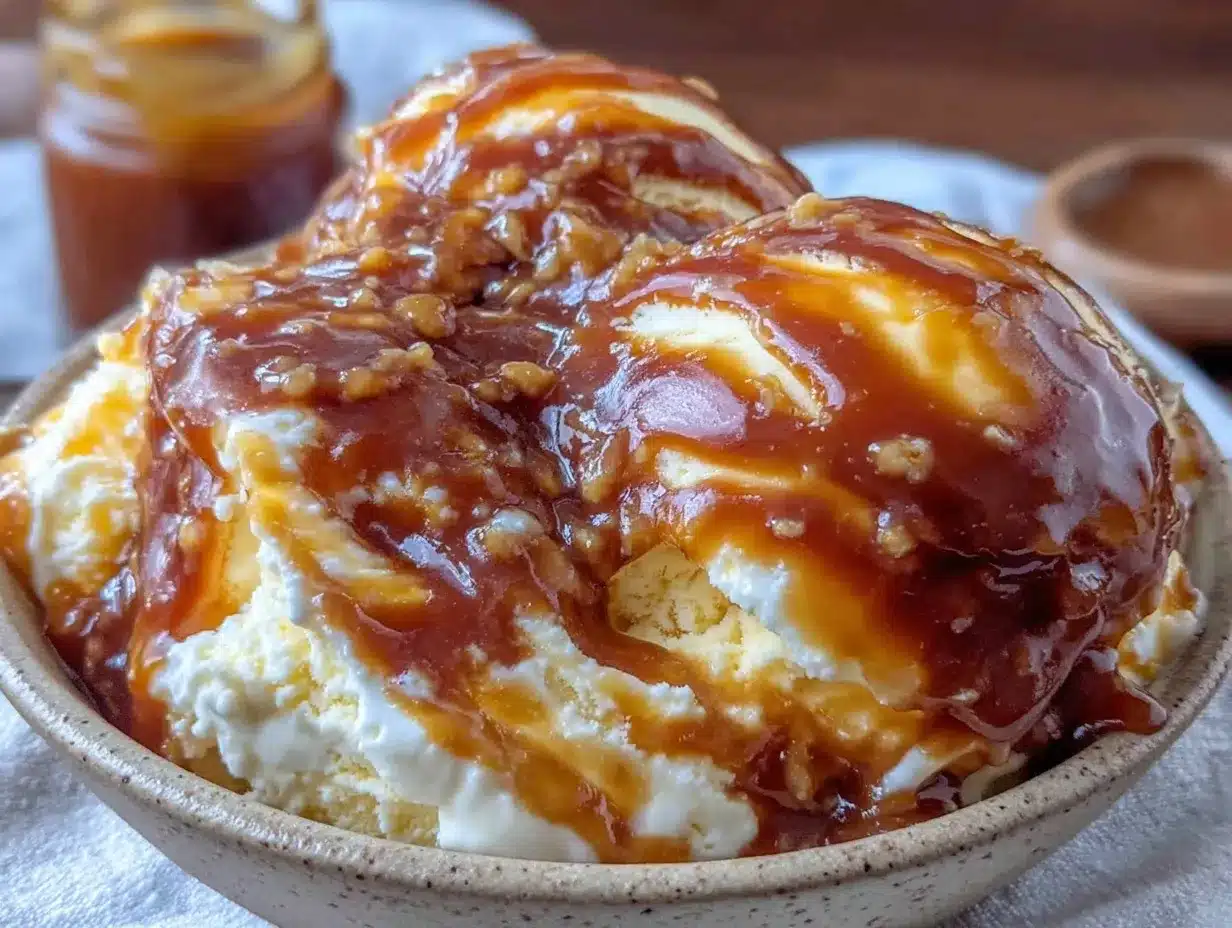
The first time I made this creamy no-churn salted caramel swirl ice cream, I honestly didn’t expect much. I was wrestling with a late afternoon craving and zero motivation to haul out the ice cream maker hidden somewhere in the back of the freezer. With just a few pantry staples and a jar of homemade salted caramel leftover from a previous dessert experiment, I gave this no-churn version a shot. I remember swirling that golden ribbon of caramel through the soft, fluffy ice cream base and thinking, “Well, this might just be the easiest indulgence I’ve pulled off in a while.” A couple of hours later, as I tasted the first spoonful, I was hooked — the perfect balance of sweet and salty with a texture so creamy it felt like cheating.
Since then, this recipe has quietly become my go-to for last-minute dessert emergencies or those slow Sunday afternoons when I just want something sweet but fuss-free. It’s funny how a simple, no-fuss recipe can turn into a small moment of joy, right? Honestly, there’s something so satisfying about that silky texture paired with the rich caramel swirls. It’s not just ice cream; it’s a little treat that feels homemade and special without any of the usual hassle.
What stuck with me most is how forgiving this recipe is—it doesn’t demand perfect timing or fancy equipment, unlike traditional ice creams. Plus, the salted caramel adds this warm, cozy note that makes every bite feel like a tiny celebration. If you’re someone who loves classic flavors but hates complicated steps, this creamy no-churn salted caramel swirl ice cream might just become your new favorite, too.
Why You’ll Love This Recipe
After making this salted caramel swirl ice cream a handful of times, I can confidently say it’s a winner for so many reasons. Here’s why it’s earned a permanent spot in my dessert lineup:
- Quick & Easy: You’ll have this dessert ready in under 10 minutes, perfect for those spontaneous cravings or a sweet finish to dinner.
- Simple Ingredients: No hunting for fancy items here—you likely already have heavy cream, sweetened condensed milk, and caramel sauce at hand.
- Perfect for Any Occasion: Whether it’s a warm summer afternoon or a cozy night in, this ice cream fits right in.
- Crowd-Pleaser: I’ve served it at casual gatherings, and it disappears fast—kids and adults alike can’t resist it.
- Unbelievably Delicious: The luscious creaminess paired with the salty-sweet caramel swirl is a flavor combo that feels indulgent but never overwhelming.
What sets this recipe apart is the way the caramel is gently folded in to create those beautiful swirls without overpowering the creamy base. Instead of just mixing it all in, I swirl it lightly, so you get pockets of caramel that surprise you with each bite. Also, skipping the ice cream maker doesn’t mean sacrificing texture—whipping the cream just right gives you that decadent, airy mouthfeel. It’s comfort food that’s fuss-free, with a little extra soul from the salted caramel twist. Honestly, it’s the kind of dessert that makes you pause, close your eyes, and savor the moment.
What Ingredients You Will Need
This creamy no-churn salted caramel swirl ice cream uses simple, wholesome ingredients to create a bold flavor and velvety texture without the fuss. Most of these are pantry staples, and the salted caramel can be homemade or store-bought depending on your preference.
- Heavy Cream (1 ½ cups / 360 ml) — cold, for whipping to perfect fluffy peaks
- Sweetened Condensed Milk (1 can, 14 oz / 396 g) — this adds sweetness and creaminess without extra sugar granules
- Pure Vanilla Extract (1 teaspoon) — for a warm, fragrant base flavor
- Salted Caramel Sauce (¾ cup / 180 ml) — homemade or store-bought; I recommend Trader Joe’s caramel for convenience, but a homemade version yields a richer flavor
- Sea Salt (a pinch) — to sprinkle over the caramel swirls for that perfect salty kick
Optional add-ins:
- Chopped toasted pecans or walnuts (¼ cup / 30 g) — for crunch and a nutty contrast
- Mini chocolate chips (2 tablespoons / 30 g) — adds a subtle chocolatey note
If you prefer a dairy-free option, you can swap heavy cream for canned coconut cream (chilled, thick part only) and use sweetened condensed coconut milk instead. For a lower-sugar version, try sugar-free caramel sauce and a lightly sweetened condensed milk alternative, but keep in mind texture differences.
Equipment Needed
- Mixing Bowl: A large bowl, preferably chilled, to whip the cream easily.
- Electric Mixer or Stand Mixer: Essential for whipping the heavy cream to stiff peaks quickly. Hand whisks can work but require more elbow grease.
- Spatula: For folding the whipped cream and caramel sauce gently.
- Freezer-Safe Container: A loaf pan or any airtight container about 8×4 inches (20×10 cm) works well for freezing and swirling the caramel.
- Measuring Cups & Spoons: For precise measurement of ingredients.
If you don’t have an electric mixer, a balloon whisk and some patience can get the job done, but the texture won’t be quite as light. For budget-friendly alternatives, simple glass or plastic containers work just fine for freezing, but make sure they seal tightly to avoid ice crystals. Also, keeping your mixing bowl chilled (pop it in the fridge or freezer for 10 minutes before starting) helps the cream whip faster and fluffier.
Preparation Method
- Chill your mixing bowl and beaters. Place your mixing bowl and beaters in the fridge for about 10-15 minutes. Cold equipment helps the heavy cream whip more efficiently.
- Whip the heavy cream. Pour 1 ½ cups (360 ml) of cold heavy cream into the chilled bowl. Using an electric mixer on medium-high speed, whip until stiff peaks form—this usually takes about 4-5 minutes. Stop as soon as you see firm peaks that hold their shape but still look airy. Over-whipping can turn it grainy, so keep an eye on it.
- Mix the sweetened condensed milk and vanilla. In a separate bowl, combine the entire 14 oz (396 g) can of sweetened condensed milk with 1 teaspoon vanilla extract. Stir gently to blend.
- Fold the whipped cream into the condensed milk mixture. Using a spatula, carefully fold about a third of the whipped cream into the condensed milk mixture to lighten it. Then fold in the remaining cream gently to maintain the airy texture. Avoid vigorous stirring—you want to keep as much volume as possible.
- Prepare the caramel swirl. Pour half of the ice cream base into your freezer-safe container. Drizzle about half of the salted caramel sauce (¾ cup / 180 ml) over it in thin ribbons.
- Swirl the caramel. Using a butter knife or skewer, gently swirl the caramel into the ice cream base to create marbled streaks. Don’t overmix; the goal is to keep distinct swirls.
- Add the remaining ice cream base and caramel. Pour the remaining ice cream mixture over the swirled layer. Drizzle the rest of the salted caramel on top and swirl again lightly. If using, sprinkle a pinch of sea salt over the top to enhance the salted caramel flavor.
- Freeze the ice cream. Cover the container tightly with plastic wrap or an airtight lid. Freeze for at least 6 hours or overnight until firm.
- Serve and enjoy. When ready, let the ice cream sit at room temperature for 5-10 minutes to soften slightly for easier scooping. Scoop into bowls or cones and savor the creamy, salted caramel goodness.
Pro tip: If you want to add chopped nuts or chocolate chips, gently fold them in after swirling the caramel but before freezing for extra texture.
Cooking Tips & Techniques
One of the trickiest parts of making no-churn ice cream is getting the whipped cream just right. If the cream is too soft, the ice cream can turn icy; if over-whipped, it can become grainy. I’ve learned through trial that chilling your bowl and beaters beforehand makes all the difference—trust me, it’s worth the few extra minutes.
When folding the whipped cream into the condensed milk, patience is key. Use a gentle folding motion to keep the mixture airy and light. Rushing it or stirring vigorously can deflate the cream and lead to a denser final texture.
For the caramel swirl, don’t be tempted to mix it in fully. The magic is in those pockets of thick caramel that surprise you with salty-sweet bursts. Using a skewer or butter knife to swirl creates a pretty marbled effect that looks as good as it tastes.
Also, if you’re using store-bought caramel, taste it first. Some are sweeter or thicker than others, so adjust the amount you swirl in accordingly. Adding a pinch of flaky sea salt really balances the sweetness, so don’t skip it, even if your caramel is pre-salted.
If you want to multitask, whip the cream while you prepare the caramel sauce, or even make a quick batch of homemade caramel in advance. This way, you can assemble and freeze without any downtime.
Variations & Adaptations
- Nutty Caramel Crunch: Fold in toasted pecans or walnuts for a satisfying crunch. This adds a lovely texture contrast to the creamy base.
- Chocolate Caramel Swirl: Add mini chocolate chips or drizzle melted dark chocolate alongside the caramel swirls for a chocolate-caramel combo that’s irresistible.
- Dairy-Free Version: Use canned coconut cream instead of heavy cream and sweetened condensed coconut milk in place of regular condensed milk. Make sure your caramel sauce is dairy-free or substitute with a coconut caramel.
For a seasonal twist, try swapping caramel with a homemade apple butter or pumpkin swirl during fall. Or, if you want to experiment with different flavors, a butter pecan no-churn ice cream offers a nutty, buttery alternative that’s just as simple.
Serving & Storage Suggestions
This creamy no-churn salted caramel swirl ice cream is best enjoyed slightly softened—about 5-10 minutes out of the freezer—to scoop nicely and release those flavors. Serve it in simple bowls or waffle cones for a classic touch.
Pair it with warm desserts like fresh fig and honey crostata for a contrast of temperatures and textures, or alongside a slice of rich chocolate cake to impress guests effortlessly.
Store leftovers in an airtight container to prevent ice crystals. This ice cream keeps well for up to 2 weeks in the freezer. If you notice it’s too hard to scoop, let it sit at room temperature for a few minutes before serving. Flavors often deepen after a day or two, so sometimes waiting to dig in pays off.
Nutritional Information & Benefits
Approximate nutrition per ½ cup serving:
| Calories | 310 |
|---|---|
| Fat | 22g |
| Saturated Fat | 14g |
| Sugar | 25g |
| Protein | 3g |
This recipe is rich in calcium and protein thanks to the dairy, and the salted caramel adds a satisfying flavor punch with minimal ingredients. If you use high-quality caramel with real butter, you’re also getting some healthy fats. For those watching carbs, consider using a sugar-free caramel sauce and low-carb sweetened condensed milk alternatives.
Keep in mind, this is an indulgence meant for occasional enjoyment, but it’s a nice homemade option compared to store-bought ice creams loaded with stabilizers and artificial ingredients.
Conclusion
Making this creamy no-churn salted caramel swirl ice cream has been a small but sweet victory for my busy kitchen days. It balances ease and elegance in a way few desserts do, and the satisfying caramel swirls always bring a little smile to my face. Whether you’re new to homemade ice cream or just want a quick, delicious treat without the fuss of churning, this recipe fits the bill perfectly.
Feel free to tweak the caramel amount or add your favorite mix-ins to make it truly yours. I love how forgiving this recipe is, so don’t hesitate to experiment a bit. And if you’re ever in the mood for a creamy homemade dessert with a different twist, you might enjoy the butter pecan no-churn ice cream pie I shared recently—it’s another easy way to impress without stress.
Give it a try, and I’d love to hear how your caramel swirl ice cream turns out!
Frequently Asked Questions
Can I make this recipe without an ice cream maker?
Yes! This is a no-churn recipe, so it’s designed to be made without any special equipment. Whipping the cream and folding it with condensed milk creates the creamy texture without churning.
How long does this ice cream need to freeze?
For the best texture, freeze for at least 6 hours or overnight. This ensures the ice cream sets properly and the caramel swirls remain distinct.
Can I use store-bought caramel sauce?
Absolutely. Store-bought caramel works well, but taste it first to adjust the amount, especially if it’s very sweet or not salted.
Is there a dairy-free option for this recipe?
Yes! Use canned coconut cream instead of heavy cream and sweetened condensed coconut milk. Make sure your caramel is dairy-free or substitute with coconut caramel.
How do I prevent ice crystals from forming?
Use an airtight container to freeze your ice cream and avoid opening the freezer often. Also, folding the whipped cream gently helps keep the texture smooth and less icy.
Pin This Recipe!
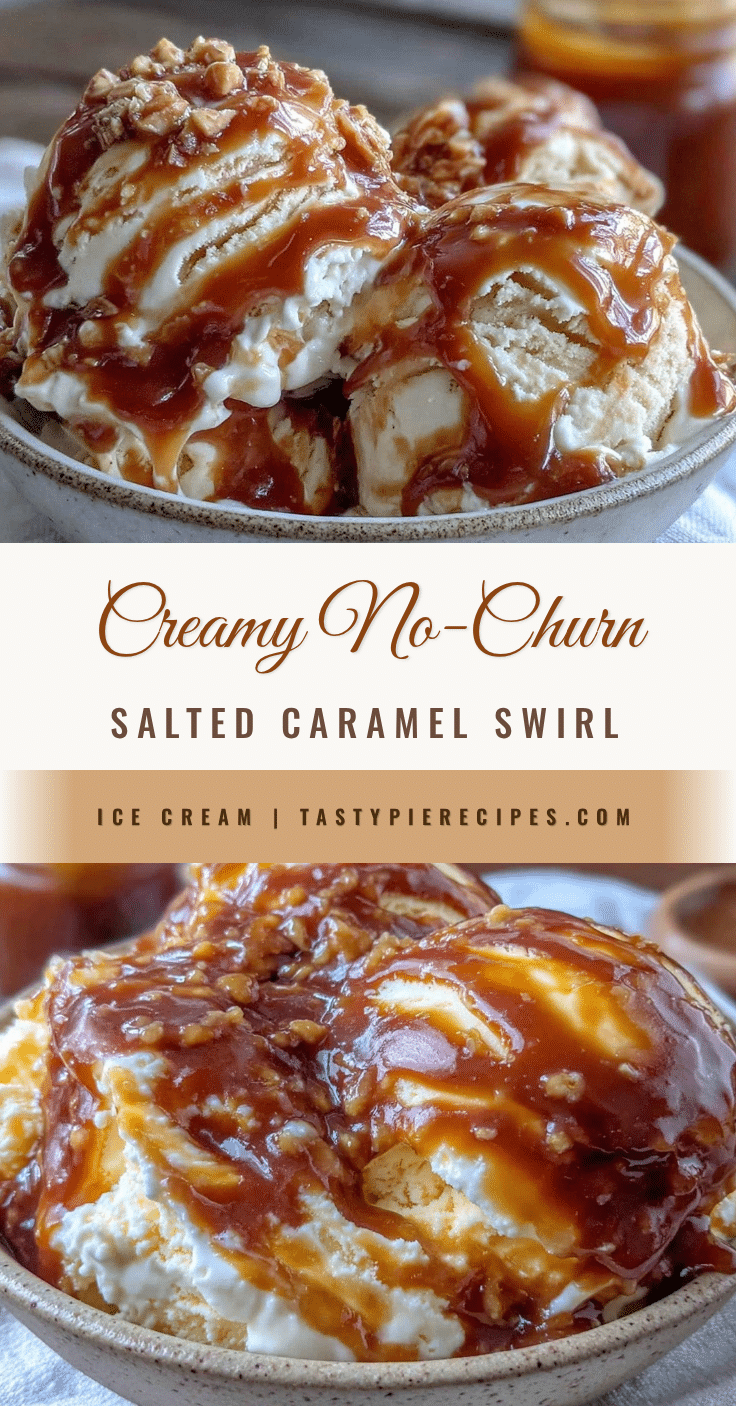
Creamy No-Churn Salted Caramel Swirl Ice Cream

A quick and easy no-churn ice cream recipe featuring a creamy base swirled with rich salted caramel sauce for a perfect balance of sweet and salty indulgence.
- Prep Time: 15 minutes
- Cook Time: 0 minutes
- Total Time: 6 hours 15 minutes
- Yield: 8 servings 1x
- Category: Dessert
- Cuisine: American
Ingredients
- 1 ½ cups (360 ml) cold heavy cream
- 1 can (14 oz / 396 g) sweetened condensed milk
- 1 teaspoon pure vanilla extract
- ¾ cup (180 ml) salted caramel sauce (homemade or store-bought)
- Pinch of sea salt
- Optional: ¼ cup (30 g) chopped toasted pecans or walnuts
- Optional: 2 tablespoons (30 g) mini chocolate chips
Instructions
- Chill your mixing bowl and beaters in the fridge for 10-15 minutes.
- Pour cold heavy cream into the chilled bowl and whip with an electric mixer on medium-high speed until stiff peaks form, about 4-5 minutes.
- In a separate bowl, combine sweetened condensed milk and vanilla extract; stir gently to blend.
- Fold about one-third of the whipped cream into the condensed milk mixture to lighten it, then fold in the remaining whipped cream gently to maintain airy texture.
- Pour half of the ice cream base into a freezer-safe container.
- Drizzle half of the salted caramel sauce over the base in thin ribbons.
- Use a butter knife or skewer to gently swirl the caramel into the ice cream base to create marbled streaks without overmixing.
- Pour the remaining ice cream base over the swirled layer.
- Drizzle the remaining salted caramel on top and swirl lightly again.
- Sprinkle a pinch of sea salt over the top to enhance the salted caramel flavor.
- Cover the container tightly with plastic wrap or an airtight lid and freeze for at least 6 hours or overnight until firm.
- Before serving, let the ice cream sit at room temperature for 5-10 minutes to soften slightly for easier scooping.
- Scoop into bowls or cones and enjoy.
Notes
Chill your mixing bowl and beaters before whipping cream for best results. Fold whipped cream gently into condensed milk to keep texture airy. Swirl caramel lightly to create distinct pockets of flavor. Use airtight container to prevent ice crystals. Let ice cream soften 5-10 minutes before scooping. Optional add-ins like nuts or chocolate chips can be folded in after swirling caramel but before freezing.
Nutrition
- Serving Size: ½ cup
- Calories: 310
- Sugar: 25
- Fat: 22
- Saturated Fat: 14
- Protein: 3
Keywords: no-churn ice cream, salted caramel, easy dessert, homemade ice cream, no ice cream maker, creamy ice cream, caramel swirl


