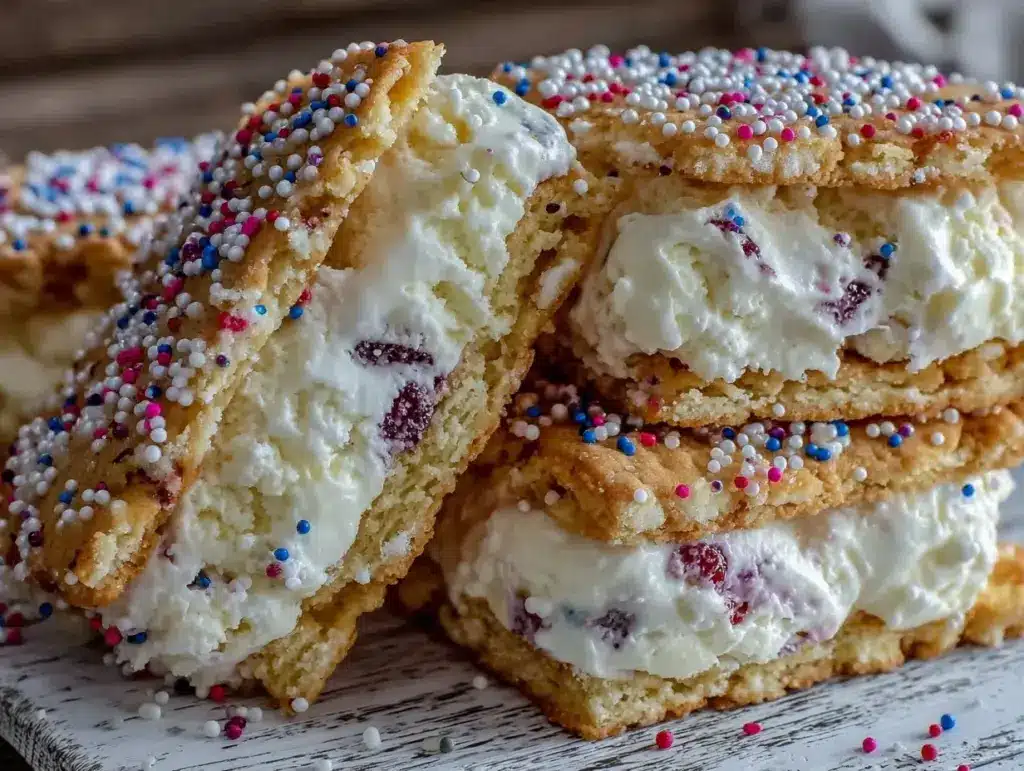
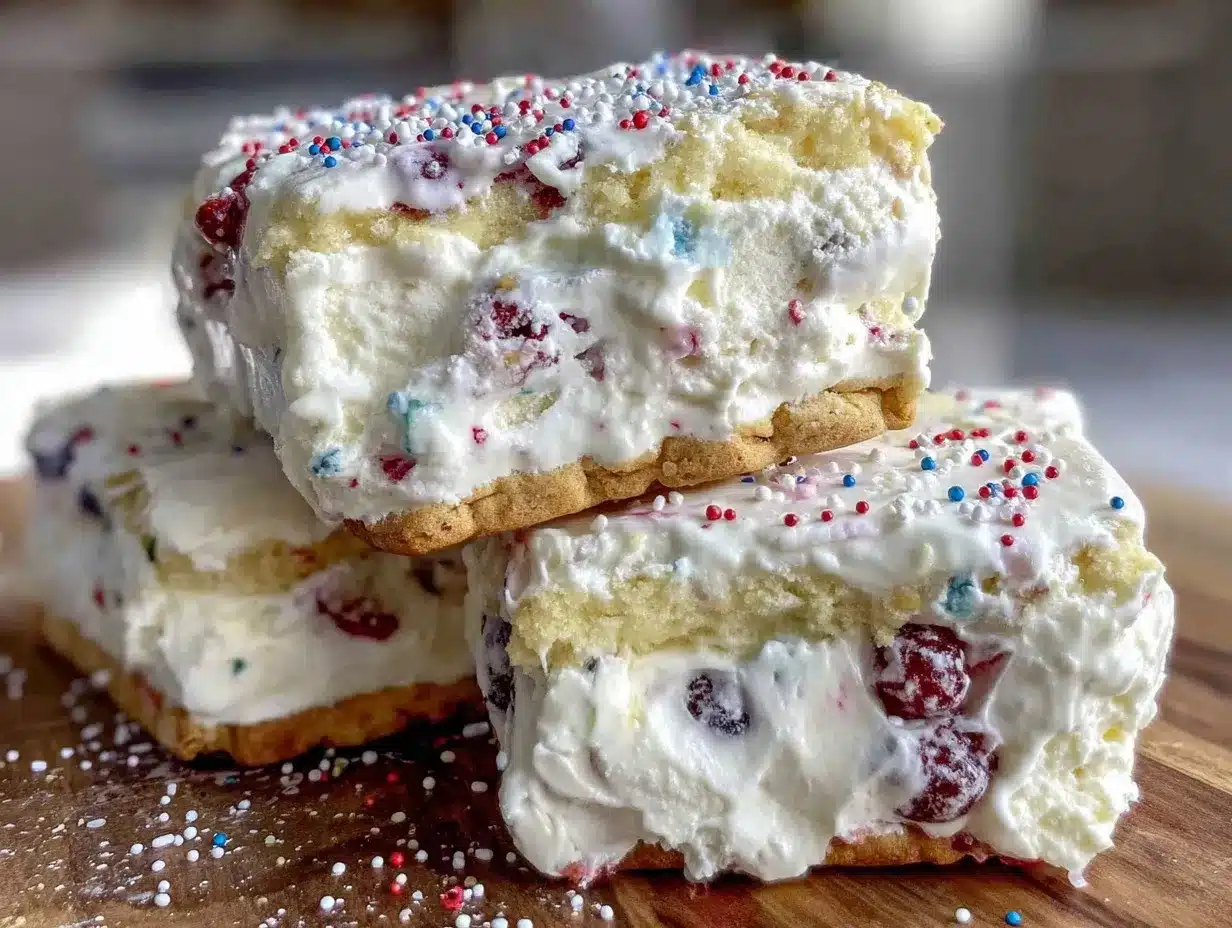
“Hey, you really have to try these!” That’s what my neighbor said one sunny afternoon just before the Fourth of July. Honestly, I was skeptical. Ice cream sandwiches? Patriotic? With sprinkles? But I figured, why not? So I dug into the freezer, pulled out the homemade cookies I’d baked earlier that week, and gave it a go. The moment I bit into the soft, chewy cookies hugging a thick slab of creamy vanilla ice cream, flecked with those cheerful red, white, and blue sprinkles, I was hooked. It wasn’t just a dessert; it was a little celebration in every bite.
Making these Cozy Patriotic Homemade Ice Cream Sandwiches quickly became my go-to way to mark the holiday — and honestly, any day I needed a bit of comfort. There’s something about the nostalgia of ice cream sandwiches paired with the festive colors that just feels right. I’ve made these more times than I can count this summer, tweaking the cookie texture here, adjusting the ice cream thickness there. It’s like having a tiny party that you can hold in your hand.
What really stuck with me was how easy this recipe is, despite looking like you spent all day on it. You know, the kind of dessert that impresses without the stress—and that’s exactly what I needed on those chaotic summer afternoons. And the sprinkles? They add just the right pop of fun and crunch without going overboard. It’s cozy, it’s patriotic, and it’s honestly one of those treats you don’t want to share but feel you should.
So without any fuss or frills, here’s why these homemade ice cream sandwiches have a permanent spot in my recipe box and maybe, just maybe, they’ll find a spot in yours too.
Why You’ll Love This Recipe
This Cozy Patriotic Homemade Ice Cream Sandwiches recipe has been tested more times than I can count—sometimes twice in a single day when summer heat called for it. It’s got that perfect balance of chewy cookie and creamy ice cream that’s hard to find in store-bought versions. Here’s why it might just become your favorite summer treat:
- Quick & Easy: From mixing the cookie dough to freezing the sandwiches, it takes under an hour, perfect for last-minute celebrations or when you need a sweet pick-me-up.
- Simple Ingredients: No need to hunt down fancy stuff; almost everything’s a pantry staple. Plus, you can swap ingredients if needed without messing up the whole batch.
- Perfect for Patriotic Occasions: Whether it’s the Fourth of July, Memorial Day, or just a summer picnic, those red, white, and blue sprinkles instantly put you in a festive mood.
- Crowd-Pleaser: Kids adore them for the color and fun, adults appreciate the nostalgic, homemade vibe. Great for family get-togethers or casual parties.
- Unbelievably Delicious: The soft, buttery cookies with creamy vanilla ice cream and a hint of crunch from the sprinkles make this the kind of dessert you savor slowly, eyes closed.
What sets this recipe apart? It’s the way the cookie dough is just lightly sweetened, letting the sprinkles shine without overwhelming. Plus, I use a quick chill step before baking that really keeps the cookies tender but sturdy enough to hold the ice cream. And the homemade vanilla ice cream? It’s creamy but not heavy, with just a touch of real vanilla bean—because why not go a little extra when you can?
Honestly, this is more than just a recipe—it’s a little homemade ritual that turns simple ingredients into something special, perfect for impressing guests or treating yourself after a long day.
What Ingredients You Will Need
This recipe uses simple, wholesome ingredients to deliver bold flavor and satisfying texture without the fuss. Most of these you probably already have on hand, and the sprinkles bring that festive touch without any extra work.
- For the Cookies:
- All-purpose flour (2 ½ cups / 320 g) – Provides that sturdy yet soft base.
- Baking soda (½ teaspoon) – Helps the cookies rise just enough.
- Salt (¼ teaspoon) – Balances the sweetness nicely.
- Unsalted butter (1 cup / 225 g), softened – Makes the cookies tender and rich.
- Granulated sugar (¾ cup / 150 g) – For subtle sweetness without overpowering.
- Brown sugar, packed (½ cup / 110 g) – Adds moisture and a hint of caramel flavor.
- Large egg (1), room temperature – Helps bind everything together.
- Pure vanilla extract (1 teaspoon) – The secret to that warm, inviting aroma.
- Red, white, and blue sprinkles (½ cup / 75 g) – For that patriotic pop of color and crunch.
- For the Ice Cream Filling:
- Heavy cream (2 cups / 480 ml) – For a rich, creamy texture.
- Whole milk (1 cup / 240 ml) – Balances the creaminess.
- Granulated sugar (¾ cup / 150 g) – Sweetens the ice cream naturally.
- Pure vanilla extract (2 teaspoons) or vanilla bean paste – Adds an authentic vanilla flavor.
- Pinch of salt – Enhances the overall flavor.
For the cookies, I prefer using King Arthur Flour for consistent texture and Land O’Lakes unsalted butter for its clean, creamy flavor. The sprinkles I grab from the baking aisle—look for ones that are sturdy and won’t melt easily, like Wilton’s brand.
If you want to make a dairy-free version, swap the heavy cream and milk with full-fat coconut milk, and use dairy-free vanilla extract. Gluten-free bakers can trade the all-purpose flour for a 1-to-1 gluten-free baking mix.
Equipment Needed
- Mixing bowls – A couple of medium and large ones for dough and ice cream base.
- Electric mixer or stand mixer – Makes creaming the butter and sugar so much easier.
- Measuring cups and spoons – For precise ingredient amounts.
- Ice cream maker – Optional but recommended for the smoothest homemade ice cream. You can also use a no-churn method if you’re in a pinch.
- Baking sheets lined with parchment paper – For baking the cookies evenly and preventing sticking.
- Spatula and silicone scraper – Helpful for folding in sprinkles and scraping down bowls.
- Freezer-safe container – To freeze the assembled sandwiches.
I’ve tried making these without a mixer, but honestly, creaming the butter and sugars by hand gets tiresome and less fluffy. An electric hand mixer definitely saves time and effort. For the ice cream maker, the Cuisinart Ice Cream Maker is my personal pick for its reliability and easy cleanup. But if you don’t have one, you can still enjoy these sandwiches by freezing a softened store-bought vanilla ice cream instead.
Preparation Method
- Prepare the Cookie Dough: In a medium bowl, whisk together 2 ½ cups (320 g) all-purpose flour, ½ teaspoon baking soda, and ¼ teaspoon salt. Set aside. (This dry mix will give the cookies their perfect texture.) About 5 minutes.
- Cream Butter and Sugars: In a large bowl, beat 1 cup (225 g) softened unsalted butter with ¾ cup (150 g) granulated sugar and ½ cup (110 g) packed brown sugar until light and fluffy. This should take about 3-5 minutes with an electric mixer. (If your butter’s not soft enough, the cookies won’t be tender.)
- Add Egg and Vanilla: Beat in 1 large room-temperature egg and 1 teaspoon pure vanilla extract until fully incorporated. (This adds moisture and flavor.)
- Combine Wet and Dry: Gradually add the dry ingredients to the wet, mixing on low speed until just combined. Avoid overmixing to keep cookies tender.
- Fold in Sprinkles: Gently fold in ½ cup (75 g) red, white, and blue sprinkles. Be careful not to overmix or the sprinkles might bleed color.
- Chill the Dough: Cover the bowl with plastic wrap and chill the dough in the fridge for at least 30 minutes. This step keeps the cookies from spreading too much and helps with texture.
- Preheat Oven: Set your oven to 350°F (175°C) and line baking sheets with parchment paper.
- Shape and Bake Cookies: Scoop rounded tablespoons of dough onto the baking sheet, spaced about 2 inches apart. Bake for 10-12 minutes, until edges are lightly golden but centers still look soft. (They’ll firm up as they cool.)
- Cool Cookies: Let cookies cool completely on the baking sheets for 5 minutes, then transfer to wire racks to cool fully. (Warm cookies will melt your ice cream filling.)
- Make the Vanilla Ice Cream: In a bowl, whisk 2 cups (480 ml) heavy cream, 1 cup (240 ml) whole milk, ¾ cup (150 g) granulated sugar, 2 teaspoons vanilla extract, and a pinch of salt until sugar dissolves. Chill the mixture for at least 1 hour before churning.
- Churn the Ice Cream: Pour chilled mixture into your ice cream maker and churn according to manufacturer’s instructions (usually about 20-25 minutes) until thick and creamy.
- Assemble Sandwiches: Scoop generous spoonfuls of ice cream onto the flat side of a cookie, then top with a second cookie, pressing gently to spread the ice cream evenly. (Don’t smoosh too hard or the ice cream will ooze out.)
- Freeze the Sandwiches: Wrap each sandwich in plastic wrap or place them in an airtight container. Freeze for at least 2 hours to firm up before serving. (They keep well for up to a week.)
One thing I learned the hard way is not to skip the chilling steps. The dough and ice cream both need their cool time to come together perfectly. Also, if your kitchen is warm, pop the cookie dough back into the fridge between scooping batches—it keeps those sprinkles crisp and colors vibrant.
Cooking Tips & Techniques
Making homemade ice cream sandwiches might sound fancy, but it’s really about a few key tricks that make the process smooth and the result fantastic.
- Butter Temperature: Soft but not melted butter makes all the difference in cookie texture. Too cold and the dough won’t cream well, too warm and cookies spread too thin.
- Don’t Overmix: Overworking the dough can develop gluten, making cookies tough. Mix until ingredients are just combined for tender results.
- Chill Dough Thoroughly: I always give the dough at least 30 minutes in the fridge; sometimes I do an hour if I have time. This step prevents spreading and keeps sprinkles from bleeding.
- Cookie Size Consistency: Using a cookie scoop ensures all the cookies bake evenly and match in size, which makes assembling sandwiches easier.
- Ice Cream Softness: When assembling, the ice cream should be firm but scoopable. If it’s too hard, let it sit out for a couple minutes; too soft and it’ll melt too fast.
- Freeze Assembled Sandwiches Well: This prevents melting and helps the flavors meld. Wrap them individually for easy grab-and-go treats.
Once, I learned the hard way that skipping the ice cream churning step and using a no-churn mix led to grainy texture—definitely not the cozy experience I wanted. But when done right, these sandwiches come together faster than you’d expect and taste like a summer dream.
Variations & Adaptations
There’s plenty of ways to make these Cozy Patriotic Homemade Ice Cream Sandwiches your own:
- Flavor Twists: Swap vanilla for strawberry or blueberry ice cream for a fruity vibe that still fits the red, white, and blue theme. You could even try a homemade chocolate ice cream for a richer treat.
- Cookie Variations: Use chocolate chip cookie dough or soft sugar cookies instead of the basic sugar cookie. For a gluten-free option, try a certified gluten-free cookie recipe.
- Dietary Substitutions: Dairy-free ice cream made from coconut or almond milk works beautifully, and you can use dairy-free butter substitutes for the cookies.
- Cooking Method: If you don’t want to bake, try quick skillet cookies on medium heat, flipping carefully, as a faster shortcut.
- Sprinkle Swaps: Use natural food-dyed sprinkles or crushed freeze-dried berries for a colorful and less processed option.
Personally, I once made a batch using chocolate chip waffle cookies from a waffle recipe I love—it added a crispy texture that was unexpectedly delightful. It’s fun to mix and match!
Serving & Storage Suggestions
These ice cream sandwiches are best served chilled straight from the freezer. Let them sit at room temperature for 3-5 minutes if they’re too hard to bite into. Present them on a simple white plate or a rustic wooden board to let those patriotic red, white, and blue sprinkles pop visually.
Pair these sandwiches with a cold glass of lemonade or iced tea to balance the sweetness. For a fun party idea, set up a DIY ice cream sandwich bar with extra sprinkles, chocolate chips, or mini candies for guests to customize their own.
Store leftovers wrapped tightly in plastic wrap or in an airtight container in the freezer for up to one week. When reheating, just avoid the microwave; instead, let them thaw at room temperature for a few minutes to soften naturally without melting.
Flavors tend to meld and get even better after a day, so if you make these ahead for a party, that wait is worth it. Just keep an eye on sprinkles that might lose their crunch over time.
Nutritional Information & Benefits
Each Cozy Patriotic Homemade Ice Cream Sandwich is roughly 250-300 calories, depending on portion size. They offer a good balance of carbs and fats, with a bit of protein from the egg and dairy.
The vanilla bean and sprinkles add just a touch of natural antioxidants and color fun without overwhelming sugar content. Using real butter and whole milk ingredients means you get wholesome fats and natural creaminess, which is a nice change from overly processed snacks.
This recipe can be made gluten-free or dairy-free with simple swaps, making it accessible for many dietary needs. Plus, it’s a great way to treat yourself mindfully at summer gatherings without feeling like you’re overdoing it.
Conclusion
Cozy Patriotic Homemade Ice Cream Sandwiches with Red White Blue Sprinkles aren’t just a festive treat—they’re a little moment of joy that you can make anytime you want to feel that summer magic. They’re easy, fun, and endlessly customizable to suit your taste or dietary needs.
Whether you’re hosting a backyard barbecue or just craving a sweet escape, this recipe delivers that perfect mix of comfort and celebration. Personally, I love how they bring a smile to everyone’s face and how the sprinkles remind me that sometimes, the simplest touches make all the difference.
Give these a try, tweak them your way, and if you have a fun spin, I’d love to hear about it! There’s something special about sharing homemade sweets—it’s like passing along a little happiness, one sandwich at a time.
FAQs About Cozy Patriotic Homemade Ice Cream Sandwiches
Can I make the cookies ahead of time?
Yes! You can bake the cookies up to 3 days in advance and store them in an airtight container at room temperature. Just be sure they’re completely cooled before assembling sandwiches.
What if I don’t have an ice cream maker?
No worries! Use a no-churn vanilla ice cream recipe or buy quality store-bought vanilla ice cream. Just soften it slightly before assembling.
Can I substitute the sprinkles for something else?
Absolutely. You can use mini chocolate chips, crushed freeze-dried berries, or even colored sugar crystals for a different texture and flavor.
How long can I store the assembled ice cream sandwiches?
Wrapped tightly in plastic or stored in an airtight freezer-safe container, they keep well for about one week.
Is there a way to make these healthier?
You can swap regular sugar for coconut sugar or a natural sweetener, use dairy-free milk alternatives, and choose gluten-free flours to fit your nutritional preferences.
For more cozy homemade treats that match the spirit of these ice cream sandwiches, you might enjoy the Cozy Skillet Chocolate Chip Cookie Sundae or the Decadent Chocolate Chip Waffle Sundae recipes, which also capture that homemade warmth with a fun twist.
Pin This Recipe!
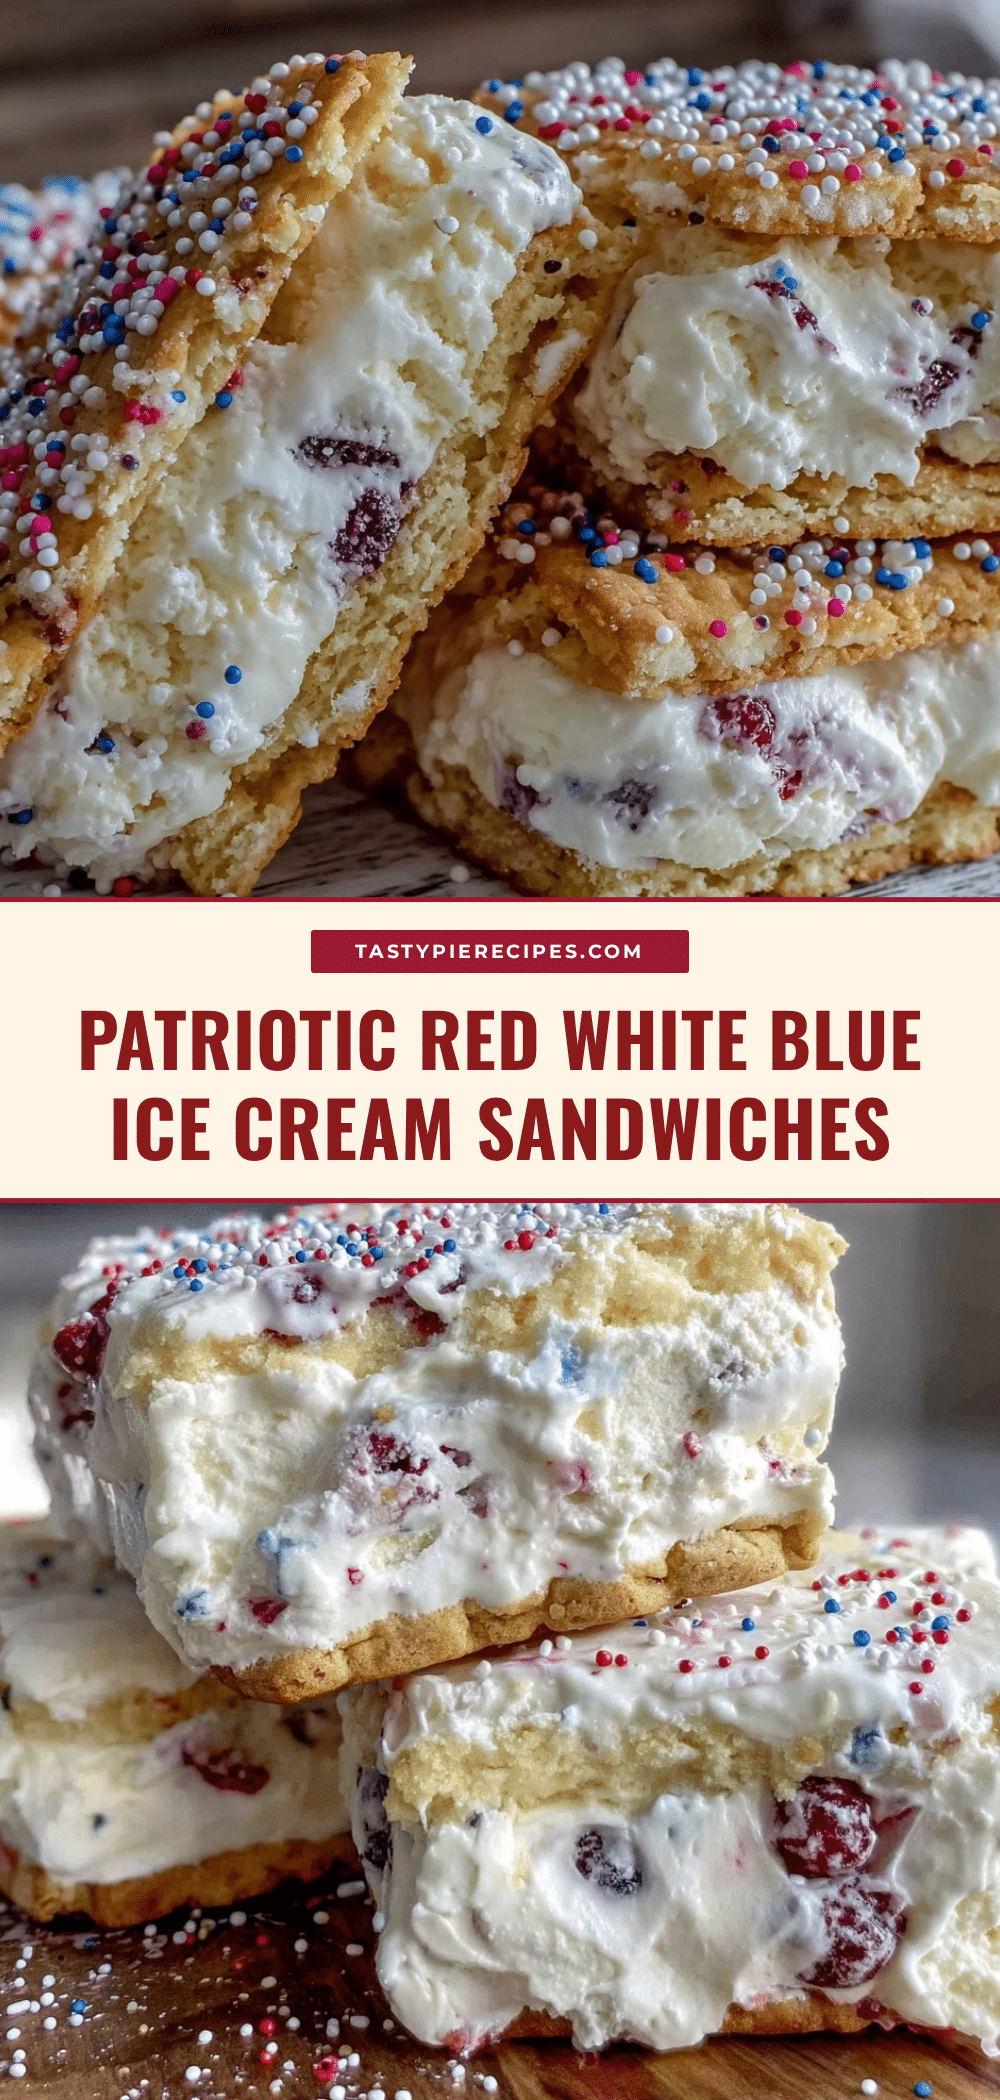
Cozy Patriotic Homemade Ice Cream Sandwiches Easy Red White Blue Recipe

These homemade ice cream sandwiches feature soft, chewy cookies with creamy vanilla ice cream and festive red, white, and blue sprinkles, perfect for patriotic celebrations or any summer day.
- Prep Time: 15 minutes
- Cook Time: 12 minutes
- Total Time: 1 hour 45 minutes
- Yield: 12 sandwiches 1x
- Category: Dessert
- Cuisine: American
Ingredients
- 2 ½ cups (320 g) all-purpose flour
- ½ teaspoon baking soda
- ¼ teaspoon salt
- 1 cup (225 g) unsalted butter, softened
- ¾ cup (150 g) granulated sugar
- ½ cup (110 g) packed brown sugar
- 1 large egg, room temperature
- 1 teaspoon pure vanilla extract
- ½ cup (75 g) red, white, and blue sprinkles
- 2 cups (480 ml) heavy cream
- 1 cup (240 ml) whole milk
- ¾ cup (150 g) granulated sugar
- 2 teaspoons pure vanilla extract or vanilla bean paste
- Pinch of salt
Instructions
- In a medium bowl, whisk together 2 ½ cups all-purpose flour, ½ teaspoon baking soda, and ¼ teaspoon salt. Set aside.
- In a large bowl, beat 1 cup softened unsalted butter with ¾ cup granulated sugar and ½ cup packed brown sugar until light and fluffy, about 3-5 minutes with an electric mixer.
- Beat in 1 large room-temperature egg and 1 teaspoon pure vanilla extract until fully incorporated.
- Gradually add the dry ingredients to the wet, mixing on low speed until just combined. Avoid overmixing.
- Gently fold in ½ cup red, white, and blue sprinkles, being careful not to overmix.
- Cover the bowl with plastic wrap and chill the dough in the fridge for at least 30 minutes.
- Preheat oven to 350°F (175°C) and line baking sheets with parchment paper.
- Scoop rounded tablespoons of dough onto the baking sheet, spaced about 2 inches apart.
- Bake for 10-12 minutes, until edges are lightly golden but centers still look soft.
- Let cookies cool on baking sheets for 5 minutes, then transfer to wire racks to cool completely.
- In a bowl, whisk 2 cups heavy cream, 1 cup whole milk, ¾ cup granulated sugar, 2 teaspoons vanilla extract, and a pinch of salt until sugar dissolves. Chill for at least 1 hour.
- Pour chilled mixture into an ice cream maker and churn according to manufacturer’s instructions, about 20-25 minutes, until thick and creamy.
- Scoop generous spoonfuls of ice cream onto the flat side of a cookie, then top with a second cookie, pressing gently to spread the ice cream evenly.
- Wrap each sandwich in plastic wrap or place in an airtight container and freeze for at least 2 hours before serving.
Notes
Chill the dough for at least 30 minutes to prevent spreading and keep sprinkles from bleeding color. Use softened butter for tender cookies. If no ice cream maker is available, use a no-churn vanilla ice cream or store-bought softened vanilla ice cream. Freeze assembled sandwiches for at least 2 hours before serving. Let sandwiches sit at room temperature for 3-5 minutes if too hard to bite.
Nutrition
- Serving Size: 1 ice cream sandwich
- Calories: 275
- Sugar: 20
- Sodium: 150
- Fat: 15
- Saturated Fat: 9
- Carbohydrates: 30
- Fiber: 1
- Protein: 4
Keywords: ice cream sandwiches, homemade ice cream, patriotic dessert, red white blue sprinkles, Fourth of July dessert, summer treat, easy dessert


