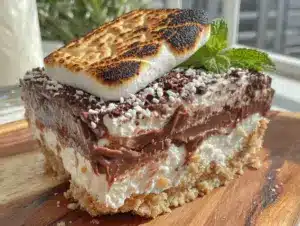
I figured a dessert this simple couldn’t possibly taste like the real thing. It took about one bite for that assumption to collapse completely.
The first time I made this Easy No-Bake S’mores Icebox Cake, it was a desperate move. It was the middle of July, the air conditioner was wheezing, and I had promised to bring dessert to a backyard gathering. Firing up the oven felt like a personal insult to the universe. So I stood in my kitchen, staring at a box of graham crackers, a bag of marshmallows, and a block of cream cheese, wondering if I could somehow trick everyone into thinking they were eating a campfire treat without ever striking a match. The answer, as it turns out, was a resounding yes. Honestly, this might be the best dessert I’ve ever thrown together without turning on a single appliance.
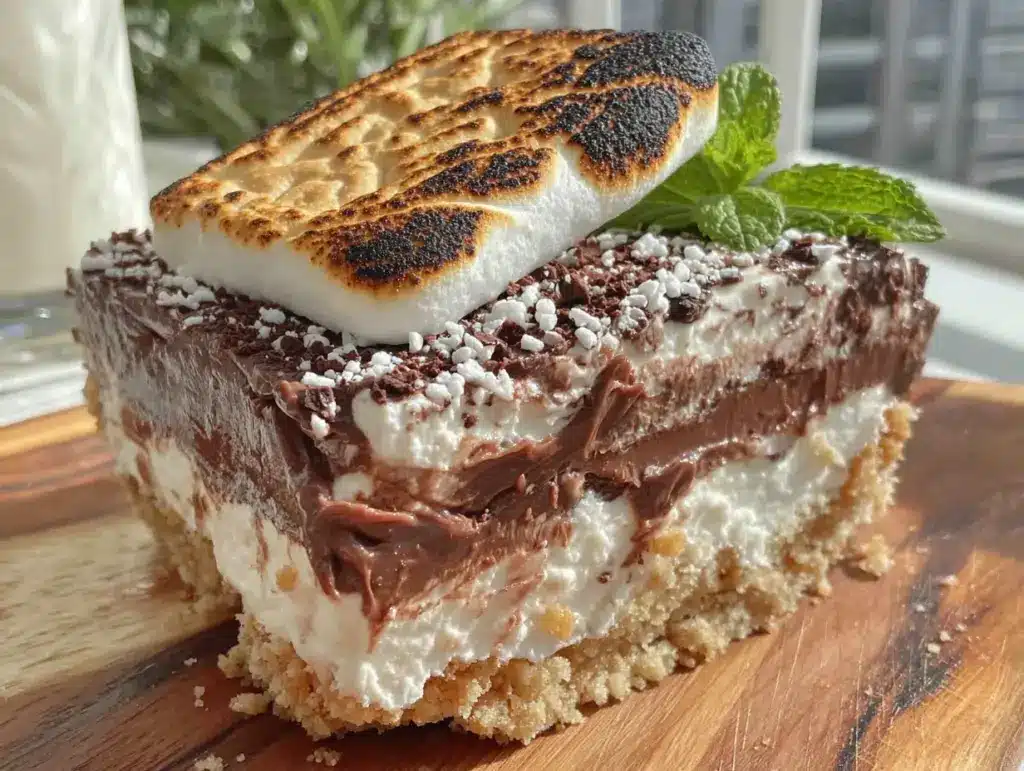
There’s something deeply satisfying about building this cake. You layer graham crackers, a luscious chocolate cream cheese filling, and clouds of marshmallow fluff, then let the refrigerator do all the heavy lifting. The crackers soften into a tender, cake-like texture that mimics the perfect campfire s’more, but without the smokey hair and melted chocolate fingers. It’s a quiet kind of magic—the kind that makes you feel like you’ve discovered a secret shortcut to happiness.
This recipe stuck because it solves a real problem. It gives you all the nostalgic joy of a s’more with none of the heat, mess, or fuss. It’s the dessert you make when you want to impress people but also want to keep your kitchen cool and your sanity intact.
Why You’ll Love This Recipe
This is not your average icebox cake. It’s a crowd-pleasing masterpiece that feels like a cheat code for summer entertaining. Here is why you are going to absolutely love it:
- No Oven Required: The kitchen stays cool, which is a win in my book during those sweltering months. This is the perfect solution when you need a stunning dessert but can’t handle the heat.
- Simple Ingredients: You probably have most of these in your pantry right now. No fancy trips to specialty stores or hunting for obscure ingredients. It’s all stuff you know and love.
- Incredibly Easy: If you can spread a filling and stack crackers, you can make this cake. It’s almost embarrassingly simple, but the result looks like you slaved away for hours.
- Perfect for Any Occasion: This cake is a hit at summer barbecues, potlucks, birthday parties, or even a cozy night in. It travels well and always gets devoured.
- Make-Ahead Magic: This is the kind of dessert that actually gets better after a day in the fridge. You can make it a day or two ahead of time, which is a lifesaver when you’re hosting.
- Unbelievably Delicious: The combination of creamy, chocolatey filling, soft graham crackers, and sweet, gooey marshmallow is pure comfort. It’s the taste of summer camp, but better.
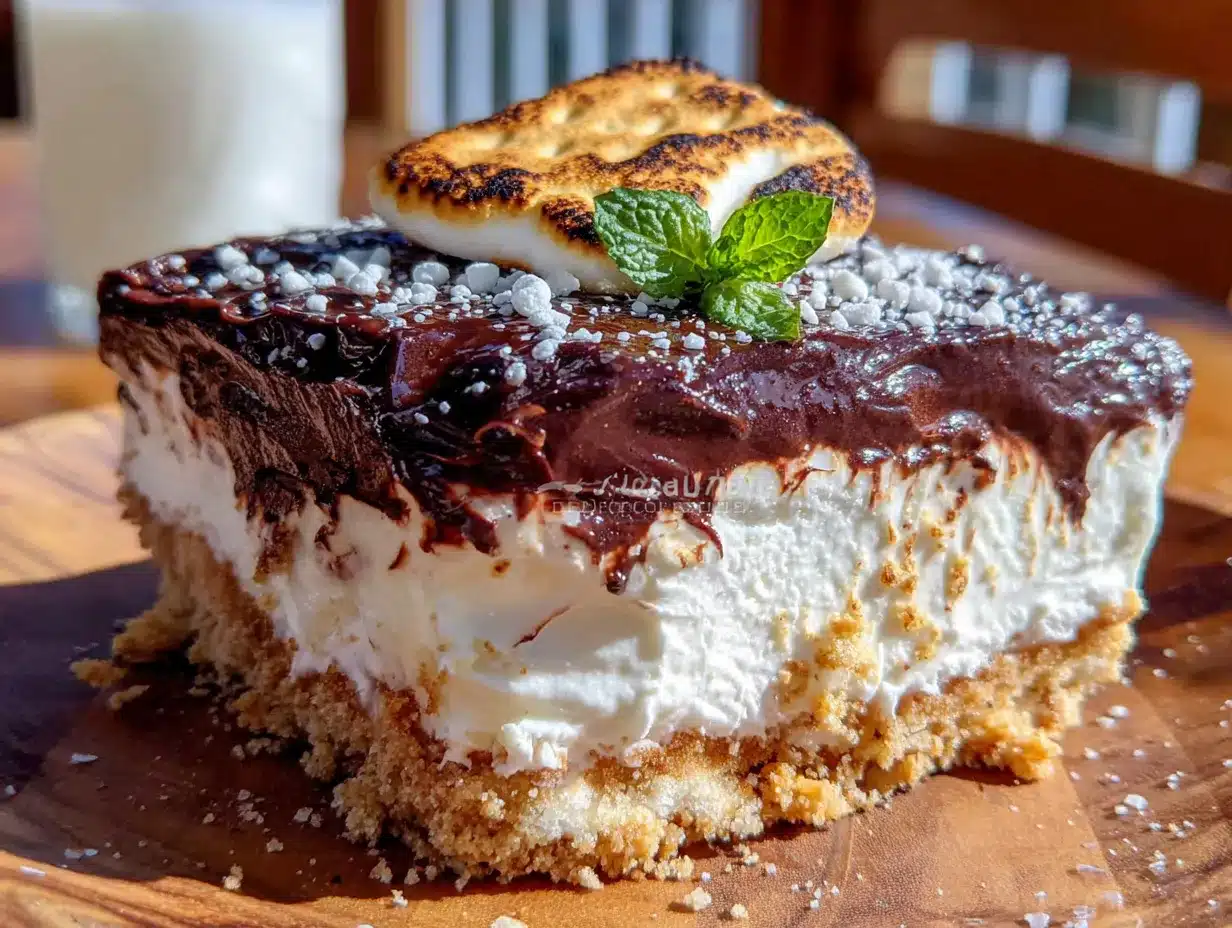
What makes this recipe different from all the others? It’s the texture. The filling is a perfectly balanced blend of cream cheese, whipped cream, and melted chocolate that creates a mousse-like consistency. It’s not too heavy, not too sweet—it’s just right. Plus, the marshmallow topping gets a quick broil at the end for that authentic, toasted campfire flavor without needing a fire pit. It’s comfort food, reimagined for the modern, busy cook.
What Ingredients You Will Need
This recipe uses simple, wholesome ingredients to deliver that classic s’mores flavor without the fuss. Most of these are pantry staples you likely already have on hand.
- Graham Crackers (about 1 standard box): These form the “cake” layers. You’ll need the full sheets, not the crushed crumbs. I prefer the classic honey-flavored ones, but cinnamon or chocolate graham crackers would work beautifully for a twist.
- Heavy Whipping Cream (2 cups / 480 ml): This is the base for our light and airy filling. Make sure it’s very cold for the best volume. You can also use a 16-ounce tub of Cool Whip, thawed, for an even quicker version.
- Cream Cheese (8 ounces / 226 grams), softened: This adds a subtle tang and richness that balances the sweetness of the chocolate and marshmallow. Let it sit on the counter for 30 minutes before you start.
- Powdered Sugar (1/2 cup / 60 grams): This sweetens the cream cheese mixture without making it grainy. Sift it if it’s lumpy.
- Vanilla Extract (1 teaspoon): A little vanilla enhances all the other flavors. Use pure vanilla extract if you have it.
- Milk Chocolate Chips (1 ½ cups / 270 grams): I love the creamy sweetness of milk chocolate for this cake. It feels the most authentic to a classic s’more. You can use semi-sweet or dark chocolate chips if you prefer a less sweet filling.
- Unsalted Butter (2 tablespoons / 28 grams): This helps the melted chocolate stay smooth and shiny and adds a lovely richness. (I recommend using a good quality butter like Kerrygold for the best flavor).
- Marshmallow Fluff (1 jar / about 7 ounces / 200 grams): This is the easiest way to get that classic marshmallow layer. You can also use a homemade marshmallow cream if you’re feeling ambitious.
- Miniature Marshmallows (2 cups): These are for the topping. They toast up beautifully under the broiler and give that iconic s’mores look.
Ingredient Selection Tips
For the best texture, use full-fat cream cheese. The low-fat versions can make the filling watery. When it comes to chocolate, I’ve found that Guittard or Ghirardelli milk chocolate chips melt the smoothest. Look for a marshmallow fluff that doesn’t have high fructose corn syrup if that’s a concern for you. If you are making this for a party and want a festive twist, you could even swap the graham crackers for the festive red, white, and blue frosted animal crackers for a completely different look and flavor profile.
Equipment Needed
You don’t need any fancy gadgets for this cake. Here is what you will need:
- 9×5-inch Loaf Pan: This is the perfect size for this icebox cake. You can also use an 8×8-inch square pan, but the layers will be a bit shorter and the cake will be wider.
- Electric Hand Mixer or Stand Mixer: You’ll need this to whip the cream and cream cheese to the right consistency. A whisk and a strong arm will also work, but be prepared for a workout.
- Large Mixing Bowls: A couple of medium to large bowls are essential for making the filling and melting the chocolate.
- Small Microwave-Safe Bowl: For melting the chocolate and butter together.
- Rubber Spatula: For folding the whipped cream into the cream cheese mixture and spreading the layers evenly.
- Plastic Wrap: To cover the pan tightly as it chills in the refrigerator.
- Small Offset Spatula or Butter Knife: This makes spreading the layers much easier and neater.
If you don’t have a loaf pan, you can use a 9-inch springform pan. Just line the bottom with parchment paper for easy removal. My first time making this, I used a Pyrex dish and it worked perfectly—just adjust the layers to fit your container.
Preparation Method
This is the easiest part. Follow these steps, and you’ll have a show-stopping dessert in no time. The total active time is about 20 minutes.
- Make the Chocolate Cream Cheese Filling: In a large mixing bowl, beat the softened cream cheese with an electric mixer until it’s smooth and creamy. Add the powdered sugar and vanilla extract and beat until combined, scraping down the sides of the bowl as needed. In a separate small, microwave-safe bowl, combine the milk chocolate chips and unsalted butter. Microwave in 30-second intervals, stirring after each, until the mixture is completely smooth and melted. Let it cool for a minute or two, then pour the melted chocolate into the cream cheese mixture. Beat on low speed until the chocolate is fully incorporated and the mixture is a uniform, rich chocolate color.
- Whip the Cream: In a clean, cold bowl, pour the heavy whipping cream. Using your electric mixer with the whisk attachment, beat the cream on medium-high speed until stiff peaks form. This means when you lift the beaters, the cream holds its shape and doesn’t droop. Be careful not to over-whip it, or you’ll end up with butter!
- Fold it Together: Take about a third of the whipped cream and stir it into the chocolate cream cheese mixture. This lightens the batter and makes it easier to fold in the rest. Then, gently fold in the remaining whipped cream using a rubber spatula. Use a slow, sweeping motion, rotating the bowl as you go, until no white streaks remain. You want a light, fluffy, mousse-like filling.
- Assemble the First Layers: Line your 9×5-inch loaf pan with plastic wrap, leaving some overhang on the sides. This will help you lift the cake out later. Spread a very thin layer of the chocolate filling on the bottom of the pan (just enough to barely cover it). This helps the first layer of graham crackers stick. Now, place a layer of graham crackers on top, breaking them as needed to fit snugly. You should use about 3 to 4 full sheets per layer.
- Layer, Layer, Layer: Spread about 1/3 of the remaining chocolate filling evenly over the graham crackers. Then, dollop about 1/3 of the marshmallow fluff on top and gently spread it out. It doesn’t have to be perfect. Place another layer of graham crackers on top. Repeat this process two more times: filling, fluff, crackers. You should end with a final layer of graham crackers on top.
- Top with Marshmallows: Spread the remaining marshmallow fluff over the top layer of graham crackers. Then, scatter the miniature marshmallows evenly on top. Press them down gently so they stick.
- Chill: Cover the pan tightly with plastic wrap and refrigerate for at least 6 hours, but preferably overnight. This is the most important step! The chilling time allows the graham crackers to soften and absorb moisture from the filling, transforming them into a tender, cake-like texture. The flavors also meld together beautifully.
- Toast the Marshmallows (Optional but Highly Recommended): Just before serving, remove the cake from the pan using the plastic wrap overhang. Place it on a serving plate. If you want that iconic toasted marshmallow top, turn your oven’s broiler to high. Place the cake on a baking sheet and put it under the broiler for 30-60 seconds. Watch it like a hawk! The marshmallows will puff and turn golden brown very quickly. Do not walk away. You can also use a kitchen torch for more control.
- Slice and Serve: Let the cake sit at room temperature for about 5-10 minutes before slicing. This makes it easier to cut cleanly. Use a sharp, thin-bladed knife, wiping it clean between cuts for the neatest slices.
Sensory Cue: As you fold the whipped cream into the chocolate, you’ll notice the mixture transforms from a dense paste into a light, airy cloud. When you lift the lid after chilling, you’ll smell the sweet, nostalgic aroma of graham crackers, chocolate, and marshmallow. The first slice will reveal beautiful, distinct layers that have melded together into a cohesive, perfect dessert.
Cooking Tips & Techniques
I’ve made this cake more times than I can count, and I’ve learned a few things along the way. Here are my best tips for success:
- Don’t Skip the Chill Time: I know it’s tempting to rush this, but the chill time is non-negotiable. If you cut into it too early, the graham crackers will be crunchy and the filling will be runny. The magic happens overnight. Trust the process.
- Watch the Broiler: That first time I tried to toast the marshmallows, I got distracted for just a second. Let’s just say I was scraping burnt marshmallow off a very sad-looking cake. Keep your eyes glued to the oven. It happens in seconds.
- Room Temperature Cream Cheese is Key: Cold cream cheese will leave you with a lumpy filling. Let it soften on the counter for 30 minutes. If you forget, you can microwave it in 10-second bursts, but be careful not to melt it.
- Use a Sharp Knife for Slices: A dull knife will drag the filling and make a mess. Run the knife under hot water, dry it off, and then make your cut. Wipe the blade clean between each slice for picture-perfect pieces.
- Make it a Day Ahead: This cake is a dream for meal prep. It actually tastes better on day two, as the flavors have had even more time to meld. I often make this the day before a party and just do the broiler step right before serving.
Variations & Adaptations
This recipe is incredibly versatile. Here are a few ways to make it your own:
- Peanut Butter S’mores Icebox Cake: Swirl 1/2 cup of creamy peanut butter into the chocolate filling before folding in the whipped cream. The salty, nutty flavor is a fantastic contrast to the sweet marshmallow. It’s a match made in heaven.
- Berry S’mores Icebox Cake: Add a layer of fresh raspberries or sliced strawberries between the marshmallow fluff and the graham crackers. The tart berries cut through the sweetness beautifully and add a pop of color. This is my go-to for summer parties.
- Gluten-Free Version: Simply swap the regular graham crackers for your favorite gluten-free graham cracker brand. The rest of the recipe is naturally gluten-free, so this is an easy adaptation that everyone can enjoy.
- Vegan Version: Use a vegan cream cheese (like Kite Hill or Tofutti), a dairy-free whipping cream (like coconut cream from a can of full-fat coconut milk), and vegan chocolate chips. For the marshmallow fluff, look for a vegan version or use a stabilized aquafaba meringue. It’s a bit more work but totally doable.
- Spiced S’mores Cake: Add 1 teaspoon of ground cinnamon and a pinch of cayenne pepper to the chocolate filling. The warmth of the spices adds a cozy, unexpected depth that is absolutely delicious.
I once made a version with fresh red, white, and blue layered cream popsicles flavors by adding a blueberry compote layer. It was a hit for a Fourth of July party, and the colors looked so festive against the chocolate and marshmallow.
Serving & Storage Suggestions
This cake is best served chilled, straight from the refrigerator. The texture is perfect—firm enough to slice, but soft and creamy in the mouth.
- Serving: Slice the cake with a hot, dry knife for the cleanest cuts. Serve it on a plate with a drizzle of chocolate syrup or a dusting of cocoa powder for an extra touch. A dollop of fresh whipped cream on the side is never a bad idea.
- Storage: Store any leftovers in an airtight container in the refrigerator for up to 5 days. The cake will continue to soften, but it will still be delicious.
- Freezing: You can freeze this cake for up to 2 months. Wrap it tightly in plastic wrap, then a layer of aluminum foil. To serve, thaw it in the refrigerator overnight. Do not thaw it at room temperature, or it may become watery.
- Flavor Development: The flavors actually deepen and meld together beautifully over time. The cake is good on day one, but it’s absolutely spectacular on day two or three. The graham crackers have fully softened, and the chocolate and marshmallow have become one cohesive flavor.
Nutritional Information & Benefits
This is a dessert, so let’s be honest—it’s a treat. But here’s a general idea of what you’re working with. Per serving (based on 8 servings), you can expect approximately:
| Nutrient | Amount (approx.) |
|---|---|
| Calories | 450-550 |
| Fat | 28g |
| Carbohydrates | 55g |
| Protein | 6g |
| Sugar | 40g |
While this isn’t a health food, the cream cheese and heavy cream provide some calcium and protein. The milk chocolate offers a small amount of antioxidants, but let’s not kid ourselves—this is pure, soul-satisfying comfort. It’s the kind of dessert you make when you want to feel good, not when you’re counting macros. And honestly, there’s a time and place for that.
Conclusion
This Easy No-Bake S’mores Icebox Cake is more than just a recipe—it’s a solution. It solves the problem of wanting a show-stopping, nostalgic dessert without turning on the oven. It solves the problem of needing something impressive with minimal effort. It solves the problem of craving that campfire flavor in the middle of a heatwave.
I love this recipe because it’s a little bit magic. It takes simple, humble ingredients and transforms them into something that feels special. It’s the dessert that makes people say, “Wait, you made this? It’s incredible!” And you get to smile and say, “It was nothing.” Because honestly, it almost was.
I encourage you to make this your own. Swap the chocolate, add some fruit, or keep it classic. The beauty of this cake is its flexibility. So go ahead, give it a try. I promise you won’t regret it.
Have you tried this recipe? I’d love to hear about it! Leave a comment below and let me know how it turned out, or share a photo of your creation on social media. Don’t forget to tag me so I can see your beautiful s’mores cake!
Frequently Asked Questions
Can I use Cool Whip instead of heavy cream?
Absolutely! A 16-ounce tub of thawed Cool Whip is a perfect shortcut. Just fold it into the chocolate cream cheese mixture instead of whipping your own cream. It saves a step and works beautifully.
How long does this cake need to chill?
At least 6 hours, but overnight is best. The longer it chills, the softer the graham crackers become and the more the flavors meld together. I always recommend making it the day before you plan to serve it.
Can I make this in a different pan?
Yes! You can use an 8×8-inch square pan for a shorter, wider cake, or even a 9-inch springform pan. Just adjust the number of layers to fit the size of your pan. The flavor and texture will be the same.
My marshmallows burned under the broiler. What did I do wrong?
You probably walked away! The broiler is incredibly fast. Keep the oven door slightly ajar and watch them constantly. It should only take 30-60 seconds. If you’re nervous, a kitchen torch gives you much more control.
Can I use homemade marshmallow cream instead of store-bought fluff?
Definitely. Homemade marshmallow cream is delicious and will work perfectly. Just make sure it’s stable and not too runny before you spread it. You can find great recipes online for a simple marshmallow cream made with egg whites and sugar.
Pin This Recipe!
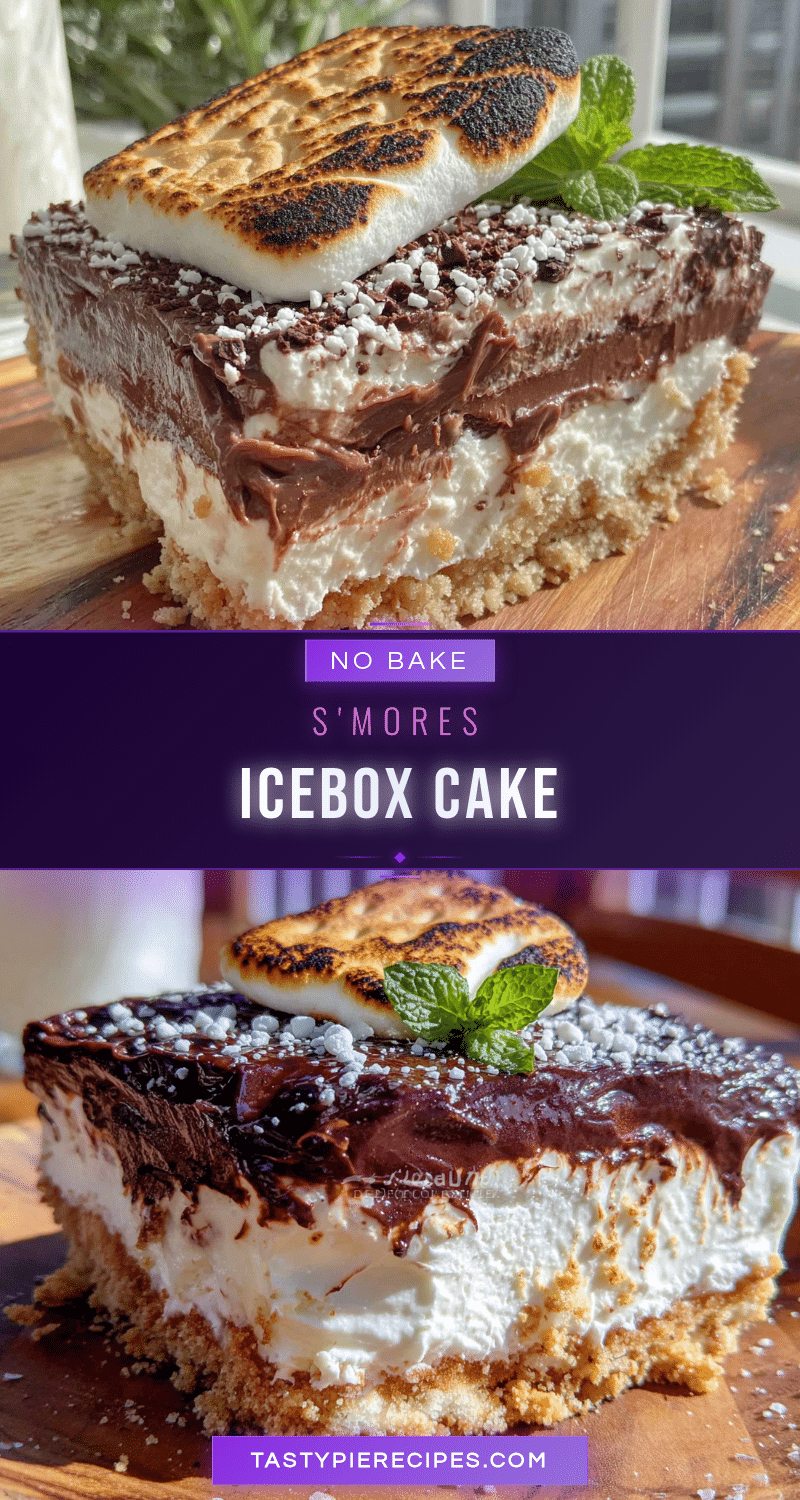
Best Easy No-Bake Smores Icebox Cake Recipe

This Easy No-Bake S’mores Icebox Cake is a crowd-pleasing masterpiece that gives you all the nostalgic joy of a s’more with none of the heat, mess, or fuss. It’s the dessert you make when you want to impress people but also want to keep your kitchen cool and your sanity intact.
- Prep Time: 20 minutes
- Cook Time: 1 minute (broiling)
- Total Time: 6 hours 21 minutes (including chilling)
- Yield: 8 servings
- Category: Dessert
- Cuisine: American
Ingredients
- Graham Crackers (about 1 standard box)
- Heavy Whipping Cream (2 cups / 480 ml)
- Cream Cheese (8 ounces / 226 grams), softened
- Powdered Sugar (1/2 cup / 60 grams)
- Vanilla Extract (1 teaspoon)
- Milk Chocolate Chips (1 ½ cups / 270 grams)
- Unsalted Butter (2 tablespoons / 28 grams)
- Marshmallow Fluff (1 jar / about 7 ounces / 200 grams)
- Miniature Marshmallows (2 cups)
Instructions
- Make the Chocolate Cream Cheese Filling: In a large mixing bowl, beat the softened cream cheese with an electric mixer until it’s smooth and creamy. Add the powdered sugar and vanilla extract and beat until combined, scraping down the sides of the bowl as needed. In a separate small, microwave-safe bowl, combine the milk chocolate chips and unsalted butter. Microwave in 30-second intervals, stirring after each, until the mixture is completely smooth and melted. Let it cool for a minute or two, t…
- Whip the Cream: In a clean, cold bowl, pour the heavy whipping cream. Using your electric mixer with the whisk attachment, beat the cream on medium-high speed until stiff peaks form. This means when you lift the beaters, the cream holds its shape and doesn’t droop. Be careful not to over-whip it, or you’ll end up with butter!
- Fold it Together: Take about a third of the whipped cream and stir it into the chocolate cream cheese mixture. This lightens the batter and makes it easier to fold in the rest. Then, gently fold in the remaining whipped cream using a rubber spatula. Use a slow, sweeping motion, rotating the bowl as you go, until no white streaks remain. You want a light, fluffy, mousse-like filling.
- Assemble the First Layers: Line your 9×5-inch loaf pan with plastic wrap, leaving some overhang on the sides. This will help you lift the cake out later. Spread a very thin layer of the chocolate filling on the bottom of the pan (just enough to barely cover it). This helps the first layer of graham crackers stick. Now, place a layer of graham crackers on top, breaking them as needed to fit snugly. You should use about 3 to 4 full sheets per layer.
- Layer, Layer, Layer: Spread about 1/3 of the remaining chocolate filling evenly over the graham crackers. Then, dollop about 1/3 of the marshmallow fluff on top and gently spread it out. It doesn’t have to be perfect. Place another layer of graham crackers on top. Repeat this process two more times: filling, fluff, crackers. You should end with a final layer of graham crackers on top.
- Top with Marshmallows: Spread the remaining marshmallow fluff over the top layer of graham crackers. Then, scatter the miniature marshmallows evenly on top. Press them down gently so they stick.
- Chill: Cover the pan tightly with plastic wrap and refrigerate for at least 6 hours, but preferably overnight. This is the most important step! The chilling time allows the graham crackers to soften and absorb moisture from the filling, transforming them into a tender, cake-like texture. The flavors also meld together beautifully.
- Toast the Marshmallows (Optional but Highly Recommended): Just before serving, remove the cake from the pan using the plastic wrap overhang. Place it on a serving plate. If you want that iconic toasted marshmallow top, turn your oven’s broiler to high. Place the cake on a baking sheet and put it under the broiler for 30-60 seconds. Watch it like a hawk! The marshmallows will puff and turn golden brown very quickly. Do not walk away. You can also use a kitchen torch for more control.
- Slice and Serve: Let the cake sit at room temperature for about 5-10 minutes before slicing. This makes it easier to cut cleanly. Use a sharp, thin-bladed knife, wiping it clean between cuts for the neatest slices.
Notes
Don’t skip the chill time; it’s non-negotiable for the right texture. Watch the broiler closely as marshmallows can burn in seconds. Use room temperature cream cheese for a smooth filling. For clean slices, use a hot, dry knife and wipe between cuts. The cake tastes even better on day two.
Nutrition
- Serving Size: 1 slice (1/8 of cake
- Calories: 500
- Sugar: 40
- Sodium: 320
- Fat: 28
- Saturated Fat: 16
- Carbohydrates: 55
- Fiber: 1
- Protein: 6
Keywords: no-bake dessert, icebox cake, s'mores, summer dessert, easy dessert, no oven, graham crackers, marshmallow, chocolate