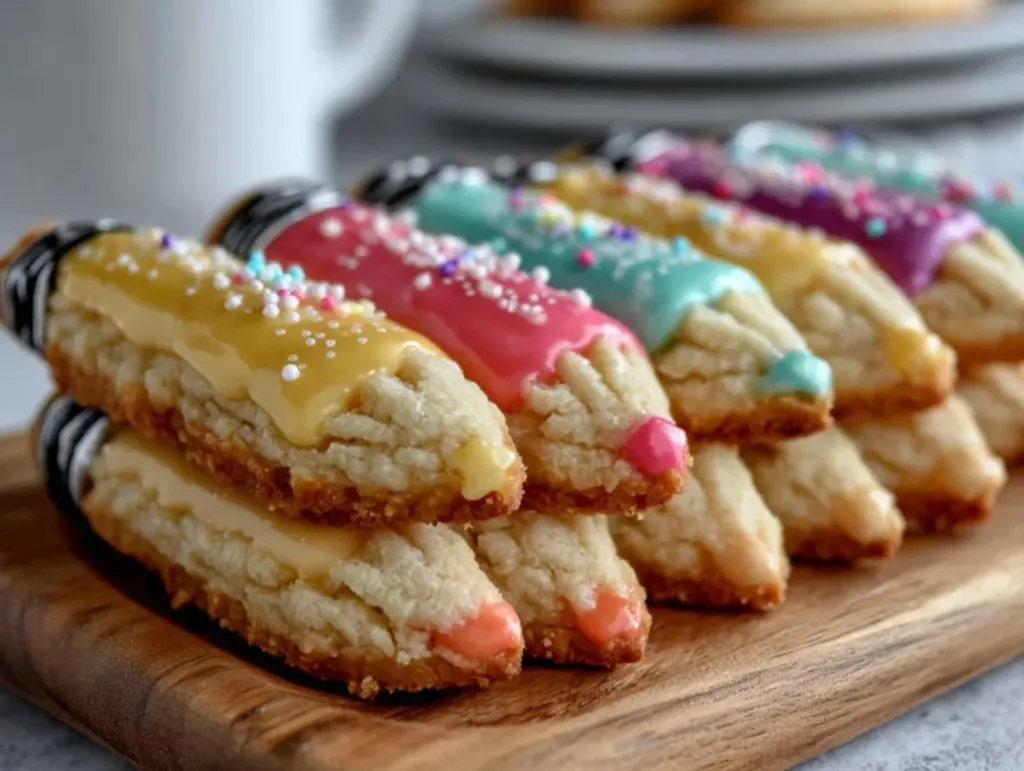
I figured making pencil-shaped sugar cookies would be a breeze—just roll out the dough, cut, bake, and decorate. It took about three batches and a lot of royal icing disasters for that to fall apart completely. Honestly, I thought those sharp edges and clean lines were only for professional bakers with fancy cutters and steady hands. Turns out, with a bit of trial, error, and a few tweaks, those pencil cookies came out sharper, sweeter, and more fun than I ever expected.
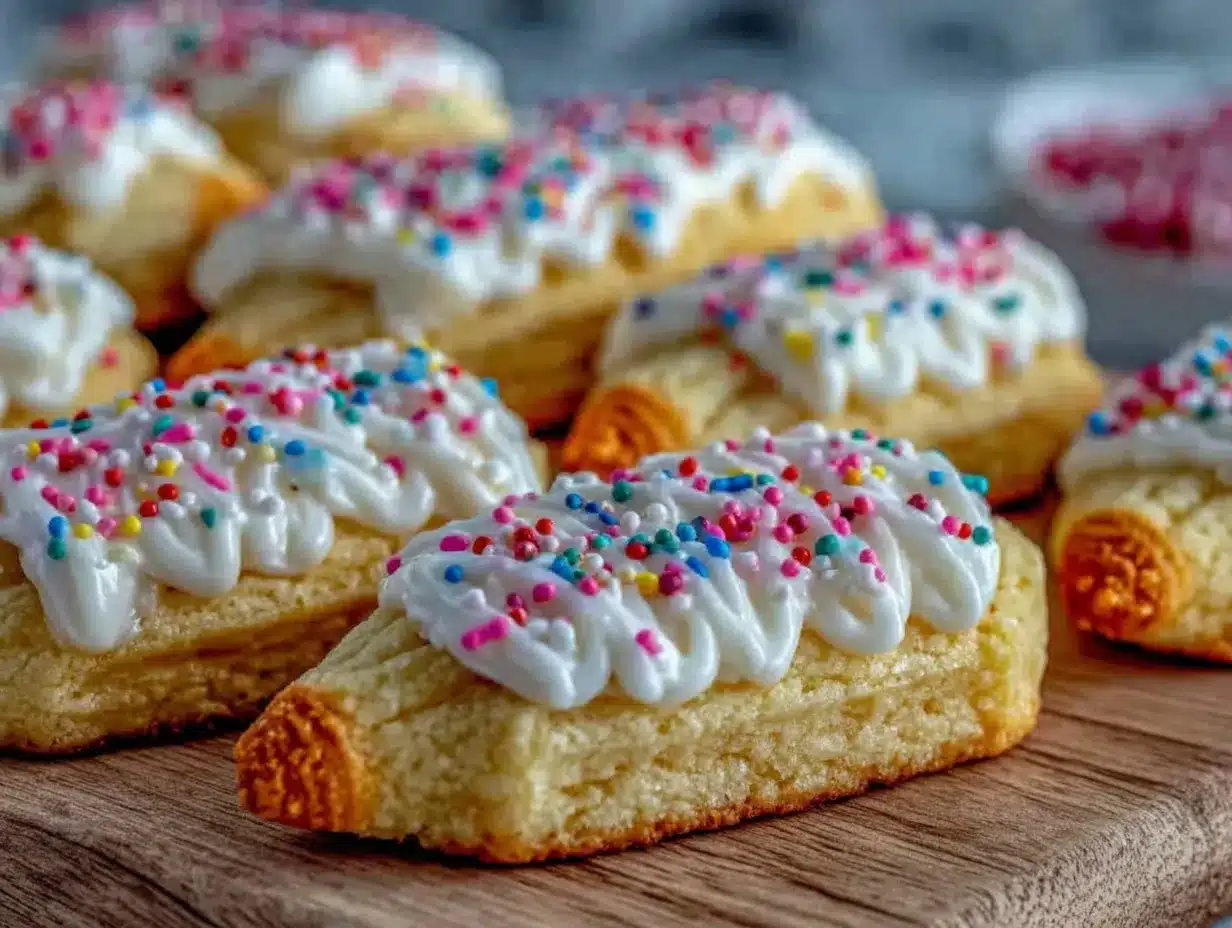
There was this one afternoon, the kitchen smelling faintly of vanilla and almond extract, when I sat down with a piping bag that was leaking royal icing everywhere except on the cookies. The mess was frustrating, but the bright yellow and pink icing on those little pencil shapes made me smile—like edible school supplies that just might make homework a bit more bearable.
What surprised me most was how forgiving the sugar cookie dough was and how transforming a simple sugar cookie into a pencil shape with royal icing details could turn a casual bake into something playful and impressive. It’s the kind of recipe that sticks with you—not because it’s perfect the first time, but because it invites you to get messy, learn, and end up with cookies that look almost too cute to eat (but you do anyway).
These pencil-shaped sugar cookies became my quirky go-to for back-to-school gatherings, teacher gifts, or even just a weekend challenge to get the kids involved. They’re not just cookies; they’re a little bit nostalgic, a little bit crafty, and definitely a whole lot of fun. That’s why this recipe stayed in my rotation long after the first crumb fell apart—because sometimes the imperfect moments taste the sweetest.
Why You’ll Love This Recipe
This recipe for perfect pencil-shaped sugar cookies with royal icing is a gem that’s been tested, tweaked, and shared with friends, family, and even a few very picky kids. Here’s why it’s a must-try:
- Quick & Easy: You can have these cookies ready to decorate in under 30 minutes of active prep time—ideal when you need a last-minute treat or a fun afternoon project.
- Simple Ingredients: You likely have everything in your pantry already—basic baking staples like flour, sugar, butter, and eggs, plus a few baking essentials for royal icing.
- Perfect for Celebrations: These cookies are a hit at back-to-school parties, teacher appreciation days, or even birthday bashes with a crafty twist.
- Crowd-Pleaser: Kids adore them for the fun shapes and colors, and adults appreciate the buttery, tender cookie base with smooth, glossy icing.
- Unbelievably Delicious: The sugar cookie dough is soft but holds its shape beautifully, while the royal icing dries with that classic matte finish that’s just right for detailed designs.
What sets this recipe apart is the royal icing tutorial baked right in. You’re not just getting cookie dough; you’re getting a foolproof way to make piping and flooding easier, even if your hands shake a little. I’m not a professional decorator, so these tips come from honest mistakes and wins alike.
This isn’t your average sugar cookie recipe—it’s got the right balance of chew and crisp, with that iconic pencil shape that feels both nostalgic and fresh. Plus, the royal icing recipe is smooth and dries quickly, so you can get creative without the usual fuss.
Honestly, these pencil cookies always bring a little smile to my face—and maybe they’ll do the same for you.
What Ingredients You Will Need
This recipe uses simple, wholesome ingredients to deliver bold flavor and satisfying texture without the fuss. Most are pantry staples, and the royal icing calls for just a few specialized items you can find easily. Here’s the breakdown:
- For the Sugar Cookies:
- All-purpose flour (2 ¾ cups / 345 g) – Look for a trusted brand like King Arthur for best texture
- Baking powder (1 tsp) – helps the cookies rise slightly without spreading too much
- Salt (½ tsp) – balances the sweetness
- Unsalted butter (1 cup / 227 g), softened – adds richness and a tender crumb
- Granulated sugar (1 ¼ cups / 250 g) – classic sweetness
- Large egg (1), room temperature – binds everything together
- Vanilla extract (1 ½ tsp) – for that warm, familiar flavor
- Almond extract (optional, ½ tsp) – gives a subtle nutty note that pairs beautifully
- For the Royal Icing:
- Powdered sugar (4 cups / 480 g), sifted – the base of the icing
- Pasteurized egg whites (3 tbsp) or meringue powder (2 tbsp) – for structure and gloss
- Fresh lemon juice (1 tbsp) or vanilla extract – adds flavor and helps set the icing
- Water (2–3 tbsp), to thin the icing as needed
- Gel food coloring – yellow, pink, black, and a bit of green for authentic pencil colors
If you want to customize or accommodate allergies, you can substitute almond flour for a gluten-free cookie base, though the texture will be different. For dairy-free needs, swap unsalted butter with a plant-based alternative like Earth Balance. The royal icing recipe can also be made vegan by using meringue powder instead of egg whites.
For the pencil’s “wood” tip, I like to mix a touch of light brown gel coloring with the pink to get a more natural look. And if fresh lemon isn’t handy, vanilla works fine, though the lemon does add a nice brightness.
Equipment Needed
- Mixing bowls – A large bowl for dough and a separate one for royal icing
- Electric mixer or stand mixer – Makes creaming butter and mixing dough much easier, but a hand mixer works too
- Measuring cups and spoons – For precise ingredient amounts
- Rolling pin – For evenly rolling out dough (a silicone one is my personal favorite for easy cleanup)
- Pencil-shaped cookie cutters – You can find these online or in specialty baking stores; if not, a sharp knife and a printed template work fine
- Baking sheets lined with parchment paper or silicone mats – Prevents sticking and promotes even baking
- Piping bags and small round tips (size #1 or #2) – For detailed royal icing work; disposable bags are budget-friendly, but reusable ones save waste
- Toothpicks or scribe tools – Helpful for smoothing icing and correcting small mistakes
- Cooling racks – To let cookies cool properly before decorating
If you don’t have a stand mixer, mixing by hand isn’t impossible but expect a bit more elbow grease. For piping, I once used a zip-top bag with a tiny corner snipped off when I was in a pinch—it works but expect less precision.
Preparation Method
- Mix the dry ingredients: In a medium bowl, whisk together 2 ¾ cups (345 g) all-purpose flour, 1 tsp baking powder, and ½ tsp salt. Set aside. This ensures the rising agent and salt are evenly distributed.
- Cream the butter and sugar: In a large bowl, beat 1 cup (227 g) softened unsalted butter with 1 ¼ cups (250 g) granulated sugar until fluffy and pale, about 3-4 minutes. This step traps air for a tender cookie.
- Add egg and extracts: Beat in 1 large egg, 1 ½ tsp vanilla extract, and optional ½ tsp almond extract until just combined. The dough might look slightly curdled but that’s okay.
- Combine dry and wet: Gradually add the dry ingredients to the butter mixture, mixing on low speed until a soft dough forms. It should be pliable but not sticky. If too sticky, add a tablespoon of flour at a time.
- Chill the dough: Flatten the dough into a disk, wrap in plastic, and refrigerate for at least 1 hour (or up to overnight). This step helps the dough firm up for clean cookie shapes and prevents spreading.
- Preheat oven and prepare baking sheets: Heat oven to 350°F (175°C). Line baking sheets with parchment paper or non-stick mats.
- Roll and cut cookies: On a lightly floured surface, roll chilled dough to about ¼-inch (6 mm) thickness. Use pencil-shaped cookie cutters to cut shapes (or a knife and template). Transfer cookies carefully to baking sheets, spacing about 1 inch apart.
- Bake: Bake for 8-10 minutes until edges just start to turn golden but centers are still pale. Overbaking will make them too crisp. Let cool on sheets for 5 minutes, then transfer to wire racks to cool completely.
- Prepare royal icing: In a clean bowl, beat 4 cups (480 g) sifted powdered sugar with 3 tbsp pasteurized egg whites (or 2 tbsp meringue powder + 3 tbsp water), adding 1 tbsp lemon juice or vanilla. Mix until thick but smooth. Add water 1 tsp at a time to reach desired consistency:
- Piping consistency: Thick enough to hold a peak but still pipeable.
- Flooding consistency: Thinner, flows smoothly, about the consistency of honey.
- Color the icing: Divide icing into small bowls. Tint yellow, pink, black, and green with gel food coloring. Use small amounts—gel colors won’t thin the icing.
- Decorate: Start by outlining pencil edges with piping consistency icing. Let dry 10 minutes. Flood the body of the pencil with yellow icing and the tip with pink mixed with a touch of brown. Use black for the pencil lead and green for the eraser end details. Use a toothpick to spread and fix edges.
- Dry completely: Let decorated cookies dry at room temperature for 4-6 hours or overnight. This ensures the royal icing sets with that signature matte finish.
If your royal icing cracks or bubbles, it’s usually from air trapped or icing that’s too thick—try thinning it slightly and avoid overmixing. And don’t rush drying! Patience pays off with smooth, professional-looking cookies.
Cooking Tips & Techniques
Working with sugar cookies and royal icing can feel intimidating, but a few tricks can make the process smoother:
- Keep dough cool: Warm dough is sticky and harder to cut. Chill it well before rolling to keep shapes sharp.
- Don’t overbake: Cookies will firm up as they cool. Pull them out when edges just start to brown, or they’ll be too crunchy.
- Royal icing consistency: Thick icing is for outlines and details, while thinner icing is for flooding. Test by dripping a little on parchment; it should spread slowly.
- Use gel colors sparingly: They won’t change icing texture but too much can make colors muddy.
- Practice piping: If you’re new to piping, practice on parchment before decorating cookies. A steady hand comes with a bit of trial.
- Fix mistakes with a toothpick: It’s your best friend for dragging icing where you want or popping bubbles.
- Store decorated cookies properly: Once dry, store in an airtight container layered with parchment. They keep nicely for up to a week.
I learned the hard way that rushing the drying time leads to smudged designs, and that using parchment paper under your cookies while piping makes cleanup less annoying. Also, piping bags with couplers let you swap tips easily—a small investment for better decorating control.
Variations & Adaptations
These pencil-shaped sugar cookies are a fun canvas for creativity. Here are some ideas for switching things up:
- Flavored dough: Add lemon zest or almond extract to the dough for subtle twists.
- Colorful pencils: Change the pencil body color to match school colors or favorite hues. Try pastel blues or greens for a soft look.
- Gluten-free: Substitute all-purpose flour with a gluten-free blend and add a touch of xanthan gum for binding.
- Dairy-free: Use vegan butter alternatives and meringue powder for the royal icing to keep it vegan-friendly.
- Different shapes: Use similar royal icing techniques on apple-shaped cookies or notebooks for a back-to-school set.
One time, I swapped out the traditional yellow for a bright rainbow-striped pencil effect, carefully layering colors with piping bags. It took patience but was a showstopper at a kid’s party. For more colorful party treats, I’ve also enjoyed making red-white-blue gelatin squares that bring that same playful vibe without the baking.
Serving & Storage Suggestions
Serve these pencil-shaped sugar cookies at room temperature to enjoy the full flavor and texture, especially the crisp edges and tender centers. They look great arranged on a platter with fresh flowers or alongside a simple pitcher of lemonade or milk for a nostalgic touch.
They’re perfect for lunchboxes, party favors, or teacher gifts wrapped in cellophane tied with a ribbon. For a fun brunch spread, pair them with a fresh fruit tart or a creamy coffee cake, like the one in this fresh fig and honey crostata recipe.
To store, place cookies in an airtight container lined with parchment paper to prevent sticking. They keep well for up to a week at room temperature. For longer storage, freeze undecorated cookies; thaw fully before decorating. Decorated cookies freeze best if the icing has dried completely—wrap tightly to avoid moisture.
Reheat cookies gently by letting them come to room temperature; avoid microwaving, which can soften the icing. Flavors often deepen after a day or two, so if you can resist, let them rest overnight before serving.
Nutritional Information & Benefits
Each pencil-shaped sugar cookie (approximately 2.5 inches long) contains roughly 120–140 calories, 5–7 grams of fat, and 15–18 grams of carbohydrates depending on icing coverage. They’re a sweet treat best enjoyed in moderation.
The ingredients are straightforward: butter provides some healthy fats, eggs add protein, and vanilla and almond extracts offer flavor without extra calories. The royal icing is mostly powdered sugar, so it’s a sugary delight rather than a health food—but it sure brightens the day.
This recipe is naturally gluten-containing unless you swap flours, and contains dairy and eggs—important if you or your guests have allergies. For a low-carb or grain-free option, almond flour can be used, though texture will vary.
From a wellness perspective, these cookies satisfy sweet cravings with a homemade touch, avoiding preservatives and artificial flavors found in store-bought cookies. Plus, the joy of making and sharing them is a bonus for mental wellbeing.
Conclusion
There’s something quietly satisfying about turning simple ingredients into pencil-shaped sugar cookies that look like little works of art. This recipe isn’t about perfection on the first try—it’s about embracing the process, getting a little messy with royal icing, and ending up with cookies that bring smiles.
Feel free to tweak the colors, flavors, or shapes to suit your mood or occasion. I love this recipe because it’s approachable enough for a casual afternoon bake but impressive enough for a party spread. It’s a sweet way to celebrate school days or just to enjoy a playful treat.
Give these pencil-shaped sugar cookies a go, and let me know how your decorating adventures turn out—I’m always curious about new ideas and tweaks. Baking is better when shared, even through stories and photos!
Frequently Asked Questions
Can I use store-bought royal icing instead of making my own?
Yes, store-bought royal icing can work in a pinch, but homemade icing offers better consistency and flavor. Plus, it’s easy to adjust thickness for piping and flooding.
How do I prevent my sugar cookies from spreading too much?
Chill the dough thoroughly before rolling and cutting, avoid over-creaming butter and sugar, and don’t bake at too high a temperature. Using baking powder helps maintain shape without too much spread.
What if my royal icing is too runny or too thick?
Add powdered sugar to thicken or a few drops of water to thin. The right consistency depends on your decorating step—thicker for outlines, thinner for flooding.
Can I decorate these cookies without royal icing?
Absolutely! You can use melted chocolate, colored sugar sprinkles, or simple glaze icing, though royal icing gives the best finish and detail.
How long do these pencil-shaped sugar cookies stay fresh?
Stored in an airtight container at room temperature, they stay fresh for up to a week. Decorating with royal icing requires letting them dry completely before storage.
Pin This Recipe!
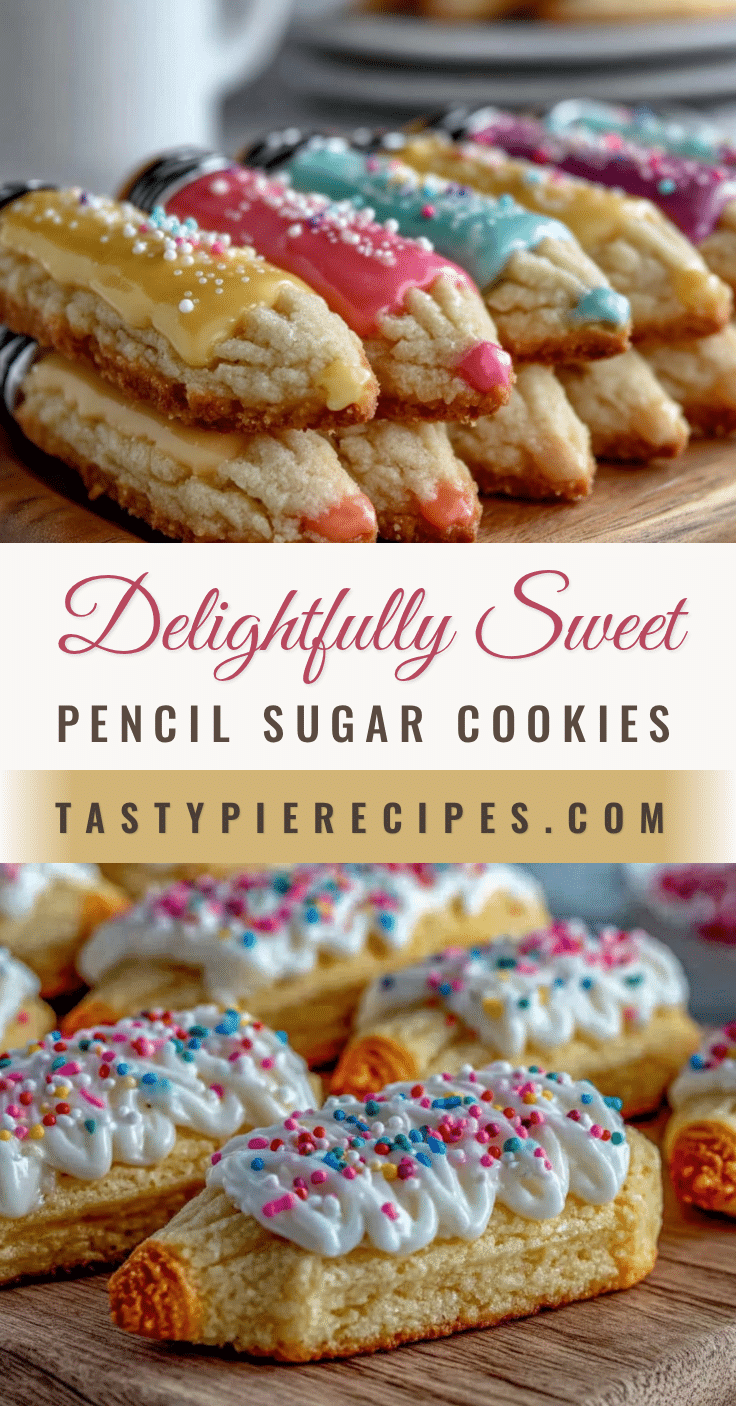
Perfect Pencil-Shaped Sugar Cookies Recipe Easy Homemade Royal Icing Tutorial

These pencil-shaped sugar cookies are a fun and nostalgic treat perfect for back-to-school gatherings, teacher gifts, or a creative baking project. The recipe includes a foolproof royal icing tutorial for decorating.
- Prep Time: 30 minutes
- Cook Time: 10 minutes
- Total Time: 1 hour 40 minutes
- Yield: 24 cookies 1x
- Category: Dessert
- Cuisine: American
Ingredients
- 2 ¾ cups (345 g) all-purpose flour
- 1 tsp baking powder
- ½ tsp salt
- 1 cup (227 g) unsalted butter, softened
- 1 ¼ cups (250 g) granulated sugar
- 1 large egg, room temperature
- 1 ½ tsp vanilla extract
- ½ tsp almond extract (optional)
- 4 cups (480 g) powdered sugar, sifted
- 3 tbsp pasteurized egg whites or 2 tbsp meringue powder
- 1 tbsp fresh lemon juice or vanilla extract
- 2–3 tbsp water
- Gel food coloring: yellow, pink, black, green
- Light brown gel food coloring (for pencil wood tip, optional)
Instructions
- In a medium bowl, whisk together flour, baking powder, and salt. Set aside.
- In a large bowl, beat softened butter and granulated sugar until fluffy and pale, about 3-4 minutes.
- Beat in egg, vanilla extract, and optional almond extract until just combined.
- Gradually add dry ingredients to the butter mixture, mixing on low speed until a soft dough forms. Add flour if too sticky.
- Flatten dough into a disk, wrap in plastic, and refrigerate for at least 1 hour or overnight.
- Preheat oven to 350°F (175°C). Line baking sheets with parchment paper or silicone mats.
- Roll chilled dough to about ¼-inch (6 mm) thickness on a lightly floured surface.
- Cut pencil shapes using cookie cutters or a knife and template. Place cookies 1 inch apart on baking sheets.
- Bake for 8-10 minutes until edges start to turn golden but centers remain pale. Cool on sheets 5 minutes, then transfer to wire racks.
- Prepare royal icing by beating powdered sugar with egg whites or meringue powder, lemon juice or vanilla, and water to desired consistency.
- Divide icing into bowls and tint with gel food coloring: yellow, pink, black, green, and light brown for pencil tip.
- Outline pencil edges with piping consistency icing; let dry 10 minutes.
- Flood pencil body with yellow icing and tip with pink mixed with brown. Use black for lead and green for eraser details. Use toothpick to smooth edges.
- Let decorated cookies dry at room temperature for 4-6 hours or overnight until icing sets matte.
Notes
Chill dough well before rolling to keep shapes sharp. Avoid overbaking to keep cookies tender. Use thick royal icing for outlines and thinner for flooding. Practice piping on parchment paper. Store decorated cookies in airtight containers layered with parchment paper for up to one week. Let icing dry completely before storage. For gluten-free, substitute flour with almond flour and add xanthan gum. For dairy-free, use plant-based butter and meringue powder for icing.
Nutrition
- Serving Size: 1 cookie (approximat
- Calories: 130
- Sugar: 12
- Sodium: 80
- Fat: 6
- Saturated Fat: 3.5
- Carbohydrates: 16
- Protein: 1
Keywords: sugar cookies, pencil-shaped cookies, royal icing, back to school, teacher gifts, homemade cookies, easy sugar cookies, cookie decorating