Juggling dinner prep while the toddler decides this is the perfect moment to test the acoustics of every pot in the kitchen—half a jar of cucumbers sitting neglected on the counter and no time to babysit a slow, fussy pickle recipe. That’s exactly how my easy quick refrigerator dill pickles recipe was born. Honestly, I just needed something tangy and crunchy fast, something that didn’t require hours of waiting or complicated canning drama.
The sharp scent of fresh dill mingling with garlic and vinegar cut through the kitchen chaos like a little moment of calm. I grabbed some basic pantry staples and tossed them together, hoping for the best. To my surprise, those pickles were ready to eat in less than a day, bursting with flavor and perfect crunch—no fuss, no pressure.
Since then, this recipe has become my go-to for last-minute snacks, a quick side for sandwiches, or even a spontaneous addition to a picnic basket. It’s the kind of recipe that feels like a small victory when life’s throwing everything at you. I keep coming back to it, not just because it’s easy but because it tastes like I spent way more time on it than I actually did. That’s the kind of magic a good quick pickle can work.
There’s something quietly satisfying about making your own pickles with simple ingredients and minimal effort, and I think that’s why this recipe stuck with me. It’s reliable, fresh, and just the right kind of tangy—plus, it’s forgiving enough to tweak however you like. That’s why I trust it to show up whenever I need a little homemade crunch without the hassle.
Why You’ll Love This Recipe
Let me tell you, this easy quick refrigerator dill pickles recipe is one of those things that keeps surprising you with how good it is, especially when you’re pressed for time or just craving something fresh and crisp. After testing and tweaking it countless times (and yes, tasting more than my fair share), I’m confident it hits the sweet spot between speed and flavor.
- Quick & Easy: Comes together in just 5 simple steps and is ready to enjoy in as little as 24 hours—perfect for busy weeknights or unexpected guests.
- Simple Ingredients: No fancy or hard-to-find stuff here—just basic pantry staples and fresh cucumbers, so you can whip these up anytime without a special trip.
- Perfect for Any Occasion: Whether it’s a casual sandwich side, a snack for game night, or part of a summer picnic spread, these pickles fit right in.
- Crowd-Pleaser: Kids love the crunch and tang, adults appreciate the fresh dill kick—everyone ends up reaching for seconds.
- Unbelievably Delicious: The balance of vinegar, garlic, and dill is spot on, delivering that classic pickle flavor without any bitterness or sogginess.
This recipe isn’t just another pickle recipe floating around; it’s the one that feels homemade and fresh without the traditional wait or fuss. The secret? I blend fresh dill and garlic right into the brine, making sure every bite bursts with flavor. Plus, using kosher salt rather than table salt keeps the texture just right and the flavor clean.
Honestly, there’s a kind of comfort in knowing you can pull together homemade pickles that taste like you spent hours fussing, even if you’re juggling a million things at once. It’s the kind of recipe that turns a quick snack into a little moment of homemade joy. If you have a craving for crunchy, tangy pickles but little patience for complicated steps, this one’s for you.
What Ingredients You Will Need
This recipe uses straightforward, wholesome ingredients that come together to make those pickles pop with flavor and crunch. Most of these are pantry staples, and the cucumbers are the star of the show—fresh, firm, and ready to soak up all that briny goodness.
- Cucumbers: About 4-5 medium-sized Kirby or Persian cucumbers, sliced into spears or rounds (Kirby cucumbers are my favorite for their firm crunch).
- Fresh Dill: 4-5 sprigs, roughly chopped (fresh dill is essential for that classic pickle aroma—dried won’t do the same job here).
- Garlic Cloves: 3-4, smashed or thinly sliced (adds a punch of flavor that mellows beautifully overnight).
- White Vinegar: 1 cup (240 ml), for that tangy bite—use distilled white vinegar for a clean, bright flavor.
- Water: 1 cup (240 ml), to balance acidity.
- Kosher Salt: 1 tablespoon, not iodized (this helps keep the pickles crisp without adding unwanted bitterness).
- Granulated Sugar: 1 teaspoon (optional, to round out the sharpness just a bit).
- Black Peppercorns: 1 teaspoon (whole, for subtle spice).
- Red Pepper Flakes: ½ teaspoon (optional, if you like a bit of heat).
These ingredients come together to create a brine that’s balanced and flavorful, with the fresh dill and garlic really shining through. If you want to switch things up, you can swap the white vinegar for apple cider vinegar for a slightly fruitier tang, or add a bay leaf for extra aroma.
Pro tip: If you can find small, firm cucumbers at your local farmer’s market, grab those—their texture and flavor are unbeatable. And if you’re ever in the mood to experiment, check out my fresh fig and honey crostata recipe for another way to enjoy seasonal produce in a simple homemade treat.
Equipment Needed
Luckily, you don’t need anything fancy to make this easy quick refrigerator dill pickles recipe. Here’s what I use and recommend:
- Glass Jars with Lids: Quart-sized Mason jars or any clean glass jar with a tight-fitting lid work great. I prefer Mason jars because they seal well and are easy to handle.
- Measuring Cups and Spoons: For precise brine ratios—accuracy helps with flavor balance.
- Mixing Bowl: To combine the brine ingredients before pouring over the cucumbers.
- Knife and Cutting Board: Sharp knife for slicing cucumbers evenly.
- Optional: A funnel helps pour the brine neatly into jars without spilling.
If you don’t have Mason jars, any clean, food-safe container with a lid will do, though glass is best to avoid any unwanted flavors. I once tried plastic containers for pickling and the flavor just wasn’t the same—glass really lets the pickles shine.
For those who love multitasking in the kitchen, having a sharp mandoline slicer can speed up slicing cucumbers uniformly, but it’s not necessary. Just be careful if you decide to use one!
Preparation Method
- Wash and Slice the Cucumbers: Rinse about 4-5 medium Kirby cucumbers under cold water. Slice them into spears or rounds, roughly ¼-inch thick for crisp pickles. This usually takes about 5-7 minutes depending on your knife skills.
- Prepare the Brine: In a mixing bowl, combine 1 cup (240 ml) white vinegar, 1 cup (240 ml) water, 1 tablespoon kosher salt, and 1 teaspoon granulated sugar (optional). Stir until salt and sugar dissolve completely, about 1-2 minutes.
- Pack the Jars: Into clean quart-sized Mason jars, evenly distribute 4-5 sprigs of fresh dill, 3-4 smashed garlic cloves, 1 teaspoon whole black peppercorns, and ½ teaspoon red pepper flakes if using. Then pack the sliced cucumbers tightly but without crushing for best texture.
- Pour the Brine: Carefully pour the prepared brine over the cucumbers and aromatics, leaving about ½ inch of headspace at the top. Tap the jars gently on the counter to release any air bubbles. Seal with the lids.
- Refrigerate and Wait: Place the jars in the refrigerator. The pickles will start tasting good in about 24 hours, but they get better after 2-3 days. They stay fresh and crunchy for up to 2 weeks.
Quick tip: If you find your pickles a little too salty or tangy, try rinsing them lightly before eating or diluting the brine next time with a bit more water. Also, the garlic aroma will mellow as the pickles sit, so don’t worry if it feels sharp at first.
Once, I accidentally added too many garlic cloves and ended up with pickles that were way too “garlicky” for my kids’ taste buds, but letting them sit a couple more days fixed that nicely. Patience and tasting as you go can make all the difference.
Cooking Tips & Techniques
Making refrigerator pickles is straightforward, but a few tips can really make your pickles pop:
- Use Kosher Salt: It dissolves well and doesn’t contain additives that can cloud your brine or affect flavor.
- Fresh Dill is Key: Dried dill loses its potency quickly. If you run out of fresh, add it sparingly and expect a milder flavor.
- Don’t Overcrowd the Jars: Leaving space allows the brine to circulate and flavor the cucumbers evenly.
- Keep Everything Clean: Make sure your jars and utensils are spotless to prevent spoilage.
- Adjust Vinegar to Taste: If you prefer a milder pickle, reduce the vinegar slightly and increase water accordingly.
- Timing Matters: I find 24 hours is the bare minimum before these taste like real pickles. If you can, give them 2-3 days to develop full flavor.
One rookie mistake I made was slicing cucumbers too thin, which made the pickles soggy. Now, I stick to about ¼-inch thick—thick enough to keep that satisfying crunch but not so thick they stay under-flavored.
Also, multitasking works well here: prep your pickles while your oven’s preheating for a roast or while you mix up a quick dessert from the pantry, like the roasted grape and brie tart I recently tried. It’s all about using your kitchen time smartly.
Variations & Adaptations
This recipe is a great base to customize depending on what you have or your flavor preferences:
- Spicy Pickles: Add more red pepper flakes or a sliced jalapeño for a fiery kick.
- Garlic Lovers’ Pickles: Double the garlic cloves and add a few smashed ones to the brine for an extra punch.
- Herb Variations: Swap dill with fresh tarragon or add a few mustard seeds for a different flavor profile.
- Low-Sodium Option: Reduce the salt by half and increase the vinegar slightly to keep the tang.
- Different Vegetables: Try the same brine with sliced carrots, green beans, or cauliflower florets for quick refrigerator pickled veggies.
Personally, I once added a splash of apple cider vinegar instead of white vinegar, and it gave a subtle fruity twist that paired really well with sandwiches. If you like experimenting, you might enjoy trying pickled cucumbers alongside dishes like a stars and stripes cookie dough dip for a fun contrast of flavors at your next gathering.
Serving & Storage Suggestions
These easy quick refrigerator dill pickles are best served chilled straight from the fridge. They make a perfect crunchy side for sandwiches, burgers, or even as a tangy snack on their own.
Try pairing them with creamy dishes or rich meats to cut through the heaviness—think pulled pork, smoked turkey, or even alongside a creamy potato salad for that classic picnic vibe.
Store pickles in the refrigerator in their sealed jars for up to 2 weeks. Over time, the pickles will continue to absorb the brine and get a bit more intense in flavor, so if you prefer a milder pickle, enjoy them sooner rather than later.
When reheating leftovers from a meal with these pickles, serve them cold on the side to keep that satisfying crunch. If you want to refresh their crispness, a quick soak in ice water for 10 minutes can help revive them.
Nutritional Information & Benefits
These homemade dill pickles are low in calories—about 10-15 calories per serving—and naturally fat-free. The vinegar and garlic provide antioxidants, and the cucumbers add hydration and fiber.
Because this recipe uses simple, whole ingredients without preservatives, it’s a wholesome alternative to store-bought pickles, which often contain added sugars and artificial flavors.
For those watching sodium intake, cutting back on the kosher salt can help, though keep in mind salt is essential for that classic pickle texture and preservation.
Overall, this recipe offers a tasty way to enjoy probiotics if you let your pickles ferment slightly longer (though this recipe is designed for refrigerator quick pickling, not fermentation). It’s a fresh, flavorful snack that makes you feel good about what you’re eating.
Conclusion
In a world where kitchen time is often limited and flavor is non-negotiable, this easy quick refrigerator dill pickles recipe stands out for its simplicity and deliciousness. It’s become my reliable go-to whenever I want crunchy, tangy pickles in a hurry without the fuss of traditional canning.
Feel free to tweak this recipe to match your taste buds—more garlic, extra heat, or a herb swap here and there. I love this recipe because it’s flexible, forgiving, and always hits the spot.
Give it a try, and if you find your own favorite variation, I’d love to hear about it in the comments below. There’s something special about sharing homemade food stories and little kitchen victories, don’t you think? Happy pickling!
FAQs
How long do quick refrigerator dill pickles last?
They keep well in the fridge for up to 2 weeks. After that, the texture and flavor might change, so it’s best to enjoy them within that timeframe.
Can I use any type of cucumber for this recipe?
Kirby or Persian cucumbers are ideal because they’re firm and less watery. Regular slicing cucumbers can work but might result in softer pickles.
Do I need to boil the brine for refrigerator pickles?
Nope! This recipe uses a cold brine, which saves time and keeps the cucumbers crisp. Just stir until salt and sugar dissolve.
Can I make these pickles spicy?
Absolutely! Add red pepper flakes, sliced jalapeños, or even a pinch of cayenne pepper to the brine for some heat.
Are these pickles fermented?
No, these are quick refrigerator pickles made with vinegar, not naturally fermented. They’re ready faster but don’t develop the same probiotic qualities as fermented pickles.
Pin This Recipe!
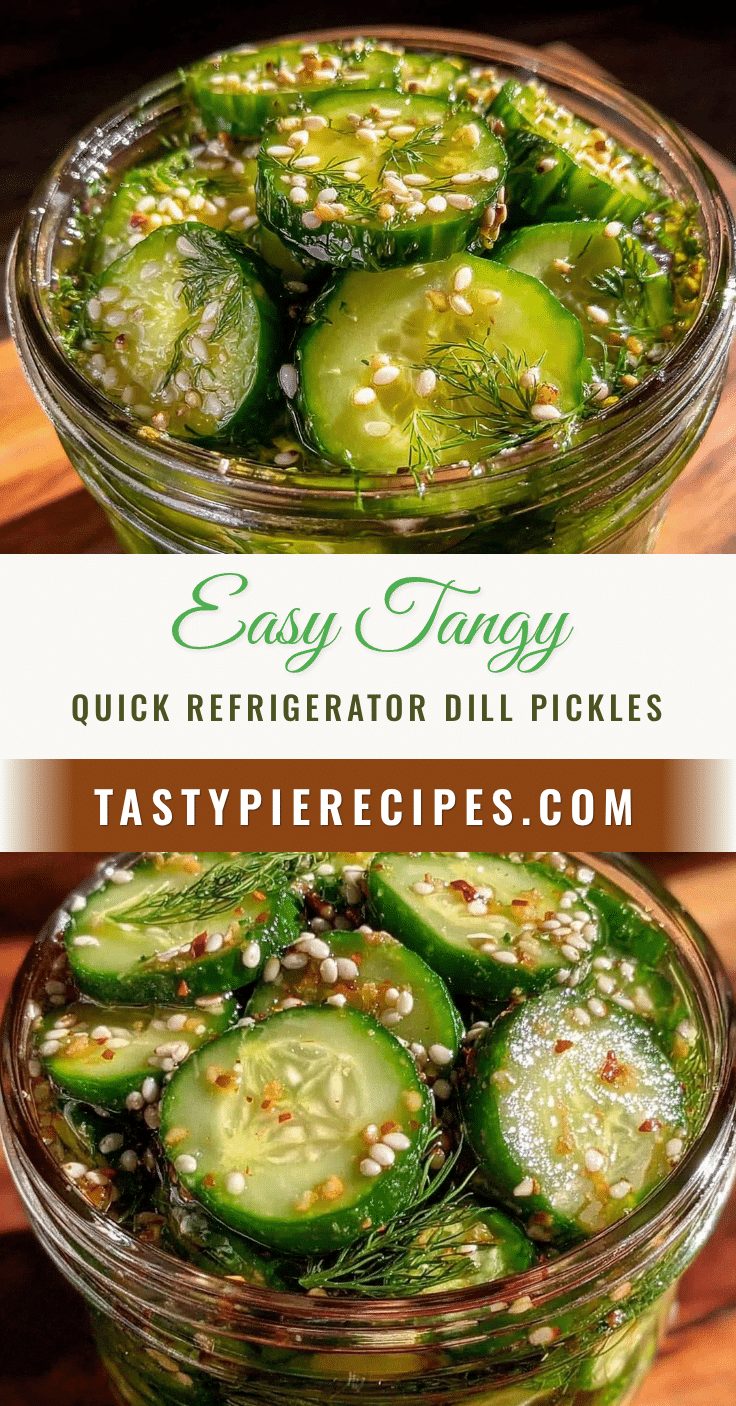
Easy Quick Refrigerator Dill Pickles

A simple and fast recipe for homemade refrigerator dill pickles that are tangy, crunchy, and ready to enjoy in as little as 24 hours without complicated canning.
- Prep Time: 10 minutes
- Cook Time: 0 minutes
- Total Time: 24 hours (including refrigeration time)
- Yield: 4-5 servings 1x
- Category: Side Dish
- Cuisine: American
Ingredients
- 4–5 medium Kirby or Persian cucumbers, sliced into spears or rounds
- 4–5 sprigs fresh dill, roughly chopped
- 3–4 garlic cloves, smashed or thinly sliced
- 1 cup (240 ml) white vinegar (distilled)
- 1 cup (240 ml) water
- 1 tablespoon kosher salt (not iodized)
- 1 teaspoon granulated sugar (optional)
- 1 teaspoon whole black peppercorns
- ½ teaspoon red pepper flakes (optional)
Instructions
- Wash and slice the cucumbers into ¼-inch thick spears or rounds.
- In a mixing bowl, combine white vinegar, water, kosher salt, and granulated sugar (if using). Stir until salt and sugar dissolve completely.
- Pack clean quart-sized Mason jars with fresh dill, smashed garlic cloves, black peppercorns, red pepper flakes (if using), and sliced cucumbers tightly but without crushing.
- Pour the prepared brine over the cucumbers and aromatics, leaving about ½ inch of headspace. Tap jars gently to release air bubbles and seal with lids.
- Refrigerate the jars. Pickles will be ready to eat in about 24 hours and improve in flavor after 2-3 days. Keep refrigerated and consume within 2 weeks.
Notes
Use kosher salt for best texture and flavor. Fresh dill is essential for classic pickle aroma. Do not overcrowd jars to allow brine circulation. Pickles taste best after 2-3 days but can be eaten after 24 hours. Store refrigerated up to 2 weeks. Adjust vinegar and water ratio to taste. Rinse pickles if too salty or dilute brine next time. Optional variations include adding jalapeños for heat or swapping dill for other herbs.
Nutrition
- Serving Size: About 1/2 cup pickle
- Calories: 15
- Sugar: 1
- Sodium: 600
- Carbohydrates: 3
- Fiber: 1
Keywords: quick pickles, refrigerator pickles, dill pickles, easy pickles, homemade pickles, quick refrigerator dill pickles