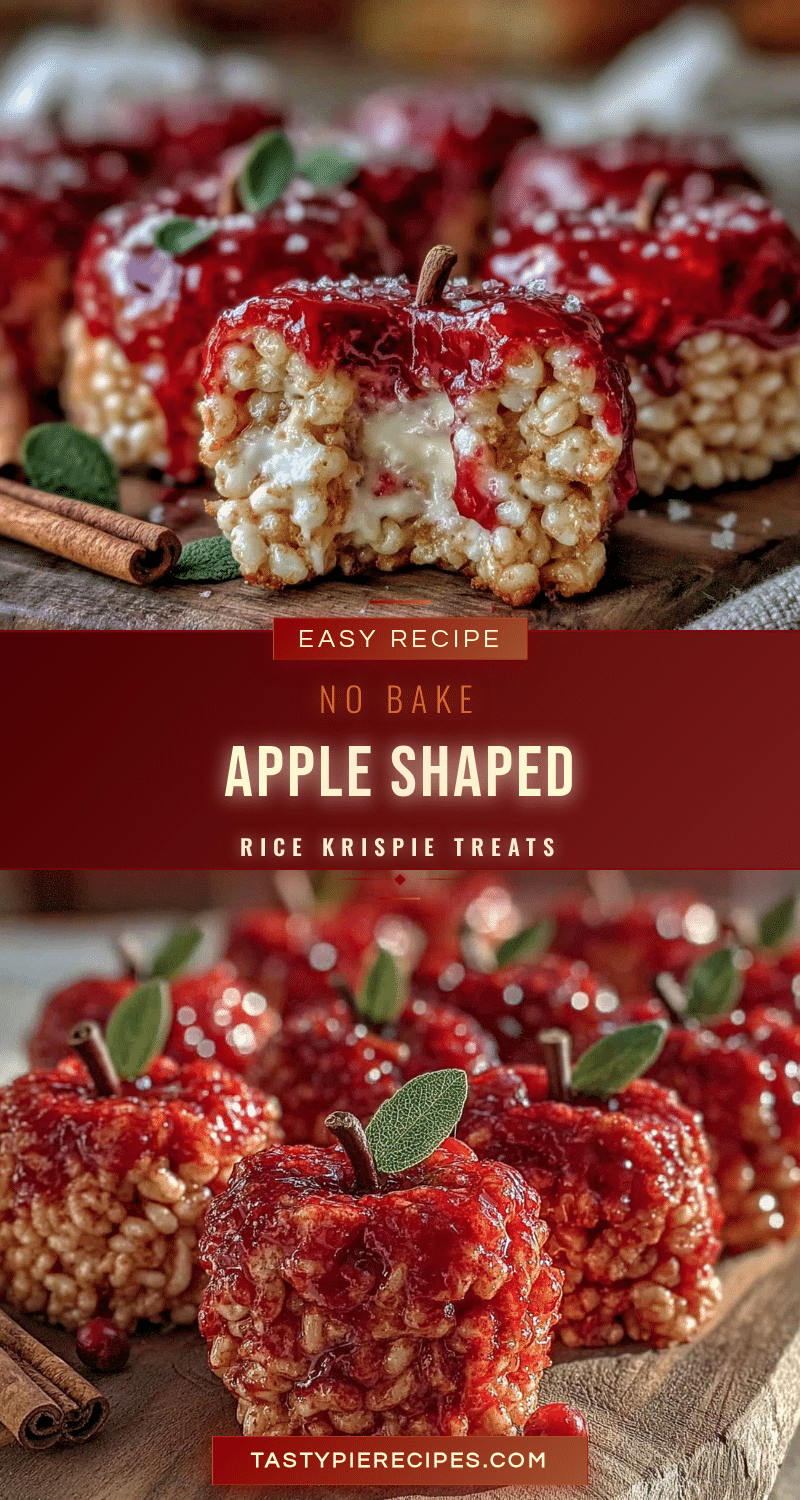
Three-time-in-a-week and still wondering why these Easy No Bake Apple Shaped Rice Krispie Treats keep pulling me back. Honestly, I thought the first batch was a fluke—crisp, chewy, and perfectly shaped little apples that didn’t fall apart like my usual Rice Krispie experiments. But then there was the Friday before last, when I remade them with a dash of cinnamon, and somehow, that warm spice sealed the deal. And yesterday? I swapped out regular marshmallows for the mini ones, which made the texture just a tad more pillowy without losing that satisfying snap. It’s like the recipe is a puzzle I’m endlessly tinkering with, but instead of frustration, each try leaves me with a snack that’s oddly comforting and fun to share.
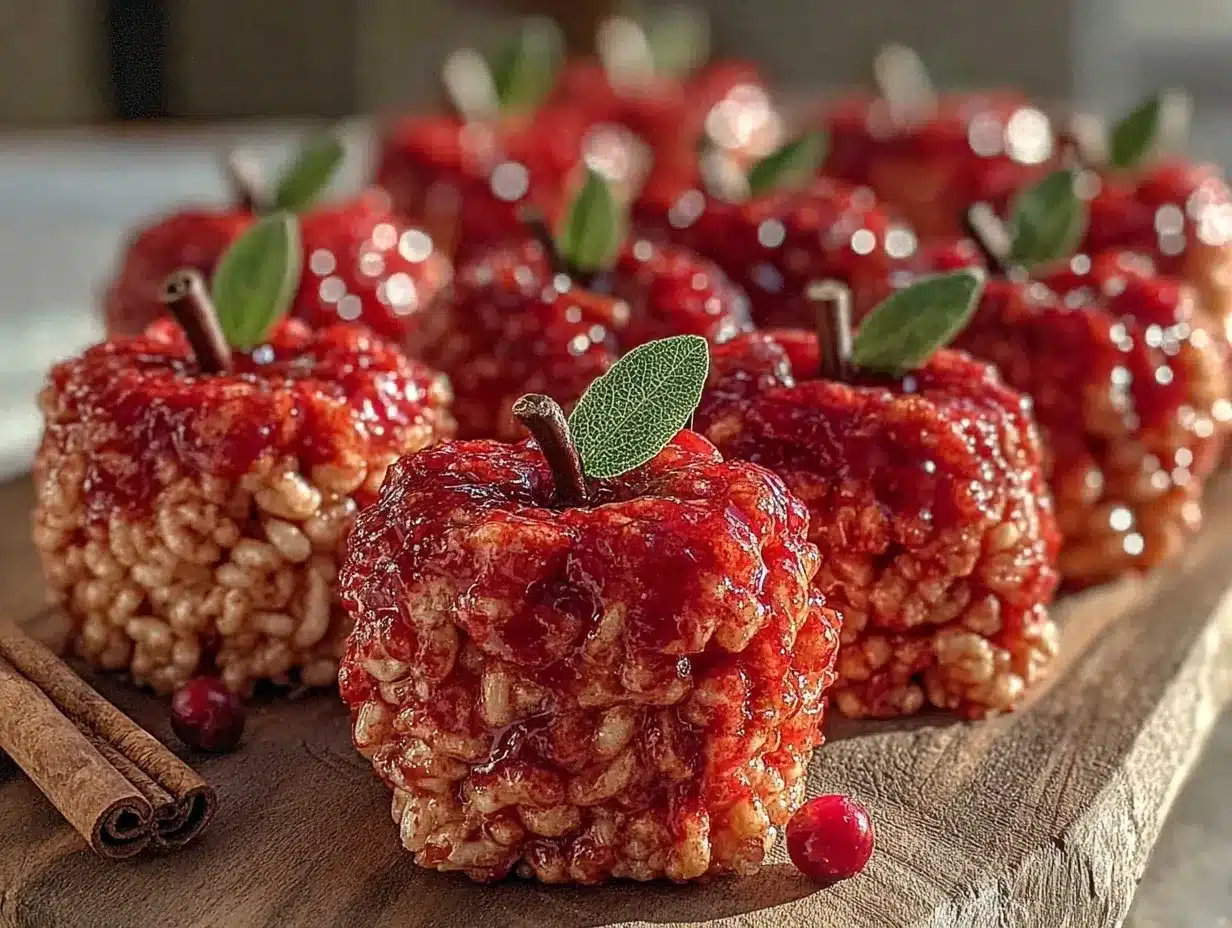
There’s something about forming those little apple shapes by hand that slows me down just enough to appreciate the sticky mess on my fingers and the sweet smell that fills the kitchen. The edges get just a bit golden, not burnt, and the glossy sheen from melted marshmallows makes them look like candies from an old-fashioned candy shop. This recipe wasn’t on my radar until I stumbled on it while trying to make a quick fall-themed treat for a spontaneous school visit. I didn’t expect to get hooked, but here we are—every Friday, these apple-shaped Rice Krispie treats are a small tradition.
What really keeps this recipe on repeat for me is how flexible it is—whether I add a touch of caramel drizzle, swap in peanut butter, or keep it classic, it always feels like a cozy nod to the season without a fuss. It’s simple enough for kids to help shape, and honestly, their sticky fingers and giggles make the whole process a little sweeter. I’m pretty sure these treats have quietly become my go-to for quick fall desserts that don’t require the oven or a complicated mess. And that’s why I trust you’ll find a little magic in these too.
Why You’ll Love This Recipe
Having tested this recipe multiple times, I can say it truly nails the balance between fun and ease. Here’s what makes these Easy No Bake Apple Shaped Rice Krispie Treats stand out:
- Quick & Easy: Ready in under 30 minutes, making it perfect for those unexpected snack cravings or last-minute fall gatherings.
- Simple Ingredients: You’ll likely have everything on hand—just marshmallows, butter, and Rice Krispies cereal, plus a few extras for shaping and flavor.
- Perfect for Fall: The apple shape and optional cinnamon sprinkle add that cozy seasonal vibe, great for school snacks, autumn parties, or a casual treat after a pumpkin-picking day.
- Crowd-Pleaser: Kids and adults alike love the playful shape and the nostalgic taste, making it a hit whether you’re bringing it to a potluck or just keeping it at home.
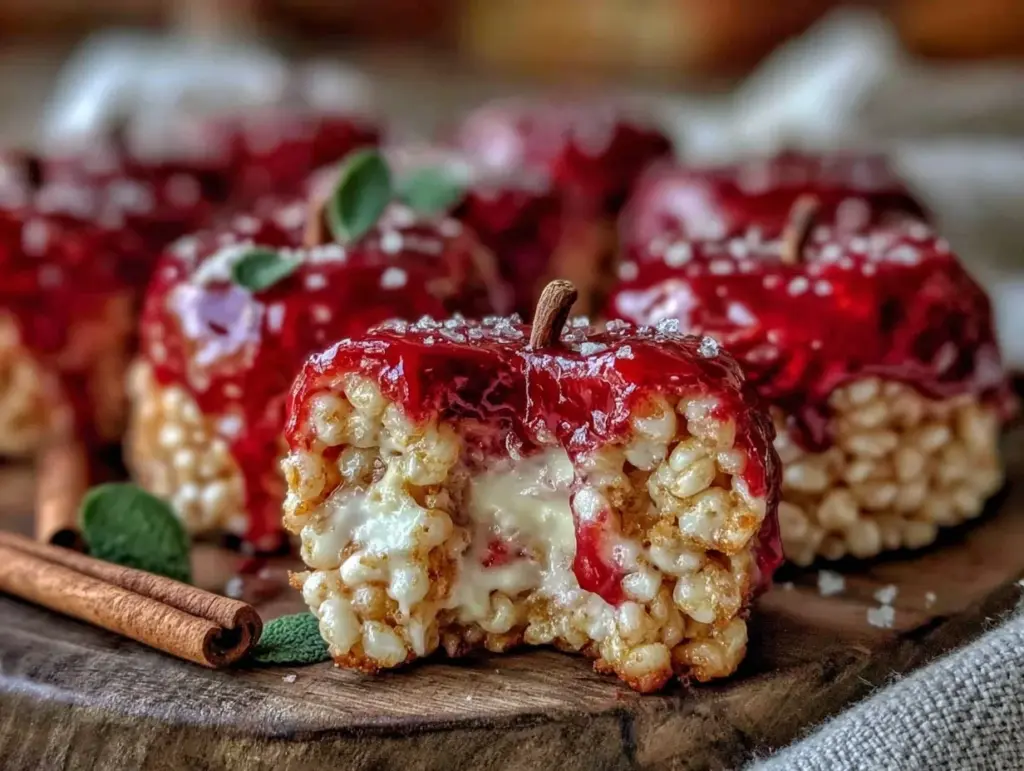
- Unbelievably Delicious: The texture is spot on—crispy but chewy, with just enough stickiness to hold the shape without being messy.
Unlike your typical Rice Krispie treats, this recipe takes a little creative twist by molding the treats into apple shapes, which not only looks adorable but adds a tactile element that keeps you engaged. The secret? A light buttering of your hands to keep the sticky marshmallow mixture manageable and a gentle press rather than a squeeze, so you don’t lose that classic rice crispy crunch. I’ve also played around with adding a hint of vanilla or a pinch of cinnamon right into the melted marshmallows, which subtly lifts the flavor without complicating the process.
These treats aren’t just sugar bombs—they’re a bit of fall nostalgia wrapped in a no-fuss, no-bake recipe that feels homemade and heartfelt. If you’re someone who likes a little hands-on crafting with your baking, this is the recipe that’ll stick with you (pun intended). Plus, they pair surprisingly well with a cup of warm cider or even a simple glass of milk—simple pleasures, really.
What Ingredients You Will Need
This recipe uses simple, wholesome ingredients to deliver bold flavor and satisfying texture without the fuss. Most are pantry staples, and substitutions are easy if you have dietary preferences or allergies.
- Rice Krispies Cereal (6 cups / 150 g) – The base of the treat, providing that iconic crispy texture. I prefer Kellogg’s for consistent crunch.
- Marshmallows (10 oz / 283 g, about 40 large or mini marshmallows) – The glue that holds everything together. Mini marshmallows melt faster, but large ones work perfectly.
- Unsalted Butter (3 tbsp / 42 g) – Adds richness and helps melt the marshmallows smoothly. I like using European-style butter for a creamier flavor.
- Cinnamon (1 tsp, optional) – Gives that cozy fall warmth and pairs beautifully with the apple shape.
- Red Food Coloring (a few drops, optional) – For a vibrant apple look if you want to get festive.
- Green Fruit Leather or Fruit Roll-Ups (for leaves, optional) – Adds a fun visual touch and a little chewiness contrast.
- Vegetable Oil or Butter (for greasing hands and molds) – Keeps the sticky mixture manageable while shaping.
Substitution tips: Use gluten-free crispy rice cereal to make this recipe gluten-free. Swap butter with coconut oil for a dairy-free version, and replace marshmallows with vegan marshmallows if needed.
For a little twist, I once added a handful of finely chopped nuts into the mix for crunch, but be mindful of allergies. And if you’re aiming for a more natural look, skip the food coloring and let the golden marshmallows shine.
Equipment Needed
- Large Mixing Bowl: For combining the cereal and marshmallow mixture.
- Medium Saucepan: To melt the butter and marshmallows together gently.
- Wooden Spoon or Silicone Spatula: Essential for stirring without scratching your pots.
- Apple-Shaped Cookie Cutter: The key to getting that perfect shape—if you don’t have one, a simple round cutter or your hands work just fine.
- Baking Sheet or Tray: To shape and cool the treats on.
- Wax Paper or Parchment Paper: To line your tray and keep the treats from sticking.
- Greaseproof Gloves or Oil/Butter for Hands: Hands get sticky fast; greasing them helps a ton.
If you don’t have an apple-shaped cutter, I’ve shaped them freehand many times—just a gentle press into an oval with a slight dip on top and a pinch at the bottom for the apple stem. It’s a bit imperfect but charmingly rustic.
For budget-friendly kitchens, a butter knife or spoon can double as a tool to add details like the apple’s stem or leaf indentation. And trust me, the process is just as fun without fancy tools.
Preparation Method
- Prepare your workspace: Line a baking sheet with wax or parchment paper and lightly grease your hands with butter or vegetable oil to prevent sticking. This usually takes about 5 minutes.
- Melt the butter: In a medium saucepan over low heat, melt 3 tablespoons (42 g) of unsalted butter slowly. You want it fully melted but not browned—this should take about 3 minutes.
- Add marshmallows: Toss in 10 ounces (283 g) of marshmallows, stirring constantly as they melt together with the butter. This step takes roughly 5 minutes; keep the heat low to avoid burning.
- Add flavor and color (optional): Stir in 1 teaspoon of cinnamon and a few drops of red food coloring if desired, mixing until fully incorporated and the color is even.
- Combine with cereal: Remove the saucepan from heat and immediately pour in 6 cups (150 g) of Rice Krispies cereal. Use a wooden spoon or silicone spatula to fold gently until all the cereal is coated with the marshmallow mixture. This should take about 2 minutes. Don’t overmix—you want to keep the crispness.
- Shape the treats: While the mixture is still warm but cool enough to handle (about 3-5 minutes after mixing), scoop out portions and gently press into apple shapes on the prepared baking sheet. If using an apple cookie cutter, press the cutter into the mixture on the sheet and carefully remove the excess around it. If shaping by hand, form ovals with slight indentations at the top and a pinch at the bottom for the stem. Work quickly before the mixture cools and hardens.
- Add leaves and stems: Cut small pieces of green fruit leather or fruit roll-ups to create leaves and press them gently at the top of each apple shape. For stems, use small rolled-up bits of the same fruit leather or leftover cereal mixture.
- Cool and set: Let the treats cool completely at room temperature for about 30 minutes until firm. Avoid refrigerating as it can make them tough.
- Serve or store: Once set, serve immediately or store in an airtight container for up to 3 days.
Pro tip: If the mixture starts to harden while shaping, warm it up briefly in the microwave for 10-15 seconds to soften it again. Be careful not to overheat.
The smell during step 3 is honestly the best—warm butter and sweet marshmallows, like a cozy kitchen hugging you.
Cooking Tips & Techniques
Getting these Easy No Bake Apple Shaped Rice Krispie Treats just right is all about timing and texture. Here’s what I’ve learned after a few sticky fingers and a handful of batches:
- Low and slow melting: Melt the butter and marshmallows over low heat to avoid scorching. High heat can turn marshmallows grainy and ruin the texture.
- Grease your hands well: This is crucial. Sticky marshmallow mix loves to cling, so butter or oil your hands generously before shaping to keep things smooth and less frustrating.
- Don’t overmix: Stir the cereal in gently to preserve that crispy snap. Overmixing can crush the cereal, making treats dense instead of light and airy.
- Work quickly: The mixture sets fast! Have your tray and cutters ready before you start mixing. If it cools too much, it becomes tough to shape.
- Use the right cutter size: Medium-sized cutters work best; too small and they crumble, too big and they’re hard to eat in one bite.
- Storage matters: Keep treats in an airtight container at room temperature to maintain crispness. Refrigeration can dry them out or make them chewy.
Once, I tried refrigerating leftover treats and ended up with a rubbery mess—lesson learned the hard way! Also, warming the mixture slightly if it gets stiff is a lifesaver for shaping without ruining texture.
For multitasking, prepare your shaping station while the marshmallows melt. That way, you can form treats immediately and avoid wasting any sticky mix.
Variations & Adaptations
These apple-shaped treats are a great base for creativity. Here are some ways I’ve tweaked the recipe to suit different tastes and occasions:
- Peanut Butter Swirl: Stir in 1/4 cup (60 g) creamy peanut butter into the melted marshmallow mixture before adding cereal for a nutty twist.
- Caramel Drizzle: Drizzle store-bought or homemade caramel sauce over cooled treats for an extra layer of indulgence—perfect for fall parties.
- Chocolate Dipped: Dip half of each apple-shaped treat into melted dark chocolate and sprinkle with sea salt for a sweet-salty combo.
- Gluten-Free: Use certified gluten-free crispy rice cereal to make this treat safe for gluten-sensitive friends.
- Vegan/Dairy-Free: Swap butter for coconut oil and regular marshmallows for vegan marshmallows to keep it plant-based.
I once swapped out the Rice Krispies for puffed quinoa for a nuttier texture and it surprisingly held together well, though the crunch was less traditional. It’s a good option if you want a grain twist.
For a seasonal touch, try mixing in dried apple bits or cinnamon chips right before shaping. It adds little bursts of flavor that complement the apple theme perfectly.
Serving & Storage Suggestions
These Easy No Bake Apple Shaped Rice Krispie Treats are best served at room temperature when the texture is just right—crispy, chewy, and easy to bite into. Arrange them on a festive fall-themed platter with a few fresh apples or cinnamon sticks for a lovely presentation.
They make fantastic snacks for classroom parties, casual get-togethers, or a quick afternoon pick-me-up. Pair them with a warm cup of apple cider, chai tea, or even a simple glass of milk to balance out the sweetness.
To store, place the treats in an airtight container at room temperature. They’ll keep well for 2-3 days, but honestly, they rarely last that long in my house. Avoid the fridge, as cooling can dry them out or make them chewy in an unpleasant way.
If you want to prepare in advance, wrap each treat individually in wax paper to keep them fresh and prevent sticking. When ready to eat, let them sit at room temperature for 10 minutes if they’ve been stored in a cool place.
Over time, the flavors mellow a bit, which some people actually enjoy for a softer, more mellow treat. Just don’t wait too long or they might lose their signature crispness.
Nutritional Information & Benefits
Each serving of these Easy No Bake Apple Shaped Rice Krispie Treats (about one medium-sized treat) contains approximately:
| Calories | 150 kcal |
|---|---|
| Fat | 4.5 g |
| Carbohydrates | 28 g |
| Protein | 1 g |
| Sugar | 18 g |
The key ingredients—Rice Krispies cereal and marshmallows—are primarily sources of carbs and sugars, making this a treat rather than a health food. Adding cinnamon brings antioxidant benefits and a warm flavor boost without calories.
For those mindful of allergens, this recipe contains gluten (unless using gluten-free cereal), dairy (butter), and gelatin (marshmallows). You can adapt it easily for gluten-free or vegan diets by swapping ingredients.
From a wellness perspective, these treats are best enjoyed as an occasional sweet snack. Pairing them with a protein-rich meal or a fiber-filled side can help balance your day.
Conclusion
Whether you’re whipping up a quick after-school snack or preparing a festive fall treat, these Easy No Bake Apple Shaped Rice Krispie Treats bring a little magic to simple ingredients. Their playful shape and nostalgic flavor make them a joy to make and eat—perfect for anyone who loves hands-on kitchen fun without the oven hassle.
Feel free to customize the flavor, experiment with mix-ins, or even team them up with other seasonal treats like the fresh fig and honey crostata or the roasted grape and brie tart for a fall dessert spread that’s both simple and impressive.
Personally, this recipe sticks with me because it marries nostalgia with creativity—a little project that’s as satisfying to make as it is to eat. Give it a try, and don’t hesitate to share how you’ve made it your own. I’m always curious to hear about new twists or tricks!
FAQs
Can I make these apple-shaped Rice Krispie treats without a cookie cutter?
Yes! You can shape them by hand into small ovals and pinch one end to create a stem. It’s a bit rustic but adds charm and is just as tasty.
How do I keep the Rice Krispie treats from sticking to my hands while shaping?
Grease your hands well with butter or vegetable oil before handling the mixture. You can also use wax paper or gloves to prevent sticking.
Can I store these treats in the refrigerator?
It’s better to store them at room temperature in an airtight container. Refrigeration can make them hard or chewy in an unpleasant way.
What can I use instead of marshmallows to make this recipe vegan?
Use vegan marshmallows available at many health food stores or online. They melt similarly and work well in this recipe.
Is it possible to add flavors like caramel or peanut butter?
Absolutely! Stir in peanut butter with the melted marshmallows or drizzle caramel over cooled treats for extra flavor layers.
Pin This Recipe!