“You really have to try these cannoli shells,” my friend insisted last weekend, sliding a plate across the table with a sly grin. Honestly, I was skeptical. Homemade cannoli? That sounded like a project better suited for a pastry chef, not a busy weeknight cook. But one bite of those crisp, golden shells filled with that luscious vanilla bean cream, and I was hooked.
It wasn’t some grand kitchen experiment or a fancy occasion that birthed this recipe. No, it was a spontaneous plan to impress a small gathering when my usual dessert ideas felt too tired. The shells came together surprisingly fast, with that satisfying snap when you bite — like fireworks on your tongue. Plus, the filling had this smooth, dreamy texture, thanks to real vanilla beans scraped right into the cream. I found myself making these cannoli shells three times in one week, just to savor the comforting crunch and that creamy sweetness.
Late at night, with only the hum of the kitchen light and a quiet playlist, I realized this was exactly the kind of recipe I’d been missing: simple enough to whip up without fuss but special enough to make you pause and smile. It’s the kind of treat that feels like a mini celebration every time — no party needed.
Why You’ll Love This Recipe
This crispy celebration cannoli shells with creamy vanilla bean filling quickly became a household favorite for several reasons, and I’m excited to share why it might just become one of yours, too.
- Quick & Easy: You can have these shells fried and filled in under 45 minutes — perfect for last-minute dessert cravings or surprise guests.
- Simple Ingredients: Most of what you need is probably already in your pantry, with fresh vanilla bean adding that extra touch of luxury without complicated prep.
- Perfect for Celebrations: Whether it’s a birthday, holiday, or casual get-together, these cannoli shells bring a festive vibe that’s hard to beat.
- Crowd-Pleaser: Kids, adults, and even those picky eaters will ask for seconds, thanks to the light crispiness and smooth vanilla filling.
- Unbelievably Delicious: The contrast between crunchy shells and silky cream is a texture party — honestly, it’s comfort food with a fancy twist.
What sets this apart from other cannoli recipes is the balance — not too sweet, just right in flavor, and that little secret technique of chilling the dough before frying, which keeps the shells perfectly crisp and non-greasy. Plus, the vanilla bean filling isn’t your average sweetened ricotta; it’s whipped for a fluffy finish that melts in your mouth. This recipe isn’t just a dessert; it’s a moment you’ll want to savor.
What Ingredients You Will Need
This recipe relies on straightforward, quality ingredients that come together to create that iconic cannoli crunch and creamy filling. Most are pantry staples, with a fresh vanilla bean bringing the magic.
- For the Cannoli Shells:
- All-purpose flour, 2 cups (250 g) – Look for a good quality brand like King Arthur for best texture
- Granulated sugar, 2 tbsp – Adds just a hint of sweetness
- Salt, ¼ tsp – Balances flavor
- Unsalted butter, 2 tbsp, cold and diced – Adds richness and flakiness
- Egg yolk, 1 large – Helps bind and enrich dough
- White wine or dry Marsala wine, ¼ cup (60 ml) – Classic ingredient for authentic flavor and crispiness (can substitute with apple cider vinegar + water)
- Vanilla extract, 1 tsp – Enhances aroma
- Vegetable oil or peanut oil, for frying – Use a neutral oil with a high smoke point
- For the Creamy Vanilla Bean Filling:
- Whole milk ricotta cheese, 1 ½ cups (375 g), drained well – I prefer fresh ricotta from a trusted deli or brand like Calabro
- Powdered sugar, ⅓ cup (40 g) – For smooth sweetness without graininess
- Heavy cream, ½ cup (120 ml), cold – Whipped to add airiness
- Vanilla bean, 1 large, seeds scraped – The star ingredient for authentic vanilla flavor (substitute 1 tsp vanilla extract if needed)
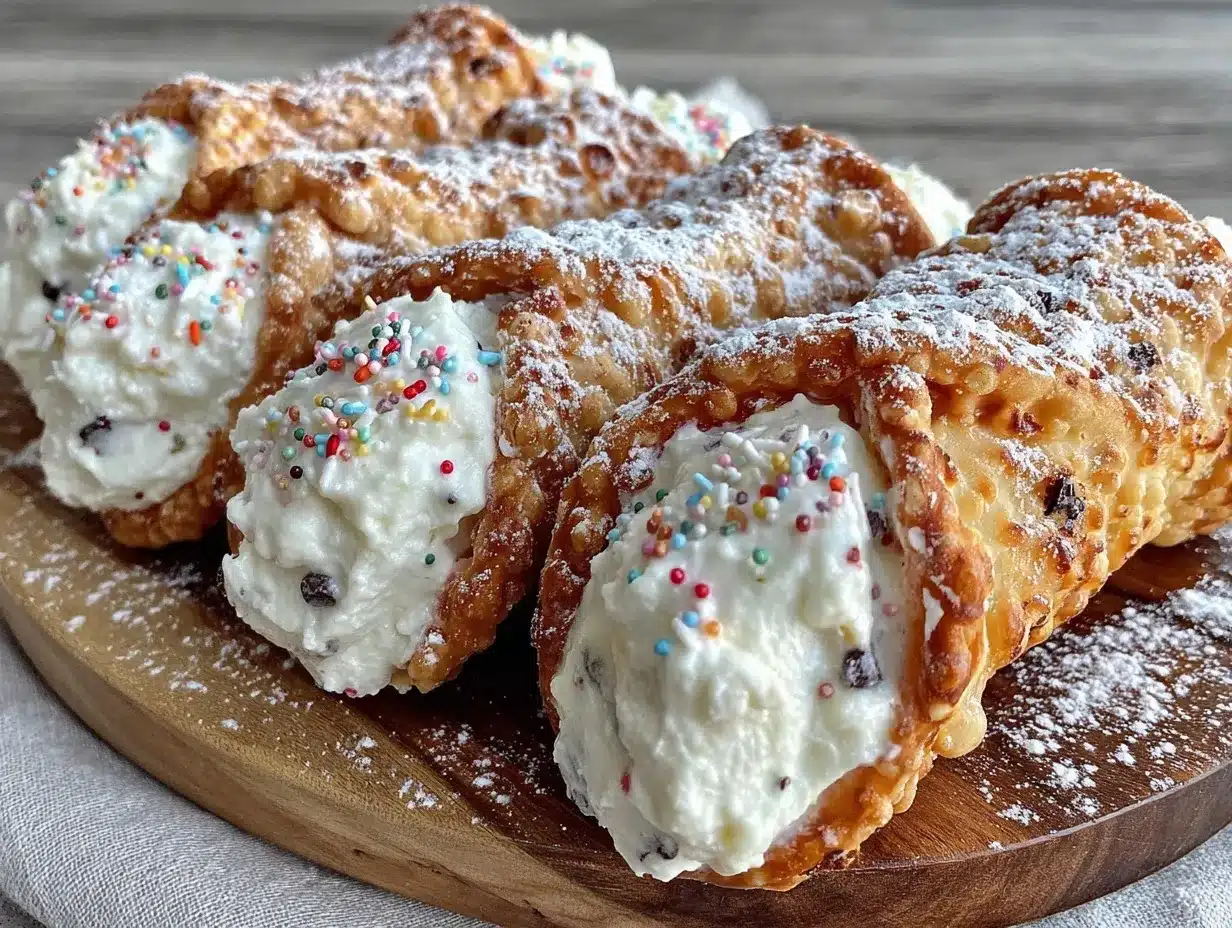
- Mini chocolate chips or chopped pistachios, ¼ cup (optional) – For a bit of texture and extra flavor
Feel free to swap out the wine if you want a non-alcoholic version or try almond flour for a slightly different shell texture (though it won’t be as crisp). Drain your ricotta overnight in cheesecloth for best results — this step really makes the filling creamy without being watery.
Equipment Needed
- Mixing bowls – A set of medium and large bowls for dough and filling prep
- Rolling pin – For rolling out the dough thinly and evenly; a pasta machine works too if you have one
- Cannoli forms or metal tubes – These help shape the shells while frying; if you don’t have these, small metal spoons or even thick chopsticks can work in a pinch
- Deep frying pan or heavy-bottomed pot – For frying the shells safely with enough oil
- Slotted spoon or spider strainer – To remove shells from hot oil easily
- Wire rack or paper towels – For draining excess oil after frying
- Electric mixer or whisk – To whip the cream and mix the filling effortlessly
I once tried frying the shells in a shallow skillet and learned quickly that deeper oil helps achieve an even golden color without soggy spots. If you don’t want to buy cannoli tubes, I recommend getting a set online — they’re inexpensive and reusable, making the process so much easier. Also, keep your rolling pin and mixing bowls handy for prepping other recipes like the crispy Belgian waffles that require similar tools.
Preparation Method
- Make the Cannoli Dough (15-20 minutes): In a large bowl, whisk together 2 cups (250 g) flour, 2 tbsp sugar, and ¼ tsp salt. Cut in 2 tbsp cold unsalted butter with your fingers or a pastry cutter until the mixture resembles coarse crumbs.
Add 1 egg yolk, 1 tsp vanilla extract, and slowly pour in ¼ cup (60 ml) white wine. Stir with a fork until the dough just comes together. - Knead and Chill (10 minutes + chilling): Turn dough onto a floured surface and knead gently about 5 minutes until smooth and elastic. Wrap in plastic wrap and chill in the fridge for at least 30 minutes. This rest keeps the dough easier to roll and prevents shrinking during frying.
- Roll and Cut (15 minutes): Divide dough into two portions. Roll each out to about 1/8 inch (3 mm) thickness on a lightly floured surface. Using a 4-inch (10 cm) round cutter or the rim of a glass, cut out circles.
Important: If dough resists rolling, let it rest a few more minutes to relax. - Shape the Shells: Wrap each dough circle around a cannoli form, sealing edges with a dab of water or egg white. Make sure edges overlap slightly to avoid oil seeping in.
- Heat Oil and Fry (10-12 minutes): Heat vegetable oil in a deep pan to 350°F (175°C). Carefully fry 2-3 shells at a time until golden and crisp, about 2-3 minutes per side.
Tip: Don’t overcrowd the pan to keep oil temperature steady. - Drain and Cool: Remove shells with slotted spoon, drain on paper towels or a wire rack. Let cool completely before filling to keep them crisp.
- Prepare the Filling (10 minutes): Drain ricotta overnight or for a few hours in a fine sieve lined with cheesecloth to remove excess moisture. In a bowl, combine ricotta, ⅓ cup (40 g) powdered sugar, and vanilla bean seeds.
Whip ½ cup (120 ml) heavy cream until soft peaks form, then gently fold into ricotta mixture until light and airy. Stir in mini chocolate chips or pistachios if using. - Fill the Shells: Use a piping bag or small spoon to fill cooled shells just before serving. Overfilling can cause sogginess, so fill right before eating.
One time I forgot to chill the dough and ended up with shells that shrank oddly while frying — the chill step really is key to that classic crisp and shape. Also, if your shells bubble too much during frying, the oil might be too hot or the dough rolled too thick. Keep it thin and steady!
Cooking Tips & Techniques
Some tricks I’ve picked up to get these cannoli shells just right:
- Chill the dough: This relaxes the gluten and prevents shrinking or tough shells.
- Roll thinly but evenly: Thin dough crisps perfectly, but uneven thickness can cause uneven frying. Use a rolling pin with thickness guides if you have one.
- Oil temperature matters: Keep the oil around 350°F (175°C). Too hot burns shells; too cool makes them greasy and limp.
- Drain well and cool before filling: Cannoli shells lose their crunch if filled too soon or if excess oil isn’t drained.
- Use fresh vanilla bean: Nothing beats those tiny black specks in the filling — it’s a game changer for flavor.
- Don’t fill too early: Fill shells just before serving to keep that satisfying crunch intact.
Honestly, I learned the hard way that skipping the draining step on ricotta leads to a watery filling that can sog shells fast. Also, multitasking by whipping the cream while shells fry saves time and keeps your workflow smooth — kind of like when I made that quick ramen upgrade with egg and sesame oil, balancing steps for best results.
Variations & Adaptations
There’s plenty of room to put your own spin on these crispy cannoli shells and creamy vanilla bean filling:
- Chocolate-Dipped Shells: Dip cooled shells in melted dark or white chocolate for a decadent finish.
- Fruit-Infused Filling: Fold in finely chopped candied orange peel or fresh berries to the vanilla filling for a bright twist.
- Gluten-Free Option: Use a gluten-free all-purpose blend for the dough, but expect a slightly different texture — still delicious!
- Vegan Adaptation: Substitute butter with coconut oil, egg yolk with flax egg, and ricotta with a creamy tofu blend. Use coconut cream instead of heavy cream.
- Spiced Shells: Add a pinch of cinnamon or nutmeg to the dough for a warm aroma that pairs beautifully with the vanilla.
Once, I tried swapping the vanilla bean for lavender buds in the filling, and while it was interesting, I definitely prefer the pure vanilla bean for that timeless flavor. For those who love texture, adding crushed pistachios to the filling or sprinkling on top adds a nice crunch and color pop.
Serving & Storage Suggestions
These cannoli shells are best served fresh and crisp, at room temperature or slightly chilled. If you want to make them ahead, fry the shells and store them in an airtight container at room temperature for up to 3 days. Fill just before serving to keep that iconic crunch.
Leftover filling can be refrigerated in a sealed container for up to 2 days — give it a quick whip before piping back into shells. If you need to reheat shells, avoid the microwave as it’ll make them soggy. Instead, pop them in a 300°F (150°C) oven for 3-5 minutes to refresh their crispiness.
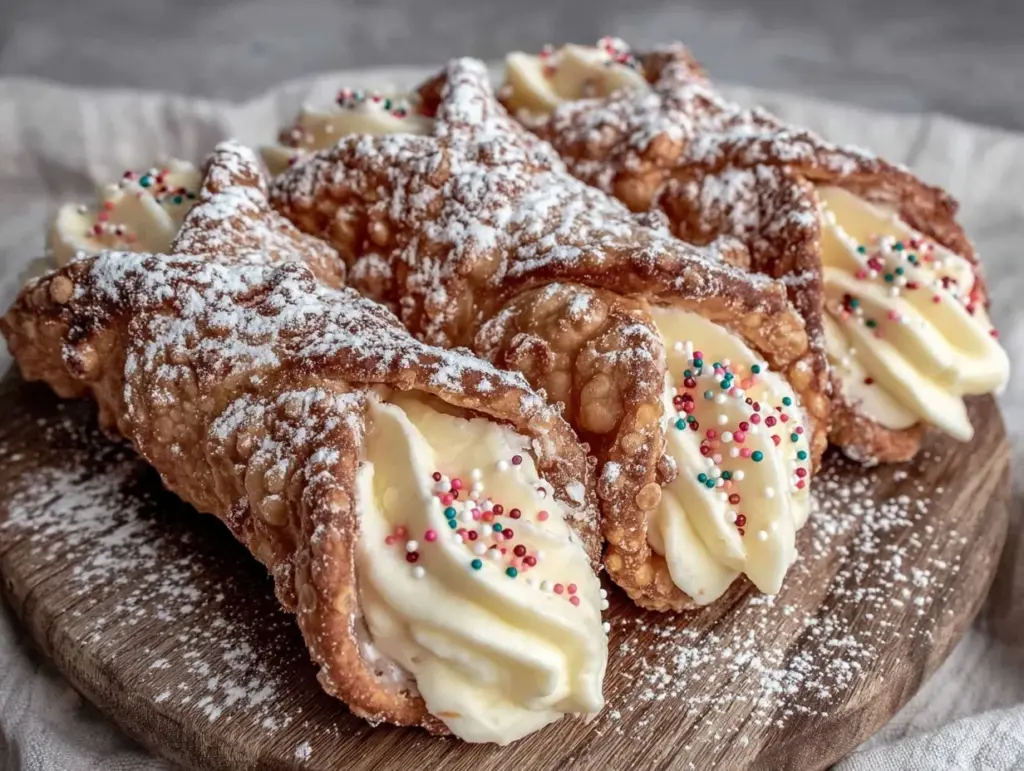
For a festive presentation, sprinkle powdered sugar on top and garnish with chopped pistachios or mini chocolate chips. These go wonderfully alongside a cup of espresso or a glass of sparkling wine for celebrations. If you enjoy mixing sweet and savory, these cannoli would be a surprising but delightful finish after a meal featuring savory bacon jam or a hearty brunch spread.
Nutritional Information & Benefits
Estimated per serving (1 filled cannoli): approximately 250 calories, 12g fat, 25g carbohydrates, 4g protein.
The ricotta filling provides a good source of calcium and protein, while the vanilla bean adds natural antioxidants. Using fresh ingredients like whole milk ricotta and real vanilla bean avoids additives and artificial flavoring common in store-bought desserts. This recipe can be adapted to gluten-free or dairy-free needs, making it accessible for various diets. While rich, these treats can fit into balanced eating when enjoyed in moderation — a little indulgence goes a long way in brightening the day!
Conclusion
These crispy celebration cannoli shells with creamy vanilla bean filling are proof that homemade doesn’t have to mean complicated. The satisfying crunch, the smooth filling speckled with real vanilla bean, and the simple ingredients all come together to create a dessert that’s both timeless and approachable. Whether you’re surprising guests or just treating yourself, this recipe offers a sweet moment of joy without the stress.
Feel free to tweak the filling, try new toppings, or pair it with your favorite coffee. I love how this recipe brings a little celebration to everyday life, and I hope it becomes a staple in your kitchen, too. If you’ve enjoyed this, you might find inspiration in recipes like the crispy air fryer avocado fries — another crunchy, crowd-pleasing treat with a fresh twist.
Go ahead and make a batch — you’ll find these cannoli shells hard to resist.
FAQs about Crispy Celebration Cannoli Shells
How long can I store the cannoli shells before filling?
You can store the fried shells in an airtight container at room temperature for up to 3 days. Fill them just before serving to keep them crisp.
Can I make the vanilla bean filling ahead of time?
Yes, the filling can be made and refrigerated for up to 2 days. Just give it a quick whisk before filling the shells to restore fluffiness.
What if I don’t have cannoli tubes?
You can use metal spoons, chopsticks, or even tightly rolled foil to shape the shells while frying, though tubes make the process easier and more uniform.
Can I bake the cannoli shells instead of frying?
While frying gives the classic crisp texture, you can bake them at 400°F (200°C) for about 8-10 minutes, flipping halfway, but expect a different texture—less crunchy and more biscuit-like.
Is it possible to freeze the cannoli shells or filling?
Fried shells don’t freeze well as they lose crispness. The filling can be frozen in an airtight container for up to one month; thaw overnight in the fridge and re-whip before use.
Pin This Recipe!
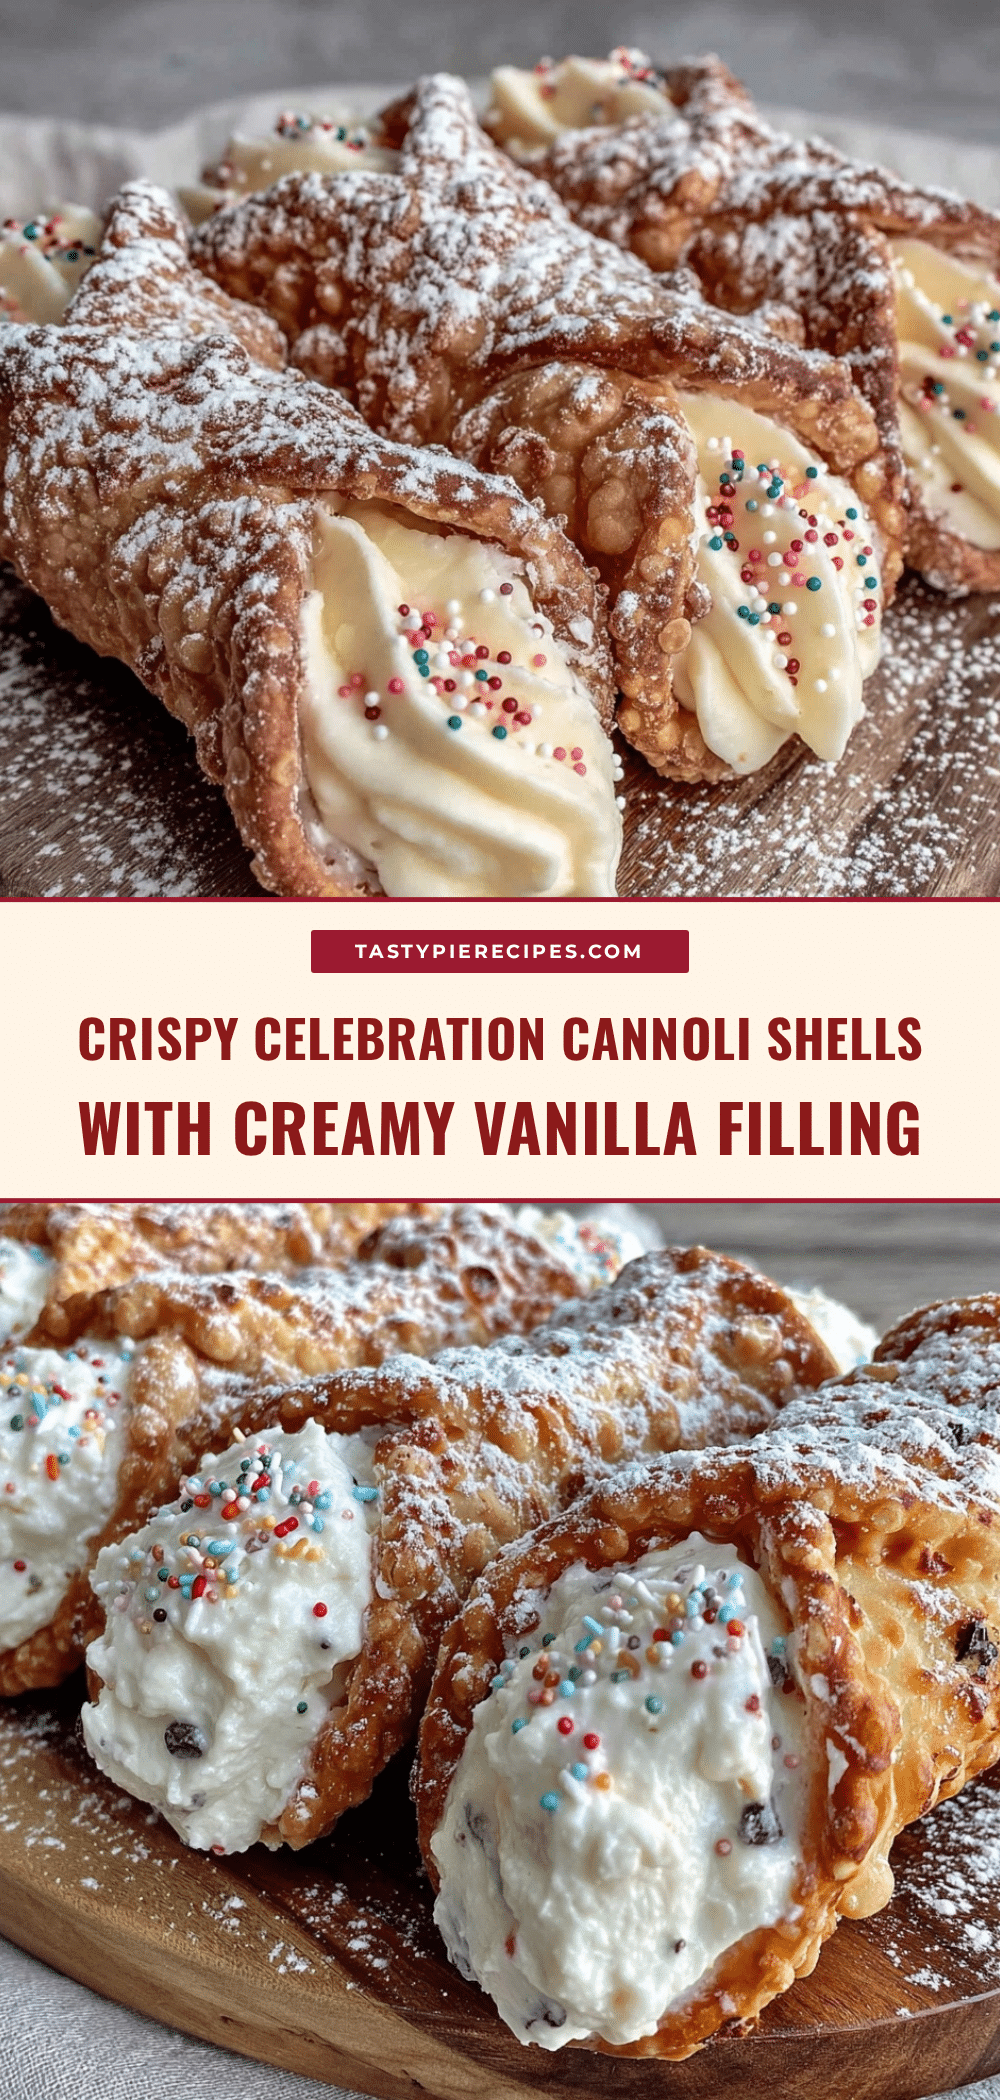
Crispy Celebration Cannoli Shells Recipe with Easy Vanilla Bean Filling

A quick and easy recipe for crispy homemade cannoli shells filled with a smooth, fluffy vanilla bean cream. Perfect for celebrations or any time you want a festive, crowd-pleasing dessert.
- Prep Time: 40 minutes
- Cook Time: 10-12 minutes
- Total Time: 50-52 minutes
- Yield: 8 servings 1x
- Category: Dessert
- Cuisine: Italian
Ingredients
- 2 cups (250 g) all-purpose flour
- 2 tbsp granulated sugar
- 1/4 tsp salt
- 2 tbsp unsalted butter, cold and diced
- 1 large egg yolk
- 1/4 cup (60 ml) white wine or dry Marsala wine (can substitute with apple cider vinegar + water)
- 1 tsp vanilla extract
- Vegetable oil or peanut oil, for frying
- 1 1/2 cups (375 g) whole milk ricotta cheese, drained well
- 1/3 cup (40 g) powdered sugar
- 1/2 cup (120 ml) heavy cream, cold
- 1 large vanilla bean, seeds scraped
- 1/4 cup mini chocolate chips or chopped pistachios (optional)
Instructions
- In a large bowl, whisk together flour, sugar, and salt. Cut in cold unsalted butter until mixture resembles coarse crumbs.
- Add egg yolk, vanilla extract, and slowly pour in white wine. Stir with a fork until dough just comes together.
- Turn dough onto floured surface and knead gently about 5 minutes until smooth and elastic. Wrap in plastic wrap and chill in fridge for at least 30 minutes.
- Divide dough into two portions. Roll each out to about 1/8 inch (3 mm) thickness on a lightly floured surface. Cut out 4-inch (10 cm) circles.
- Wrap each dough circle around a cannoli form, sealing edges with a dab of water or egg white. Ensure edges overlap slightly.
- Heat vegetable oil in a deep pan to 350°F (175°C). Fry 2-3 shells at a time until golden and crisp, about 2-3 minutes per side. Do not overcrowd the pan.
- Remove shells with slotted spoon and drain on paper towels or wire rack. Let cool completely before filling.
- Drain ricotta overnight or for a few hours to remove excess moisture. In a bowl, combine ricotta, powdered sugar, and vanilla bean seeds.
- Whip heavy cream until soft peaks form, then gently fold into ricotta mixture until light and airy. Stir in mini chocolate chips or pistachios if using.
- Fill cooled shells with the vanilla bean filling using a piping bag or small spoon just before serving.
Notes
Chill the dough to prevent shrinking and ensure crisp shells. Roll dough thinly and evenly. Maintain oil temperature at 350°F (175°C) for best frying results. Drain shells well and fill just before serving to keep crispness. Draining ricotta well is essential for creamy, non-watery filling. For gluten-free or vegan adaptations, substitute ingredients as suggested in the recipe.
Nutrition
- Serving Size: 1 filled cannoli
- Calories: 250
- Fat: 12
- Carbohydrates: 25
- Protein: 4
Keywords: cannoli, cannoli shells, vanilla bean filling, crispy dessert, homemade cannoli, Italian dessert, easy cannoli recipe, celebration dessert