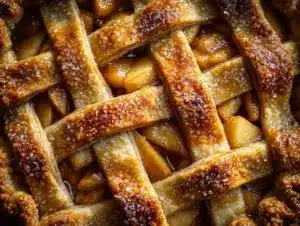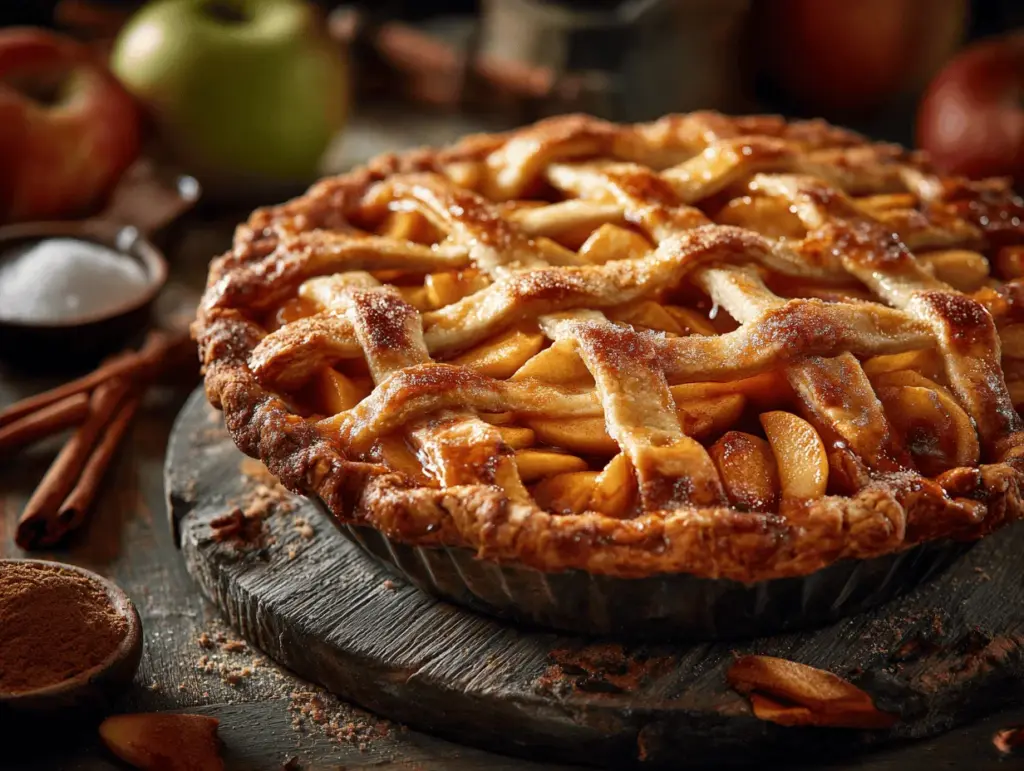
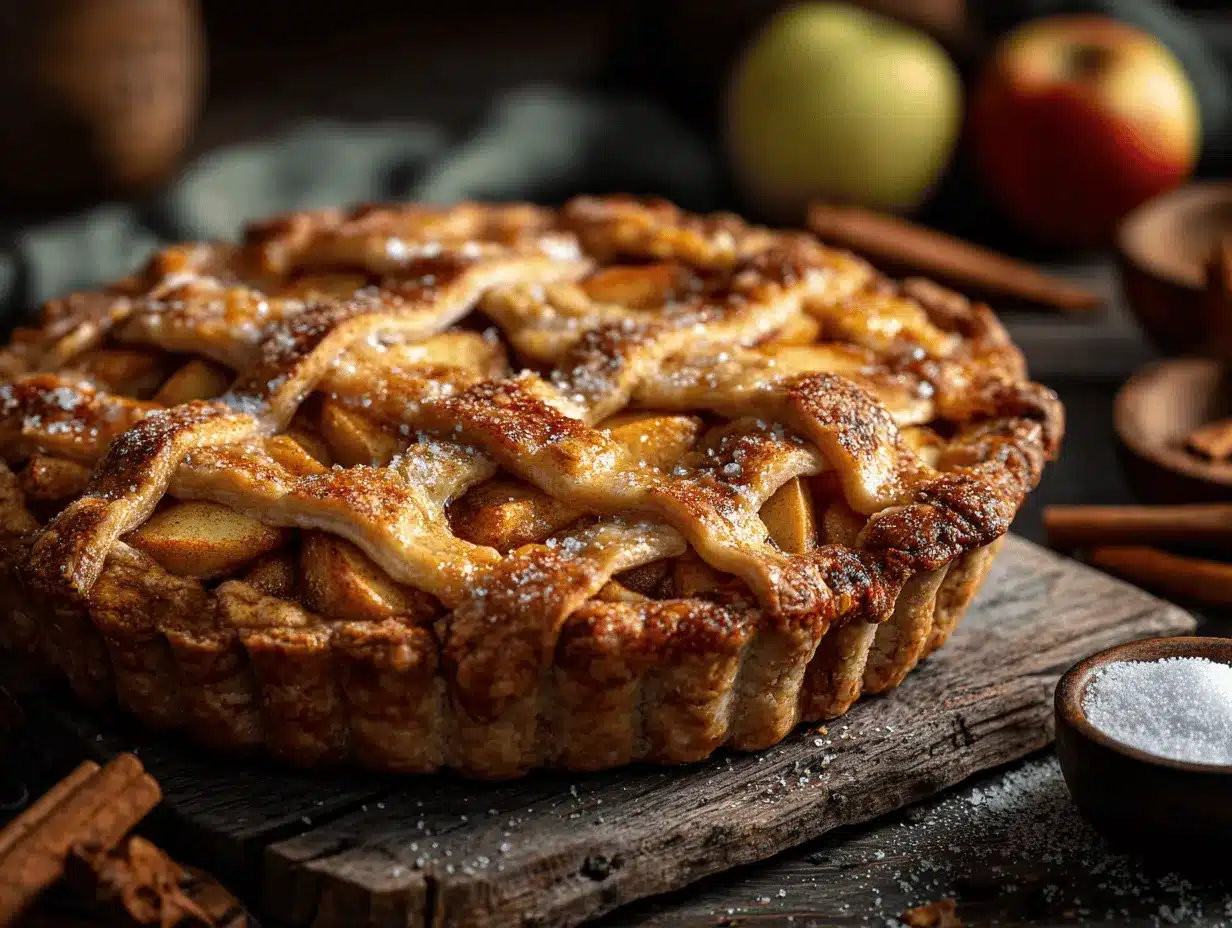
The smell of cinnamon-laced apples bubbling away in the oven is pure autumn magic, isn’t it? I remember the first time I tackled making a gluten-free apple pie—it was a chilly fall weekend, and I was set on proving that gluten-free baking doesn’t mean compromising on flavor or texture. Spoiler alert: it worked! This pie has a perfectly flaky crust and a sweet, spiced apple filling that’ll have everyone coming back for seconds (or thirds!). Whether you’re gluten-free by necessity or just love experimenting, this recipe is an absolute keeper.
Gluten-free apple pie might sound tricky, but trust me, it’s easier than you think. With just a few tweaks to traditional techniques, you can whip up a dessert that tastes like something straight out of grandma’s kitchen. Get ready to roll up your sleeves—this recipe is your ticket to impressing friends and family at every fall gathering.
Why You’ll Love This Recipe
- Perfectly flaky crust: The gluten-free crust in this recipe is light, buttery, and holds together beautifully.
- Simple ingredients: No fancy gluten-free blends or hard-to-find ingredients—everything you need is easy to grab.
- Classic fall flavor: Warm cinnamon, nutmeg, and tender baked apples make this the ultimate autumn dessert.
- Great for gatherings: Everyone will love it, whether they’re gluten-free or not. It’s a true crowd-pleaser.
- Comfort food vibes: One bite and you’ll feel wrapped in cozy flavors that scream “fall baking perfection.”
- Customizable: You can tweak the filling spices or use different apple varieties for your own signature twist.
What makes this pie stand out is its balance—it’s not overly sweet, the crust is buttery without being dense, and the apples stay tender and juicy rather than turning mushy. It’s the kind of dessert that makes you close your eyes and savor every bite. Plus, if you’ve struggled with gluten-free baking before, this recipe is proof that you can achieve bakery-quality results right at home.
What Ingredients You Will Need
This recipe uses wholesome ingredients that come together to create a dessert that’s both comforting and impressive. Here’s what you’ll need:
For the crust:
- 2 ½ cups gluten-free all-purpose flour (make sure it includes xanthan gum)
- 1 tablespoon granulated sugar (adds a touch of sweetness)
- ½ teaspoon salt
- 1 cup unsalted butter, chilled and cubed
- 6–8 tablespoons ice-cold water (adjust as needed)
For the apple filling:
- 6 medium apples, peeled, cored, and sliced (I recommend a mix of Granny Smith and Honeycrisp)
- ¾ cup granulated sugar
- ¼ cup light brown sugar
- 2 tablespoons gluten-free all-purpose flour (helps thicken the filling)
- 1 teaspoon ground cinnamon
- ½ teaspoon ground nutmeg
- 1 tablespoon lemon juice
- 1 teaspoon vanilla extract
Optional topping:
- 1 egg, beaten (for brushing the crust)
- 1 tablespoon coarse sugar (for sprinkling)
No complex gluten-free blends are required here! Just simple ingredients that deliver big flavors. If you’re feeling adventurous, you can even toss in a pinch of cardamom for a unique twist.
Equipment Needed
Here’s everything you’ll need to make this gluten-free apple pie:
- Mixing bowls (medium and large)
- Pastry cutter or food processor (to prepare the crust)
- Rolling pin
- Pie dish (standard 9-inch size)
- Peeler and corer (for prepping apples)
- Knife and cutting board
- Measuring cups and spoons
- Baking sheet (to catch any drips)
If you don’t have a pastry cutter, you can use two forks to work the butter into the flour—it just takes a little extra patience. And if you’re new to pie baking, don’t worry—a simple rolling pin and pie dish are all you really need to get started!
Preparation Method
- Make the crust: In a medium bowl, whisk together the gluten-free flour, sugar, and salt. Add the cubed butter and use a pastry cutter (or food processor) to cut the butter into the flour until the mixture resembles coarse crumbs. Gradually add the ice-cold water, one tablespoon at a time, mixing until the dough holds together. Divide into two disks, wrap in plastic wrap, and chill for at least 30 minutes.
- Prepare the filling: In a large bowl, combine the sliced apples, granulated sugar, brown sugar, gluten-free flour, cinnamon, nutmeg, lemon juice, and vanilla extract. Toss until the apples are evenly coated. Let sit for 15 minutes to allow the flavors to meld.
- Roll out the crust: On a lightly floured surface, roll out one disk of dough into a 12-inch circle. Transfer to the pie dish, pressing gently into the edges. Trim any excess dough, leaving about 1 inch hanging over the edge.
- Add the filling: Pour the apple mixture into the prepared crust, making sure to spread it evenly.
- Top the pie: Roll out the second disk of dough and carefully place it over the filling. Trim the edges, then crimp the crust with your fingers or a fork to seal. Cut a few small slits in the top crust to allow steam to escape.
- Optional egg wash: Brush the top crust with beaten egg and sprinkle with coarse sugar for a golden, sparkling finish.
- Bake: Preheat your oven to 375°F (190°C). Place the pie on a baking sheet to catch any drips and bake for 50–60 minutes, or until the crust is golden brown and the filling is bubbling.
- Cool: Let the pie cool on a wire rack for at least 2 hours before slicing. This helps the filling set properly.
Pro tip: If your crust starts to brown too quickly, cover the edges with strips of aluminum foil to prevent burning.
Cooking Tips & Techniques
Here are some helpful tips to ensure your gluten-free apple pie turns out perfectly:
- Keep the butter cold: Cold butter is key to achieving a flaky crust. If it starts to soften while you’re working, pop it back in the fridge for a few minutes.
- Chill the dough: Don’t skip chilling the dough—it makes it easier to roll out and helps prevent shrinking during baking.
- Choose the right apples: A mix of tart and sweet apples, like Granny Smith and Honeycrisp, gives the best flavor and texture.
- Don’t overwork the dough: Handle the crust gently to avoid making it tough.
- Use a baking sheet: Place the pie dish on a baking sheet to catch any juices that might bubble over.
And remember, pie baking is an art, not an exact science. If your crust tears while transferring, just patch it up—no one will notice once it’s baked!
Variations & Adaptations
Want to mix things up? Here are some fun variations on this classic gluten-free apple pie:
- Vegan option: Swap the butter in the crust for vegan butter and skip the egg wash. Use coconut oil or almond milk to brush the crust instead.
- Low-sugar version: Reduce the sugar by half and let the natural sweetness of the apples shine.
- Spiced twist: Add a pinch of cardamom or cloves to the filling for an extra layer of flavor.
- Apple-pear combo: Replace half of the apples with sliced pears for a unique, delicate filling.
- Mini pies: Use muffin tins to make individual-sized apple pies—perfect for parties!
I’ve tried the apple-pear combo myself, and it’s a delightful twist that adds a subtle floral sweetness to the pie. Experiment and make it your own!
Serving & Storage Suggestions
For the best experience, serve your gluten-free apple pie warm with a scoop of vanilla ice cream or a dollop of whipped cream. The contrast between the cold topping and warm pie is unbeatable!
If you have leftovers (unlikely!), store them in the refrigerator for up to three days. Cover the pie with plastic wrap or transfer individual slices to an airtight container. To reheat, simply warm slices in the oven at 350°F (175°C) for 10 minutes or zap them in the microwave for 30 seconds.
Want to make it ahead? You can freeze the baked pie for up to two months. Just wrap it tightly in plastic wrap and aluminum foil. Thaw overnight in the fridge and reheat in the oven before serving.
Nutritional Information & Benefits
Here’s a rough breakdown of the nutritional values per slice (based on eight slices):
- Calories: ~320
- Fat: ~15g
- Carbohydrates: ~45g
- Protein: ~3g
- Fiber: ~4g
Apples are a great source of dietary fiber and vitamin C, making this dessert slightly more wholesome than you’d expect. Plus, using a gluten-free crust makes it suitable for those with gluten sensitivities or celiac disease.
Conclusion
This irresistible gluten-free apple pie is proof that you don’t need gluten to enjoy a flaky, delicious crust and a comforting, spiced filling. It’s the perfect fall dessert, whether you’re baking for a special occasion or simply craving something cozy.
Give it a try and make it your own—add a pinch of your favorite spice, experiment with different apples, or serve it alongside your favorite fall beverage. I love this recipe because it’s not just a pie; it’s a slice of autumn happiness.
If you try this recipe, let me know how it turned out in the comments! And don’t forget to share it with your friends—it’s too good to keep to yourself.
FAQs
Can I use store-bought gluten-free pie crust?
Absolutely! While homemade crust has a special charm, store-bought gluten-free crusts can save time and still taste great.
What are the best apples for pie?
A mix of Granny Smith and Honeycrisp works wonderfully, but you can also use Fuji, Braeburn, or Jonagold for a slightly sweeter pie.
Can I freeze the dough?
Yes! Wrap the dough tightly in plastic wrap and freeze for up to two months. Thaw it in the fridge before using.
How do I prevent a soggy bottom crust?
Make sure your filling isn’t too wet and preheat your oven fully before baking. You can also brush the bottom crust with egg white to create a moisture barrier.
Can I make this pie dairy-free?
Yes! Use dairy-free butter for the crust and skip the egg wash. The pie will still turn out delicious.
Pin This Recipe!