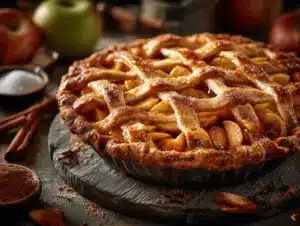
The first time I pulled a golden, bubbling gluten-free apple pie from the oven, the scent was so inviting that my family practically hovered around the kitchen, forks in hand. There’s just something about the sweet perfume of spiced apples and flaky pastry that makes you feel instantly at home. You know, I used to think gluten-free baking meant sacrificing that classic, tender crust, but this recipe completely changed my mind—and honestly, my life. If you’re on the hunt for an easy homemade gluten-free apple pie recipe that actually delivers on flavor and texture, you’re in the right place.
I started making gluten-free apple pie out of necessity when a close friend was diagnosed with celiac disease. I didn’t want her to miss out on fall’s best dessert, and let’s face it, apple pie is a non-negotiable tradition in my house. After more test bakes than I care to admit (and a few less-than-perfect crusts), I finally landed on this version—one that tastes so good, nobody ever guesses it’s gluten-free. The crust is tender and buttery, the filling is perfectly balanced between tart and sweet, and the whole pie slices up beautifully. Whether you’re baking for a holiday feast or just craving a cozy treat, this gluten-free apple pie brings everyone to the table, gluten-free or not.
This pie is especially perfect for busy families, those with dietary restrictions, or anyone who craves a taste of classic fall comfort—without the worry of gluten. Plus, it’s so easy to put together, you’ll want to make it even when it’s not apple season. I’ve baked this gluten-free apple pie for potlucks, weeknight dinners, and, yes, even breakfast (don’t judge—it’s got apples!). Trust me, this one’s a keeper.
Why You’ll Love This Gluten-Free Apple Pie Recipe
- Quick & Easy: You can have this gluten-free apple pie in the oven in under 30 minutes, which is a lifesaver on busy days or when you get last-minute guests.
- Simple Ingredients: No fancy flours or hard-to-find substitutes here—just pantry staples and fresh apples. Chances are, you’ve got most of what you need already.
- Perfect for Fall Gatherings: Whether it’s Thanksgiving, a cozy brunch, or a casual family dinner, this pie always fits right in. The warm spices and apples just scream autumn comfort.
- Crowd-Pleaser: This gluten-free apple pie gets rave reviews from everyone—kids, adults, even those who usually side-eye anything gluten-free. The crust is so flaky, no one believes it’s not the “real thing.”
- Unbelievably Delicious: The filling is just the right mix of tart and sweet, with a hint of cinnamon and nutmeg. Paired with the golden, crisp crust, every bite is pure comfort.
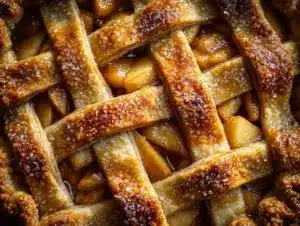
What sets this recipe apart? For starters, the gluten-free pie crust uses a blend of flours and a sneaky trick—grating cold butter into the dough—for a texture that’s incredibly close to classic pie crust. I’ve tested this approach over a dozen times, tweaking the ratios until the dough rolled out easily and baked up tender every single time. The apple filling isn’t too runny or too thick, thanks to a careful balance of thickener and juicy apples. I’ve even used this recipe in my bakery’s holiday lineup, and it always sells out fast.
The best part? This isn’t just another gluten-free pie. It’s the kind of dessert that makes you pause and savor the moment—maybe even close your eyes after that first bite. It’s nostalgic, soul-warming, and just plain good. If you want a gluten-free apple pie that doesn’t taste like a compromise, this is it.
What Ingredients You Will Need
This gluten-free apple pie recipe uses classic ingredients for that nostalgic flavor, but with a few gluten-free swaps that keep things easy and delicious. Honestly, you won’t miss regular flour for a second. Here’s what you’ll need:
- For the Gluten-Free Pie Crust:
- Gluten-free all-purpose flour blend (2 1/2 cups / 310g) – I like King Arthur Measure for Measure or Cup4Cup for best texture and flavor.
- Xanthan gum (1/2 tsp) – Only if your flour blend doesn’t include it; this helps bind the dough.
- Granulated sugar (1 tbsp) – Adds a touch of sweetness and helps the crust brown.
- Kosher salt (1/2 tsp) – Balances the sweetness and sharpens the flavors.
- Unsalted butter, very cold (1 cup / 226g, cut into small cubes or grated) – Makes the crust flaky and rich. You can use plant-based butter for dairy-free.
- Ice water (6-8 tbsp / 90-120ml) – Keeps everything cold so the butter stays in little pockets, creating flakiness.
- Apple cider vinegar (1 tsp) – Tenderizes the dough and adds a subtle tang (trust me, it works wonders).
- For the Apple Pie Filling:
- Firm, tart apples (6-7 medium, about 2 1/2 lbs / 1.1kg, peeled, cored, and thinly sliced) – Granny Smiths are my go-to, but Honeycrisp or Braeburn work well too. A mix gives great depth of flavor.
- Granulated sugar (1/2 cup / 100g) – Sweetens and helps draw out the apples’ juices.
- Light brown sugar (1/4 cup / 50g, packed) – Adds a subtle caramel note.
- Ground cinnamon (1 1/2 tsp) – Classic apple pie spice.
- Ground nutmeg (1/4 tsp) – Optional, but it adds warmth.
- Gluten-free cornstarch or tapioca starch (2 tbsp / 16g) – Thickens the filling without clouding the flavor.
- Fresh lemon juice (1 tbsp) – Brightens the flavors and keeps the apples from browning.
- Pure vanilla extract (1 tsp) – Deepens the flavor.
- Pinch of salt – Just a little, to round out the filling.
- For Assembly:
- Egg (1 large, for egg wash; can sub with milk or cream for egg-free)
- Coarse sugar (for sprinkling, optional but adds a lovely crunch)
Substitution Tips:
- Flour: Use your favorite 1:1 gluten-free flour blend. Almond flour doesn’t work as a direct swap, but you can mix in a bit for a nuttier flavor.
- Butter: Plant-based butter sticks work well for a dairy-free version—just keep them cold.
- Apples: Use a mix of tart and sweet apples for best flavor, or whatever’s fresh at your market.
- Starch: Tapioca and cornstarch both work; adjust quantity if your apples are extra juicy.
Equipment Needed
- 9-inch pie plate – Glass or ceramic is my favorite for even baking, but metal works too.
- Mixing bowls – One large for the apples, one medium for the dough.
- Pastry cutter or box grater – For working the butter into the flour. If you don’t have either, two forks or even your fingers will do (just work quickly to keep it cold).
- Rolling pin – Or use a bottle of wine in a pinch (I’ve done this more times than I can count!).
- Measuring cups and spoons – Accurate measurements make a difference in gluten-free baking.
- Peeler and sharp paring knife – For prepping apples quickly and safely.
- Bench scraper – Handy for transferring dough and cleaning up, but not essential.
- Baking sheet – Place under the pie to catch drips and keep your oven clean.
- Parchment paper or plastic wrap – For rolling out dough easily without sticking.
- Pastry brush – For the egg wash, but a paper towel works in a pinch.
Honestly, I’ve made this pie with the most basic kitchen gear when traveling—don’t stress if you don’t have a fancy pastry cutter. Just keep the butter cold and work quickly. For cleaning, I always wipe my rolling pin and pie plate with a damp cloth right after use—saves a ton of scrubbing later.
How to Make Gluten-Free Apple Pie: Step-by-Step

- Prep the Pie Dough (15 minutes):
- In a large bowl, whisk together 2 1/2 cups (310g) gluten-free flour, 1/2 tsp xanthan gum (if needed), 1 tbsp sugar, and 1/2 tsp salt.
- Grate in 1 cup (226g) cold butter (or cut in with a pastry cutter or two forks) until the mixture resembles coarse crumbs with pea-sized bits.
- Stir in 1 tsp apple cider vinegar.
- Add 6 tbsp (90ml) ice water, one tablespoon at a time, tossing with a fork until the dough just begins to come together. Add more water if needed—a little at a time—to avoid a sticky dough.
- Turn the dough out onto a piece of plastic wrap. Divide in half, form into two disks, wrap tightly, and chill for at least 1 hour (or up to 2 days).
- Make the Apple Filling (10 minutes):
- While the dough chills, peel, core, and thinly slice 6-7 medium apples (about 2 1/2 lbs / 1.1kg).
- In a large bowl, toss the apples with 1/2 cup (100g) granulated sugar, 1/4 cup (50g) light brown sugar, 1 1/2 tsp cinnamon, 1/4 tsp nutmeg, 2 tbsp (16g) cornstarch, 1 tbsp lemon juice, 1 tsp vanilla, and a pinch of salt. Set aside to let the juices start to release.
- Roll Out the Dough (10 minutes):
- On a lightly floured sheet of parchment or plastic wrap, roll out one dough disk to a 12-inch (30cm) circle. If it cracks, patch it gently—gluten-free dough is more delicate, but it’ll bake up beautifully.
- Gently lift and fit into a 9-inch pie plate, pressing lightly to fit and leaving a slight overhang. Chill while you roll out the top crust.
- Roll the second disk into another 12-inch (30cm) circle for the top.
- Assemble the Pie (5 minutes):
- Spoon the apple filling (and all juices) into the chilled crust, mounding slightly in the center.
- Dot the filling with a tablespoon of butter for extra richness, if desired.
- Place the top crust over the apples. Trim excess dough, leaving about 1/2 inch (1cm) around the edge. Fold the edges under and crimp with your fingers or a fork.
- Cut a few slits in the top to vent steam. Brush with beaten egg and sprinkle with coarse sugar, if using.
- Bake the Pie (55-60 minutes):
- Preheat oven to 400°F (200°C). Place the pie on a baking sheet to catch drips.
- Bake for 25 minutes, then reduce temperature to 350°F (175°C) and continue baking for 30-35 minutes, until the crust is golden and the filling is bubbling. If the edges brown too fast, cover them loosely with foil.
- Cool on a rack for at least 2 hours before slicing (the hardest part!). The filling sets as it cools, so don’t rush this step.
Troubleshooting Tips: If your dough is too crumbly, add a splash more ice water. If it’s sticky, chill it longer or use a bit more flour to roll out. If the filling is too runny after baking, let the pie cool completely before slicing. That’s the secret for neat slices!
Cooking Tips & Techniques
- Keep Everything Cold: Gluten-free dough is super sensitive to warmth. I’ve learned (the hard way) that chilling your flour and even your mixing bowl on a hot day makes a huge difference.
- Handle Gently: Unlike wheat dough, gluten-free crust doesn’t get tough from overworking, but it can tear easily. If cracks appear, just moisten your fingers and patch them up. No one will know once it’s baked.
- Butter Grating Trick: Grating cold butter straight into the flour is my secret weapon. It distributes the fat perfectly, giving you a flaky, tender crust every time.
- Don’t Skip the Rest: Resting the dough in the fridge after mixing and again after rolling helps hydrate the flour and keeps the butter cold.
- Juicy Filling Solution: If your apples are extra juicy, toss them with sugar and let them sit for 20 minutes, then drain off some liquid before mixing in the starch and spices. This keeps the crust crisp, not soggy.
- Watch the Oven: Every oven is a little different. Start checking your pie at the 45-minute mark; if the crust looks done but the filling isn’t bubbling, tent with foil and keep baking.
Honestly, I’ve had pies overflow, crust edges burn, or fillings go soupy. My lesson? Don’t stress about perfection. Even a wonky pie tastes amazing—especially with a scoop of ice cream on top. If you’re multitasking (like wrangling kids or prepping dinner), mix the dough and apples ahead, then assemble when you’re ready. Consistency comes with practice and a bit of forgiving spirit—no one ever complains about an extra slice of homemade pie.
Variations & Adaptations
- Vegan/Dairy-Free: Swap butter for plant-based butter sticks and brush the crust with coconut milk instead of egg. I’ve done this for friends, and it works beautifully—just keep the butter very cold.
- No-Refined Sugar: Use coconut sugar or maple sugar in the filling and crust for a more natural sweetness. The flavor is a little deeper, which I love in fall desserts.
- Apple-Pear Pie: Replace half the apples with ripe pears for a softer, juicier filling—especially nice in late fall when pears are perfect.
- Spice It Up: Add 1/4 teaspoon ground ginger or cardamom for a different flavor profile. My family loves a ginger-apple twist around the holidays.
- Crumb Topping Instead of Double Crust: Skip the top crust and sprinkle with a simple oat-pecan crumble (use certified gluten-free oats). Bake as directed for a rustic touch.
- Nut-Free: All ingredients are nut-free as written, but always double-check your flour blend for cross-contamination if allergies are a concern.
Personally, my favorite riff is the apple-pear combo with a touch of ginger. It’s a little unexpected and always gets compliments. Don’t be afraid to mix up your apples, swap in other fruits, or try a crumb topping—this gluten-free apple pie recipe is super forgiving.
Serving & Storage Suggestions
This gluten-free apple pie is best served slightly warm or at room temperature. I love to plate big wedges with a scoop of vanilla ice cream or a dollop of whipped cream—classic, but never boring. For a fun brunch, try it with sharp cheddar cheese on the side (a quirky but delicious New England tradition!).
If you’re serving a crowd, cut the pie into smaller slices and arrange on a pretty platter. It pairs beautifully with coffee, chai, or hot apple cider—especially on chilly fall days.
To store, cover leftover pie loosely with foil or plastic wrap and keep at room temperature for up to 1 day. For longer storage, refrigerate for up to 4 days. You can freeze baked slices, tightly wrapped, for up to 2 months (just thaw overnight in the fridge and reheat gently in the oven at 300°F/150°C for 10-15 minutes).
The flavors deepen as the pie sits, so leftovers are never a bad thing. If you’re reheating a whole pie, tent with foil to prevent over-browning. Honestly, cold apple pie with morning coffee is one of life’s simple pleasures.
Nutritional Information & Benefits
Each slice of this gluten-free apple pie (based on 8 servings) has about 320 calories, 10g fat, 58g carbs, and 3g protein. Sugar and carb content will vary depending on your apples and sweeteners used.
What I love about this recipe is that apples bring fiber, vitamin C, and polyphenols—so you’re getting some benefits along with the indulgence. Using gluten-free flours makes this pie celiac-friendly, and you can easily make it dairy-free or lower in sugar if needed. Just a heads-up: the recipe contains eggs (for the wash) and dairy (in the crust), but swaps are easy.
For me, this pie is about balance—a treat that fits into a healthy routine, made with real, simple ingredients you can feel good about sharing.
Conclusion
If you’re looking for a gluten-free apple pie recipe that’s easy, delicious, and full of fall vibes, this is the one. The crust is flaky and golden, the apple filling is perfectly spiced, and the whole process is honestly less intimidating than you might think. You can customize it for any diet or occasion, and it’s the kind of dessert that brings everyone to the kitchen—even the skeptics!
I make this gluten-free apple pie every fall, and it never lasts long in my house. Give it a try, tweak it to suit your crew, and don’t forget to share your creations in the comments. Have a favorite apple blend or a fun twist? Let me know—I’m always looking for new ideas!
Happy baking—may your kitchen smell amazing and your pie slices be generous!
FAQs About Gluten-Free Apple Pie
What’s the best gluten-free flour blend for apple pie crust?
I’ve had great results with King Arthur Measure for Measure and Cup4Cup. Any 1:1 gluten-free blend should work, but avoid bean-based blends—they can taste a bit odd in sweet recipes.
Can I make this gluten-free apple pie ahead of time?
Absolutely! Bake it up to a day ahead. Let it cool completely, then cover and store at room temp or in the fridge. Reheat in a low oven if you like it warm.
What apples are best for gluten-free apple pie?
Granny Smiths are my favorite for tartness, but mixing in some Honeycrisp or Braeburn adds sweetness and complexity. Use whatever’s fresh and crisp.
How do I prevent a soggy bottom crust?
Start the pie at a high oven temp (400°F/200°C) for the first 25 minutes, and make sure to thicken your filling well. Letting the pie cool before slicing also helps the crust stay crisp.
Can I freeze gluten-free apple pie?
Yes! Freeze baked slices or a whole pie, tightly wrapped. Thaw overnight in the fridge and reheat in a 300°F/150°C oven before serving for best texture.
PrintGluten-Free Apple Pie

This easy homemade gluten-free apple pie features a flaky, tender crust and a perfectly spiced apple filling. It’s a classic fall dessert that everyone will love—gluten-free or not.
- Prep Time: 35 minutes
- Cook Time: 55-60 minutes
- Total Time: 2 hours 35 minutes (includes chilling and cooling time)
- Yield: 8 servings 1x
- Category: Dessert
- Cuisine: American
Ingredients
- 2 1/2 cups gluten-free all-purpose flour blend (such as King Arthur Measure for Measure or Cup4Cup)
- 1/2 teaspoon xanthan gum (only if your flour blend doesn’t include it)
- 1 tablespoon granulated sugar
- 1/2 teaspoon kosher salt
- 1 cup (2 sticks) unsalted butter, very cold, cut into small cubes or grated (or plant-based butter for dairy-free)
- 6–8 tablespoons ice water
- 1 teaspoon apple cider vinegar
- 6–7 medium firm, tart apples (about 2 1/2 lbs), peeled, cored, and thinly sliced (Granny Smith, Honeycrisp, or Braeburn)
- 1/2 cup granulated sugar
- 1/4 cup light brown sugar, packed
- 1 1/2 teaspoons ground cinnamon
- 1/4 teaspoon ground nutmeg (optional)
- 2 tablespoons gluten-free cornstarch or tapioca starch
- 1 tablespoon fresh lemon juice
- 1 teaspoon pure vanilla extract
- Pinch of salt
- 1 large egg (for egg wash; or milk/cream for egg-free)
- Coarse sugar for sprinkling (optional)
- 1 tablespoon butter (for dotting filling, optional)
Instructions
- In a large bowl, whisk together gluten-free flour, xanthan gum (if needed), sugar, and salt.
- Grate in cold butter or cut in with a pastry cutter or two forks until mixture resembles coarse crumbs with pea-sized bits.
- Stir in apple cider vinegar.
- Add ice water, one tablespoon at a time, tossing with a fork until dough just comes together. Add more water if needed.
- Turn dough onto plastic wrap, divide in half, form into two disks, wrap tightly, and chill for at least 1 hour (up to 2 days).
- While dough chills, peel, core, and thinly slice apples.
- In a large bowl, toss apples with granulated sugar, brown sugar, cinnamon, nutmeg, cornstarch, lemon juice, vanilla, and a pinch of salt. Set aside.
- On a lightly floured sheet of parchment or plastic wrap, roll out one dough disk to a 12-inch circle. Fit into a 9-inch pie plate, leaving a slight overhang. Chill while rolling out the top crust.
- Roll the second disk into another 12-inch circle for the top.
- Spoon apple filling (with juices) into the chilled crust, mounding slightly in the center. Dot with butter if desired.
- Place top crust over apples. Trim excess dough, leaving about 1/2 inch around the edge. Fold edges under and crimp.
- Cut a few slits in the top to vent steam. Brush with beaten egg and sprinkle with coarse sugar if using.
- Preheat oven to 400°F. Place pie on a baking sheet.
- Bake for 25 minutes, then reduce temperature to 350°F and continue baking for 30-35 minutes, until crust is golden and filling is bubbling. Cover edges with foil if browning too quickly.
- Cool on a rack for at least 2 hours before slicing to allow filling to set.
Notes
Keep all ingredients cold for best crust texture. If dough is crumbly, add a bit more ice water; if sticky, chill longer or use more flour to roll out. Let pie cool completely before slicing for neat slices. For dairy-free, use plant-based butter and coconut milk for the wash. For a crumb topping, skip the top crust and use a gluten-free oat-pecan crumble.
Nutrition
- Serving Size: 1 slice (1/8 of pie)
- Calories: 320
- Sugar: 26
- Sodium: 180
- Fat: 10
- Saturated Fat: 6
- Carbohydrates: 58
- Fiber: 3
- Protein: 3
Keywords: gluten-free apple pie, easy apple pie, homemade apple pie, fall dessert, gluten-free dessert, celiac-friendly, Thanksgiving pie, apple pie recipe