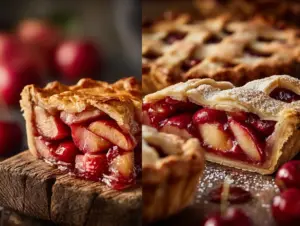
The first time I tasted a cheesy hot pepper jelly mini pie bite, it was at a wild backyard party—picture twinkling lights, laughter, and everyone circling the food table. These little bites stole the show. The flaky pastry, gooey melted cheese, and that spicy-sweet kick from hot pepper jelly? Seriously, it was love at first crunch. I remember sneaking one after another when nobody was looking (don’t judge me, they’re addictive!).
Honestly, cheesy hot pepper jelly mini pie bites are the kind of party appetizer that brings folks together. You know that moment when someone takes a bite and their eyes light up? That’s what these deliver—every single time. I started making them for game nights and family gatherings, and now my text messages fill up with requests for “those spicy cheesy pie things.” They’re perfect for entertaining because they’re easy to prep, look fancy (but aren’t fussy), and disappear faster than anything else on the table.
If you’ve never tried hot pepper jelly in a savory snack, you’re in for a treat. The contrast between the creamy cheese and the sweet heat is just magic. Plus, these mini pie bites are simple enough for beginner cooks, yet impressive enough for Pinterest-worthy spreads. Whether you’re after a quick weekend snack or planning your next holiday bash, this recipe is a total lifesaver. As someone who’s tested it at least a dozen times, I can promise you—the cheesy hot pepper jelly mini pie bites will be the star of your appetizer lineup.
Why You’ll Love This Recipe
- Quick & Easy: Comes together in about 30 minutes, so you’re not stuck in the kitchen while everyone else is having fun.
- Simple Ingredients: No need for a specialty grocery run. You’ll find everything you need at your local store—or probably already in your fridge.
- Perfect for Parties: These bites are ideal for holidays, game nights, or potlucks. Seriously, I’ve watched people skip the main meal just to load up on these!
- Crowd-Pleaser: Kids love the cheesy goodness, and adults appreciate the grown-up heat from the hot pepper jelly. Even picky eaters go back for seconds.
- Unbelievably Delicious: The combo of flaky pie crust, melty cheese, and spicy-sweet jelly is pure comfort but with a fun twist.
What sets my cheesy hot pepper jelly mini pie bites apart? First, I blend sharp cheddar and creamy cream cheese for that perfect texture—no rubbery cheese here. I always use a little extra hot pepper jelly, so you get a bolder flavor in every bite. The trick is in sealing the edges well and using a mini muffin pan for perfect portions. There’s nothing like watching guests close their eyes and savor that first bite. It’s a recipe I’ve tweaked over time, and it’s now my go-to for stress-free entertaining.
Honestly, these are the kind of appetizers that make you feel like a kitchen rockstar (without needing chef skills). They turn a simple get-together into a memorable feast and leave everyone asking for the recipe. Trust me, you’ll want to save this one for every occasion!
What Ingredients You Will Need
This recipe uses simple, wholesome ingredients to deliver bold flavor and satisfying texture without the fuss. Most items are pantry staples, and you can easily swap a few things if you’re in a pinch.
- For the Pie Bites:
- Refrigerated pie crusts (2 sheets) – Let them come to room temperature for easier handling
- Sharp cheddar cheese, shredded (1 cup / 120g) – Adds punchy flavor
- Cream cheese, softened (4 oz / 115g) – Gives creamy richness
- Hot pepper jelly (1/2 cup / 120ml) – The star ingredient! Use your favorite brand; I love Stonewall Kitchen or homemade for extra zing
- Egg (1, beaten) – For egg wash to help golden up the crust
- Fresh chives or green onions, chopped (2 tbsp / 8g) – Optional, for garnish and a fresh kick
- Salt and pepper (pinch each) – To taste
- Ingredient Tips & Substitutions:
- Pie crust: Use store-bought for convenience or homemade if you’ve got extra time.
- Cheese: Swap cheddar with pepper jack for more heat, or use mozzarella for a milder bite.
- Cream cheese: Try goat cheese or Boursin for a tangy twist.
- Hot pepper jelly: Sub with sweet chili sauce or jalapeño jelly if needed.
- Gluten-free: Opt for gluten-free pie crusts or use crescent roll dough if you prefer.
When picking your hot pepper jelly, look for one with a balance of sweetness and heat. If you like things fiery, go for a habanero-based jelly. For mild spice, stick to jalapeño or red pepper jelly. And if you’re making these for a crowd, using a blend of cheddar and cream cheese guarantees the perfect gooey texture every time!
Pro tip: If you’re making these in summer, try adding a tiny spoonful of diced fresh peaches or mango alongside the jelly. It’s a fun seasonal twist that looks gorgeous and tastes fantastic!
Equipment Needed
- Mini muffin pan (24-cup) – Essential for bite-sized perfection. If you don’t have one, use a regular muffin tin and make slightly larger pies.
- Round cookie cutter (2.5-inch / 6cm) – For cutting pie crust circles. A drinking glass works in a pinch.
- Mixing bowls – For blending cheeses and prepping ingredients.
- Small spatula or spoon – To fill each pie cup easily.
- Pastry brush – For egg wash; you can use your fingers if you’re feeling rustic.
- Baking sheet (optional) – For cooling the bites after baking.
- Wire cooling rack – Helps keep the bottoms crisp.
I’ve baked these mini pies in both nonstick and silicone pans; both work fine, but nonstick makes them easier to pop out. If you use silicone, give it a quick spray with oil. And don’t stress about fancy cutters—an overturned glass gets the job done. For cleanup, soak your pans right away; hot jelly can stick!
If you’re just starting out, most of these tools are budget-friendly. The mini muffin pan especially is a game-changer for all sorts of snacks and desserts.
Preparation Method

- Prep the Pie Crust:
Take the refrigerated pie crust out and let it sit for 10 minutes at room temperature. This prevents tearing when you roll it out. On a lightly floured surface, roll the crusts slightly to about 1/8 inch (3mm) thickness. Use a 2.5-inch (6cm) cutter or glass to cut out 24 circles. If you run short, gather scraps and re-roll.
Tip: Pie crust should feel cool but pliable, not sticky. - Make the Cheese Filling:
In a bowl, mix together 1 cup (120g) shredded cheddar, 4 oz (115g) cream cheese, and a pinch of salt and pepper. Blend until smooth and creamy. If the mix feels stiff, add a teaspoon of milk.
Note: The filling should be thick enough to scoop but not runny. - Fill the Mini Pies:
Spray your mini muffin pan lightly with nonstick spray. Gently press one pie crust circle into each well, letting the edges come slightly up the sides. Drop a heaping teaspoon of cheese filling into each crust. Top with 1/2 teaspoon of hot pepper jelly per pie bite.
Warning: Don’t overfill, or the jelly may bubble out. - Seal and Top:
If you like, cut extra crust into small shapes or strips to lay over the top for decoration. Brush each pie lightly with beaten egg using a pastry brush. This gives a golden finish.
Tip: If you want super crispy tops, sprinkle a pinch of shredded cheese on each before baking. - Bake:
Preheat oven to 375°F (190°C). Bake for 16-18 minutes, or until the crust is golden and the filling bubbles gently. Remove from oven and let cool in the pan for 5 minutes, then transfer to a wire rack.
Sensory cue: The kitchen will smell sweet and savory with a hint of heat!
If you’re making a double batch, rotate pans halfway through for even browning. I’ve found that using parchment strips in the muffin wells makes it easier to lift the pies if your pan tends to stick. For best results, serve warm—you’ll notice the cheese is perfectly gooey and the jelly glistens.
Cooking Tips & Techniques
I’ve made cheesy hot pepper jelly mini pie bites more times than I can count, and a few lessons stand out. First, don’t rush the crust prep—let it warm up or you’ll get cracks. If your cheese filling is too cold, it won’t blend smoothly, so let your cream cheese soften a bit. Always use a light hand when spreading the jelly, or it’ll overflow (trust me, I’ve cleaned enough sticky muffin pans to know!).
Baking in the middle rack is best for even color. If your pies look pale, give them an extra minute—but keep an eye out, as the jelly can scorch quickly. If you’re multitasking, assemble pies while the oven heats, and clean as you go. I’ve tried freezing these before baking, but the crust tends to get soggy, so bake fresh whenever possible.
Consistency matters. Use equal amounts of filling for each pie bite—an ice cream scoop works great for this. For extra crunch, sprinkle a little panko or crushed crackers over the top before baking. If you like a smokier flavor, add a pinch of smoked paprika to the cheese blend. My biggest fail was once forgetting the egg wash; the pies tasted fine but looked dull. So don’t skip that step!
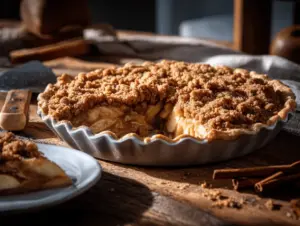
Variations & Adaptations
- Gluten-Free: Use gluten-free pie crust or crescent dough. The results are just as tasty, and nobody will miss the wheat.
- Meaty Twist: Add a few crumbles of cooked bacon or sausage to the cheese mix—amazing for brunch!
- Mild Version: Swap hot pepper jelly for apricot or fig preserves if your crowd isn’t into heat. A sprinkle of fresh herbs on top can brighten the flavor.
- Vegetarian Option: Add a layer of sautéed mushrooms or spinach under the cheese for extra heartiness.
- Allergen Substitutions: Use dairy-free cream cheese and cheese shreds for lactose-intolerant guests. The pies still come out creamy and delicious.
I once tried switching the jelly for cranberry relish during the holidays, and it was a hit! For a seasonal spin, add a sliver of roasted sweet pepper or caramelized onion before the jelly. If you love experimenting, try different cheese blends—Swiss and Gruyère are fantastic for a nutty flavor, while Monterey Jack gives more melt.
Serving & Storage Suggestions
Serve cheesy hot pepper jelly mini pie bites warm for maximum gooeyness. I like to pile them on a rustic wooden board with fresh herbs scattered around—makes for a Pinterest-worthy shot. For parties, offer a little bowl of extra hot pepper jelly for dipping. Pair with sparkling cider, crisp white wine, or even a cold beer. These bites go great with light salads or a platter of fresh veggies if you want a balanced spread.
To store, cool completely and place in an airtight container. They’ll keep in the refrigerator for up to 3 days. For longer storage, freeze them on a baking sheet, then transfer to a zip bag—just reheat in a 350°F (175°C) oven for about 8 minutes. The flavors intensify after a day, so leftovers are even better. Avoid microwaving, as the crust can turn chewy.
Honestly, these little pies are perfect for prepping ahead. You can assemble and chill them, then bake right before guests arrive. The jelly’s spicy sweetness melds with the cheese for a snack that tastes homemade every time.
Nutritional Information & Benefits
Each cheesy hot pepper jelly mini pie bite packs about 90–120 calories, with 6g fat, 7g carbs, and 3g protein. The cheese provides calcium and protein, while hot pepper jelly adds a dose of vitamin C from the peppers. If you use whole-grain or gluten-free crust, you’ll get a little fiber too.
For those watching dairy, swap in vegan cheese and cream cheese to keep things lighter. The bites are naturally vegetarian unless you add meat. Common allergens include wheat, dairy, and egg, so be sure to note substitutions for sensitive guests. I love that you can make these lower-carb by using almond flour crusts—they still taste amazing!
From a wellness angle, these bites satisfy without going overboard. They’re rich but portion-controlled, making them a smarter party snack. In my house, they’re a guilt-free treat that also fits into busy weeknight snacking.
Conclusion
Cheesy hot pepper jelly mini pie bites are the ultimate party appetizer. They’re quick, crave-worthy, and packed with personality. The combo of creamy cheese and sweet heat is a total game-changer—seriously, you’ll want these at every gathering. Whether you stick to the classic or try one of the fun variations, this recipe is endlessly customizable.
I keep coming back to these mini pies because they bring so much joy to the table. Friends always ask for the secret, and honestly, it’s just a little love and a dash of hot pepper jelly. Don’t be afraid to tweak the ingredients to suit your taste—add more spice, swap cheeses, or go gluten-free. Your kitchen, your rules!
Give these a try and let me know your favorite twist. Drop a comment, share your photos, or tag me if you post your own batch on Pinterest. Happy snacking, and may your parties always be delicious!
Frequently Asked Questions
Can I make cheesy hot pepper jelly mini pie bites ahead of time?
Yes! You can assemble them up to a day in advance, cover, and refrigerate. Bake right before serving for best results.
What if I don’t have hot pepper jelly?
You can substitute with sweet chili sauce, jalapeño jelly, or even apricot preserves for a milder spin.
How do I keep the mini pie bites from sticking to the pan?
Use a nonstick mini muffin pan and spray lightly with oil before adding the crust. Let them cool a few minutes before removing.
Can these be frozen?
Absolutely. Freeze baked pies on a tray, transfer to a zip bag, and reheat in the oven for about 8 minutes at 350°F (175°C).
Are these spicy?
They have a gentle heat from the hot pepper jelly, but you can control the spice by choosing a milder or hotter jelly. Kids usually love them!
PrintCheesy Hot Pepper Jelly Mini Pie Bites
These bite-sized party appetizers feature flaky pie crust, gooey cheddar and cream cheese, and a spicy-sweet kick from hot pepper jelly. Quick to make and irresistibly delicious, they’re perfect for entertaining and guaranteed to disappear fast.
- Prep Time: 15 minutes
- Cook Time: 18 minutes
- Total Time: 33 minutes
- Yield: 24 mini pie bites 1x
- Category: Appetizer
- Cuisine: American
Ingredients
- 2 refrigerated pie crusts (room temperature)
- 1 cup shredded sharp cheddar cheese
- 4 oz cream cheese, softened
- 1/2 cup hot pepper jelly
- 1 egg, beaten (for egg wash)
- 2 tbsp fresh chives or green onions, chopped (optional, for garnish)
- Pinch salt
- Pinch black pepper
- Nonstick spray (for pan)
Instructions
- Take refrigerated pie crusts out and let sit for 10 minutes at room temperature. On a lightly floured surface, roll crusts to about 1/8 inch thickness. Cut out 24 circles using a 2.5-inch cutter or glass. Re-roll scraps if needed.
- In a bowl, mix together cheddar cheese, cream cheese, salt, and pepper until smooth and creamy. If stiff, add a teaspoon of milk.
- Spray mini muffin pan lightly with nonstick spray. Press one pie crust circle into each well, letting edges come up the sides. Add a heaping teaspoon of cheese filling to each crust. Top with 1/2 teaspoon hot pepper jelly per pie bite.
- Optionally, cut extra crust into shapes or strips for decoration. Brush each pie lightly with beaten egg. Sprinkle a pinch of shredded cheese on top for extra crispiness if desired.
- Preheat oven to 375°F (190°C). Bake for 16-18 minutes, until crust is golden and filling bubbles. Cool in pan for 5 minutes, then transfer to wire rack. Serve warm, garnished with chives or green onions.
Notes
Let pie crust warm up before rolling to prevent cracks. Use equal amounts of filling for each bite. For extra crunch, sprinkle panko or crushed crackers on top before baking. Serve warm for best texture. Can be made ahead and baked just before serving. Freeze baked bites and reheat in oven for best results.
Nutrition
- Serving Size: 1 mini pie bite
- Calories: 105
- Sugar: 2
- Sodium: 140
- Fat: 6
- Saturated Fat: 3
- Carbohydrates: 7
- Fiber: 0.5
- Protein: 3
Keywords: party appetizer, mini pies, hot pepper jelly, cheesy bites, easy snack, finger food, game night, holiday recipe