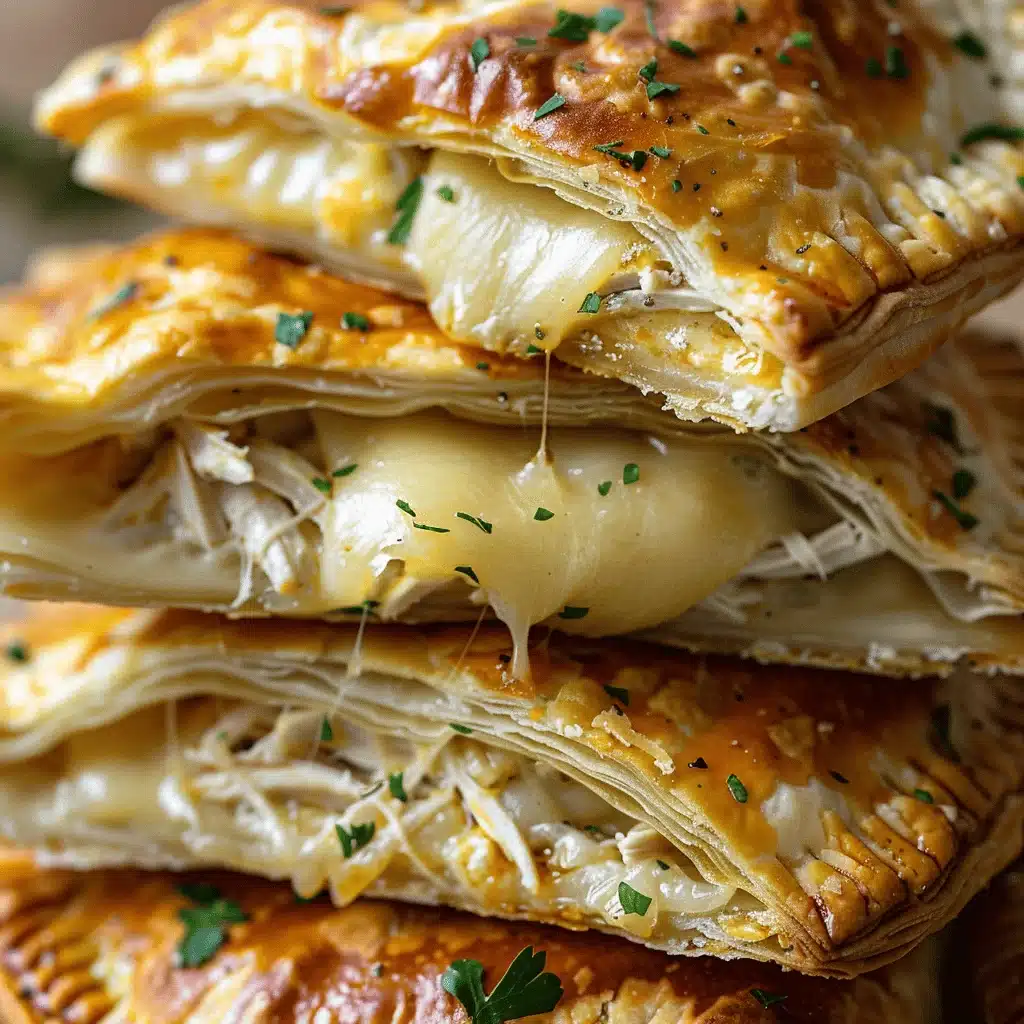
There’s just something magical about the smell of buttery pastry and melting cheese wafting through the kitchen. Honestly, when I pull a tray of these Cheesy Garlic Chicken Hand Pies out of the oven, everyone comes running—even the picky eaters. I first made these on a chilly Sunday when leftovers were running low and comfort food was calling my name. One bite, and I was hooked: flaky crust, juicy chicken, gooey cheese, and that punch of garlicky flavor that makes your taste buds do a happy dance.
These hand pies are not just another quick dinner; they’re a total crowd-pleaser with a golden, crispy exterior hiding a creamy, savory filling inside. I’ve baked them for weeknight dinners, packed them for picnics, and honestly, they’ve even saved me during those “what’s for lunch?” moments. They’re hearty enough for a main meal but portable enough to take on the go—a rare combo! I’ve tweaked this cheesy garlic chicken hand pie recipe over a dozen times, always chasing that perfect balance of flavor and texture. Now, it’s my go-to for busy nights and special occasions alike.
Whether you’re a busy parent, a meal-prep lover, or just someone who can’t resist melty cheese and flaky pastry, this recipe is for you. Plus, it’s easy to customize, so everyone can have their favorite version. Trust me, after you try these hand pies, you’ll want to make them again (and again). Let’s get baking!
Why You’ll Love This Cheesy Garlic Chicken Hand Pie Recipe
After years of recipe testing (and, let’s face it, a few kitchen disasters!), I can say with confidence: these cheesy garlic chicken hand pies are the kind of meal that makes you forget about takeout. Here’s why they’re a family favorite and why I think you’ll be obsessed too:
- Quick & Easy: Ready in under an hour, these hand pies are perfect for busy weeknights or spontaneous cravings. No need to fuss with complicated steps or long marinating times.
- Simple Ingredients: Most items are likely already in your fridge or pantry. Chicken (rotisserie or leftover works great!), cheese, garlic, and a sheet of puff pastry—no special grocery trips needed.
- Perfect for Any Occasion: They’re a hit at potlucks, brunches, game-day parties, or even as a cozy dinner. I’ve even served them at holiday gatherings to rave reviews.
- Crowd-Pleaser: Both kids and adults absolutely demolish these. You know you’ve struck gold when even the pickiest eaters ask for seconds!
- Unbelievably Delicious: The combo of golden, buttery pastry, gooey cheese, and garlicky chicken is pure comfort food—no bland bites here.
What sets this cheesy garlic chicken hand pie recipe apart? For starters, I blend roasted garlic right into the filling for a mellow, rich flavor that doesn’t overpower. A sprinkle of herbs adds depth, and using a mix of cheeses means every bite is extra gooey. The crust bakes up perfectly crisp—no soggy bottoms! Honestly, I’ve tried lots of hand pie recipes, and this is the one I always come back to. It’s reliable, customizable, and guaranteed to wow your family or guests. Whether you’re looking to impress or just need a comforting meal, these hand pies deliver every single time.
What Ingredients You Will Need
This cheesy garlic chicken hand pie recipe keeps things simple but big on flavor. Most ingredients are pantry staples, and there’s plenty of room for swaps if you’re missing something. Here’s what you’ll need for golden, gooey perfection:
- For the Filling:
- Cooked chicken breast or thigh, shredded (2 cups / about 300g) – Rotisserie chicken is a huge time-saver!
- Cream cheese, softened (4 oz / 115g) – Makes the filling creamy and rich.
- Shredded mozzarella cheese (1 cup / 115g) – For that signature cheese pull.
- Shredded cheddar cheese (1/2 cup / 60g) – Adds sharpness and body.
- Fresh garlic, minced (3 cloves) – Or roasted for a milder flavor.
- Fresh parsley, chopped (2 tbsp) – Adds color and a pop of freshness.
- Salt (1/2 tsp) & black pepper (1/4 tsp) – To taste.
- Italian seasoning (1 tsp) – Optional, but gives a nice herby lift.
- Heavy cream or milk (2 tbsp / 30ml) – Helps the filling stay moist.
- For the Crust:
- Puff pastry sheets, thawed (2 sheets / about 450g) – I love Pepperidge Farm, but any good-quality brand works.
- All-purpose flour (for dusting) – Just enough to keep things from sticking.
- For the Topping:
- Egg, beaten (1 large) – For that golden, shiny finish.
- Grated Parmesan cheese (2 tbsp) – Optional, but adds a savory crunch.
- More chopped parsley – For garnish (optional, but pretty!).
Ingredient Tips: If you’re out of mozzarella, Monterey Jack is a great swap (it melts beautifully). No cheddar? Try Colby or a mild Swiss. For a gluten-free version, look for GF puff pastry in specialty stores. Want it lighter? Use reduced-fat cheeses and cream cheese. And for a bit of heat, toss in a pinch of red pepper flakes!
Equipment Needed
- Baking Sheet: A standard rimmed baking sheet is perfect. Line with parchment for easy cleanup—trust me, it’s worth it.
- Mixing Bowls: One medium for the filling, one small for the egg wash. Stainless steel or glass both work well.
- Rolling Pin: To gently roll out the puff pastry. If you don’t have one, a wine bottle (cleaned, of course!) will do the trick.
- Sharp Knife or Pizza Cutter: For slicing pastry into even squares or rounds. I’ve used both, and a pizza cutter is speedier.
- Pastry Brush: For brushing on the egg wash. A silicone brush is easiest to clean, but a regular one is fine.
- Measuring Cups and Spoons: Essential for getting the ratios just right.
- Fork: For sealing the edges. A simple kitchen fork does the job, but if you have a crimper, that’s even better.
- Cooling Rack: Not essential, but helps keep the hand pies crisp once out of the oven.
If you’re just getting started, don’t stress over fancy tools. I’ve made these with just a knife, bowl, and sheet pan. And if your pastry brush goes missing (happens to me all the time), a wad of paper towel dipped in egg works in a pinch. Just be careful with sharp knives and keep your surfaces lightly floured to avoid sticking.
How to Make Cheesy Garlic Chicken Hand Pies

- Preheat and Prepare: Preheat your oven to 400°F (200°C). Line a baking sheet with parchment paper—this keeps things from sticking and makes for easy cleanup.
- Mix the Filling: In a medium bowl, combine 2 cups (300g) shredded cooked chicken, 4 oz (115g) cream cheese, 1 cup (115g) mozzarella, 1/2 cup (60g) cheddar, 3 minced garlic cloves, 2 tbsp chopped parsley, 1/2 tsp salt, 1/4 tsp pepper, 1 tsp Italian seasoning, and 2 tbsp (30ml) heavy cream. Stir well until creamy and evenly mixed. If the filling seems dry, add another splash of cream.
- Prepare the Puff Pastry: On a lightly floured surface, gently roll out 2 sheets (about 450g) of thawed puff pastry to smooth any creases. Cut each sheet into 4 equal squares (for 8 pies total) or use a large round cutter if you prefer a half-moon shape. Don’t worry if the edges aren’t perfect—they’ll puff up beautifully!
- Fill the Pies: Spoon about 2-3 tablespoons of chicken filling onto the center of each pastry square. Be careful not to overfill or the pies might burst open. Leave about 1/2 inch (1.25cm) border around the edges.
- Seal the Edges: Brush the pastry edges lightly with water. Fold each square over to form a triangle (or fold rounds into half-moons). Press the edges with a fork to seal. If the pastry feels sticky, dust with a bit more flour.
- Add the Finishing Touches: Place the hand pies on the prepared baking sheet, spaced a couple inches apart. Brush the tops with beaten egg for a shiny, golden finish. Sprinkle with 2 tbsp grated Parmesan and extra parsley if using. Use a sharp knife to cut a small steam vent in the top of each pie.
- Bake: Bake in the preheated oven for 20–25 minutes, or until golden brown and puffed. The tops should look shiny and the edges crisp. If some cheese oozes out, don’t panic—that’s the best part!
- Cool Slightly and Enjoy: Let the hand pies cool on the baking sheet for 5 minutes, then transfer to a rack. Serve warm for maximum gooeyness.
Preparation Notes: If your kitchen runs hot, chill the assembled pies in the fridge for 10 minutes before baking to help them hold their shape. If you spot any filling poking out, just pinch it back together—imperfections add character! And don’t skip the egg wash; it makes the crust extra golden and irresistible. If your pastry tears, patch with a leftover scrap and keep going. The smell alone will have everyone drooling!
Cooking Tips & Techniques
- Keep Pastry Cold: Warm puff pastry gets sticky and difficult to handle. If it softens too much, pop it back in the fridge for a few minutes.
- Don’t Overfill: Trust me, I’ve made the mistake of stuffing too much filling in—leads to leaks and less-than-pretty pies. Two to three tablespoons per pie is the sweet spot.
- Vent the Tops: Always cut a small slit or poke holes in the top so steam can escape. This keeps the crust flaky rather than soggy.
- Egg Wash for Shine: Don’t skip the egg wash—makes a huge difference for that bakery-worthy, golden look.
- Troubleshooting Leaks: If some cheese oozes out, it’s totally normal! If you want less mess, seal the edges tightly and avoid overfilling.
- Batch Baking: If you’re making a big batch, keep unbaked pies chilled while the first batch bakes. Hot pastry can get sticky fast.
I’ve learned (the hard way) that warm pastry tears easily, so patience pays off. Multitasking tip: Mix your filling while the oven preheats and the pastry thaws. If you’re short on time, using pre-cooked chicken is a game-changer. For extra flavor, sprinkle a bit of garlic salt on top before baking—my family loves that! Consistency is all about keeping things cold and not rushing the sealing step. The more you make, the easier it gets—promise!
Variations & Adaptations
- Spicy Kick: Add chopped jalapeños or a pinch of red pepper flakes to the filling for a spicy version. Pepper Jack cheese works well here too.
- Veggie-Packed: Swap half of the chicken for sautéed mushrooms, spinach, or roasted bell peppers. I’ve tried a chicken-and-broccoli combo, and it’s fantastic.
- Gluten-Free: Use gluten-free puff pastry (available in many specialty stores). Double-check your cheeses and seasonings for hidden gluten if needed.
- Dairy-Free: Substitute dairy-free cream cheese and cheese alternatives, and brush with olive oil instead of egg wash.
- Different Cooking Methods: Air fryer fans—yes, you can! Bake at 375°F (190°C) for 12–15 minutes, checking for golden color.
- Personal Touch: Sometimes I add a spoonful of caramelized onions or sun-dried tomatoes for extra depth. Each version has its own charm!
Feel free to experiment! If someone in your house can’t do garlic, use roasted shallots for a milder flavor. For a kid-friendly twist, try mini pies with just chicken and cheese—no “green stuff.” The recipe is forgiving, and you’ll find your favorite combo in no time.
Serving & Storage Suggestions
These cheesy garlic chicken hand pies are best served warm, straight from the oven when the cheese is still gooey. I love piling them onto a rustic board, sprinkled with fresh parsley, and pairing them with a crisp side salad or a bowl of tomato soup. They also go great with a sparkling lemonade, iced tea, or even a glass of chilled white wine for the adults.
Leftover hand pies keep well in the refrigerator for up to 3 days. Store in an airtight container, separating layers with parchment paper. To reheat, pop them in a 350°F (175°C) oven for 8–10 minutes, or until hot and crispy. They freeze beautifully too—just wrap cooled pies in foil and freeze for up to 2 months. Reheat straight from frozen at 350°F (175°C) for about 20 minutes.
Flavors deepen as the pies sit, so don’t be surprised if leftovers taste even better the next day. Avoid microwaving if possible; the crust can get soggy. But if you must, a few minutes in the toaster oven works wonders!
Nutritional Information & Benefits
Each hand pie (based on 8 per recipe) is estimated to contain around 320 calories, 15g protein, 20g fat, and 22g carbohydrates. The protein-rich chicken and cheese make these both filling and satisfying, while the puff pastry keeps things indulgent. You’ll get a boost of calcium and vitamin A from the cheeses, and garlic offers some immune-supporting properties.
This recipe can be adapted to fit gluten-free or lower-carb diets with a few swaps. For those watching sodium, use reduced-salt cheeses and seasonings. Allergens include dairy, gluten, and eggs—always double-check each ingredient if cooking for someone with allergies. Personally, I love how these hand pies fit into a balanced meal plan when paired with veggies or a side salad. They’re proof that comfort food can be both delicious and nourishing!
Conclusion
So there you have it—my go-to cheesy garlic chicken hand pie recipe! It’s the kind of meal that brings everyone to the table, sparks joy (and maybe a little competition for the last one), and makes dinner feel special even on a regular night. Whether you stick to the classic or try your own twist, these hand pies are sure to become a staple in your kitchen too.
I genuinely hope you give this recipe a try and make it your own. Don’t forget—kitchen adventures are all about having fun and making memories. If you whip up a batch, I’d love to hear how they turned out! Leave a comment, share your favorite variation, or tag me to show off your golden, gooey creations. Here’s to more delicious nights and happy, cheesy hands!
FAQs About Cheesy Garlic Chicken Hand Pies
Can I make cheesy garlic chicken hand pies ahead of time?
Absolutely! Assemble the hand pies and store them in the fridge (unbaked) for up to 24 hours. Bake them fresh when ready to serve for the best texture.
What can I use instead of puff pastry?
Pie dough, crescent roll dough, or even biscuit dough can work in a pinch. Puff pastry gives the flakiest result, but feel free to use what you have.
How do I keep the hand pies from getting soggy?
Make sure the filling isn’t too wet, and always cut a vent in the top for steam to escape. Baking on parchment also helps keep the bottoms crisp.
Can I freeze these hand pies?
Yes! Let baked hand pies cool completely, wrap tightly, and freeze for up to 2 months. Reheat in the oven for best results—no thawing needed.
What are good dipping sauces for these hand pies?
Marinara, ranch, or a garlic aioli are all fantastic. My kids love dunking them in honey mustard too—get creative with your favorites!
PrintCheesy Garlic Chicken Hand Pie

These golden, flaky hand pies are filled with creamy, garlicky chicken and gooey cheese, making them a comforting, crowd-pleasing dinner or snack. Easy to make and perfect for busy nights, picnics, or special occasions.
- Prep Time: 20 minutes
- Cook Time: 25 minutes
- Total Time: 45 minutes
- Yield: 8 hand pies 1x
- Category: Main Course
- Cuisine: American
Ingredients
- 2 cups cooked chicken breast or thigh, shredded (about 10 oz)
- 4 oz cream cheese, softened
- 1 cup shredded mozzarella cheese
- 1/2 cup shredded cheddar cheese
- 3 cloves fresh garlic, minced (or roasted for milder flavor)
- 2 tablespoons fresh parsley, chopped
- 1/2 teaspoon salt
- 1/4 teaspoon black pepper
- 1 teaspoon Italian seasoning (optional)
- 2 tablespoons heavy cream or milk
- 2 sheets puff pastry, thawed (about 16 oz total)
- All-purpose flour, for dusting
- 1 large egg, beaten
- 2 tablespoons grated Parmesan cheese (optional)
- More chopped parsley, for garnish (optional)
Instructions
- Preheat oven to 400°F (200°C). Line a baking sheet with parchment paper.
- In a medium bowl, mix shredded chicken, cream cheese, mozzarella, cheddar, garlic, parsley, salt, pepper, Italian seasoning, and heavy cream until creamy and evenly combined.
- On a lightly floured surface, gently roll out puff pastry sheets to smooth creases. Cut each sheet into 4 equal squares (for 8 pies total) or use a large round cutter for half-moon shapes.
- Spoon 2-3 tablespoons of chicken filling onto the center of each pastry square, leaving a 1/2-inch border.
- Brush pastry edges lightly with water. Fold each square over to form a triangle (or rounds into half-moons) and press edges with a fork to seal.
- Place hand pies on prepared baking sheet, spaced apart. Brush tops with beaten egg, sprinkle with Parmesan and extra parsley if desired. Cut a small steam vent in the top of each pie.
- Bake for 20–25 minutes, until golden brown and puffed.
- Let cool on the baking sheet for 5 minutes, then transfer to a rack. Serve warm.
Notes
Keep puff pastry cold for easier handling. Don’t overfill pies to prevent leaks. Always vent tops for steam to escape. Egg wash gives a golden, shiny finish. For gluten-free, use GF puff pastry. Hand pies freeze well; reheat in oven for best texture.
Nutrition
- Serving Size: 1 hand pie
- Calories: 320
- Sugar: 2
- Sodium: 480
- Fat: 20
- Saturated Fat: 10
- Carbohydrates: 22
- Fiber: 1
- Protein: 15
Keywords: cheesy chicken hand pie, garlic chicken hand pie, puff pastry hand pie, easy dinner, comfort food, kid friendly, portable meal, savory pie, chicken recipe, party food