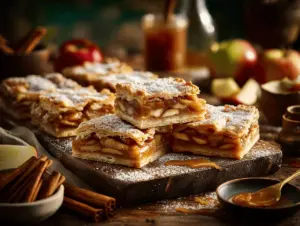
Warm cinnamon, bubbling apples, and buttery crumble—if you’re not already picturing a cozy kitchen, then you haven’t tried these apple pie bars yet. The first time I baked them, the whole house smelled like my grandma’s kitchen in October. You know the feeling: crisp leaves outside, a mug of cider, and the promise of homemade treats cooling on the counter. These apple pie bars check all the boxes for an easy fall dessert. Honestly, they’ve become my go-to recipe for potlucks, family gatherings, and those random Tuesday nights when I just need something sweet. If you love the flavor of classic apple pie but hate fussing with a rolling pin, this recipe is about to become your new favorite.
Apple pie bars are everything you want in an autumn dessert—comforting, just a little rustic, and (let’s face it) way less work than a traditional pie. I started making these bars a few years ago when I was short on time but craving that old-fashioned flavor. After a few tweaks—less sugar here, a pinch more cinnamon there—I landed on a version that’s always a hit. Whether you’re an experienced baker or a total newbie, you’ll appreciate how simple these are. Plus, you can serve a crowd without breaking a sweat. With a thick layer of juicy apples nestled between buttery crust and streusel topping, every bite is pure fall comfort. As someone who’s tested this apple pie bars recipe more times than I can count (and eaten plenty straight from the pan!), I can honestly say it’s one of the easiest ways to wow your family and friends this season.
Why You’ll Love This Apple Pie Bars Recipe
Let me tell you, these apple pie bars are more than just a shortcut to classic apple pie—they’re a total game-changer for fall desserts. I’ve baked them for bake sales, book clubs, and even a couple of neighborly porch drop-offs. Every single time, folks are asking for the recipe before they’ve even finished their slice!
- Quick & Easy: No pie crust drama—just press, layer, and bake. You’ll have a pan of fragrant bars cooling in about an hour, making these perfect for busy weeknights or last-minute gatherings.
- Simple Ingredients: Everything you need is probably already in your pantry: apples, flour, sugar, butter, and cinnamon. No fancy stuff required.
- Perfect for a Crowd: This recipe makes a big batch—enough for a party, family get-together, or even a Friendsgiving potluck.
- Family Favorite: Kids love these bars (especially with a scoop of vanilla ice cream), and adults can’t resist the nostalgic flavor.
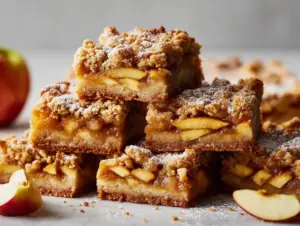
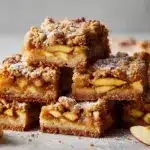
- All the Apple Pie Flavor—None of the Fuss: The buttery shortbread base, juicy cinnamon apples, and crumbly streusel topping hit all the right notes. It’s apple pie made easy!
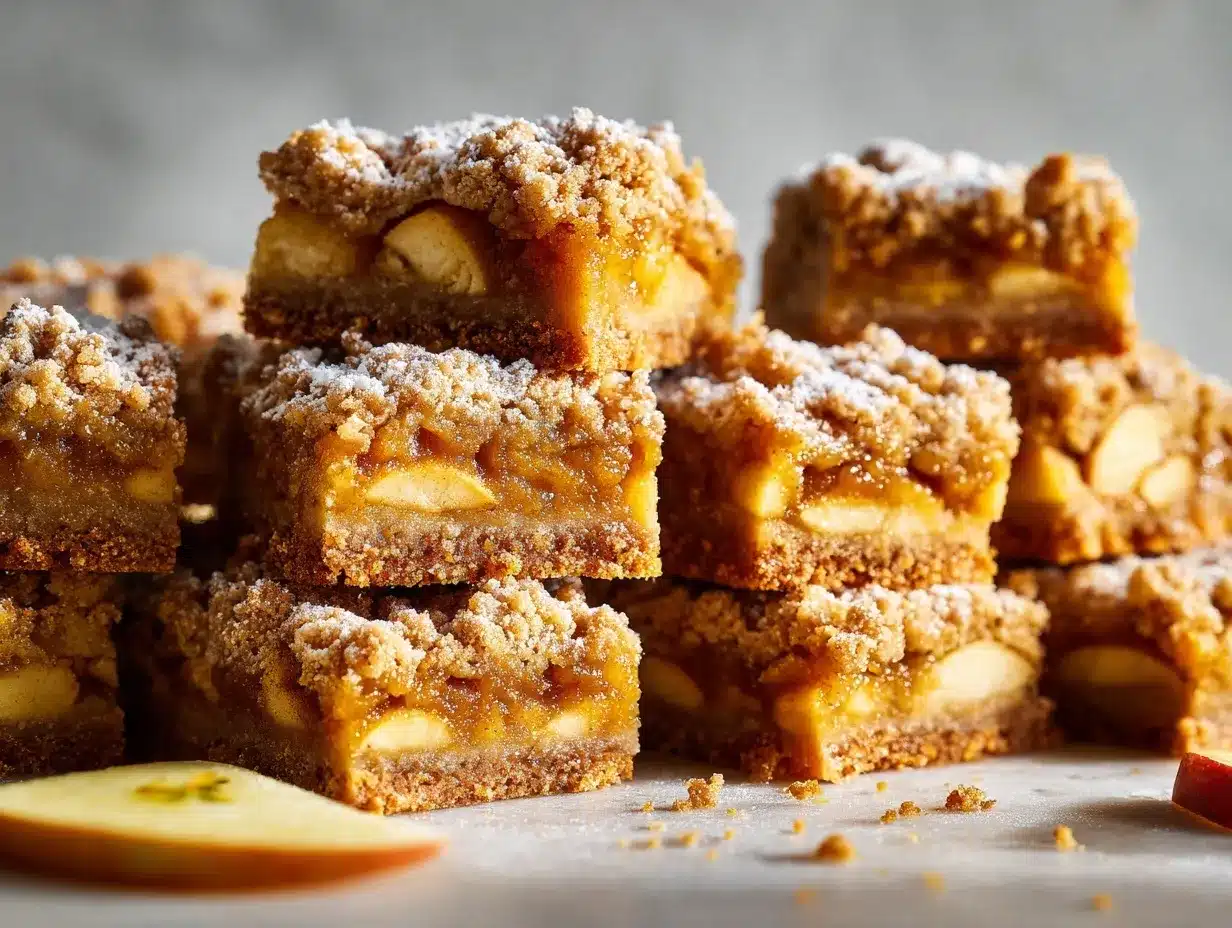
What truly sets this recipe apart? For me, it’s the texture—crispy edges, gooey apple filling, and a golden crumbly topping. I blend some oats into the streusel for extra crunch, and I always use a mix of tart and sweet apples to keep the flavor balanced. You’ll notice there’s no need to peel every single apple perfectly (a little rustic charm never hurt anyone). And unlike traditional pie, you don’t have to wait ages for pretty slices—just cut and serve. If you’re looking for a fall dessert that’s low-stress but high-impact, these apple pie bars are it. Trust me, after you take the first bite, you’ll understand why this recipe has a permanent spot in my fall baking rotation.
What Ingredients You Will Need
This apple pie bars recipe calls for straightforward ingredients—nothing you can’t find at your local grocery store, and maybe even in your kitchen right now. I love that you can tweak things based on what you have, and I’ll share a few of my favorite swaps below.
- For the Crust & Streusel:
- All-purpose flour (unbleached if you have it, but any kind works)
- Old-fashioned rolled oats (for a little chew and flavor in the topping)
- Granulated sugar (for sweetness and structure)
- Light brown sugar (adds warmth and caramel notes)
- Salt (just a pinch for balance)
- Unsalted butter, melted (I suggest European-style for extra richness, but any unsalted butter works)
- Ground cinnamon (freshly opened is best for big flavor)
- Vanilla extract (real deal if you can swing it—it makes a difference!)
- For the Apple Filling:
- Apples, peeled and diced (about 4-5 medium; I like a mix of Granny Smith and Honeycrisp for tart-sweet balance)
- Granulated sugar (to boost the apples’ natural sweetness)
- Ground cinnamon (because, obviously—fall!)
- All-purpose flour or cornstarch (just a little, to thicken those lovely juices)
- Lemon juice (keeps apples from browning and adds brightness)
- Optional Add-ins:
- Chopped walnuts or pecans (for crunch—totally optional)
- Pinch of nutmeg or ginger (if you want to amp up the spice)
- Powdered sugar (for dusting over the top once bars are cool)
If you need to swap flour for a gluten-free blend, go for it—I’ve done it with good results using Bob’s Red Mill 1-to-1. Don’t have fresh apples? Frozen diced apples work in a pinch (just thaw and drain first). And for dairy-free folks, use vegan butter instead of regular—your bars will still turn out golden and delicious. You can also use coconut sugar instead of brown sugar for a little twist.
Equipment Needed
You don’t need a fancy kitchen to make these apple pie bars. Here’s what I use every time, plus some workarounds if you’re short on gadgets.
- 9×13-inch baking pan (a metal pan gives crisp edges, but glass works too—just watch the bake time)
- Mixing bowls (one large for the crust/streusel, one medium for the apples)
- Measuring cups and spoons (go for sturdy sets—plastic or metal are both fine)
- Whisk and wooden spoon (a fork works in a pinch for mixing the crumble)
- Cutting board and sharp knife (for prepping apples—if you have an apple corer, even better)
- Spatula (for spreading and serving—bonus points if it’s offset for smoothing the layers)
- Parchment paper (makes for easy bar removal, but you can grease the pan if needed)
Honestly, I’ve used everything from my grandma’s ancient glass dish to a cheap aluminum pan from the dollar store. Just keep an eye on baking time if your pan is dark or thin—bars may brown a little faster. If you’re short on mixing bowls, just rinse between steps. And parchment paper is worth the extra step; it makes serving (and cleanup) so much easier. If you’re using a glass pan, I recommend lowering the oven temperature by 25°F (about 15°C) to prevent over-browning.
How to Make Irresistible Apple Pie Bars
- Prep the Pan & Oven: Preheat your oven to 350°F (175°C). Line a 9×13-inch (23x33cm) baking pan with parchment paper, leaving an overhang for easy lifting. Lightly grease the paper for extra insurance.
- Make the Crust & Streusel: In a large mixing bowl, combine 2 1/2 cups (315g) all-purpose flour, 1 cup (90g) old-fashioned oats, 1/2 cup (100g) granulated sugar, 1/2 cup (110g) light brown sugar, and 1/2 teaspoon salt. Stir in 1 teaspoon ground cinnamon. Pour in 1 cup (225g) melted unsalted butter and 1 1/2 teaspoons vanilla extract. Mix until the dough is crumbly but holds together when pressed. Set aside 1 1/2 cups of this mixture for the topping.
- Press the Crust: Take the remaining dough and press it firmly into the bottom of your prepared pan. Use the bottom of a measuring cup or your hands to pack it down evenly. Bake for 12-14 minutes or until lightly golden and set. Remove and let cool slightly (the crust will firm up as it cools).
- Prepare the Apple Filling: While the crust bakes, peel, core, and dice 4-5 medium apples (about 4 cups/500g). In a medium bowl, toss apples with 1/3 cup (65g) granulated sugar, 2 tablespoons (16g) all-purpose flour or 1 tablespoon (8g) cornstarch, 1 teaspoon ground cinnamon, and 1 tablespoon lemon juice. Stir until apples are evenly coated.
- Assemble the Bars: Spread the apple filling evenly over the slightly cooled crust. Sprinkle the reserved crumb mixture over the apples, covering as much as possible. If using, add a handful of chopped walnuts or pecans for crunch.
- Bake: Return the pan to the oven and bake for 35-40 minutes (glass pans may take longer), or until the topping is golden brown and apples are bubbly around the edges. If bars brown too quickly, tent loosely with foil for the last 10 minutes.
- Cool & Slice: Let bars cool completely in the pan—this part is tough, but it helps them set up. For quickest results, pop the pan in the fridge for 1 hour before slicing. Use the parchment overhang to lift bars out and transfer to a cutting board. Slice into 16-20 bars (or smaller, if serving a crowd).
Prep note: If your apples are extra juicy, sprinkle an extra teaspoon of flour over them before layering. For an extra treat, dust cooled bars with powdered sugar or drizzle with a quick vanilla glaze. Bars keep their shape best once fully cooled (but I won’t judge if you sneak a warm piece!).
Cooking Tips & Techniques for Perfect Apple Pie Bars
After many rounds of testing (and a few kitchen mishaps), I’ve picked up some tricks to keep your apple pie bars foolproof and fabulous every time.
- Choose the Right Apples: Mixing tart and sweet apples (like Granny Smith with Fuji or Honeycrisp) keeps the flavor balanced and prevents bars from being too mushy or too sharp.
- Don’t Overwork the Crust: When mixing your crust, stop as soon as the dough forms crumbles—overmixing can make the base tough instead of tender.
- Keep an Eye on Baking Time: Every oven is a little different. Start checking at the 35-minute mark. If the streusel is browning too fast, loosely cover with foil.
- Let Bars Cool Fully: This is the hardest part, but cutting too soon makes them fall apart. Chilling in the fridge speeds things up and gives cleaner edges.
- Layer Evenly: When spreading the apple mixture, try to distribute it in an even layer—this helps every bar get the right crust-to-apple-to-streusel ratio.
- Troubleshooting: If your bars turn out soggy, your apples may have been extra juicy—add a little more flour or cornstarch next time. If the crust seems dry, try adding an extra tablespoon of butter.
- Personal Experience: Once, I forgot to line the pan—never again! Parchment makes removing and slicing the bars so much easier.
Honestly, it’s a forgiving recipe. A little messiness only adds to the homemade charm. And if you’re baking for a big group, doubling the recipe is no problem—just use a rimmed sheet pan and keep an eye on the bake time.
Variations & Adaptations
One of the reasons I love this apple pie bars recipe is how flexible it is. Here are a few ways you can switch things up to suit your tastes, dietary needs, or even what’s in your pantry:
- Gluten-Free Apple Pie Bars: Substitute all-purpose flour with a 1-to-1 gluten-free baking blend. I’ve had good luck with Bob’s Red Mill—just be sure your oats are certified gluten-free too.
- Dairy-Free Version: Swap in vegan butter or coconut oil for the crust and streusel. The flavor changes slightly but still totally delicious.
- Apple-Pear Bars: Replace half the apples with diced ripe pears for a fun twist. The pears add lovely floral notes and extra juiciness.
- Streusel Boost: Add a handful of chopped nuts (walnuts, pecans, or almonds) or a sprinkle of shredded coconut to the topping for extra crunch and flavor.
- Spice It Up: Stir in a pinch of ground ginger, cardamom, or nutmeg for a more complex, bakery-style spice profile.
- Alternative Sweeteners: Use coconut sugar or maple sugar instead of brown sugar for a deeper, caramel-like sweetness.
- Personal Favorite: Once, I added a handful of dried cranberries to the apple layer—absolutely loved the pop of tartness!
If you’re avoiding nuts for allergies, just skip them—the bars are still plenty flavorful. And don’t be afraid to adjust sugar to taste, especially if your apples are super sweet or tart this season.
Serving & Storage Suggestions
These apple pie bars are at their best served just slightly warm or at room temperature. I love plating them with a scoop of vanilla ice cream or a dollop of whipped cream—totally classic. For a cozy brunch, try pairing with hot coffee or spiced chai. If you’re feeling extra, a drizzle of caramel sauce over the top is never a bad idea!
To store, keep bars in an airtight container at room temperature for up to 2 days. For longer storage, refrigerate for up to 5 days—they’re still soft and tasty chilled, or you can bring them back to room temp before serving. You can also freeze individual bars: wrap tightly in plastic, then foil, and freeze for up to 2 months. Thaw overnight in the fridge or warm gently in a low oven (about 300°F/150°C) for a few minutes to bring back that fresh-baked texture.
And honestly? The flavors get even better after a day or two as the apples and spices mingle, so these bars are perfect for making ahead before a big gathering. Just save a couple for yourself—they go fast!
Nutritional Information & Benefits
Here’s a quick look at what you’re enjoying with every apple pie bar. Each bar (out of 20) is around 180-210 calories, with about 4g fat, 35g carbs, and 2g protein. (This can vary based on your exact ingredients and serving size.)
Apples bring fiber, vitamin C, and natural sweetness—plus that classic “an apple a day” feeling. Oats in the crust add a bit of whole grain goodness and help keep you feeling satisfied. These bars are nut-free as written (unless you add nuts), and they can easily be made gluten-free or dairy-free as needed. Just note, the recipe does contain potential allergens like wheat (flour) and dairy (butter), so be sure to check your options if you’re baking for folks with sensitivities.
From a wellness angle, I love that you can tweak the sugar or swap in whole-wheat flour for a bit more nutrition. And there’s definitely something to be said for the emotional boost of a good homemade treat in the fall!
Conclusion
If you’re searching for a fall dessert that’s as easy as it is crowd-pleasing, this apple pie bars recipe is your answer. You get all the coziness of classic apple pie—without the fuss of rolling dough or worrying about soggy bottoms. Whether you’re baking for a family dinner, a potluck, or just craving a little autumn comfort, these bars will deliver every time.
Feel free to make the recipe your own—swap in pears, add a handful of nuts, use gluten-free flour, or dial up the spices. That’s the beauty of apple pie bars: they’re unfussy, forgiving, and always delicious. Honestly, I bake them because they remind me of home, and because they never fail to bring a smile to anyone who tries them.
So, what are you waiting for? Give these apple pie bars a try, then let me know how you served them, what tweaks you made, or if you have a new favorite fall dessert! Leave a comment, share with your friends, or tag your bake on Pinterest—I’d love to see your creations. Happy baking, friends!
Frequently Asked Questions
Can I make apple pie bars ahead of time?
Absolutely! In fact, I think they taste even better the next day as the flavors meld. Just store covered at room temperature or in the fridge until you’re ready to serve.
What are the best apples for apple pie bars?
I recommend a mix of tart and sweet apples, like Granny Smith with Honeycrisp or Fuji. This gives the bars great flavor and texture that isn’t too mushy or too sour.
Can I freeze apple pie bars?
Yes! Once cooled and sliced, wrap bars individually and freeze for up to 2 months. Thaw overnight in the fridge or briefly warm in the oven before serving.
How do I make these gluten-free?
Use a 1-to-1 gluten-free flour blend in place of all-purpose flour, and make sure your oats are certified gluten-free. The bars turn out just as tasty!
What should I do if my apple pie bars are too soft or soggy?
This usually means the apples were extra juicy. Next time, add a bit more flour or cornstarch to the filling, and be sure to let the bars cool completely before slicing for the cleanest cuts.
PrintApple Pie Bars Recipe Easy Fall Dessert Bars for a Crowd
These apple pie bars combine a buttery shortbread crust, juicy cinnamon apples, and a crumbly oat streusel topping for an easy, crowd-pleasing fall dessert. All the classic apple pie flavor—none of the fuss!
- Prep Time: 20 minutes
- Cook Time: 50 minutes
- Total Time: 1 hour 10 minutes
- Yield: 16-20 bars 1x
- Category: Dessert
- Cuisine: American
Ingredients
- 2 1/2 cups all-purpose flour
- 1 cup old-fashioned rolled oats
- 1/2 cup granulated sugar
- 1/2 cup light brown sugar
- 1/2 teaspoon salt
- 1 teaspoon ground cinnamon
- 1 cup unsalted butter, melted
- 1 1/2 teaspoons vanilla extract
- 4–5 medium apples (about 4 cups), peeled and diced (mix of Granny Smith and Honeycrisp recommended)
- 1/3 cup granulated sugar
- 2 tablespoons all-purpose flour or 1 tablespoon cornstarch
- 1 teaspoon ground cinnamon
- 1 tablespoon lemon juice
- Optional: 1/2 cup chopped walnuts or pecans
- Optional: Pinch of nutmeg or ginger
- Optional: Powdered sugar for dusting
Instructions
- Preheat oven to 350°F (175°C). Line a 9×13-inch baking pan with parchment paper, leaving an overhang. Lightly grease the paper.
- In a large mixing bowl, combine flour, oats, granulated sugar, brown sugar, salt, and cinnamon. Stir to combine.
- Pour in melted butter and vanilla extract. Mix until crumbly but holds together when pressed. Reserve 1 1/2 cups of this mixture for the topping.
- Press the remaining dough firmly into the bottom of the prepared pan. Bake for 12-14 minutes until lightly golden. Let cool slightly.
- While the crust bakes, peel, core, and dice apples. In a medium bowl, toss apples with granulated sugar, flour or cornstarch, cinnamon, and lemon juice until evenly coated.
- Spread apple filling evenly over the slightly cooled crust.
- Sprinkle reserved crumb mixture over the apples. Add nuts if using.
- Bake for 35-40 minutes, or until topping is golden brown and apples are bubbly. Tent with foil if browning too quickly.
- Cool bars completely in the pan. For cleanest slices, chill in the fridge for 1 hour.
- Use parchment overhang to lift bars out. Slice into 16-20 bars. Dust with powdered sugar if desired.
Notes
Mix tart and sweet apples for best flavor. Let bars cool fully before slicing for clean edges. For gluten-free, use a 1-to-1 gluten-free flour blend and certified gluten-free oats. For dairy-free, substitute vegan butter. Bars can be made ahead and freeze well. If apples are very juicy, add extra flour or cornstarch to filling.
Nutrition
- Serving Size: 1 bar (1/20th of recipe)
- Calories: 200
- Sugar: 18
- Sodium: 60
- Fat: 4
- Saturated Fat: 2.5
- Carbohydrates: 35
- Fiber: 2
- Protein: 2
Keywords: apple pie bars, fall dessert, easy apple dessert, crowd dessert, apple bars, potluck dessert, apple recipes, autumn baking, streusel bars, apple pie, make ahead dessert