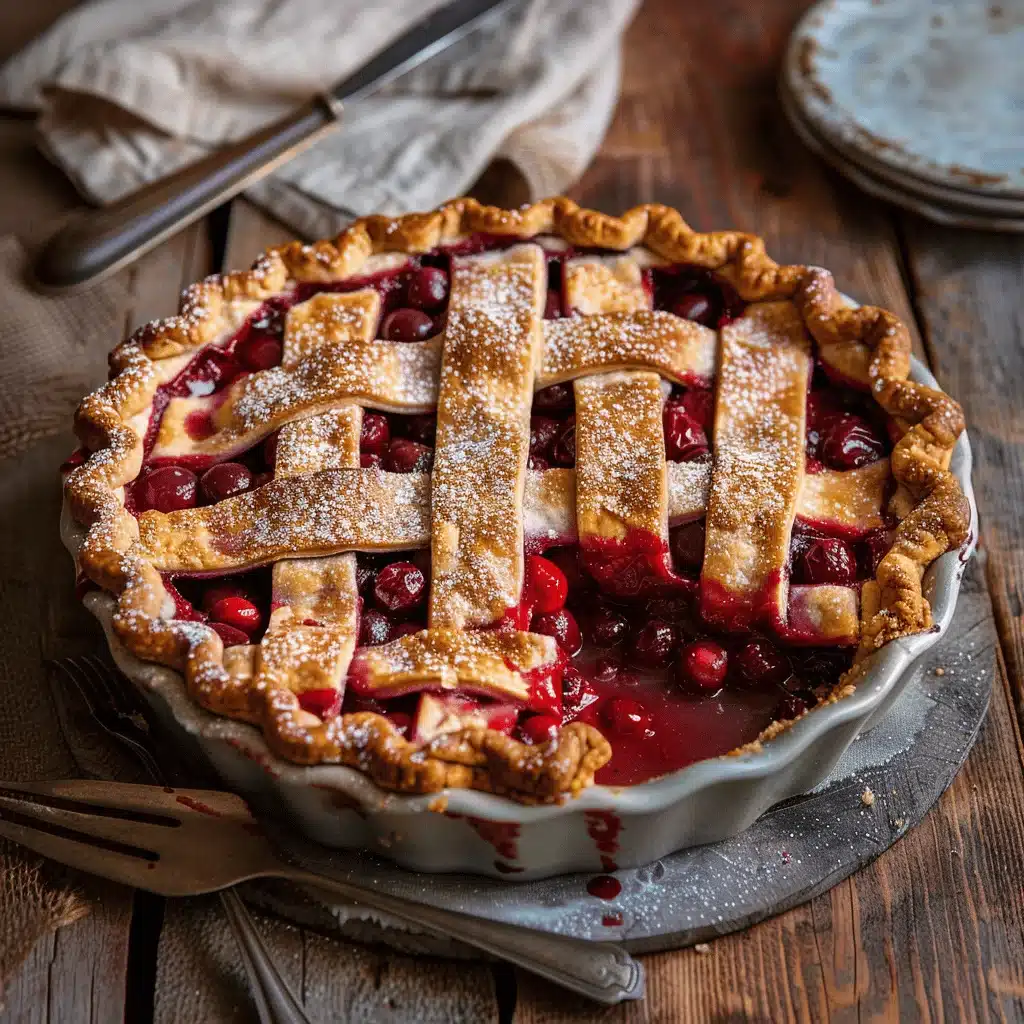
The smell of buttery, golden crust paired with the rich aroma of bubbling cherries fills your kitchen—it’s the kind of comfort dessert that makes you stop and savor the moment. This Ultimate Deep Dish Cherry Pie is the perfect combination of gooey fruit filling and flaky, buttery crust, and it’s guaranteed to become your go-to pie recipe. Whether you’re prepping for a holiday dinner or just craving something indulgent to pair with a scoop of vanilla ice cream, this recipe has your back.
I first fell in love with deep dish pies during a summer trip to Michigan, where the cherries were so fresh they practically begged to be baked into a pie. Over the years, I’ve refined this recipe to get the perfect balance of tart and sweet, with a filling that’s luscious but not overly runny. Trust me, this pie is worth the effort—and it’s easier than you think to pull off like a pro!
Why You’ll Love This Recipe
- Perfectly Gooey Filling: The cherry filling is thick yet juicy, with the ideal sweetness and a slight tang.
- Flaky, Buttery Crust: The homemade crust is golden and crisp, with just the right amount of richness to complement the cherries.
- Great for Any Occasion: Whether it’s a holiday dessert or a casual Sunday treat, this pie always steals the show.
- Simple Ingredients: You don’t need anything fancy—just cherries, flour, sugar, butter, and a few pantry staples.
- Comfort Food at Its Best: It’s the kind of dessert that feels like a hug in food form.
What sets this cherry pie apart? The deep dish format allows for a generous amount of filling, which stays perfectly gooey without overpowering the crust. Plus, the crust recipe has been tested to ensure it’s flaky yet sturdy enough to hold up to all that delicious cherry goodness. Once you taste it, you’ll understand why this pie is such a showstopper.
What Ingredients You Will Need
This recipe uses simple, wholesome ingredients to deliver a bold flavor and satisfying texture without any fuss. Here’s what you’ll need:
For the Crust:
- 2 ½ cups (315g) all-purpose flour
- 1 tsp salt
- 1 tbsp sugar
- 1 cup (230g) unsalted butter, cold and cubed
- 6-8 tbsp ice water
For the Filling:

- 6 cups fresh or frozen cherries (pitted)
- 1 cup (200g) granulated sugar
- ¼ cup (30g) cornstarch
- 1 tsp almond extract (optional, but adds amazing flavor!)
- 1 tbsp lemon juice
- 1 tbsp unsalted butter
For Assembly:
- 1 large egg, beaten (for egg wash)
- 1 tbsp coarse sugar (for sprinkling)
If you’re out of fresh cherries, frozen ones work beautifully—just thaw and drain them before using. For a gluten-free option, substitute the all-purpose flour with a trusted 1:1 gluten-free flour blend.
Equipment Needed
Here’s a list of kitchen tools you’ll need for this recipe:
- Deep dish pie pan (9-inch diameter)
- Rolling pin
- Mixing bowls
- Pastry cutter or food processor for the crust
- Cherry pitter (optional, but a lifesaver if using fresh cherries!)
- Basting brush for egg wash
If you don’t have a cherry pitter, a simple straw works as a DIY tool to remove pits. As for the pie pan, you can use a ceramic or glass dish—both distribute heat evenly for a beautifully baked crust.
Preparation Method
- Make the crust: In a large mixing bowl, whisk together the flour, salt, and sugar. Add the cold butter cubes and use a pastry cutter (or pulse in a food processor) until the mixture forms pea-sized crumbs. Gradually add ice water, one tablespoon at a time, until the dough comes together. Divide the dough into two discs, wrap them in plastic, and refrigerate for at least 30 minutes.
- Prepare the filling: Combine cherries, sugar, cornstarch, almond extract, and lemon juice in a large bowl. Stir well and let sit for 10 minutes to allow the flavors to meld.
- Roll out the crust: Roll out one disc of dough on a floured surface to about 12 inches in diameter. Carefully transfer it to your pie pan, pressing gently to fit the edges without stretching the dough.
- Add the filling: Pour the cherry mixture into the crust, spreading it evenly. Dot with small pieces of butter.
- Top with crust: Roll out the second disc of dough and place it over the filling. Trim excess dough and pinch the edges to seal. Cut small slits or designs into the top crust for venting.
- Brush and sprinkle: Brush the top crust with beaten egg and sprinkle with coarse sugar for a golden, sparkly finish.
- Bake: Preheat your oven to 375°F (190°C). Bake the pie for 45-50 minutes, or until the crust is golden brown and the filling is bubbly. If the edges brown too quickly, cover them with foil or a pie shield.
- Cool: Let the pie cool for at least 2 hours before slicing to allow the filling to set.
Your kitchen will smell like absolute heaven while this bakes—trust me on that!
Cooking Tips & Techniques
- Keep your butter cold: Cold butter is key to achieving a flaky pie crust. If your kitchen is warm, chill your mixing bowl and utensils beforehand.
- Don’t overwork the dough: Overmixing can lead to a tough crust, so stop as soon as the dough comes together.
- Balance the sweetness: Taste your cherries beforehand—if they’re particularly tart, you may want to add an extra tablespoon of sugar.
- Vent the top crust: Proper venting prevents steam buildup and ensures an evenly baked filling.
- Let it cool: Resist the urge to slice too soon! Cooling allows the filling to thicken and gives you those perfect pie slices.
These tips will help you nail the texture and flavor every single time.
Variations & Adaptations
- Gluten-Free Option: Use a 1:1 gluten-free flour blend for the crust.
- Berry Blend: Swap half the cherries for blueberries or raspberries for a mixed berry pie.
- Crumble Topping: Skip the top crust and add a streusel topping made with oats, brown sugar, and butter.
- Vegan Adaptation: Use plant-based butter and a flaxseed egg substitute for the crust.
- Mini Pies: Divide the crust and filling into smaller portions to make individual pies in ramekins or muffin tins.
Personally, I love the berry blend version for summer gatherings—it’s a burst of seasonal flavor!
Serving & Storage Suggestions
This pie is best served slightly warm with a scoop of vanilla ice cream or whipped cream. If you’re feeling extra fancy, drizzle a little chocolate sauce on top for a decadent twist.
To store leftovers, cover the pie tightly with plastic wrap or foil and keep it in the refrigerator for up to 4 days. You can also freeze the fully baked pie for up to 3 months—just wrap it well and thaw in the fridge before reheating in a 350°F (175°C) oven for about 15 minutes.
The flavors actually deepen after a day, making it even more delicious!
Nutritional Information & Benefits
Here’s a quick nutritional breakdown for one slice (based on 8 servings):
- Calories: 350
- Fat: 15g
- Carbohydrates: 50g
- Protein: 4g
Cherries are packed with antioxidants and vitamins, making this dessert not only indulgent but also a source of nutrients. Keep in mind the pie contains butter and sugar, so enjoy it as a treat in moderation!
Conclusion
The Ultimate Deep Dish Cherry Pie is everything you want in a dessert—gooey, flaky, and absolutely irresistible. It’s a recipe that feels like a celebration of comfort and flavor, perfect for sharing with loved ones or savoring solo.
If you try this recipe, I’d love to hear how it turned out! Share your photos, leave a comment, or tell me about your own twist on this pie. Let’s make baking a joyful adventure together.
Now go preheat your oven, grab those cherries, and get ready to bake the pie of your dreams!
FAQs
Can I use canned cherries instead of fresh?
Yes, canned cherries can work! Just drain them well and reduce the sugar slightly since canned cherries are often sweetened.
How do I prevent my crust from getting soggy?
Brush the bottom crust with a thin layer of egg white before adding the filling—it creates a barrier to keep it crisp.
What’s the best way to pit cherries?
If you don’t have a cherry pitter, use a straw or chopstick to push the pits out—it’s a quick and easy hack.
Can I make this pie ahead of time?
Absolutely! Bake the pie a day in advance and store it in the fridge. Let it come to room temperature or warm it slightly before serving.
What’s the secret to a flaky crust?
Cold ingredients are key! Use chilled butter, water, and even chill your flour if your kitchen is warm.