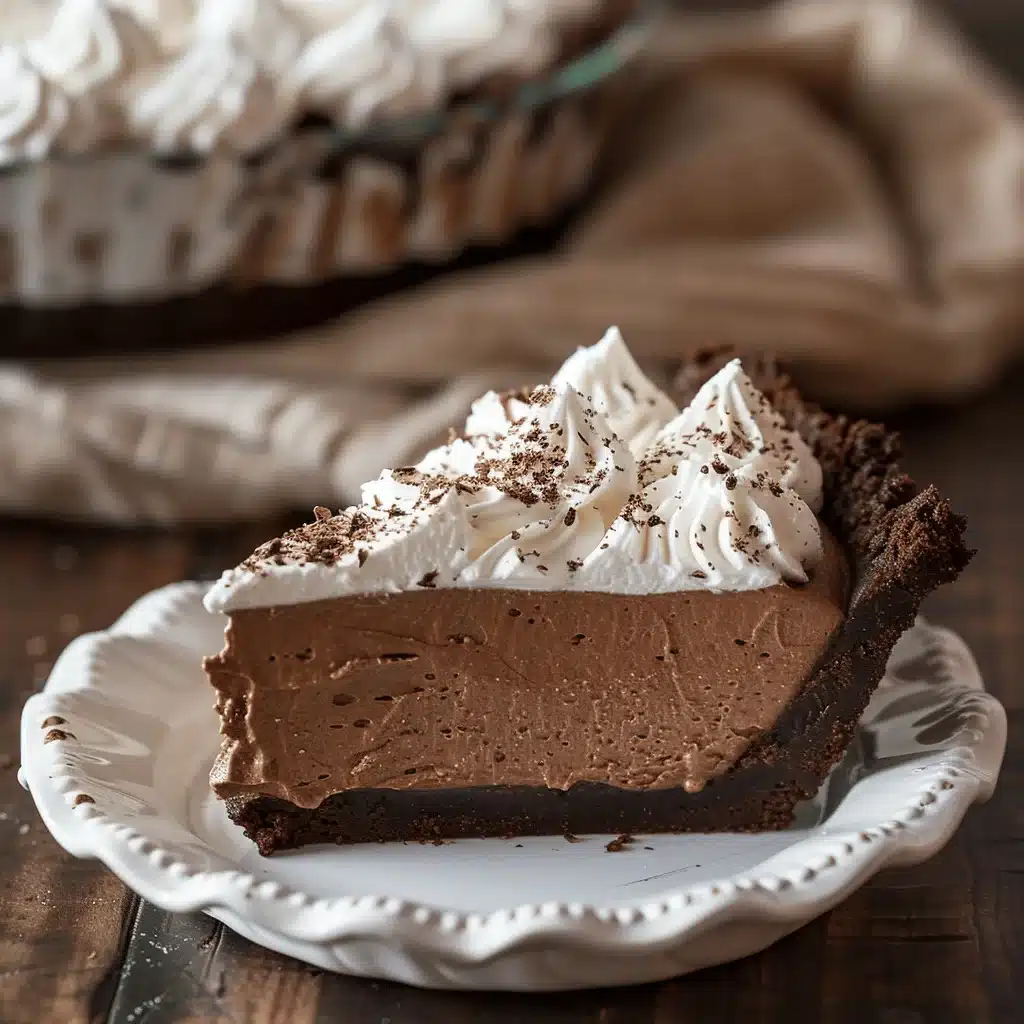
The first bite of a chocolate silk pie is pure magic. Imagine a velvety, creamy chocolate filling that melts in your mouth, paired with a buttery, flaky crust and topped with fluffy whipped cream. This pie is the ultimate indulgence, yet surprisingly simple to make at home. I first discovered this recipe when I was looking for a show-stopping dessert for a family gathering, and let me tell you—it’s been a hit every single time. Whether it’s a birthday, holiday, or just a cozy weekend treat, this chocolate silk pie is the crowd-pleaser you didn’t know you needed.
What makes this chocolate silk pie special is its balance of richness and lightness. You don’t need fancy techniques or rare ingredients; this recipe is approachable even for beginners. Plus, it’s versatile enough to fit any occasion, from formal dinners to casual potlucks. Trust me, once you make this pie, you’ll be the dessert hero of your circle. Let’s dive into the irresistible world of chocolate silk pie!
Why You’ll Love This Recipe
- Unbelievably Creamy: The chocolate filling is smooth as silk, with a melt-in-your-mouth texture that feels luxurious.
- Easy to Make: No fancy techniques here—this recipe uses simple steps and ingredients you probably already have.
- Perfect for Any Occasion: Whether it’s Thanksgiving, a birthday, or just because, this pie fits the bill.
- Customizable: You can tweak the crust, topping, or even the chocolate flavor to suit your preferences.
- Guaranteed Crowd-Pleaser: Everyone loves chocolate, and this pie delivers on flavor and presentation.
What sets this recipe apart is the balance of textures and flavors. The filling is silky and rich, the crust adds a buttery crunch, and the whipped cream topping lightens everything up. It’s truly the ultimate dessert experience. Plus, it’s easy to make ahead of time, so you can focus on enjoying your event without last-minute stress.
What Ingredients You Will Need
This recipe is made with simple, wholesome ingredients that come together beautifully. Here’s what you’ll need:
For the Crust:
- 1 ½ cups (190g) all-purpose flour
- ½ cup (115g) unsalted butter, chilled and cubed
- 2-3 tbsp (30-45ml) ice water
- 1 tbsp (12g) granulated sugar (optional, for a slightly sweet crust)
- Pinch of salt
For the Filling:

- 1 cup (240ml) heavy cream
- 3 large egg yolks
- 1 cup (170g) semi-sweet chocolate chips
- ½ cup (115g) unsalted butter, softened
- ¾ cup (150g) granulated sugar
- 1 tsp (5ml) pure vanilla extract
For the Topping:
- 1 cup (240ml) heavy whipping cream
- 2 tbsp (25g) powdered sugar
- Chocolate shavings or cocoa powder (optional, for garnish)
If you’re looking for substitutions, you can use store-bought pie crust for convenience or swap semi-sweet chocolate for dark chocolate if you prefer a richer taste.
Equipment Needed
- Pie pan (9-inch)
- Mixing bowls (various sizes)
- Rolling pin (or substitute with a bottle, in a pinch)
- Electric mixer or whisk
- Double boiler or heatproof bowl and saucepan
- Spatula
- Cooling rack
If you don’t have a double boiler, you can use a heatproof bowl set over a pot of simmering water—it works just as well. And for the pie pan, ceramic or glass pans tend to bake more evenly than metal ones.
Preparation Method
- Prepare the Crust: In a bowl, combine flour, sugar, and salt. Add the chilled butter cubes and work them into the flour using your fingers or a pastry cutter until the mixture resembles coarse crumbs. Gradually add ice water, 1 tablespoon at a time, until the dough comes together. Wrap in plastic wrap and refrigerate for 30 minutes.
- Roll Out the Dough: On a lightly floured surface, roll out the chilled dough to fit your 9-inch pie pan. Transfer the dough to the pan and gently press it into place. Trim the edges and crimp them if desired. Pre-bake the crust at 375°F (190°C) for 10-12 minutes. Let cool completely.
- Make the Filling: Using a double boiler, melt the chocolate chips and butter together until smooth. Remove from heat and let cool slightly. In a separate bowl, beat egg yolks and sugar until pale and thick. Slowly add the melted chocolate mixture and vanilla extract, mixing until combined.
- Whip the Cream: In another bowl, whip the heavy cream until stiff peaks form. Gently fold the whipped cream into the chocolate mixture until fully incorporated. Pour the filling into the cooled crust and smooth the top with a spatula.
- Chill the Pie: Cover the pie and refrigerate for at least 4 hours, or overnight, to set.
- Prepare the Topping: Just before serving, whip the heavy whipping cream with powdered sugar until soft peaks form. Spread or pipe the whipped cream over the chilled pie. Garnish with chocolate shavings or a dusting of cocoa powder.
Cooking Tips & Techniques
- Chill the Butter: Ensuring the butter is cold when making the crust is key to achieving a flaky texture.
- Temper the Egg Yolks: Add the melted chocolate slowly to the egg yolk mixture to avoid scrambling the eggs.
- Don’t Overwhip: Be careful not to overwhip the cream for the filling or topping—it should be light and fluffy, not grainy.
- Cool Completely: Let the crust cool fully before adding the filling to prevent sogginess.
- Plan Ahead: This pie needs time to chill and set, so prepare it a day in advance for best results.
Variations & Adaptations
- Gluten-Free Option: Use a gluten-free flour blend for the crust or substitute with a nut-based crust.
- Dairy-Free Option: Swap butter and cream for plant-based alternatives, such as coconut cream and vegan butter.
- Flavor Boost: Add a tablespoon of espresso powder to the filling for a mocha twist.
- Seasonal Garnish: Top with fresh berries in summer or crushed peppermint candies during the holidays.
- Individual Servings: Prepare this recipe in small tart pans for single-serve portions.
I’ve personally tried adding orange zest to the filling for a citrusy twist—it’s divine!
Serving & Storage Suggestions
This chocolate silk pie is best served chilled. Slice it up and present it with a dollop of whipped cream and a sprinkle of chocolate shavings for a picture-perfect dessert. Pair it with a cup of coffee or a glass of red wine for an extra indulgent treat.
To store, cover the pie and keep it in the refrigerator for up to 4 days. If you need to freeze it, wrap it tightly in plastic wrap and aluminum foil, then freeze for up to 2 months. Thaw in the refrigerator overnight before serving. Reheat slices briefly in the microwave to soften the filling if desired, but it’s best enjoyed cold!
Nutritional Information & Benefits
Here’s a rough estimate per serving (based on 10 servings):
- Calories: 420
- Fat: 30g
- Carbohydrates: 35g
- Protein: 5g
This recipe is rich but also provides some benefits. Dark chocolate is packed with antioxidants, while the homemade crust avoids preservatives. You can adjust sugar levels or opt for dairy-free alternatives to make it suit your dietary needs.
Conclusion
If you’re looking for a dessert that’s equal parts indulgent and impressive, this chocolate silk pie is your answer. Its creamy texture, rich flavor, and stunning presentation make it perfect for any occasion. Whether you’re a seasoned baker or a beginner, this recipe is approachable and rewarding. Give it a try and let your creativity shine—customize the toppings, tweak the flavors, or make it your own.
I’d love to hear how it turns out for you! Share your thoughts, photos, or adaptations in the comments below. Let’s keep spreading the love for homemade desserts. Happy baking!
FAQs
Can I use store-bought pie crust?
Yes, store-bought crust works perfectly if you’re short on time. Look for one labeled as “ready to bake” for best results.
How long does the pie need to chill?
Ideally, the pie should chill for at least 4 hours, but overnight is even better for a fully set filling.
Can I make this ahead of time?
Absolutely! This pie is perfect for making a day or two in advance. Just add the whipped cream topping right before serving.
What’s the best way to garnish the pie?
Chocolate shavings, cocoa powder, or fresh berries are great options. You can also use crushed nuts for added texture.
Can I freeze leftovers?
Yes, wrap leftover slices tightly and freeze for up to 2 months. Thaw in the refrigerator before eating.
Pin This Recipe!