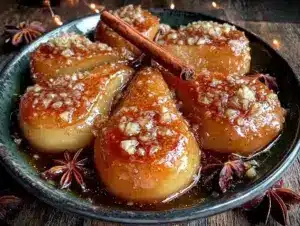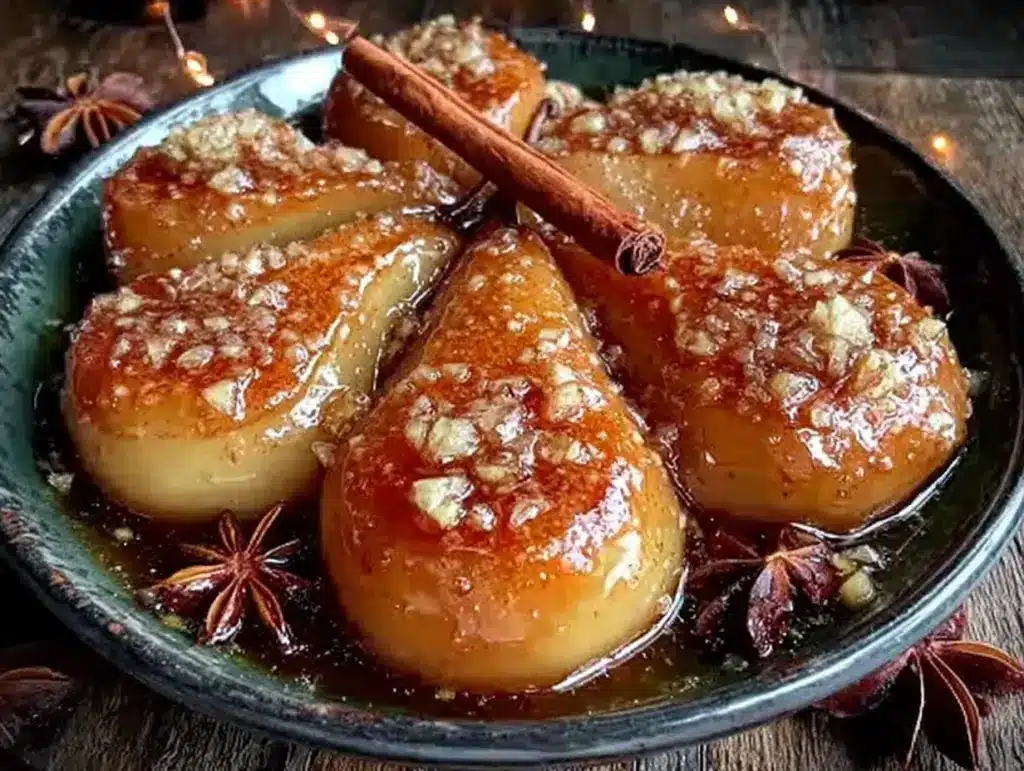
The syrup clings to the pear in a way that feels almost deliberate—thick, glossy, and catching the light like amber glass. That’s the whole point of this recipe. Not the five minutes it takes to pull together, not the fact that you probably have everything in your pantry already, but that moment when you drag a spoon through the warm cinnamon-vanilla syrup and watch it coat every curve of the pear half. I made these for the first time on a Tuesday night when I needed dessert but didn’t have the energy for anything that required washing a mixer. The can of pears had been sitting in my cabinet for months, the kind of thing you buy for a fruit salad and then forget exists. But one sniff of cinnamon sticks simmering with vanilla, and I knew this was going to become one of those recipes I’d make on autopilot. There’s no pretense here—just pears, a few pantry spices, and the quiet satisfaction of turning something ordinary into something you actually crave. If you’ve ever opened a can of pears and thought, “this needs… more,” this is the recipe that answers that thought without asking for much in return.
Why You’ll Love This Recipe
I’ve tested this one more times than I care to admit—mostly because I kept eating the test batches before I could write down notes. After a decade of developing recipes, I can tell you that the best ones aren’t always the most complicated. Sometimes they’re the ones that make you feel like a kitchen genius with almost zero effort.
- Ready in Under 15 Minutes: From opening the can to spooning into bowls, this comes together faster than you can order takeout. Perfect for those evenings when a sweet craving hits out of nowhere.
- Pantry-Friendly Ingredients: Canned pears, cinnamon, vanilla, a little butter and sugar—that’s it. No specialty grocery runs required. You probably have everything right now.
- Perfect for Last-Minute Guests: Serve these warm over ice cream, alongside a simple cake, or just on their own with a dollop of whipped cream. They look and taste like you planned ahead.
- Surprisingly Versatile: These spiced pears work for breakfast (try them over oatmeal), dessert (over pound cake is my favorite), or even as a topping for yogurt bowls.
- Comfort in a Bowl: There’s something about warm fruit with cinnamon that just feels like a hug. This is the kind of dessert that makes you slow down and actually taste what you’re eating.
What makes this different from every other “spiced canned fruit” recipe out there? It’s the double hit of vanilla—both in the syrup and as a finishing drizzle—that gives the pears a rounded, almost floral sweetness. Most versions rely on cinnamon alone and end up tasting one-note. Here, the vanilla softens the edges and makes the whole thing feel luxurious without any extra work. Honestly, it’s the kind of recipe you’ll memorize after one try.
What Ingredients You Will Need
This recipe uses simple, everyday ingredients that work together to create something far greater than the sum of their parts. The magic happens in the simmering, where the syrup reduces and the flavors meld into each other.
- Canned pear halves (15 oz can), in juice or light syrup: Look for pears packed in pear juice or light syrup rather than heavy syrup—you want them sweet but not cloying. I prefer Bartlett pears for their tender texture, but any variety works. Drain them but reserve the liquid for the syrup base (don’t throw it away!).
- Reserved pear juice (about ½ cup): This is your flavor foundation. Using the canning liquid instead of water keeps the pear flavor concentrated and honest. If your can is packed in heavy syrup, you might want to cut it with a splash of water to balance sweetness.
- Unsalted butter (2 tablespoons): Adds richness and helps carry the vanilla and cinnamon flavors. Salted butter works in a pinch, just reduce any added salt in the recipe. I use Kerrygold when I want that extra creamy finish.
- Light brown sugar (3 tablespoons, packed): Brown sugar brings molasses notes that pair beautifully with cinnamon. Dark brown sugar works too and will give you a deeper, more caramel-like syrup. If you’re out of brown sugar, use granulated sugar with a teaspoon of molasses stirred in.
- Ground cinnamon (1 teaspoon): The backbone of this recipe. I recommend Saigon cinnamon if you can find it—it’s warmer and more complex than standard cassia cinnamon. For a more delicate flavor, try using one whole cinnamon stick instead and let it steep in the syrup.
- Pure vanilla extract (1½ teaspoons): Split the vanilla—use 1 teaspoon in the simmering syrup and reserve ½ teaspoon to stir in at the very end. That final hit of raw vanilla makes a noticeable difference. Avoid imitation vanilla here; the real thing matters when the ingredient list is this short.
- Pinch of salt: Just a tiny pinch. Salt doesn’t make it salty—it makes everything else taste more like itself. Don’t skip it.
- Optional: 1 whole cinnamon stick and 1 vanilla bean pod (for steeping): If you want to go all out, simmering with whole spices instead of ground gives you a clearer, more elegant syrup. Strain before serving if you use whole spices.
Equipment Needed
- Medium skillet or shallow saucepan (10-inch): A wide pan gives the syrup more surface area to reduce and coat the pears evenly. I use my trusty stainless steel skillet for this, but nonstick works fine too.
- Wooden spoon or silicone spatula: For gently turning the pears without breaking them apart. A metal spoon can scratch nonstick pans and might accidentally pierce the tender fruit.
- Measuring spoons and cups: For accuracy, though this recipe is forgiving enough that you can eyeball it after the first try.
- Small bowl: To hold the drained pear liquid before adding it to the pan.
- Tongs or a slotted spoon: For lifting the pear halves out of the syrup without splashing yourself. Tongs give you more control.
- Serving bowls or plates: These pears look beautiful in shallow bowls that show off the syrup.
If you don’t have a skillet, a regular saucepan works—just watch the syrup more carefully since it might reduce faster in a narrower pan. And honestly, if you have a can of pears and a microwave, you can even cheat by heating everything in a microwave-safe bowl for 2-3 minutes, stirring halfway through. Not quite as good as stovetop, but in a pinch, it gets the job done.
Preparation Method
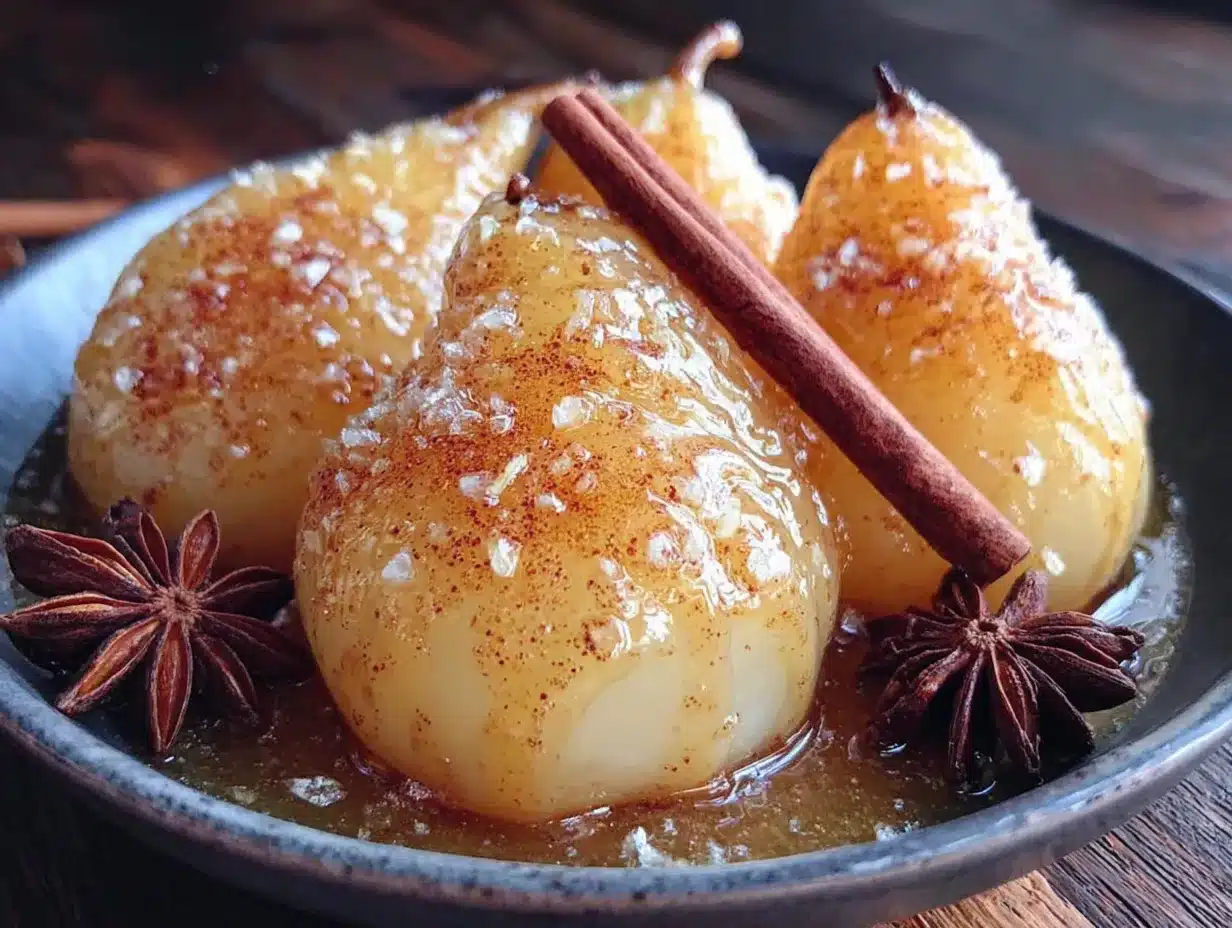
This comes together in about 12 minutes from start to finish. Here’s exactly how to do it so those pears come out perfect every time.
- Drain the pears, reserving the liquid. Open your can of pear halves and pour the entire contents into a fine-mesh strainer set over a bowl. Catch that liquid—you’ll need about ½ cup of it. Gently shake the strainer to remove excess moisture from the pears, then set them aside on a plate. Don’t rinse them; you want that light coating of pear juice to stay on the fruit.
- Start the syrup base. Place your skillet or saucepan over medium heat. Add the butter and let it melt completely, swirling the pan occasionally so it doesn’t brown. You want it just melted, not browned—about 30 seconds. If the butter starts to foam aggressively, turn the heat down slightly.
- Add the sugar and cinnamon. Sprinkle the brown sugar and ground cinnamon evenly over the melted butter. Stir continuously with your wooden spoon for about 1 minute until the sugar dissolves and the mixture becomes fragrant and bubbly. You’ll smell the cinnamon opening up—that’s your cue. The mixture will look grainy at first, then smooth out as the sugar melts.
- Pour in the reserved pear juice. Slowly add the ½ cup of reserved pear juice while stirring. The mixture will sputter a bit—that’s normal. Keep stirring until the syrup is smooth and all the sugar has fully dissolved, about 1-2 minutes. Bring it to a gentle simmer, not a rolling boil. You should see small bubbles around the edges of the pan.
- Add the first hit of vanilla. Stir in 1 teaspoon of the vanilla extract. Watch the syrup darken slightly as the vanilla integrates. Let it simmer for another 30 seconds to marry the flavors.
- Add the pear halves. Carefully place the drained pear halves into the simmering syrup, flat side down. Use your tongs or a slotted spoon to lower them in gently so you don’t splash hot syrup. Arrange them in a single layer—if your pan is too small, work in batches. The pears should be nestled in the syrup but not drowning in it.
- Simmer and baste. Let the pears cook for 3-4 minutes, then flip them over using your tongs. Baste the tops with the syrup using a spoon. Continue simmering for another 2-3 minutes, basting occasionally. The pears should be heated through and the syrup should have thickened slightly—it will coat the back of a spoon. You’re looking for the syrup to reduce by about a third.
- Finish with the remaining vanilla. Remove the pan from the heat. Stir in the remaining ½ teaspoon of vanilla extract. This final addition keeps the vanilla flavor bright and fresh rather than cooked-out. Swirl the pan gently to incorporate it.
- Rest for 2 minutes. Let the pears sit in the warm syrup for 2 minutes off the heat. This allows them to absorb more flavor without overcooking. The pears should be tender but still hold their shape—if they start to fall apart, you’ve gone too far.
- Serve warm. Use your tongs to transfer the pear halves to serving bowls. Spoon the warm cinnamon-vanilla syrup generously over the top. Serve immediately while the syrup is still loose and glossy.
Pro tip from my kitchen: If you want thicker syrup, remove the pears after step 8 and let the syrup simmer alone for another 2-3 minutes. It will reduce further and become almost like a light caramel. Pour it back over the pears just before serving.
Cooking Tips & Techniques
I learned most of these the hard way—by making mistakes and eating the evidence. Here’s what I wish someone had told me before my first attempt.
Don’t overcook the pears. Canned pears are already cooked during the canning process. You’re just reheating and flavoring them here. If you simmer them for more than 8-10 minutes total, they’ll start to break down and turn mushy. The goal is tender but intact. When you poke one with a fork, it should offer slight resistance but yield easily.
Watch your heat level. Medium heat is your friend. Too high and the sugar will burn before the syrup has a chance to develop. If you see the syrup turning dark brown around the edges of the pan, pull it off the heat immediately and turn the burner down. Burnt cinnamon tastes bitter and there’s no saving it.
Let the syrup do the work. The basting step isn’t optional. Spooning the hot syrup over the pears as they cook helps the flavor penetrate without needing to stir or flip constantly. I set a timer for 2-minute intervals so I don’t forget and wander off.
One time I got distracted by a phone call and came back to pears swimming in a syrup that had reduced to almost nothing. The pears were still fine—just a bit drier than ideal—but the syrup was a sticky mess on the bottom of the pan. Now I always set a timer, even for something this quick.
Make extra syrup. Honestly, double the liquid ingredients (butter, sugar, juice, cinnamon) even if you’re only making one can of pears. The extra syrup is incredible drizzled over pancakes, stirred into yogurt, or brushed onto toast. I’ve started keeping a jar of it in the fridge at all times.
Variations & Adaptations
This recipe is endlessly flexible, and I’ve tried most of these variations myself. Here are the ones that actually work.
Spiced Chai Version: Add 2 whole cardamom pods, 1 star anise, and a 1-inch piece of fresh ginger (sliced) to the syrup along with the cinnamon. Simmer for 5 minutes before adding the pears, then strain out the whole spices. The chai notes make these pears feel like a cozy afternoon treat.
Bourbon Maple Twist: Replace the brown sugar with maple syrup and add 2 tablespoons of bourbon along with the vanilla. The bourbon doesn’t need to be expensive—anything you’d drink works. Cook for an extra minute to burn off the alcohol, leaving behind warm, oaky notes that pair beautifully with the pears.
Dairy-Free Version: Swap the butter with coconut oil or a plant-based butter alternative. Use 2 tablespoons of refined coconut oil for a neutral flavor, or unrefined if you want a subtle coconut undertone. The syrup will be slightly thinner but just as delicious.
Low-Sugar Adaptation: Use pears packed in juice (not syrup), replace the brown sugar with 2 tablespoons of monk fruit sweetener or allulose, and add an extra ¼ teaspoon of vanilla to compensate for the missing sweetness. The texture remains the same; the flavor is just less sugary.
Grilled Version: Make the syrup on the stovetop as directed, then brush the pear halves with oil and grill them cut-side down over medium heat for 2-3 minutes until you get nice grill marks. Serve with the warm syrup poured over. The char adds a smoky counterpoint to the sweet cinnamon.
I’ve personally tried the chai version on a rainy Sunday afternoon and it was so good I made it again the next day. The star anise gives the pears a subtle licorice note that I didn’t expect to love as much as I did.
Serving & Storage Suggestions
These pears are best served warm, straight from the pan, when the syrup is at its glossiest. Here’s how to make the most of them.
Serving temperature: Warm is non-negotiable for the best experience. Cold pears in cold syrup lose that luscious mouthfeel. If you’ve refrigerated leftovers, reheat them gently in a small saucepan over low heat for 2-3 minutes, or microwave individual portions for 20-30 seconds.
What to serve with them: Vanilla ice cream is the classic pairing and for good reason—the cold creaminess balances the warm spiced syrup. But don’t stop there. Spoon them over thick Greek yogurt for breakfast, layer them into parfaits with granola, or serve alongside a slice of simple pound cake or angel food cake. They’re also incredible spooned over oatmeal or even pancakes. If you’re feeling fancy, try them with a drizzle of heavy cream and a sprinkle of toasted walnuts.
Storage instructions: Transfer any leftover pears and syrup to an airtight container and refrigerate for up to 5 days. The flavors actually deepen over the first 24 hours as the pears continue to absorb the syrup. Just don’t expect them to last that long—they tend to disappear quickly.
Freezer notes: You can freeze the pears in their syrup for up to 3 months. Place them in a freezer-safe container, leaving about ½ inch of headspace for expansion. Thaw overnight in the refrigerator and reheat gently before serving. The texture of the pears will be slightly softer after freezing, but the flavor remains excellent.
How flavors develop: Day one, the syrup is bright and the cinnamon is front and center. By day two or three, the vanilla and pear flavors have melded together into something more cohesive. I actually prefer these on day two for breakfast over yogurt—the syrup has thickened slightly in the fridge and coats everything beautifully.
Nutritional Information & Benefits
Here’s the estimated nutrition for one serving (2 pear halves with about 2 tablespoons of syrup), based on using pears packed in juice and standard ingredients.
| Nutrient | Amount per Serving |
|---|---|
| Calories | 185 |
| Total Fat | 6g |
| Saturated Fat | 4g |
| Carbohydrates | 34g |
| Fiber | 3g |
| Sugar | 26g |
| Protein | 1g |
| Sodium | 55mg |
Health benefits worth noting: Pears are a good source of dietary fiber, particularly when you eat the skin (which these canned halves still have). Fiber supports digestive health and helps keep you full. Cinnamon has been studied for its anti-inflammatory properties and may help with blood sugar regulation. Vanilla, while used in small amounts, contains vanillin, a compound with antioxidant properties.
Dietary considerations: This recipe is naturally gluten-free and can be made dairy-free with the coconut oil swap mentioned above. It’s also vegetarian and can be made vegan by using plant-based butter and ensuring your sugar is vegan-friendly (most brown sugar is, but some brands filter through bone char—check labels if this matters to you).
Potential allergens: Dairy (from butter). If you’re serving guests, the dairy-free version is just as good and nobody will notice the difference.
From my perspective, this dessert sits in that sweet spot between indulgence and something you don’t feel guilty about. It’s sweet enough to feel like a treat, but the fruit base means you’re getting real nutrients too. I’ve served it to friends who are watching their sugar intake and they loved it—especially when paired with plain Greek yogurt to balance the sweetness.
Conclusion
This quick cinnamon vanilla canned pear halves recipe is proof that you don’t need fancy ingredients or hours in the kitchen to make something that feels special. It’s the kind of recipe that saves you on a busy weeknight, impresses someone without making you stress, and honestly just tastes like comfort in a bowl. I’ve made it for myself on quiet evenings, for friends who stopped by unexpectedly, and for holiday brunches where I needed one more thing on the table. Every single time, someone asks for the recipe.
The best part? You can tweak it endlessly based on what you have or what you’re craving. Add a pinch of nutmeg. Swap in cardamom. Drizzle it over ice cream or eat it straight from the pan with a spoon—I won’t tell. This recipe is yours now, and I hope you make it your own.
If you try this recipe, I’d love to hear how it went. Drop a comment below and let me know what you served it with, or tag me in your photos if you share them online. And if you’re looking for another simple dessert that delivers big flavor, you might enjoy this fresh fig and honey crostata or these caramel-stuffed triple chocolate cookies for when only chocolate will do. Happy cooking, friends!
Frequently Asked Questions
Can I use fresh pears instead of canned?
Yes, but you’ll need to adjust the cooking time. Peel and core 2-3 firm but ripe pears, then cut them in half. Simmer them in the syrup for 10-15 minutes until tender, checking frequently. Fresh pears take longer to soften and won’t be as uniformly tender as canned, but the flavor is lovely.
What if my syrup is too thin?
Remove the pears from the pan and let the syrup simmer alone over medium heat for 2-4 minutes until it reduces and thickens. Stir occasionally to prevent burning. Pour the thickened syrup back over the pears before serving. You can also stir in a cornstarch slurry (1 teaspoon cornstarch mixed with 1 tablespoon cold water) if you’re in a hurry.
Can I make this ahead of time?
Absolutely. The pears and syrup can be made up to 3 days in advance and stored in the refrigerator. Reheat gently on the stovetop or in the microwave before serving. The flavors actually improve after a day in the fridge as the pears absorb more of the syrup.
What other fruits can I use with this syrup?
Canned peach halves or slices work beautifully with this same cinnamon-vanilla syrup. Canned apples, apricots, or even pineapple chunks are also excellent. Adjust the cooking time slightly based on the fruit’s tenderness—peaches and apricots need about the same time as pears, while apples might need an extra minute or two.
Is this recipe suitable for children?
Yes, it’s very kid-friendly. The alcohol-free version (skip the bourbon) is sweet, warm, and familiar-tasting. Kids love the pears over vanilla ice cream or stirred into oatmeal. Just make sure the pears have cooled enough before serving to little ones—the syrup holds heat longer than you’d expect.
Pin This Recipe!
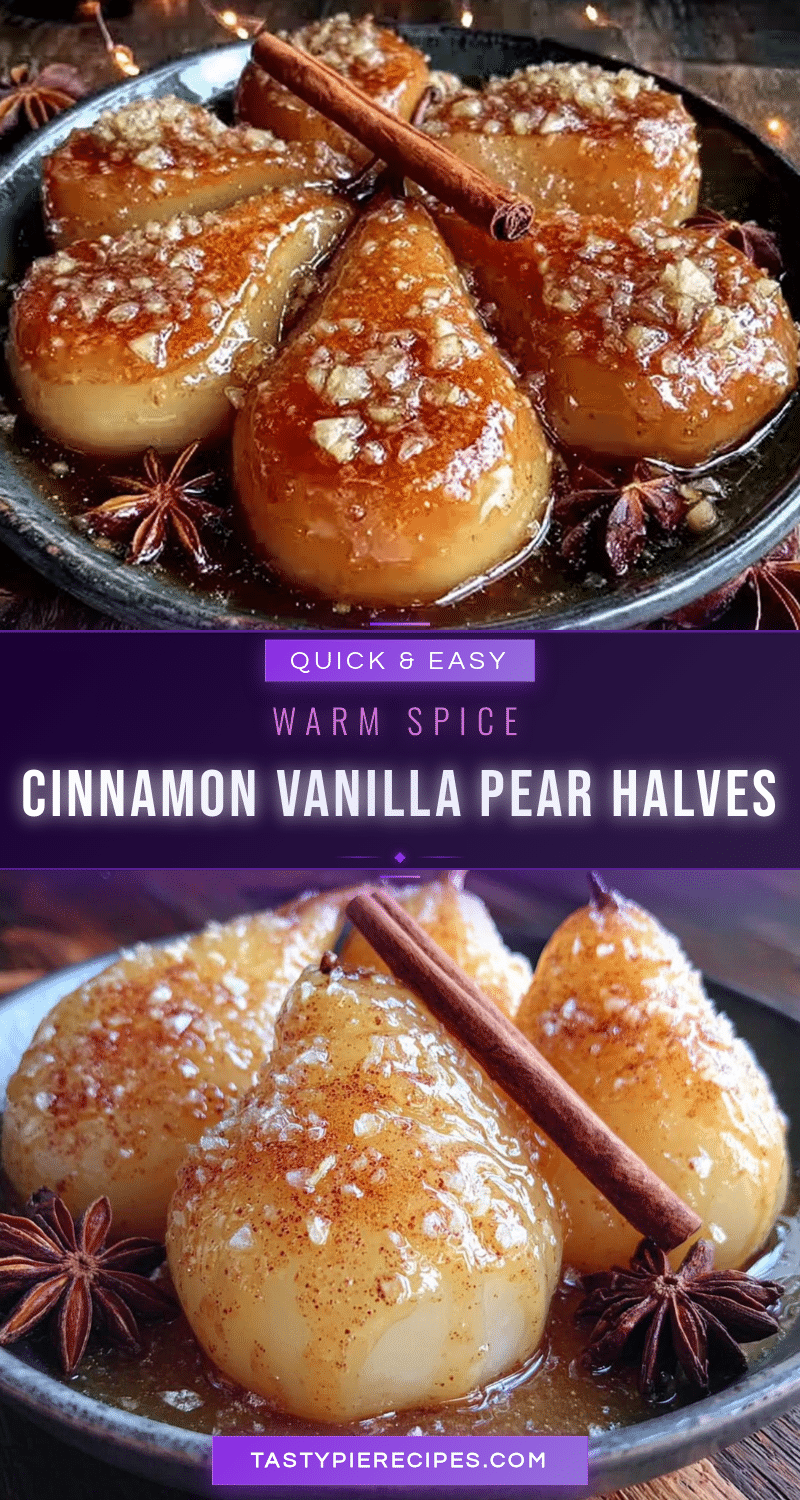
Quick & Easy Cinnamon Vanilla Canned Pear Halves Recipe

Transform canned pears into a warm, spiced dessert in under 15 minutes with this simple cinnamon-vanilla syrup recipe. Perfect for last-minute guests or a cozy weeknight treat.
- Prep Time: 5 minutes
- Cook Time: 10 minutes
- Total Time: 15 minutes
- Yield: 4 servings 1x
- Category: Dessert
- Cuisine: American
Ingredients
- 1 (15 oz) can pear halves, in juice or light syrup
- Reserved pear juice (about ½ cup)
- 2 tablespoons unsalted butter
- 3 tablespoons light brown sugar, packed
- 1 teaspoon ground cinnamon
- 1½ teaspoons pure vanilla extract, divided
- Pinch of salt
- Optional: 1 whole cinnamon stick and 1 vanilla bean pod (for steeping)
Instructions
- Drain the pears, reserving the liquid. Open the can of pear halves and pour the entire contents into a fine-mesh strainer set over a bowl. Catch that liquid—you’ll need about ½ cup of it. Gently shake the strainer to remove excess moisture from the pears, then set them aside on a plate. Don’t rinse them; you want that light coating of pear juice to stay on the fruit.
- Start the syrup base. Place your skillet or saucepan over medium heat. Add the butter and let it melt completely, swirling the pan occasionally so it doesn’t brown. You want it just melted, not browned—about 30 seconds. If the butter starts to foam aggressively, turn the heat down slightly.
- Add the sugar and cinnamon. Sprinkle the brown sugar and ground cinnamon evenly over the melted butter. Stir continuously with your wooden spoon for about 1 minute until the sugar dissolves and the mixture becomes fragrant and bubbly. You’ll smell the cinnamon opening up—that’s your cue. The mixture will look grainy at first, then smooth out as the sugar melts.
- Pour in the reserved pear juice. Slowly add the ½ cup of reserved pear juice while stirring. The mixture will sputter a bit—that’s normal. Keep stirring until the syrup is smooth and all the sugar has fully dissolved, about 1-2 minutes. Bring it to a gentle simmer, not a rolling boil. You should see small bubbles around the edges of the pan.
- Add the first hit of vanilla. Stir in 1 teaspoon of the vanilla extract. Watch the syrup darken slightly as the vanilla integrates. Let it simmer for another 30 seconds to marry the flavors.
- Add the pear halves. Carefully place the drained pear halves into the simmering syrup, flat side down. Use your tongs or a slotted spoon to lower them in gently so you don’t splash hot syrup. Arrange them in a single layer—if your pan is too small, work in batches. The pears should be nestled in the syrup but not drowning in it.
- Simmer and baste. Let the pears cook for 3-4 minutes, then flip them over using your tongs. Baste the tops with the syrup using a spoon. Continue simmering for another 2-3 minutes, basting occasionally. The pears should be heated through and the syrup should have thickened slightly—it will coat the back of a spoon. You’re looking for the syrup to reduce by about a third.
- Finish with the remaining vanilla. Remove the pan from the heat. Stir in the remaining ½ teaspoon of vanilla extract. This final addition keeps the vanilla flavor bright and fresh rather than cooked-out. Swirl the pan gently to incorporate it.
- Rest for 2 minutes. Let the pears sit in the warm syrup for 2 minutes off the heat. This allows them to absorb more flavor without overcooking. The pears should be tender but still hold their shape—if they start to fall apart, you’ve gone too far.
- Serve warm. Use your tongs to transfer the pear halves to serving bowls. Spoon the warm cinnamon-vanilla syrup generously over the top. Serve immediately while the syrup is still loose and glossy.
Notes
For thicker syrup, remove pears after step 8 and let syrup simmer alone for 2-3 minutes. Double the liquid ingredients for extra syrup to use on pancakes or yogurt. Leftovers keep refrigerated for up to 5 days; flavors deepen overnight.
Nutrition
- Serving Size: 2 pear halves with a
- Calories: 185
- Sugar: 26
- Sodium: 55
- Fat: 6
- Saturated Fat: 4
- Carbohydrates: 34
- Fiber: 3
- Protein: 1
Keywords: canned pears, cinnamon vanilla pears, quick dessert, easy dessert, spiced pears, pear halves, pantry dessert, 15-minute dessert