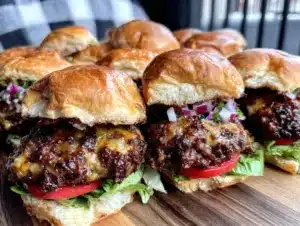
“Hey, why don’t you just smash those patties on the griddle instead of shaping them into balls?” — and that was it. A buddy’s offhand comment one lazy Saturday afternoon sparked my obsession with crispy smash burger sliders. You know how sometimes a little tweak, a simple nudge, completely changes the way you see a dish? Well, that moment did for me. I’d always loved burgers, but the idea of smashing the meat flat right onto a hot surface to get that lacy, crispy crust? Game changer.
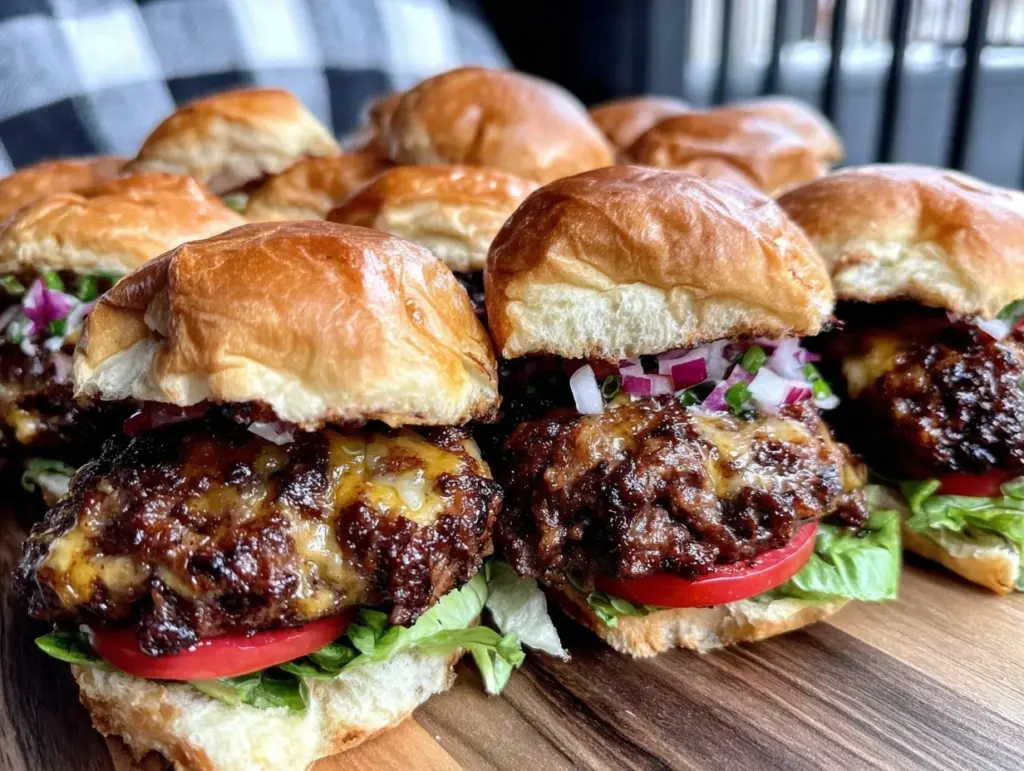
That first batch came sizzling on the griddle, the smell hitting just right, a mix of browned beef and caramelized edges. The sound of the meat hitting the pan — that unmistakable sizzle — still makes me smile. Honestly, the texture contrast between the crunchy, almost crackly edges and the juicy center is what hooked me. And making them into sliders? Perfect bite-sized indulgence for game day, when you want something casual but ridiculously satisfying.
What stuck with me, too, was how quick it all came together. No fuss, just pure flavor, with a crust you can’t get from a regular patty. It’s like the difference between a good burger and one that makes you pause mid-bite. Plus, sliders mean you can pile on toppings or keep it simple — whatever fits your crowd.
So yeah, this crispy smash burger sliders recipe isn’t just about food; it’s about that moment of discovery, the joy of sharing something simple but special. And if you ask me, that’s what game day indulgence is all about — tasty, easy, and a little bit fun. You might even find yourself making these beyond football Sundays, just because.
Why You’ll Love This Recipe
Honestly, these crispy smash burger sliders have become my go-to for game day and casual hangouts alike. Here’s why they matter on a whole other level:
- Quick & Easy: You can have these sliders sizzling in less than 20 minutes — perfect when the game’s about to start and you’re still prepping.
- Simple Ingredients: No fancy stuff needed. Just good quality ground beef, basic seasonings, and slider buns. I usually grab 80/20 ground chuck for the perfect fat content.
- Perfect for Game Day: Bite-sized, shareable, and totally crowd-pleasing. They’re great for cheering on your team without missing a play.
- Crowd-Pleaser: Kids, adults, picky eaters — everyone loves them. The crispy edges kind of hypnotize you into eating more than you planned.
- Unbelievably Delicious: That caramelized crust combined with melty cheese and your favorite toppings? Next-level comfort food right there.
What makes this recipe different? It’s all about the smashing technique — pressing the patties down hard on a hot griddle to get those crispy, crispy edges, while keeping the inside tender. Plus, layering the cheese just right to melt perfectly without losing that crusty bite. I’ve tried sliders a million ways, but this method nailed the balance between texture and juiciness every single time.
And you know, this isn’t just a recipe — it’s a little game day ritual now. The kind of treat that makes you pause, savor, and maybe even close your eyes for a second after the first bite. That’s why it’s stuck with me and why I keep making it again and again.
What Ingredients You Will Need
This recipe uses simple, wholesome ingredients to deliver bold flavor and satisfying texture without fuss. Most of these are pantry staples, so you probably have everything on hand already. Here’s what you’ll want to grab:
- Ground Beef (80/20): About 1 pound (450g) – the fat content is key for juicy, flavorful patties. I trust brands like Certified Angus Beef for consistent quality.
- Slider Buns: 8 small buns, ideally soft but sturdy enough to hold the juicy patties without falling apart.
- Salt and Black Pepper: To season each patty perfectly. Use kosher salt if you have it — it sticks better and seasons evenly.
- Cheese Slices: American cheese melts beautifully here, but cheddar or pepper jack add nice flavor twists.
- Butter: For toasting the buns. Unsalted, softened butter works best.
- Optional Toppings:
- Sliced pickles (for tang and crunch)
- Diced onions or caramelized onions
- Lettuce and tomato slices
- Ketchup, mustard, or your favorite burger sauce
Seasoning is simple but critical here. I usually keep it classic — just salt and pepper — to let the beef’s flavor shine through. If you want, a dash of smoked paprika or garlic powder can add subtle depth without overpowering.
If you’re aiming for a gluten-free option, swap the slider buns with gluten-free mini buns or even sturdy lettuce wraps. For dairy-free needs, skip the cheese or use a plant-based melting cheese alternative.
Equipment Needed
For crispy smash burger sliders, you don’t need fancy gadgets, but a few tools make life easier:
- Flat Griddle or Cast Iron Skillet: The key is a flat, heavy-bottomed surface that gets really hot. Cast iron is my favorite for that even heat and crust formation.
- Metal Spatula: Preferably a sturdy one with a thin edge to really press down and scrape up those crispy bits — a fish spatula or a burger press spatula works great.
- Small Mixing Bowl: For seasoning the beef and prepping any toppings.
- Butter Knife or Pastry Brush: For spreading butter on the buns before toasting.
- Plate or Tray: To rest your finished sliders before serving.
No burger press needed here — just your own arm strength to smash those patties! When I first tried a flimsy spatula, the patties wouldn’t flatten properly, so investing in a solid metal spatula made a huge difference. If you don’t have a griddle, a heavy skillet works fine; just make sure it’s preheated well.
Preparation Method
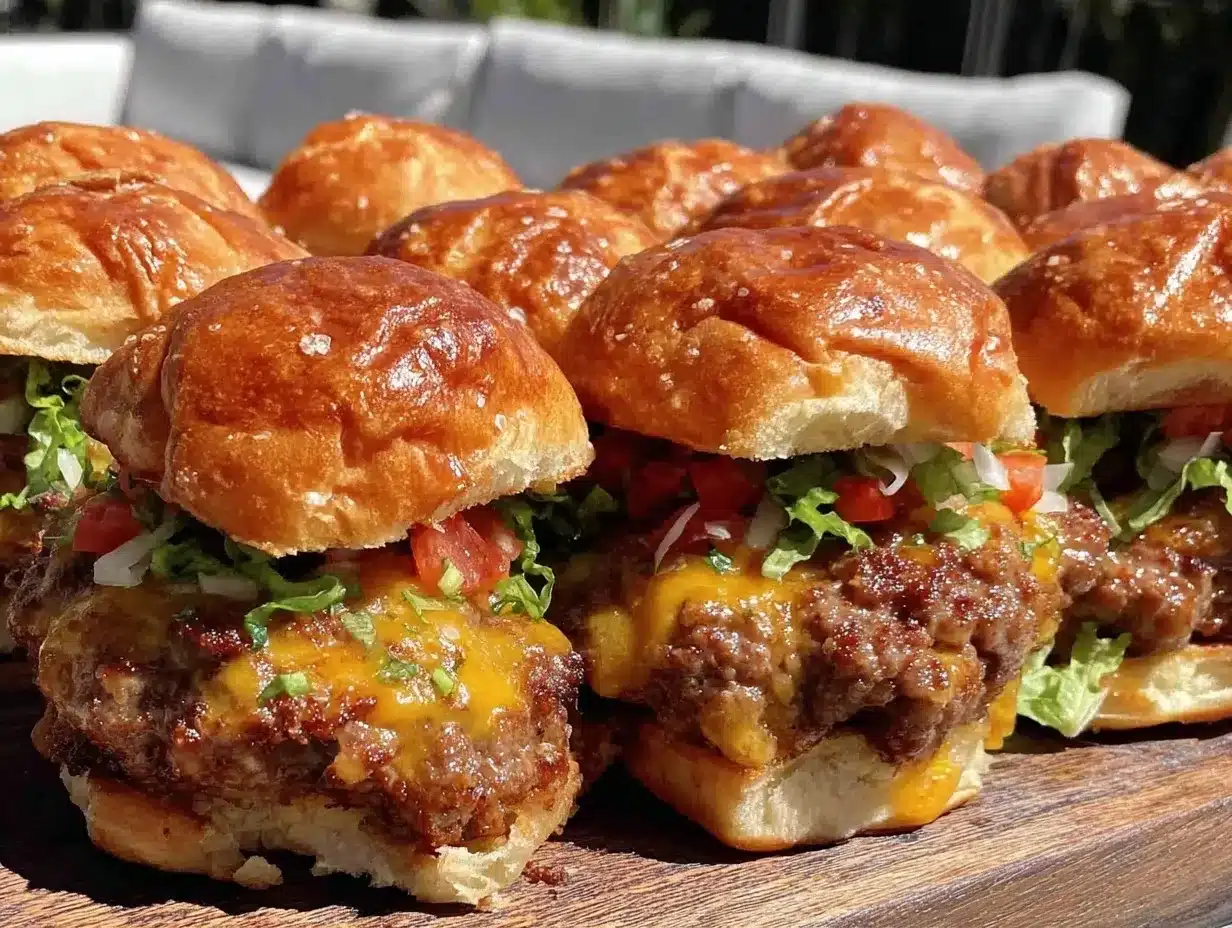
- Preheat your cooking surface: Place your cast iron skillet or griddle on medium-high heat and let it get hot — about 5 minutes. You want it nearly smoking for that perfect crust.
- Form the beef balls: Divide 1 pound (450g) of ground beef into 8 equal portions (about 2 ounces or 55g each). Don’t overwork the meat; loose balls are better for texture.
- Toast the buns: While the skillet heats, spread softened butter on each slider bun’s cut side. Place them butter-side down on a separate skillet or griddle over medium heat until golden and toasty, about 1-2 minutes. Set aside.
- Smash and cook the patties: Place 2-3 beef balls on the hot griddle with enough space between. Using the metal spatula, press firmly down on each ball to flatten into thin patties about ¼ inch (6mm) thick. Hold the pressure for 10-15 seconds.
- Season and cook: Sprinkle each patty generously with salt and pepper. Let cook undisturbed for 2-3 minutes until edges are deeply browned and crispy.
- Flip and add cheese: Flip the patties carefully using your spatula. Immediately place a slice of cheese on each patty and cook another 1-2 minutes until cheese melts and the patty is cooked through but still juicy inside.
- Assemble the sliders: Place each cheesy patty on the toasted bun bottom. Add your favorite toppings — pickles, onions, ketchup, whatever you like — then crown with the top bun.
- Serve: Serve immediately while hot and crispy. These sliders are best enjoyed fresh but you can rest them briefly on a plate tented with foil to keep warm.
Quick tip: Don’t overcrowd the pan or the patties won’t crisp properly. Cook in batches if needed. Also, resist the urge to press down again after flipping — the initial smash is all you need!
Cooking Tips & Techniques
Here’s what I’ve learned from many batches of crispy smash burger sliders (some better than others):
- High heat is your friend: The secret to that irresistible crust is a hot cooking surface. If the pan isn’t hot enough, you’ll get more stew than sear.
- Don’t over-handle the beef: Keep the meat loose. Overworking makes the patties dense and dry.
- Use a metal spatula with a thin edge: This helps you scrape up the crispy bits and flip without breaking the patties.
- Press firmly but quickly: Hold the smash for about 10-15 seconds then let the patties cook undisturbed to form that crust.
- Timing matters: The first side takes longer to get crispy—2-3 minutes is ideal. The second side cooks faster, especially with cheese melting.
- Cheese placement: Add cheese right after flipping to get it perfectly melty without soggy edges.
- Multitasking tip: Toast your buns while the patties cook; it saves time and ensures everything’s ready together.
One cooking fail I had was trying to smash too many patties at once — the pan cooled down and I ended up with sad, gray burgers. Lesson learned: cook in batches to keep the heat high and the crust crispy.
Variations & Adaptations
Mix it up depending on your taste, dietary needs, or what you have in the fridge:
- Seasonal flavors: Add finely chopped jalapeños or smoked paprika to the beef for a spicy kick perfect for fall game days.
- Cheese swaps: Try blue cheese crumbles or Swiss for a different flavor profile. Vegan cheese slices work for dairy-free options.
- Gluten-free sliders: Use gluten-free buns or lettuce wraps for handheld enjoyment without gluten.
- Double-stack: Feeling extra hungry? Double the patties and cheese for a towering slider stack.
- Personal twist: I once added caramelized onions cooked in balsamic vinegar — game day turned gourmet real quick.
For a smoky flavor, try cooking the patties on a charcoal grill griddle pan. Or swap out beef for ground turkey or plant-based meat alternative to cater to different diets.
Serving & Storage Suggestions
These sliders are best served hot, right off the griddle. I like to plate them on a wooden board with a side of crispy fries or crunchy coleslaw for a full game day spread.
They pair wonderfully with classic condiments, but a dollop of chipotle mayo or a tangy BBQ sauce can up the indulgence factor. For drinks, nothing beats a cold beer or a sparkling soda to balance the richness.
If you have leftovers (ha, unlikely!), wrap them tightly in foil or store in an airtight container in the fridge for up to 2 days. Reheat in a skillet over medium heat to keep the crust crispy — the microwave tends to make them soggy.
Flavors deepen a bit when rested, but honestly, these sliders shine best fresh and hot. Perfect timing means you get that crunch and juiciness all at once.
Nutritional Information & Benefits
Estimated per slider (without toppings):
| Calories | 180-220 kcal |
|---|---|
| Protein | 12-15g |
| Fat | 12-15g |
| Carbohydrates | 10-12g |
| Fiber | 0.5-1g |
Using 80/20 ground beef provides a good balance of protein and fat, giving these sliders their juicy, satisfying texture. The beef offers essential nutrients like iron and vitamin B12, while the cheese adds calcium.
For those watching carbs, swapping slider buns for lettuce wraps makes this a lower-carb option. Just keep in mind the cheese and butter add some saturated fat, so moderation is key for heart health.
As a nutritionist once pointed out to me, these sliders provide a hearty source of protein that keeps you fueled through long game days — just pair with some veggies or a salad to round out the meal.
Conclusion
So there you have it — crispy smash burger sliders that bring a little magic to game day without any fuss. Why bother? Because sometimes the simplest idea, like smashing a patty flat, makes all the difference in the world. You can tweak the toppings, swap the cheese, or test out new spice blends, but the core of this recipe always delivers that crispy, juicy bite that keeps you coming back.
Personally, these sliders remind me how small moments — like a friend’s casual suggestion — can lead to something truly delicious and memorable. So go ahead, try it out, and maybe share your own game day creations. I’d love to hear what you come up with!
And if you feel like rounding out your game day feast with an easy, fresh dessert, you might enjoy the perfect fresh fig and honey crostata that pairs beautifully after these sliders.
FAQs about Crispy Smash Burger Sliders
How do I get the perfect crispy crust on smash burgers?
Make sure your cooking surface is very hot before smashing the patties. Press firmly and hold for 10-15 seconds, then let cook undisturbed until edges brown deeply.
Can I use lean ground beef for this recipe?
Lean beef tends to dry out and won’t crisp as well. I recommend 80/20 ground beef for the best balance of juiciness and crust.
What’s the best cheese for meltiness on sliders?
American cheese is classic for its melt and creamy texture, but cheddar or pepper jack work well if you want more flavor.
Can I prepare these sliders ahead of time?
For best results, cook and assemble right before serving. You can prep patties in advance, but the crispy texture is best fresh.
What’s a good side dish to serve with these sliders?
Crispy fries, coleslaw, or even a tangy cucumber salad complement the rich, crispy sliders perfectly. For a sweet finish, consider something like the creamy patriotic strawberry tres leches poke cake for a festive touch.
Pin This Recipe!
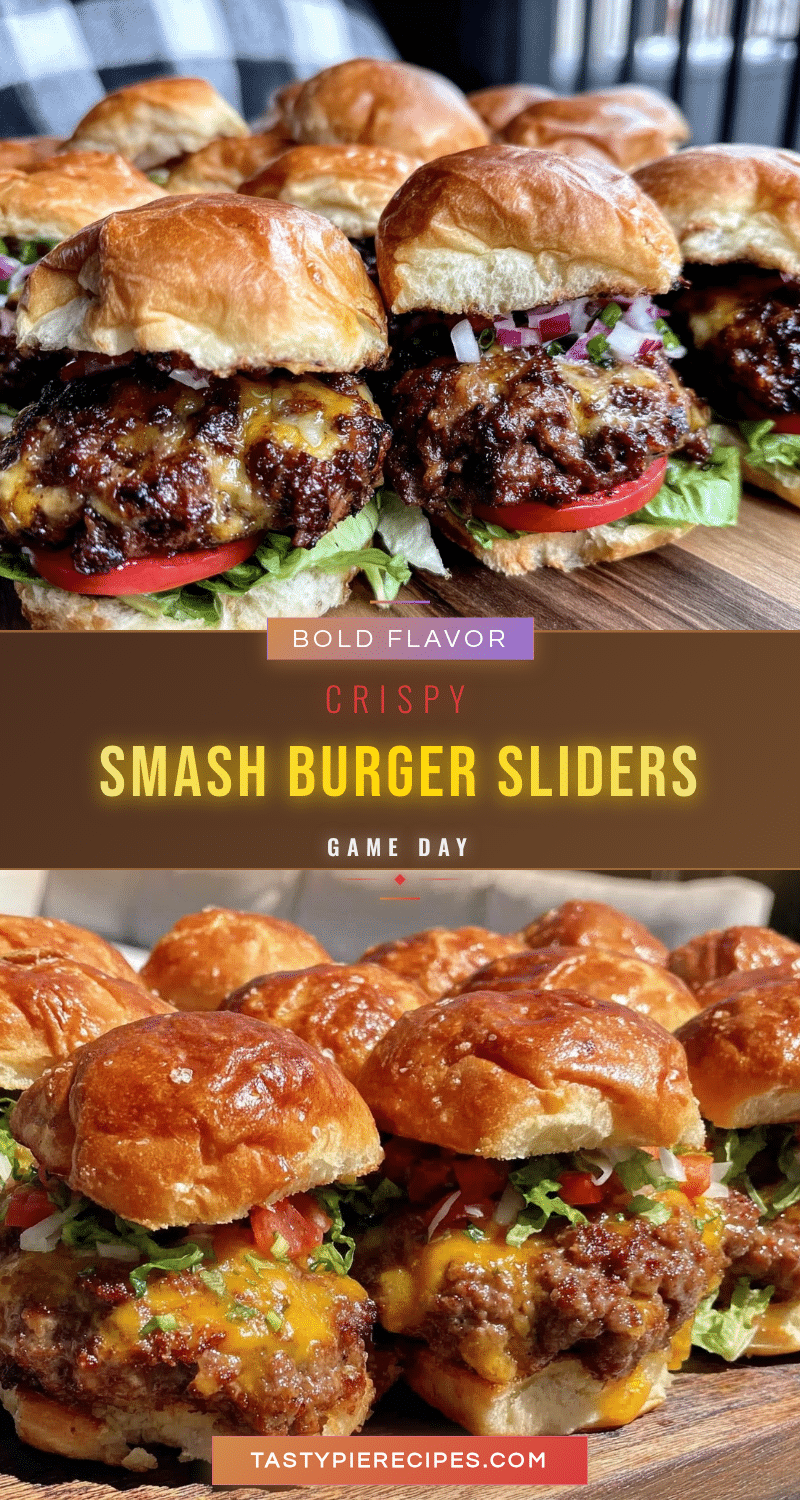
Crispy Smash Burger Sliders

These crispy smash burger sliders deliver a perfect game day indulgence with a lacy, caramelized crust and juicy center, made quickly and easily with simple ingredients.
- Prep Time: 10 minutes
- Cook Time: 10 minutes
- Total Time: 20 minutes
- Yield: 8 sliders 1x
- Category: Main Course
- Cuisine: American
Ingredients
- 1 pound (450g) ground beef (80/20)
- 8 slider buns
- Salt, to taste
- Black pepper, to taste
- 8 slices American cheese (or cheddar, pepper jack as alternatives)
- Butter, softened (for toasting buns)
- Optional toppings: sliced pickles, diced or caramelized onions, lettuce, tomato slices, ketchup, mustard, or favorite burger sauce
Instructions
- Preheat a cast iron skillet or flat griddle on medium-high heat for about 5 minutes until nearly smoking.
- Divide ground beef into 8 equal portions (about 2 ounces or 55g each) and loosely form into balls without overworking.
- Spread softened butter on the cut side of each slider bun and toast butter-side down on a separate skillet or griddle over medium heat until golden, about 1-2 minutes. Set aside.
- Place 2-3 beef balls on the hot griddle spaced apart. Using a metal spatula, press firmly down on each ball to flatten into thin patties about 1/4 inch (6mm) thick. Hold pressure for 10-15 seconds.
- Season each patty generously with salt and black pepper. Cook undisturbed for 2-3 minutes until edges are deeply browned and crispy.
- Flip patties carefully and immediately place a slice of cheese on each. Cook another 1-2 minutes until cheese melts and patties are cooked through but still juicy.
- Assemble sliders by placing each cheesy patty on the toasted bun bottom, adding desired toppings, then topping with the bun crown.
- Serve immediately while hot and crispy.
Notes
Do not overcrowd the pan to maintain high heat and crispy crust. Press patties firmly only once before cooking. Toast buns while patties cook to save time. For gluten-free, use gluten-free buns or lettuce wraps. For dairy-free, omit cheese or use plant-based cheese.
Nutrition
- Serving Size: 1 slider
- Calories: 180220
- Sugar: 12
- Sodium: 300400
- Fat: 1215
- Saturated Fat: 57
- Carbohydrates: 1012
- Fiber: 0.51
- Protein: 1215
Keywords: smash burger, sliders, game day recipe, crispy burger, easy burger recipe, American cheese burger, cast iron skillet burger